Blog

  • How to Skive Leather Safely at Your Bench

    How to Skive Leather Safely at Your Bench

    A clean skive can make a folded edge sit flat, reduce bulk at a seam, or give a wallet pocket a more refined finish. A rushed skive can do the opposite: cut through the grain, leave a wavy taper, or send a sharp blade toward your hand. Learning how to skive leather safely is less about force and more about control, setup, and knowing when to stop.

    Skiving is one of those bench skills that improves quickly when you work in small, deliberate passes. Start with scrap from the same leather you plan to use, give yourself room to work, and let the tool remove only what the project requires. The goal is a smooth transition in thickness, not the thinnest possible piece of leather.

    Set Up to Skive Leather Safely

    Before the blade touches leather, look at your bench. A stable cutting surface matters because skiving puts forward pressure on both the leather and the tool. Use a firm, non-slip work surface and make sure the leather cannot slide unexpectedly. A smooth piece of marble, granite, or a dense cutting board can work well beneath the leather, depending on the tool and project.

    Good lighting is equally useful. You need to see the changing thickness of the leather, especially when skiving natural veg tan or a light-colored flesh side. Shadows can hide an uneven pass until it is too late to correct it.

    Place the work so your cutting path moves away from your body and away from your free hand. Keep that free hand behind the blade, not ahead of it and not beside the direction of travel. If you need to hold a small piece close to the cutting area, use a clamp, a weight, or a simple hold-down tool rather than placing fingertips in the blade’s path.

    Cut-resistant gloves can add a useful layer of protection, particularly while you are learning or working with a very sharp hand skiving knife. They are not a reason to cut toward your hand or ignore tool control. Treat them as backup, not permission to take shortcuts.

    Choose the Tool That Fits the Job

    There is no single best skiving tool for every leather and every pattern. The right choice depends on how much material you need to remove, the shape of the area, and how visible the finished edge will be.

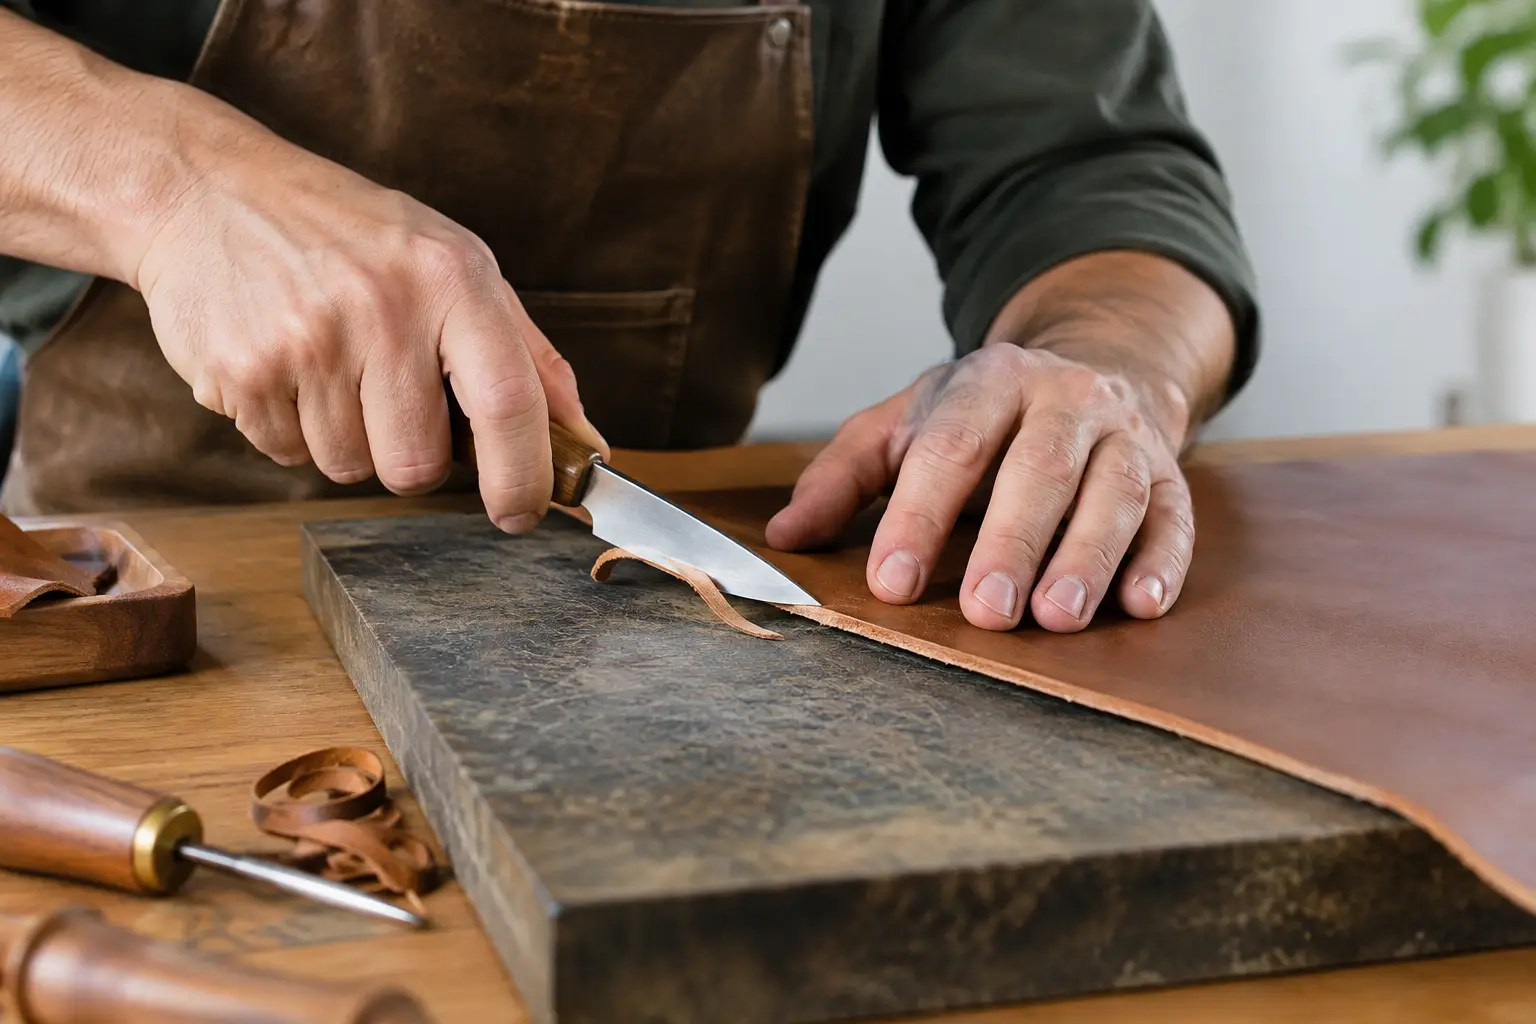
    A sharp skiving knife gives the most flexibility. It can feather a long edge, taper a pocket, reduce a seam allowance, or work into a tight corner. It also asks more of your technique, because you control the angle, pressure, and direction at once.

    A safety beveler is helpful for consistent channels and controlled reductions along an edge. A French edger can remove wider, rounded sections cleanly, while a small curved skiving knife can be useful for delicate work. For larger panels or repeat production, a bench skiver may save time, but it still needs careful adjustment and respect for the blade.

    If you are building from a project pattern, check whether the skive is meant to reduce bulk at a fold, a stitched seam, or an overlap. Those are different jobs. A fold often benefits from a gradual, wide taper. A hidden seam may only need a narrow reduction near the edge. Removing more leather than the construction calls for can weaken a stress point.

    Sharp Beats Strong

    A dull blade is one of the most common reasons skiving feels unpredictable. It catches on the fibers, requires extra force, and encourages the tool to jump forward when it finally bites. A sharp blade starts cutting with light pressure, allowing you to make small corrections before a mistake becomes permanent.

    Sharpen before the tool becomes frustrating, not after. For many hand tools, that means regular stropping between passes and occasional sharpening when stropping no longer restores a clean edge. Keep the bevel polished and free of nicks. If the tool drags, chatters, or leaves torn fibers instead of a smooth shaving, stop and address the edge.

    A very sharp blade deserves calm handling. Keep the blade covered or stored safely when it is not in use, and do not leave it buried beneath scraps on the bench. When passing a tool to another person, set it down handle-first rather than handing it blade-first.

    Mark the Area Before You Cut

    A clear guideline makes skiving safer because it removes guesswork. Mark the start and end of the skive lightly on the flesh side when possible. If you need a defined stop line, use a wing divider, scratch awl, or light crease to establish it before picking up the blade.

    For a folded edge, mark the fold line and give yourself enough room for a gradual taper leading into it. For a seam allowance, mark the stitch line and the edge reduction separately. This helps you preserve material where the stitches need strength.

    It is usually better to begin farther from the final edge than you think you need. You can extend a skive gradually. You cannot put thickness back after cutting too deep.

    Test the Leather First

    Leather density changes from hide to hide and sometimes across the same panel. Even a familiar weight of veg tan can skive differently near the shoulder than near the belly. Test a few passes on offcuts and look at the shape of the shaving.

    A thin, continuous shaving usually suggests the angle and pressure are working. Dusty crumbs, torn fibers, or thick chunks suggest a change is needed. Try a sharper blade, a shallower angle, or a shorter pass before changing everything at once.

    Use Light, Repeated Passes

    The safest and cleanest approach is to remove leather in layers. Hold the blade at a low angle to the leather and begin with almost no downward force. Push or pull according to the tool’s intended use and the direction that gives you the most stable control, but keep the motion moving away from your body.

    Start the cut gently, then maintain a steady, shallow angle through the pass. Avoid digging in at the beginning or lifting sharply at the end. If you need to remove more material, repeat the pass rather than pressing harder.

    Long skives are easier when you break them into manageable sections. Work a few inches at a time, overlap the passes slightly, and inspect the surface as you go. This takes longer than one aggressive stroke, but it gives you a much better chance of keeping the taper even.

    For tight curves, shorten your stroke and rotate the leather instead of twisting your wrist around the blade. Rotating the work keeps your hand in a stronger, more predictable position. It also helps prevent the blade from following the curve too aggressively and cutting past your marked area.

    Watch for Warning Signs

    Stop immediately if the blade begins to chatter, the leather shifts, or you feel yourself pushing harder to make progress. These are signals that the setup is no longer under control. Reset the leather, strop the blade, and return with a lighter pass.

    Be especially careful near the end of a skive. Once the leather becomes thin, it can suddenly flex or tear. Support the work flat against the surface and reduce pressure as you approach the final thickness. If the project allows it, leave a little extra material and refine it after a test fold.

    A test fold tells you more than appearance alone. Fold the skived area as it will sit in the finished piece. If the edge rolls smoothly without a visible ridge, you likely have enough reduction. If it still feels bulky, remove a little more from the thickest part rather than thinning the entire area indiscriminately.

    Correct Small Mistakes Without Chasing Them

    An uneven skive is not always a ruined piece. A shallow ridge can often be blended with a few light passes. A rough flesh side may smooth out under glue, a lining, or a folded construction. What matters is whether the skive affects the strength, shape, or visible finish of the project.

    Do not keep cutting simply because you want the surface to look perfect on the bench. Thin leather can become weak leather quickly. If the area will be stitched, pulled, or flexed repeatedly, leave enough substance to do its job.

    For beginner-friendly builds, choose projects that use short skives on tabs, pocket edges, or simple folds before attempting wide gussets or long bag straps. A well-organized pattern helps here because it tells you where bulk needs to be managed, leaving less time guessing and more time building.

    Build the Skill Before the Project Demands It

    Set aside a few minutes to practice skiving on scraps whenever you sharpen a tool or start a new leather. Make a broad taper, a narrow edge reduction, and a short curved skive. Then fold and inspect each sample. You will begin to recognize the pressure and blade angle that work for your leather.

    Safe skiving is not about making dramatic cuts. It is the quiet habit of a sharp tool, a stable workpiece, clear markings, and light passes that leaves you in control. Give the leather time, and your finished edges will show it.
  • Leather Goods Featuring Brass Hardware That Last

    Leather Goods Featuring Brass Hardware That Last

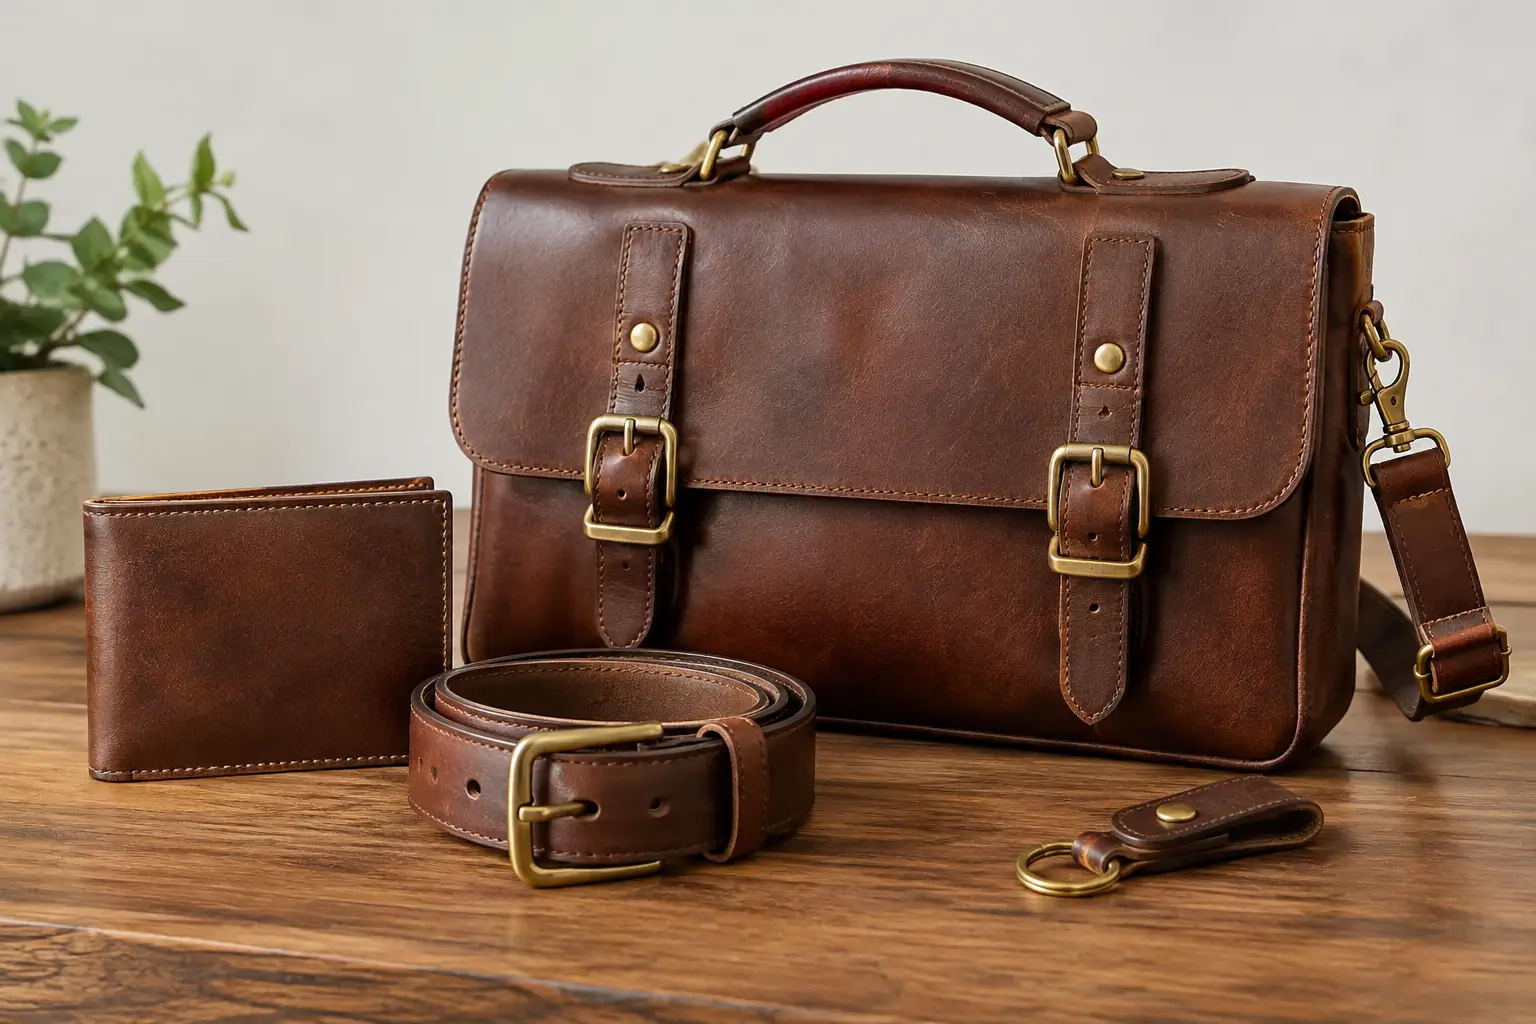
    Brass hardware can change the character of a leather project before a single stitch is pulled. On a field notebook cover, it adds a warm, practical detail. On a tote, it can make the strap system feel dependable and intentional. On a wallet or small pouch, it brings a finished look without asking for decoration that does not serve the build. Leather goods featuring brass hardware work best when the leather, hardware, and construction are chosen as one system rather than as separate decisions.

    For makers, that is the useful part of working with brass. It is not simply a finish to choose at the end. Hardware affects pattern layout, leather weight, reinforcement, edge treatment, and how the project will wear over time. A few considered choices at the start mean less time guessing at the bench and a result that feels made to be used.

    Why Brass Works So Well With Leather

    Brass has a natural warmth that sits comfortably beside vegetable-tanned, pull-up, oil-tanned, and chrome-tanned leather. New brass is bright but not flashy. With use, it develops a softer patina that often complements the marks and color shifts leather gains along the way. That shared ability to age is a major reason the pairing feels so established.

    It is also a practical material. Quality solid brass hardware resists corrosion well and stands up to regular handling. That makes it especially suitable for hardware that carries load or sees repeated movement, such as buckles, D-rings, snap hooks, rivets, and closures. A brass key clip on a small organizer may be a visual choice. A brass buckle on a shoulder strap needs to be a functional one.

    Still, brass is not automatically the right answer for every project. It costs more than many plated alternatives, and its golden tone can compete with certain leathers or a more minimal design. A black finish, nickel, or antique copper may better suit a particular pattern. The goal is not to put brass on every build. The goal is to choose hardware that supports the project’s purpose and gives the finished piece a consistent point of view.

    Start With Function, Then Choose the Hardware

    A clean pattern can make hardware selection much easier because it tells you where the forces will travel. Before ordering components, ask what the hardware needs to do. Is it holding a strap, adjusting fit, securing a flap, organizing keys, or simply adding a closure to a pocket? Each role calls for a different kind of part and a different level of reinforcement.

    For a crossbody bag, a buckle and adjustment slider must match the strap width exactly. If the strap is cut at 1 inch, use 1-inch hardware rather than forcing leather through a slightly smaller opening. That small mismatch can wrinkle the strap, make adjustment frustrating, and create unnecessary wear at the fold.

    For a tray, valet catchall, or small goods project, snaps and rivets are usually under much less stress. Here, proportion matters more than load capacity. An oversized snap can make a compact piece feel clumsy, while a very small snap can disappear visually or be difficult to operate. Test the hardware against a scrap or the printed pattern before cutting your final leather.

    A useful way to think about hardware is in three categories: load-bearing, moving, and closing. Load-bearing hardware includes D-rings, buckles, and strap anchors. Moving hardware includes swivels, sliders, and hinges. Closing hardware includes snaps, magnetic clasps, turn locks, and button studs. Some components do more than one job, but identifying the primary job helps you avoid selecting a part based only on appearance.

    Match Leather Weight to the Job

    The leather around hardware often needs more support than the rest of the piece. A soft 3 to 4 ounce leather can make a beautiful pouch body, but it may stretch around a D-ring or deform at a snap tab if used alone. A lining, a folded strap end, or a small reinforcement patch can give that area the structure it needs.

    For strap tabs and buckle attachments, many makers use a firmer leather or build thickness by laminating layers. The exact approach depends on the leather temper and the expected load. A lightly used notebook cover can tolerate a slimmer tab than a bag meant to carry a water bottle, tools, and daily essentials.

    This is where a well-considered pattern earns its place on the bench. Hardware placement marks, reinforcement pieces, and clear fold lines remove much of the trial-and-error that can turn an enjoyable build into a stalled one. You can still make material choices your own, but the structure is already doing useful work for you.

    Brass Hardware Needs Accurate Layout

    Brass is forgiving in appearance, but it is not forgiving of a crooked slot, an off-center rivet, or a strap keeper placed too close to a buckle. Because the material draws the eye, layout errors become more noticeable. Take the time to mark centerlines and confirm the orientation of each component before making a permanent cut.

    For buckle straps, check the path of the strap through the buckle before setting the keeper or stitching the fold. It sounds basic, but it is easy to install a buckle facing the wrong direction when working from the back side of a strap. Dry-fitting the whole assembly takes only a moment and can save a finished strap.

    When installing snaps, magnetic clasps, or turn locks, consider the leather thickness after folds, liners, and reinforcement are included. Hardware posts that are too short may not set securely. Posts that are too long can leave a loose setting or deform the cap. Use scraps from the actual project leather to test your setter, pressure, and post length first.

    Rivets deserve the same care. A rivet is not a substitute for good construction in a high-stress area. On a bag strap, stitching a folded tab and then using rivets as reinforcement generally gives a stronger, more polished result than relying on rivets alone. On a decorative closure tab, rivets may be sufficient. It depends on the job the part will be asked to do.

    Choosing Solid Brass, Plated Brass, and Finishes

    Not all gold-toned hardware is brass. Some pieces are solid brass, some are brass-plated, and some use another base metal with a finish designed to resemble brass. There is nothing wrong with plated hardware in the right project, especially when cost matters or the hardware is lightly used. It simply will not age the same way or offer the same long-term wear resistance as solid brass.

    For heirloom-minded builds, frequently handled bags, and projects with exposed load-bearing hardware, solid brass is often worth the added cost. Look for clear product descriptions and pay attention to the component itself, not only the finish name. A maker selling “antique brass” hardware may be describing the color, not the underlying material.

    Finish consistency matters, too. Brass snaps, buckles, rivets, and zipper pulls from different suppliers can vary from bright yellow to muted brown. That variation may be subtle in a bin of parts but obvious once installed on the same project. Whenever possible, gather all visible hardware before starting the build and compare it in natural light.

    If you like the richer look of aged brass, let real brass develop naturally rather than trying to force every piece into an artificial patina. Regular handling will create its own character. If you prefer a brighter finish, a gentle polish can restore shine, though it is wise to keep polishing compounds away from unfinished leather and stitching.

    Design Details That Make the Hardware Feel Intentional

    Good hardware placement gives a project rhythm. Repeating brass rivets on strap tabs, matching a brass snap to a brass zipper pull, or using a buckle that echoes the curve of a D-ring can make a design feel organized without becoming overly styled. You do not need every metal detail to be visible. Often, one closure and two or four structural rivets are enough.

    Keep proportions in mind. Heavy harness buckles can overpower a slim card holder, while delicate purse hardware can look undersized on a rugged tote. Consider the scale of the completed object, the width of the strap, and the visual weight of the leather. Thick, distressed leather usually welcomes more substantial hardware. Smooth, refined leather may call for simpler forms and cleaner edges.

    Edge finishing also affects the final impression. Burnished edges pair naturally with solid brass and vegetable-tanned leather, especially on straps and structured small goods. Painted edges can look equally sharp on a more modern design, but they need careful preparation around folds and hardware tabs. There is no single correct finish. The best choice is the one that matches the leather, construction, and intended use.

    Build for Use, Not Just the First Photograph

    Before you call a project finished, operate every moving and closing part several times. Adjust the buckle. Open and close the snap. Pull gently on strap anchors. Check whether a clasp contacts the leather where it should, and make sure the hardware sits flat rather than twisting under tension.

    This final check is especially helpful for makers building a new pattern for the first time. A thoughtful layout provides the structure, but your material choices still shape the final fit. Leather thickness, temper, and hardware dimensions can shift a build slightly. Taking a few minutes to inspect the result helps you learn what you would repeat and what you would adjust on the next one.

    The best leather goods featuring brass hardware do not rely on brass to make the project feel special. They use it with purpose: to carry weight, secure a closure, guide a strap, and add a quiet detail that improves with age. Choose the parts carefully, test them on scraps, and let the construction lead the design. That is how a simple piece becomes one you will be glad to use, carry, and build again.

  • A Leather Notebook Sleeve Project Example

    A Leather Notebook Sleeve Project Example

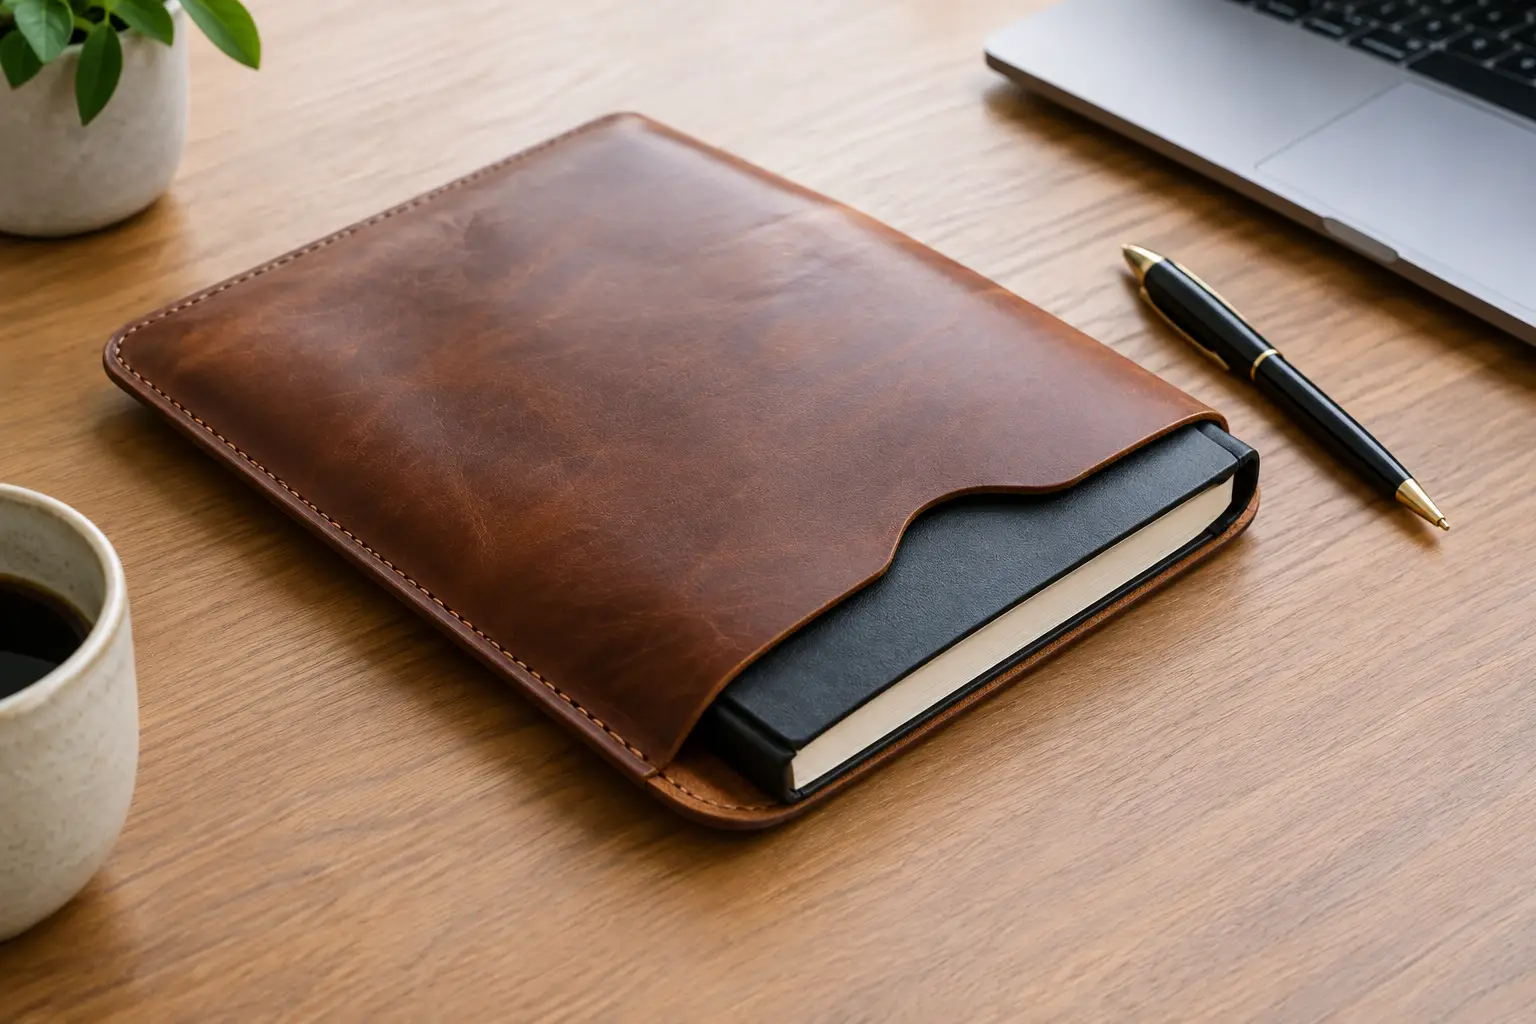
    A notebook sleeve earns its place on the bench because it asks for more than a good-looking exterior. It needs to protect a book, feel comfortable in the hand, and open without fighting the leather at the spine. This leather notebook sleeve project example shows how a straightforward design can produce a refined everyday piece while giving you room to practice clean cutting, accurate stitching, and careful edge work.

    The goal is not to create the most complicated cover possible. It is to build a sleeve that fits a common notebook well, uses materials wisely, and teaches construction choices you can carry into future projects.

    The Project: A Simple Sleeve With a Purpose

    For this example, build a slip-style sleeve for an A5 notebook or similarly sized journal. The notebook slides into an open top, with a stitched pocket on the front and back holding it in place. A narrow spine allowance gives the cover enough room to close naturally without looking loose when the notebook is inside.

    This design works especially well for a daily journal, sketchbook, or meeting notebook. It has a clean profile, protects the cover from wear, and avoids extra hardware that can complicate the build. You can add a pen loop or closure later, but the basic sleeve deserves attention first. A project with fewer moving parts makes it easier to see where fit and craftsmanship matter most.

    Start by measuring the notebook you plan to use, rather than relying only on its labeled size. Measure its height, width, and thickness with the covers closed. Add roughly 1/8 inch to the finished height for easy insertion, then allow enough width to wrap both covers and the spine without pulling. The exact allowance depends on leather weight and notebook thickness. A thin softcover journal needs less room than a thick hardcover notebook.

    Leather and Materials That Support the Build

    A vegetable-tanned leather in the 3 to 4 ounce range is a dependable choice for this project. It has enough body to protect the notebook and take a crisp finish, yet it can still bend comfortably around the spine. If you prefer a softer, broken-in feel, a 2 to 3 ounce chrome-tanned leather can work well, especially when paired with a firmer lining or pocket reinforcement.

    There is a trade-off here. Firmer leather holds a sharp shape and develops character over time, but it asks for more care when forming the spine. Softer leather folds easily and feels relaxed from day one, though it may lose some structure around the pocket openings. Neither choice is wrong. Match the leather to the kind of notebook cover you want to carry.

    For thread, a bonded polyester thread in a size appropriate to your stitching irons gives the project a tidy, durable seam. Choose a thread color that supports the leather rather than competing with it. Natural thread on tan leather feels traditional, while dark brown or black thread can give a more defined outline. You will also need adhesive, a scratch awl or silver pen, a skiving tool, edge beveler, and your usual stitching and finishing supplies.

    If you are making this as an early project, resist the urge to use every decorative option at once. A clean sleeve in good leather with even stitches will look more considered than a crowded design with uneven details.

    Leather Notebook Sleeve Project Example: Pattern Layout

    The simplest layout uses three pieces: one full outer panel and two matching inside pockets. The outer panel wraps from the left edge of the notebook, across the spine, to the right edge. Each pocket is stitched along the top, bottom, and outer side, leaving the inside edge open for the notebook cover.

    Before cutting leather, make a paper or cardstock mockup. This small step saves material and removes much of the uncertainty from the build. Fold the mockup around the actual notebook, tape the pockets in place, and test the fit. The notebook should slide in with light resistance, not force. It should close flat without the spine bunching or the pockets pulling away from the outer panel.

    Mark your stitch lines on the mockup as well. Keep them far enough from the pocket edge that the leather will not weaken over time. A stitch line set about 3/16 inch from the edge is a practical starting point for many notebook sleeves, though your leather thickness and iron spacing may call for a slightly different placement.

    Once the paper version fits, transfer each piece to leather. Keep the grain direction consistent across the panels, especially if the hide has visible pull-up, grain texture, or a directional finish. Details like this are easy to miss during cutting, but they make a noticeable difference in the finished project.

    Plan for the Spine Before You Stitch

    The spine is where an otherwise good sleeve can become frustrating. Leather does not behave like paper. If the outer panel is cut to the exact width of the notebook’s open measurement, it may pull tight when the cover closes.

    Give the spine a little breathing room. On firmer leather, you can lightly crease or form two fold lines where the notebook covers meet the spine. On softer leather, the material may shape itself after a short period of use. Do not cut deep groove lines into thin leather simply to force a fold. That can create a weak point and leave a permanent mark that looks harsher than intended.

    Build Order for a Cleaner Result

    Finish the pocket openings before attaching the pockets to the outer panel. Bevel the exposed edges if the leather supports it, sand lightly, apply your preferred edge treatment, and burnish or finish them fully. Once the pockets are stitched down, those edges are harder to work neatly.

    Next, position the pockets using the notebook itself as a fit check. Apply adhesive sparingly along the stitch margins, keeping it away from the open pocket edge. Press the pieces together, then mark or punch your stitching holes. Punching through both layers after they are glued helps keep the stitch lines aligned.

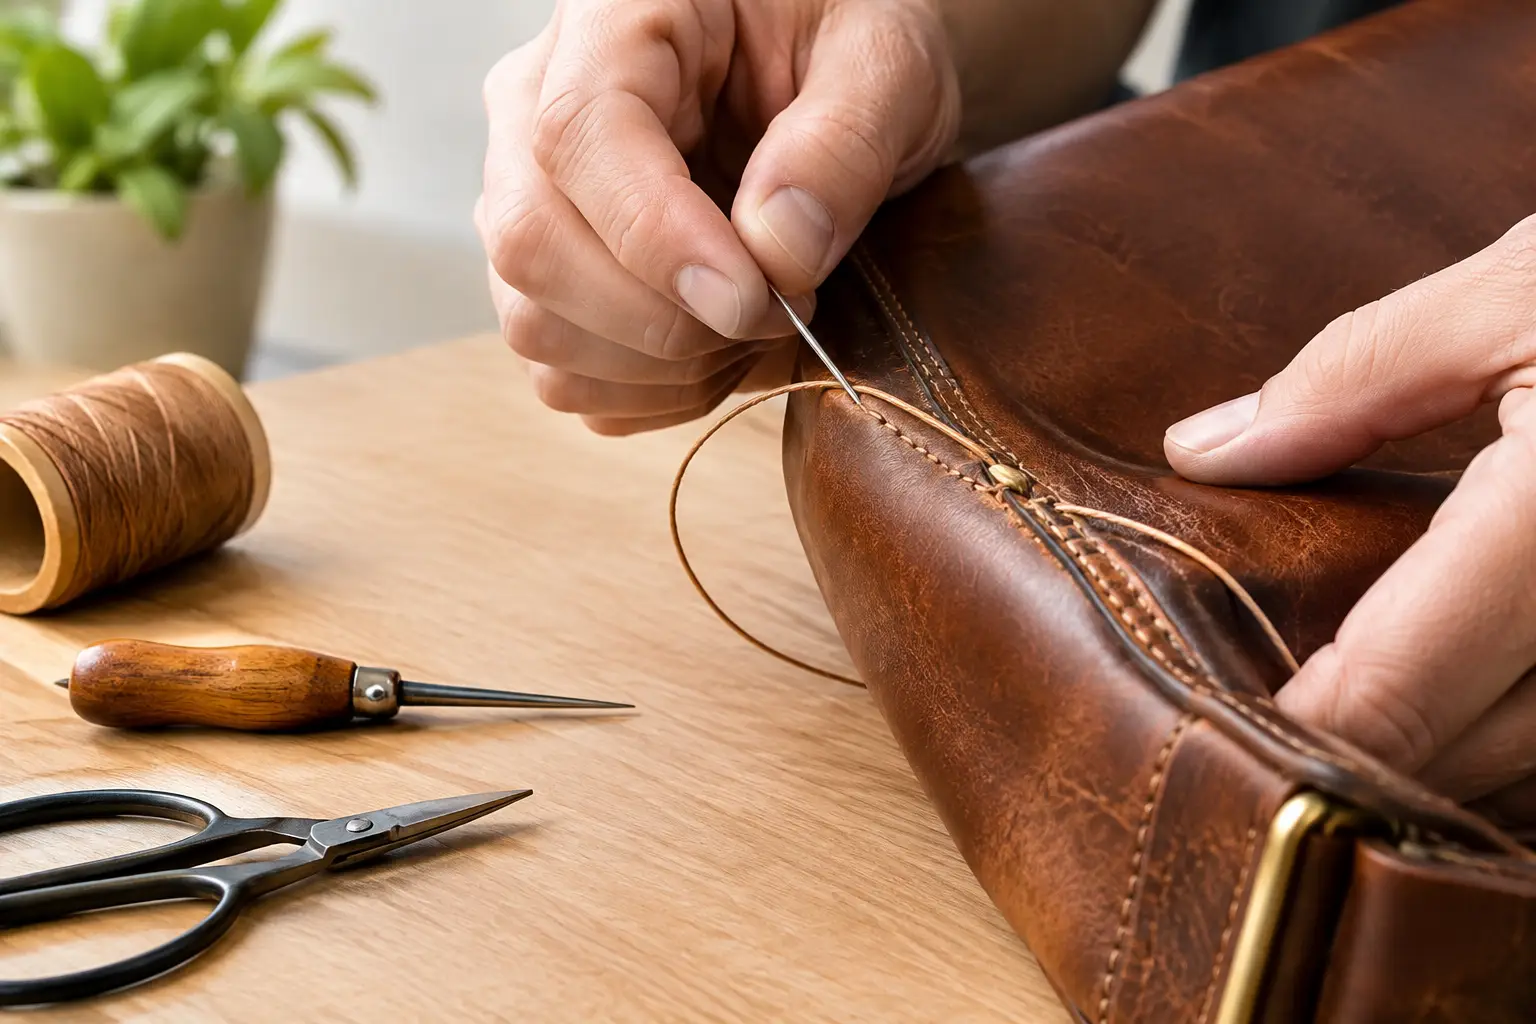
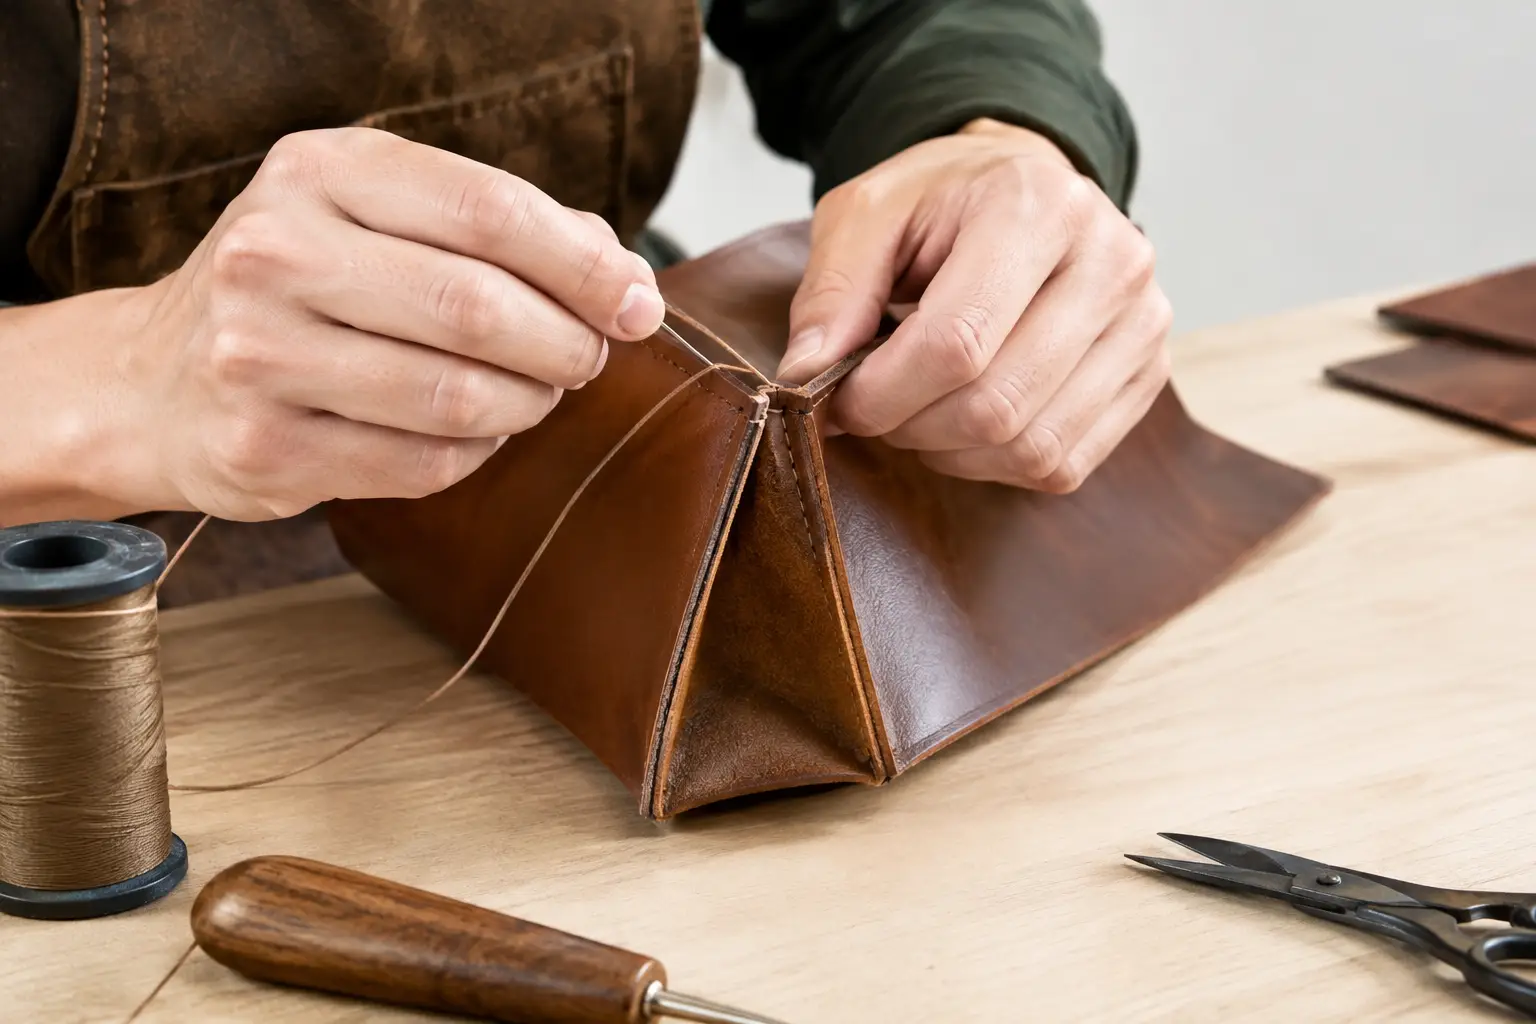
    Stitch one side at a time with a consistent saddle stitch. Maintain steady tension, but do not pull so hard that the thread cuts into the leather or causes the panel to curl. Backstitch neatly at the beginning and end, then trim and secure thread ends in your usual method.

    After stitching, check the notebook fit again before committing to final edge work. If the cover inserts smoothly and closes well, trim any slight unevenness along the outer edges. Then bevel, sand, and finish those edges in stages. Patient edge work often does more for a project than an extra decorative feature.

    Additions Worth Considering

    Once the basic sleeve fits correctly, a few additions can make it more personal. A pen loop is useful for a work notebook, but place it away from the spine so it does not create a lump when the cover closes. A small embossed initial panel or maker’s mark can add character without overwhelming the design.

    A snap tab or elastic closure is another option, though it changes the project from a simple sleeve into a more fitted cover. Add one when the notebook will travel in a bag or when you want to keep loose papers contained. For a notebook that stays on a desk, an open sleeve is often the better choice because it is quicker to use and easier to build.

    What This Project Teaches

    A notebook sleeve is a useful lesson in controlled tolerances. A wallet can hide a slight fit issue in its layers. A notebook cover cannot. If the pockets are too tight, insertion becomes a struggle. If they are too loose, the notebook shifts. If the spine is not considered, the cover will resist closing.

    That is what makes this a worthwhile project for both newer and experienced makers. Beginners can build confidence with a manageable pattern and a functional result. More experienced makers can focus on refinement: selecting better leather, adjusting the fit for a favorite notebook, or developing a version with a lining, closure, or custom interior.

    Build the first sleeve as a working sample, not a test you have to pass. Make notes on your allowances, leather weight, and how the cover behaves after a few days of use. Those small observations are how a good pattern becomes a design that truly fits your bench.

  • Leather Embossing for Clean Lasting Detail

    Leather Embossing for Clean, Lasting Detail

    A stamped border can turn a simple valet tray into a gift-worthy piece. A small maker’s mark can make a wallet feel distinctly yours. That is the appeal of leather embossing: it adds depth, texture, and intention without requiring a more complicated project.

    It also asks for a little patience. Crisp impressions come from the right leather, the right moisture level, and controlled pressure – not from hitting a stamp harder. Once those basics are in place, embossing becomes a useful skill for personalizing patterns, refining edges, and giving functional goods a more finished presence.

    What Leather Embossing Actually Does

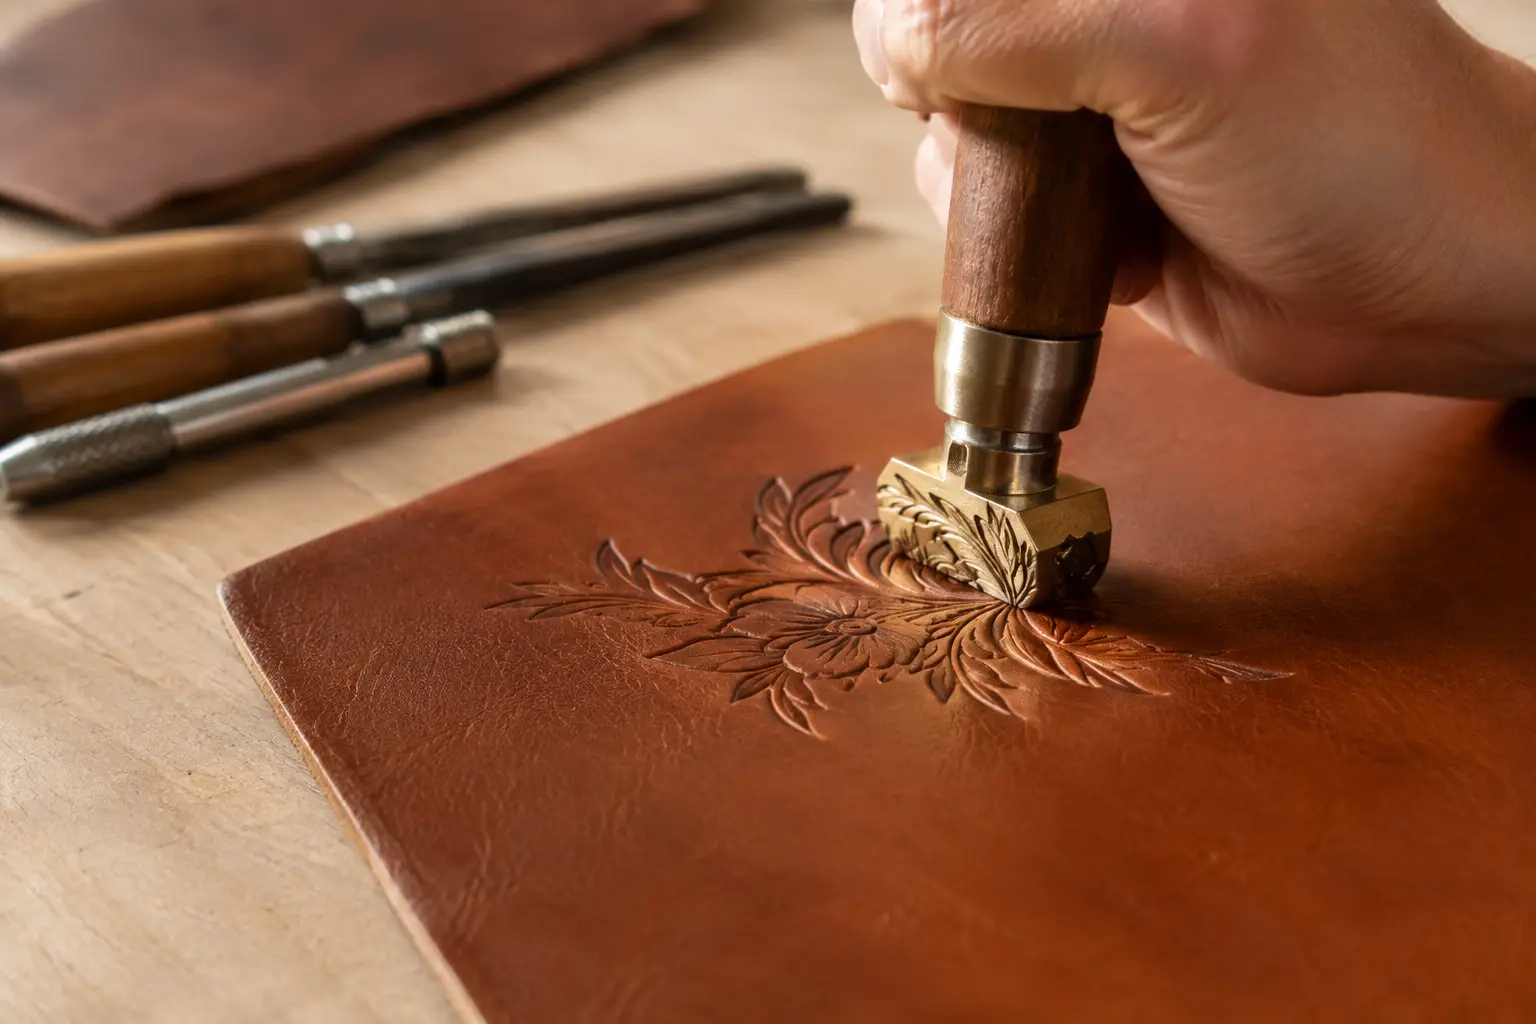
    Leather embossing creates a raised or recessed design by compressing the grain side of vegetable-tanned leather with a stamp, plate, or modeled tool. In most home workshops, the term includes simple stamping: placing a metal stamp on damp leather and striking it with a maul or press.

    You may also hear embossing used alongside tooling, carving, and debossing. The terms overlap, but the distinction can help when planning a project. Stamping repeats a prepared shape, such as a geometric mark, flower center, or border element. Carving cuts and shapes a design with swivel-knife and modeling tools. Debossing usually describes a recessed mark, while embossing can refer more broadly to any pressed design.

    For a maker building wallets, trays, notebook covers, belts, or small cases, stamping is often the most practical place to start. It produces consistent detail quickly and fits neatly into a project that already has a clear pattern and construction sequence.

    Start With Leather That Will Take an Impression

    Vegetable-tanned leather is the standard choice for leather embossing. Its fibers respond well to moisture and pressure, allowing a stamp to compress the surface and leave a defined mark. Natural, undyed veg tan is especially forgiving because you can see the impression clearly and choose a finish after the design is complete.

    Chrome-tanned leather is generally a poor candidate for traditional hand stamping. It may be soft, stretchy, coated, or finished in a way that resists an impression. Some leathers will accept a light decorative mark, but the result is less predictable and often lacks the sharpness makers expect.

    Leather weight matters, too. For many small goods, 3 to 5 ounce veg tan offers a good balance of workability and structure. Lighter leather can take a stamp, but deep impressions may distort the piece or show through the back. Heavier leather supports more pronounced detail, though it requires more force and may be better suited to belts, holsters, covers, and structured panels.

    Before stamping a project panel, test the exact leather you plan to use. A small offcut tells you more than a product description can. Try the stamp at different moisture levels, then compare the edge definition and depth after the leather dries.

    Smooth grain gives you the clearest result

    A smooth, firm grain gives stamps a clean canvas. Pull-up leather, heavily oiled leather, pebble grain, and loose-fibered hides can all be beautiful in the right project, but they may soften fine lines or make repeated impressions inconsistent.

    That does not mean every project needs pristine tooling leather. A slightly rustic surface can work well with bold maker’s marks and larger geometric stamps. The design simply needs to match the character of the hide.

    The Moisture Window Makes the Difference

    Leather that is too dry resists the stamp. Leather that is soaking wet can leave mushy edges, stretch under pressure, and darken unevenly as it dries. The workable middle ground is often called casing.

    For simple stamping, lightly dampen the grain side with a sponge or fine mist. Let the moisture absorb until the surface returns close to its natural color but still feels cool and flexible. The exact timing depends on the hide, temperature, humidity, and how much water you applied.

    A test impression is the best guide. If the stamp barely marks the surface, add a small amount of moisture and wait a few minutes. If the leather looks dark, swollen, or leaves a soft-edged print, let it dry longer before trying again.

    Avoid rushing this stage. Many uneven stamp results are blamed on tools when the real issue is inconsistent moisture across the panel. If you are working on a larger piece, dampen evenly and cover it briefly in a clean plastic bag so the moisture can settle through the leather.

    Set Up for Controlled Pressure

    A solid surface is not optional. Place the leather on a firm stone slab, dense poly board, or other non-bouncy work surface. A padded cutting mat absorbs force and weakens the impression, even if the stamp and leather are otherwise right.

    Hold the stamp upright and make deliberate contact with the leather before striking. For a small stamp, one controlled blow with a non-metal maul is often enough. For a larger stamp, use a few measured strikes while keeping the tool vertical. Rocking the stamp can blur the edges or create a doubled impression.

    A press can be useful for maker’s marks, logos, and repeated impressions, especially when you want consistency across several pieces. It is not automatically better, though. Too much pressure can flatten surrounding grain, push detail through the back of thinner leather, or make a design look harsh. Hand tools offer more feel, while a press offers repeatability. The better choice depends on the stamp, the leather weight, and the number of pieces you are making.

    If you use a maker’s mark, place it where it supports the design rather than competes with it. On a tray, that may be near a corner or centered in the base. On a wallet, an interior panel can feel more considered than a large logo on the front. A paper pattern is useful here because it lets you decide placement before the leather is cut and assembled.

    Plan Embossing Before Construction

    Most embossing should happen after cutting the leather but before stitching, lining, edge finishing, or assembly. A flat panel is easier to support, position, and inspect. Once a project is glued or sewn, the raised layers can interfere with the stamp and make it harder to keep pressure even.

    Leave enough space around stitch lines, folds, and edge creases. A deep stamp placed too close to a fold can distort when the piece bends. A border pushed too near a stitch line may leave little room for clean pricking or stitching. The design should follow the project’s function, not fight it.

    This is one reason a well-organized pattern saves time. When cut lines, stitch paths, fold locations, and decorative areas are clear from the start, you can decide where embossing belongs before the bench gets crowded with tools and adhesive. Old Line Crafts & Designs patterns are built around that same practical rhythm: less time guessing and more time building.

    Use simple designs to learn repeatable spacing

    Borders are an excellent practice exercise because they teach alignment. Begin with a center mark or a deliberate starting point, then work outward so any spacing adjustment is hidden near an edge rather than obvious in the middle.

    For repeated impressions, use a ruler and light guide marks on the flesh side or in an area that will be covered. On visible grain, avoid deep pen marks. A wing divider can create a subtle guide line for borders, and a strip of low-tack tape can help establish a straight visual reference outside the stamping area.

    Do not expect every handmade impression to be identical. Consistency matters, but a well-made stamped border still has the character of handwork. The goal is an intentional rhythm, not machine-perfect uniformity.

    Finish Without Losing the Detail

    Let the leather dry fully before applying dye, oil, conditioner, or a protective topcoat. Finishing too early can soften the impression or pull color unevenly into compressed areas.

    Dye can make stamped detail stand out, particularly when the recessed areas take color differently from the surrounding grain. It can also hide subtle impressions if applied heavily. If you want a high-contrast antique effect, practice on scrap first. Antique pastes and gels can settle into the low areas beautifully, but they need an appropriate resist if you want the background to remain lighter.

    For a natural look, a light application of conditioner followed by a suitable finish may be all the project needs. Keep coats thin. Heavy finishes can fill fine stamp lines and reduce the tactile quality that made the detail worthwhile.

    Common Problems and Straightforward Fixes

    A faint stamp usually points to dry leather, an unstable work surface, or insufficient pressure. Correct one variable at a time so you know what improved the result. A blurry stamp often means the leather was too wet, the stamp moved during striking, or the tool was rocked rather than held upright.

    If impressions vary across one panel, check moisture first. The center of a large panel can dry at a different rate than the edges. If a stamp leaves a visible halo or crushed area around the design, reduce the force or use a smaller, more suitable stamp for that leather weight.

    For a mistake in an obvious location, resist the urge to keep stamping around it in hopes that it disappears. Sometimes a border can be adjusted or a decorative element can be repeated intentionally. Other times, the cleanest answer is to recut the panel. Good leatherwork includes knowing when a fresh start will produce the better result.

    Embossing does not need to dominate a project to earn its place. A single mark on a tray, a quiet border on a notebook cover, or a small stamped detail inside a wallet can give a familiar build a personal finish. Start with scrap, make a few deliberate test impressions, and let the leather show you how much detail it wants to hold.

  • Why Leather Stitches Loosen and How to Fix Them

    Why Leather Stitches Loosen and How to Fix Them

    A saddle-stitched seam can look firm when it leaves the bench, then develop a little play after a few weeks of use. That shift is frustrating, especially when the rest of the project is clean. Understanding why leather stitches loosen helps you correct the real cause instead of simply pulling the thread tighter and hoping it holds.

    Loose stitches are rarely caused by one mistake alone. Leather moves, thread settles, holes can stretch, and the way a piece is used puts force on particular parts of a seam. A durable result comes from treating stitching as a system: leather weight, hole placement, thread choice, tension, and finishing all need to work together.

    Why leather stitches loosen after use

    The most common reason is that the thread was not set under consistent tension during stitching. In hand sewing, it is easy to pull one needle firmly and the next one only enough to close the stitch. The seam may appear even at first, but the lighter pulls leave small pockets of slack. With flexing and use, that slack migrates along the thread and becomes visible.

    Overtightening can create a similar problem. When thread is pulled so hard that it compresses the leather around each hole, the leather may rebound later. The stitch then loses its snug appearance. The goal is not maximum force. It is firm, repeatable tension that seats the thread into the leather without crushing the grain or distorting the edge.

    Leather itself also changes the equation. Softer temper leathers, chrome-tanned leather, and thinner panels can stretch around a stitch hole more easily than a firm vegetable-tanned leather. A card pocket, wallet fold, or bag strap sees repeated bending and pulling. If the stitch line is close to the edge or the holes are oversized, the leather gradually opens around the thread.

    Thread can settle after stitching as well. Waxed thread grips nicely while you sew, but it can compress into the holes with handling. This is usually a small adjustment, not a failed seam. A seam that becomes noticeably loose, however, often points to inconsistent tension, unsuitable hole size, or construction that puts too much load on a single row of stitches.

    Check the stitch holes before blaming the thread

    A clean stitch begins with holes that suit both the leather and the thread. If an awl or stitching chisel creates a hole much larger than the thread, the thread has room to move. It may look acceptable on the first day, but the gap becomes more obvious as the leather flexes.

    This does not mean every hole should be tiny. Thick thread needs enough clearance to pass without scraping, fraying, or forcing the layers apart. The useful target is a hole that lets the thread pass cleanly while allowing the leather to close around it afterward. Test your combination on an offcut before committing to a project.

    Hole shape matters, too. Diamond-shaped holes made with a sharp pricking iron and opened carefully with an awl help create the familiar angled hand-stitch appearance. Round holes can work well for certain projects, but they may show more thread movement if they are larger than necessary. Dull tools are another quiet culprit. Instead of cutting a defined opening, they tear and stretch fibers, leaving a hole that is more likely to relax under load.

    Spacing and edge distance deserve the same attention. Stitches placed too close to the edge can pull outward and loosen as the edge flexes. On most everyday goods, a stitch line set at a sensible distance from a clean, well-supported edge will wear better than one crowded tightly against it. The right measurement depends on leather thickness, project type, and pattern design, but consistency matters more than chasing a single universal number.

    Tension problems happen one stitch at a time

    Saddle stitching is strong because each stitch is independently locked by two lengths of thread. But that strength depends on a repeatable sequence. If you pull both needles in a different direction or with a different amount of force each time, the lock can sit unevenly inside the leather.

    Set a rhythm that feels controlled: pass the first needle through, pass the second needle through without piercing or splitting the first thread, then draw both threads outward and slightly back along the line of the seam. Keep the direction and pressure consistent. You are seating the stitch, not trying to win a tug-of-war with it.

    Many makers notice loose areas near the beginning or end of a seam. At the start, hands are still finding their position. At the end, it is tempting to rush the backstitching or pull hard to make the finish disappear. Slow down at both points. A few careful stitches make more difference than a dramatic final pull.

    It also helps to hold the work securely. A stitching pony keeps both hands free and presents the seam at a stable angle. You can sew without one, but unsupported work often leads to uneven pulls, twisted thread, and small changes in tension from stitch to stitch. Good bench setup is not about collecting tools. It is about removing variables that make clean work harder.

    Match thread to the project

    Thread that is too thin can leave a seam looking underfilled and can allow more movement within the holes. Thread that is too heavy may force open holes, crowd the stitch line, and overpower a fine wallet or small case. The best choice depends on the leather weight, hole spacing, and visual character of the piece.

    For a compact item with fine stitching, a smaller thread paired with closely spaced, clean holes can create a refined seam. For a tool roll, tote, or strap project, a heavier thread and more substantial edge distance may be appropriate. Neither approach is automatically stronger. The seam needs to suit the material and the work it will do.

    Thread quality matters as much as size. Low-quality thread can flatten, fuzz, or weaken during stitching. If it loses its surface finish quickly, it may not draw through the holes consistently, making tension harder to judge. A dependable, appropriately waxed thread gives you clearer feedback at the bench.

    Construction can put too much force on a seam

    Sometimes the stitching is sound, but the design asks it to carry more stress than it should. A strap attached directly to a soft bag body, a wallet pocket that is pulled tight across the grain, or a tray corner that is constantly flexed can all strain stitches over time.

    Look for signs of this before repairing the seam. If the leather beside the holes is stretched, puckered, or beginning to tear, simply restitching with tighter tension will not solve the problem. The piece may need reinforcement, a wider attachment area, a different leather weight, or a revised construction order.

    This is where a well-planned pattern earns its place on the bench. Clear stitch lines, sensible seam allowances, and construction steps that account for leather thickness help prevent stress from building into the project. Less time guessing at the layout leaves more attention for the parts that make a finished piece feel considered.

    How to repair loose leather stitching

    If only one or two stitches have relaxed and the thread is otherwise intact, you may be able to carefully tighten the affected area by working the slack toward an accessible end of the seam. Use a blunt needle or smooth tool to guide the thread gently. Avoid pulling hard on a single stitch, which can distort the hole or create uneven tension farther along the line.

    For a seam that is loose across a larger section, restitching is usually the cleaner repair. Remove the old thread without enlarging the holes, inspect the leather for damage, and stitch again using steady tension. If the holes have stretched significantly, consider whether a slightly larger thread can fill them appropriately. If the leather fibers are torn, reinforcement or a redesign may be more durable than forcing another seam through weakened material.

    After backstitching, trim the thread neatly and secure the ends in the manner that suits your material and project. A careful finish helps prevent the final stitches from backing out, but it should not be used to compensate for loose tension along the whole seam.

    Build a seam you can trust

    Before sewing your next project, make a short test seam using the same leather, thread, irons, and needles you plan to use. Bend the sample, pull gently across the seam, and inspect both sides. This small habit reveals whether the holes are too large, the thread is mismatched, or your tension needs a little adjustment before the real work begins.

    Leatherwork rewards measured practice. A stitch line does not need to be perfect to be strong and satisfying, but it should be intentional. With sharp holes, appropriate thread, steady hand tension, and construction that respects the material, your seams will stay neat long after the project leaves the bench.

  • How to Transfer Leather Patterns Without Guesswork

    How to Transfer Leather Patterns Without Guesswork

    A clean project starts before the knife touches leather. Learning how to transfer leather patterns accurately keeps your parts aligned, your stitch lines consistent, and your finished piece closer to the design you set out to build. It also saves a material that is too good to lose to a misplaced mark or an overlooked fold line.

    The goal is not to put every line from a PDF onto the leather. The goal is to transfer the information you need, in the right place, with marks that remain useful through cutting and assembly without showing on the finished side.

    Start with a correctly printed pattern

    Before making a template or marking leather, print the pattern at 100% scale. Do not select “fit to page,” “shrink oversized pages,” or a similar printer setting unless the pattern specifically instructs you to do so. Those settings can alter a piece just enough to affect a pocket fit, strap length, or alignment between layers.

    Most well-organized leather patterns include a test square or measurement reference. Measure it with a ruler after printing. If a 1-inch square does not measure 1 inch, correct the printer scaling before moving ahead. This small check is especially valuable on projects with multiple layers, curved gussets, or closely placed stitch holes.

    Read the pattern notes before cutting out the paper pieces. Look for leather weight recommendations, cut quantities, fold lines, hardware placement, and whether a piece should be flipped to create a left and right side. A few minutes of preparation means less time guessing at the bench.

    Choose a transfer method that suits the project

    There is no single best way to transfer a leather pattern. The right method depends on whether you are making a one-time build or expect to return to the design, how thick the leather is, and whether marks will sit on a visible surface.

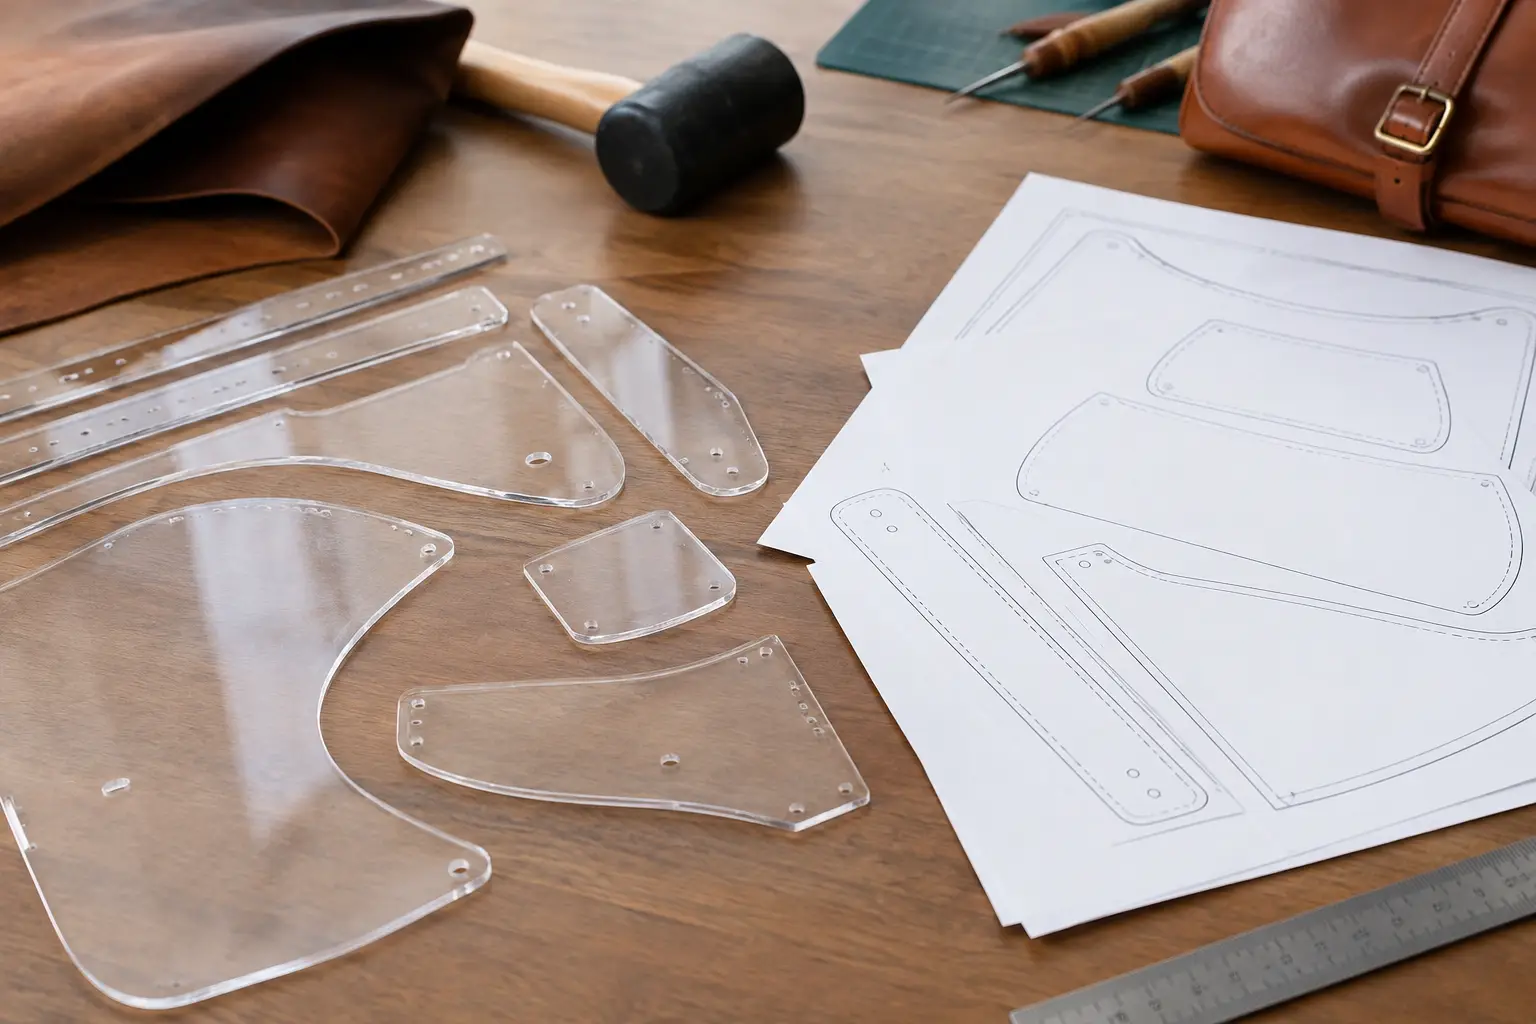
    For many makers, cardstock or manila folder templates offer the simplest starting point. They are easy to cut, stiff enough to trace around, and inexpensive to replace. For patterns you plan to use repeatedly, heavier chipboard, acrylic, or flexible template plastic will hold its shape longer and provide a more reliable edge.

    Tracing directly from paper can work for simple pieces, particularly on vegetable-tanned leather. Place the pattern over the leather and use a stylus or empty ballpoint pen to press lightly along key lines. This method is quick, but the paper can shift, and deep pressure can leave a visible impression. It is better for transferring fold lines, decorative details, or a few placement marks than for repeatedly tracing every cut edge.

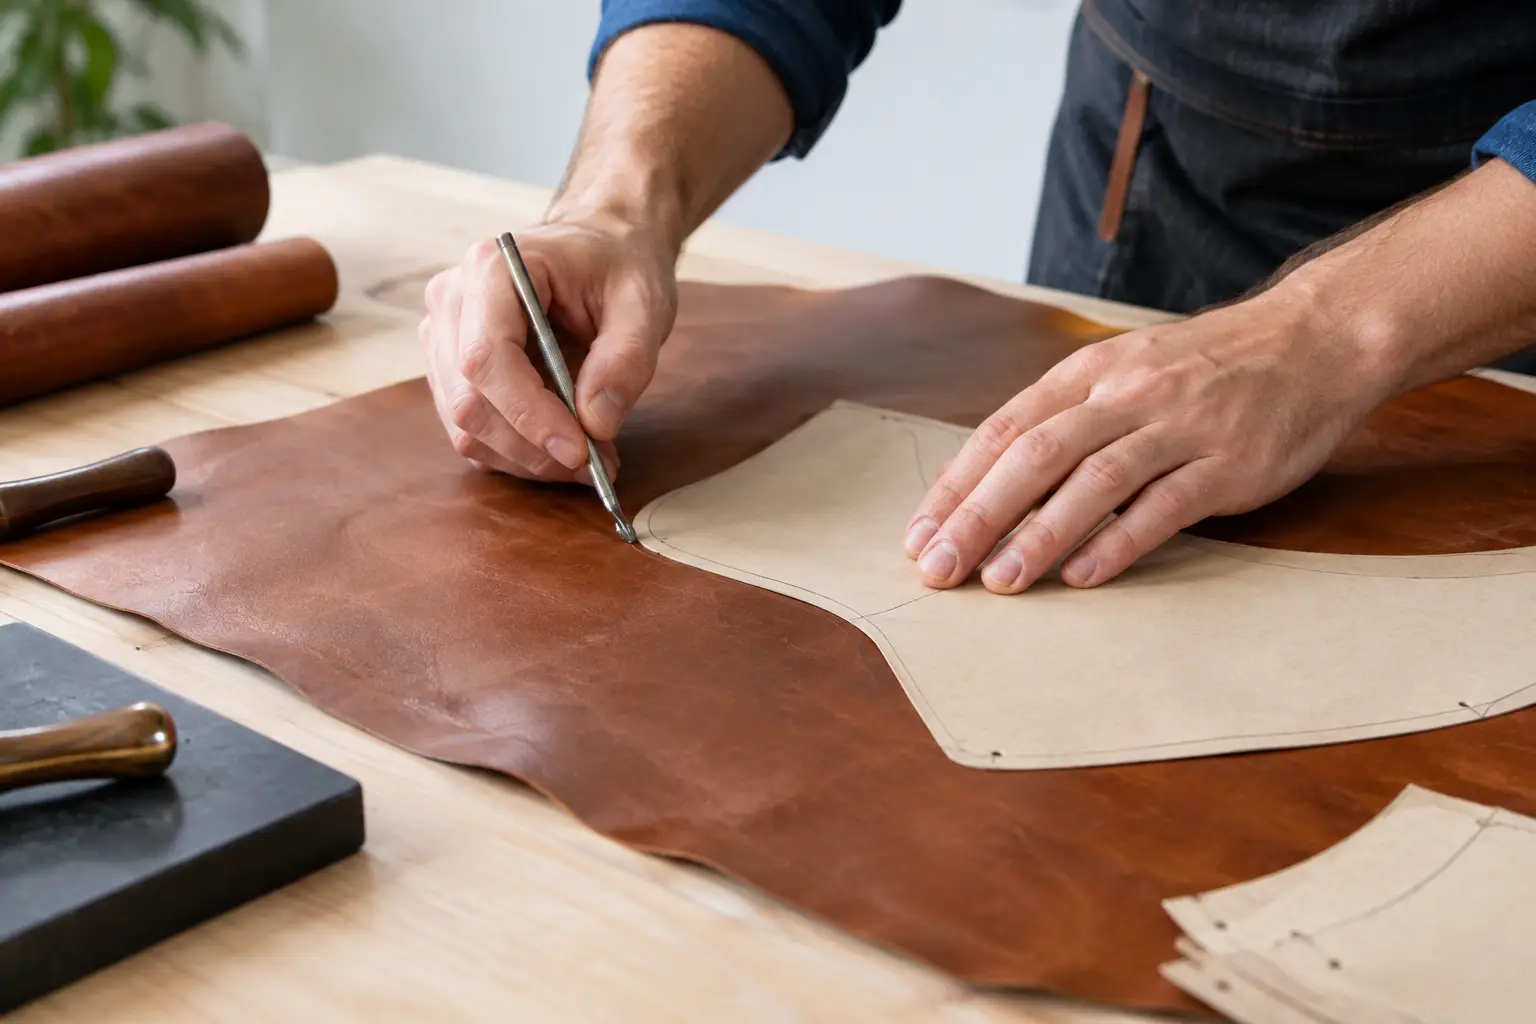
    For a cleaner and more repeatable process, cut out each paper pattern piece first, then trace around it with a suitable marking tool. Keep the tool upright against the template edge so the outline does not gradually grow larger than the original piece.

    Prepare the leather before marking

    Lay the leather on a clean, flat surface with the grain side facing the direction specified by the pattern. Check the hide for scars, loose grain, wrinkles, stretch marks, or areas that may not suit a highly visible panel. A natural mark may be a welcome part of a rustic project, but it can be distracting on a wallet front or a clean-lined case.

    Pay attention to stretch direction as well. Straps, handles, and long narrow parts are generally stronger when cut with their length running along the firmer direction of the hide. If the pattern includes a grain-direction arrow, follow it. If it does not, take a moment to gently flex the leather in both directions and note where it gives more easily.

    Arrange all template pieces before tracing. This helps you use the leather efficiently and confirms that mirrored pieces, interior panels, and reinforcements are accounted for. Leave enough space between parts for your cutting method. A knife needs less clearance than a round knife or shears, but crowded outlines still make clean cuts harder.

    Mark cut lines, stitch lines, and reference points differently

    A pattern can contain several kinds of information, and treating every line the same creates confusion. Transfer only what each stage of the build requires.

    Start with the outer cut line. On the flesh side, a scratch awl makes a fine, durable mark that will not bleed or rub off. Use light pressure. You want a visible guide, not a deep groove that changes the edge of the finished piece. A silver leather marking pen, white pencil, or removable fabric marker can also work well on darker leather, especially when the flesh side is rough or difficult to read.

    For marks on the grain side, be more selective. Use a very light pencil mark in an area that will be covered, folded, or trimmed away. On natural vegetable-tanned leather, a stylus can leave a subtle crease, but test it on a scrap first. Deep impressions and permanent ink are difficult to hide once finishing begins.

    Transfer notches, center marks, hardware locations, and fold lines next. These small references do a great deal of work during assembly. A center mark can keep a pocket straight. A notch can identify where a gusset begins. A hardware mark can prevent an otherwise finished panel from receiving a snap in the wrong place.

    If the pattern shows a stitch line rather than individual stitch holes, mark the line lightly and use a wing divider after cutting and edge preparation to establish the final distance from the edge. This often produces a more consistent result because the stitch line follows the actual cut edge, not an outline that may have shifted slightly during trimming.

    Transfer stitch holes with care

    Some patterns include marked stitch holes. These can be helpful for small projects, tight curves, and beginner-friendly builds where alignment matters. Still, it is worth deciding whether to transfer every hole or use the hole marks as a reference.

    When you want to follow individual holes, secure the paper pattern so it cannot move. Low-tack tape placed outside the piece, small pattern weights, or a few carefully positioned clips can help. Then use an awl to make tiny starter points through the paper. Avoid pushing hard enough to create large holes or heavy impressions in the leather.

    For longer seams, many makers get better results by transferring just the start and end points, then laying out the stitching with dividers and pricking irons. This gives you control over the spacing and lets you adjust slightly so the final holes land cleanly around corners. It also accounts for the reality that hand-cut leather edges may vary by a fraction of an inch.

    The trade-off is simple: pre-marked holes offer direction, while laying out your own stitch line offers flexibility. Neither approach is wrong. Choose the one that supports your current skill level and the level of precision the project calls for.

    Cut one piece first and check the fit

    When a project uses matching parts, resist the urge to cut every piece immediately. Transfer and cut one critical component first, then compare it with its mating piece or dry-fit it against the pattern. This is especially useful for flap shapes, card pockets, gussets, and panels that must align around hardware.

    If the first piece looks right, use it as a check while transferring the rest. If something seems off, you have caught the issue before it affects the full project. A pattern may be accurate, but printer scale, template thickness, leather stretch, and cutting technique all influence the final fit.

    For mirrored pieces, flip the template over rather than assuming the same orientation will work twice. Mark the flesh side of each part with a small note such as “left,” “right,” “inside,” or “glue side.” These notes disappear during construction but can prevent a frustrating mistake when several similar pieces are on the bench.

    Keep templates organized for the next build

    After cutting your leather, do not throw away the templates right away. Label each piece with the project name, size if applicable, and any helpful notes you learned during the build. You may discover that a certain leather weight works especially well, that a fold benefits from a slightly lighter crease, or that a hardware mark needs extra attention.

    Store paper templates flat in a folder or envelope. For reusable plastic or acrylic templates, keep the pieces together with a ring, pouch, or labeled sleeve. Good organization turns a successful project into a repeatable one.

    Old Line Crafts & Designs patterns are designed to give makers a clear starting structure, but your transfer process is where the design becomes your build. Work slowly on the first set of marks, use scrap leather to test unfamiliar tools, and let accuracy at this stage make every later step feel more straightforward.

  • How to Assemble a Leather Cardholder Cleanly

    How to Assemble a Leather Cardholder Cleanly

    A cardholder is a small project, but it leaves very little room for hidden mistakes. A pocket set just slightly out of square can show at every edge. A stitch line that drifts near a card slot can make an otherwise good piece feel unfinished. Learning how to assemble a leather cardholder is less about rushing through a short build and more about handling each layer with intention.

    The good news is that cardholders are excellent practice. You can build one in an afternoon, learn how leather behaves under glue and pressure, and end up with something useful enough to carry every day. The key is to establish your alignment before adhesive touches the leather, then let the construction order do the work for you.

    Start With a Dry Assembly

    Before applying glue, place every cut piece on the bench in its finished position. This is the moment to confirm which side faces out, which edges will be exposed, and how the pockets overlap. It sounds basic, but reversing one pocket or burnishing an edge that will later be trapped in a seam creates unnecessary work.

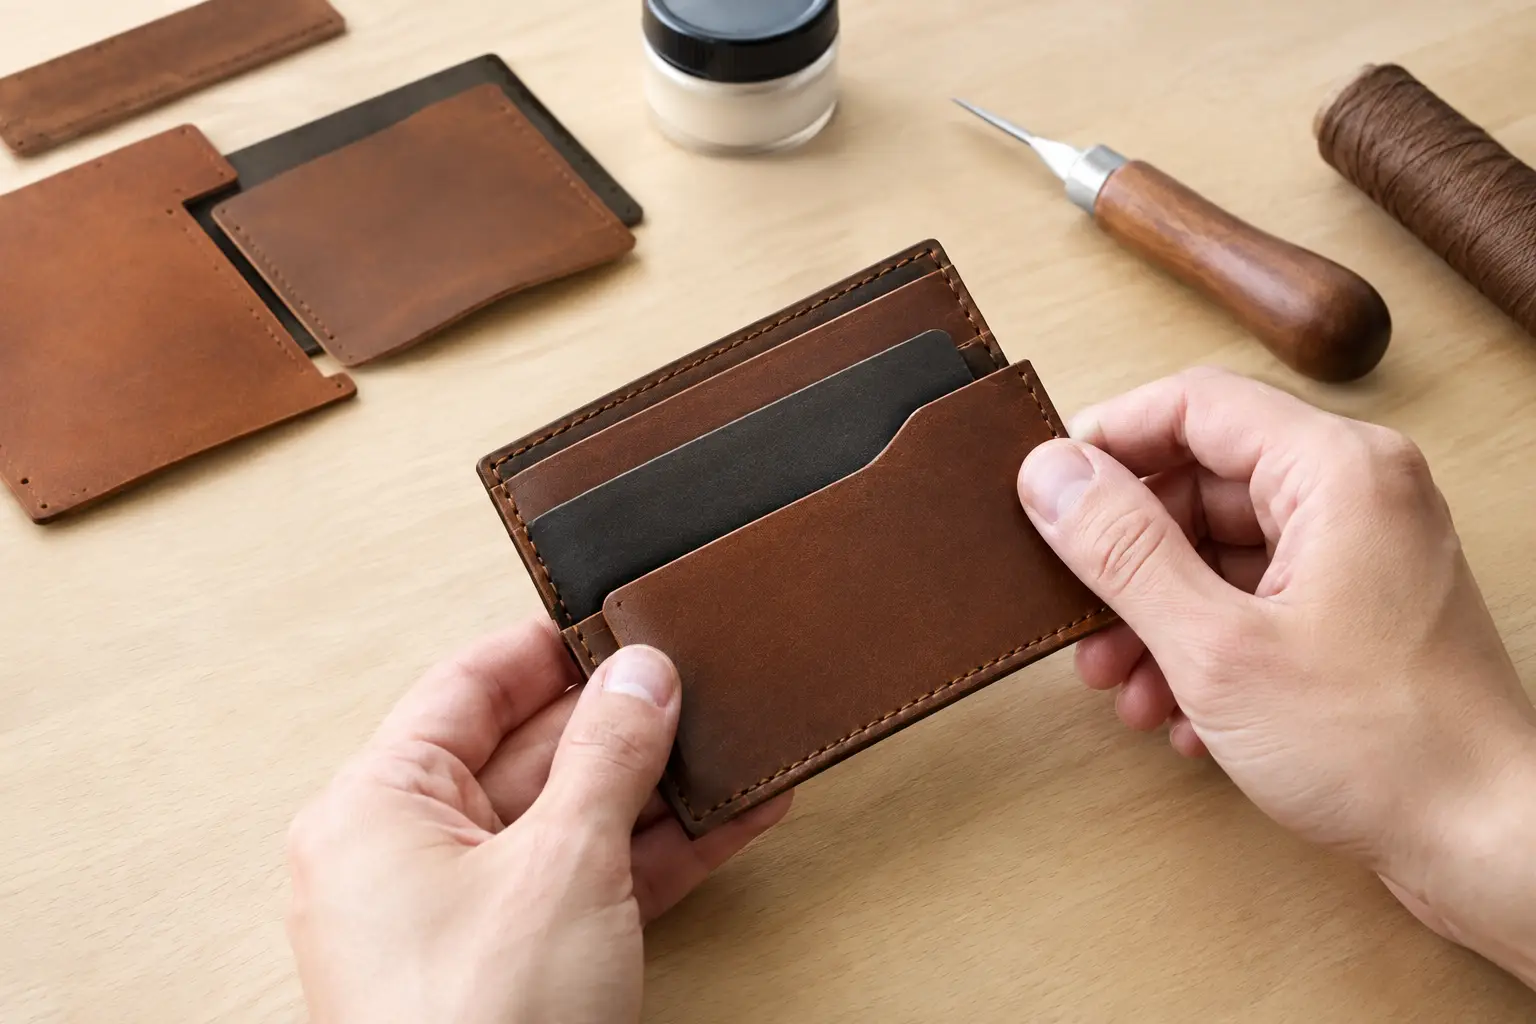
    Most leather cardholders use a back panel, one or more pocket panels, and sometimes a center divider. Start from the back panel and stack the pockets in the order they will sit when complete. Check that the card openings are level and that the side edges line up. If your pattern includes registration marks, use them. They are there to remove guesswork, not add another step.

    Put a sample card into each pocket position during this dry fit. The leather will gain a little thickness at the seams, particularly with folded or layered pockets. A card should slide in with light resistance, not require force. If the pocket opening seems tight now, it will not become roomier after stitching.

    Prepare the edges before they disappear

    Any edge that will remain visible after assembly should be finished before it is enclosed by another layer. This commonly includes the top edge of each card pocket and the top edge of a center slot. Sand these edges lightly, bevel if your leather weight supports it, then burnish or apply your preferred edge finish.

    Do not finish the outside perimeter yet. That edge is easier to sand and refine once the full cardholder is stitched and trimmed. Pre-finishing only the exposed pocket openings keeps your work clean while giving you room to correct the final shape later.

    Mark, Glue, and Build From the Inside Out

    The most reliable answer to how to assemble a leather cardholder is to work from the innermost layers outward. Attach the pocket or divider that will be covered by the next piece first. This keeps stitch lines accessible and prevents you from trying to sew through more layers than the design requires.

    Use a scratch awl or silver pen to transfer alignment points if needed. A light mark is enough. Avoid deep scratches on grain leather, especially on light colors, because they can remain visible after finishing.

    Apply adhesive only where the pieces need to hold before stitching. For a simple cardholder, that usually means narrow glue lines along the sides and bottom of each pocket. Keep adhesive away from the pocket opening and away from areas where a later stitch line needs to remain flexible.

    A thin, even coat is better than a heavy one. Too much glue can soak into the edge, interfere with burnishing, or squeeze onto the grain side when you press the layers together. Let contact cement reach the proper tack before joining the pieces. With water-based adhesives, follow the working time recommended for the product and press the layers firmly once aligned.

    When you set a pocket in place, begin at a registration point or one corner rather than dropping the entire piece down at once. Press from the center toward the edges to push out trapped air and keep the leather flat. Then use a roller, bone folder, or smooth hammer face to seat the bond without marking the grain.

    If your cardholder has two stacked pockets on each side, attach the lower pocket first. Stitch its exposed bottom or side seam before adding the pocket above it when the pattern calls for separate stitching. Once the top layer is attached, that line may no longer be accessible.

    Stitch With the Layers Fully Controlled

    After the glued pieces are secure, check the assembly again before punching stitching holes. Look closely at the pocket openings. They should be parallel, and the margins on the left and right should feel balanced. Small adjustments are still possible before the adhesive fully sets and before holes make the position permanent.

    For makers using a pre-punched pattern or template, confirm that the hole rows meet cleanly where panels overlap. If you are marking your own stitch line, set it far enough from the edge to support the leather without crowding it. On many cardholders, a consistent narrow margin looks refined, but the right distance depends on leather thickness, thread size, and the design itself.

    Punch or prick through the layers on a firm surface, keeping your tool upright. Angled holes may not seem serious from the front, but they often show as uneven spacing on the back. If you are stitching with chisels, work in short sections and keep the project flat. Thick stacks near pocket corners can shift if you try to punch the entire perimeter in one pass.

    Saddle stitching is a dependable choice for a cardholder because it creates a strong, balanced seam and is easy to repair if needed. Keep even tension rather than pulling every stitch as tight as possible. Excessive tension can pinch the leather along the seam, distort the pocket opening, and make a small wallet feel stiff.

    Backstitch neatly at the beginning and end of a run, then trim thread close to the leather. If you melt synthetic thread ends, use a controlled touch and press the softened end gently into the stitch channel. Heat should never touch the leather directly.

    Trim and Finish the Outside Perimeter

    Once the final perimeter seam is complete, the cardholder starts to feel like one piece. It may still have small layer differences along the edge, which is normal. This is where careful trimming and sanding bring the project together.

    Use a sharp knife to remove only obvious overhang. Trying to cut the whole edge perfectly flush in one aggressive pass can create waves or take too much material from a corner. Instead, trim conservatively, then sand the layers level with a sanding block or firm backing.

    Work through grits gradually. A coarser grit corrects uneven layers, while finer grits remove the scratches left behind. Keep the block square to the edge so you do not round over one panel more than the other. Pay particular attention to the corners, which can quickly become misshapen if sanded too heavily.

    After sanding, bevel the exterior edge if the leather thickness and style call for it. A very thin cardholder may look better with only a light edge break, while a heavier vegetable-tanned build often benefits from a more defined bevel and burnish. Apply water, gum tragacanth, wax, paint, or your preferred finish according to the leather and the look you want.

    Let the finished edge dry before flexing the pockets repeatedly. Then insert cards and test the fit. The pockets should hold cards securely while still allowing a clean draw. Leather relaxes with use, so avoid building a cardholder that begins too loose.

    Common Assembly Problems and Simple Fixes

    If the layers creep out of alignment while gluing, do not try to solve it by stretching the leather into place. Lift the piece carefully while the adhesive still allows it, reset from your alignment marks, and press again. If the bond has already set, trim and sand only after stitching, provided the shift is minor.

    If a pocket feels tight, first make sure the stitch line has not crossed too close to the opening. A bone folder can help shape and open the pocket slightly, but it cannot compensate for a design that lacks enough room. Testing with real cards during the dry assembly prevents this issue more effectively than forcing the leather later.

    If the finished edge looks uneven, resist adding more edge finish to hide it. Go back to sanding. Clean edge work comes from a level, well-prepared surface, not from a thick coat of product.

    A thoughtful pattern gives you the construction order and reference points, but your hands set the final standard. Take an extra minute at each glue-up, check the fit before stitching, and let the edges earn their finish. That steady approach is what turns a small stack of leather into a cardholder you will be glad to carry.

  • Acrylic Templates Versus PDF Patterns for Leatherwork

    Acrylic Templates Versus PDF Patterns for Leatherwork

    A wallet pattern can look straightforward on a screen, then ask a very practical question at the bench: how will you get those clean shapes onto leather? The choice of acrylic templates versus PDF patterns affects more than the first cut. It changes how quickly you can begin, how easily you can alter a project, how often you can rebuild it, and where you spend your budget.

    Neither format is automatically better. A well-made PDF can be an excellent workshop tool, and a carefully cut acrylic template can earn a permanent place in a maker’s drawer. The right choice depends on the project, your available tools, and the way you like to work.

    What an acrylic template gives you

    An acrylic template is a physical, reusable pattern piece. Most are cut from clear acrylic, often with etched labels or stitch guides, and are designed to be traced around or used with a knife or scratch awl. For a maker who plans to produce the same item repeatedly, that repeatability is the main appeal.

    The material holds its shape. Unlike paper or cardstock, acrylic does not soften at the corners, curl from humidity, or gradually lose accuracy after being handled through several builds. If you are making a series of card holders, coasters, key fobs, or a favorite bag design for gifts and small-batch sales, placing a rigid template on the hide can make layout feel efficient and consistent.

    Clear acrylic also helps when positioning a pattern around marks, grain direction, or areas you want to avoid. You can see the leather beneath the template before committing to a cut. That is especially useful with premium leather, where a poor layout choice can cost more than the template itself.

    There is a simple bench advantage, too. You take out the pieces, choose your leather, and start marking. No printer, assembly, trimming, or taping is required. For makers with limited workshop time, that convenience has real value.

    Where acrylic templates ask for compromise

    Acrylic is less flexible in every sense of the word. You receive the design at a fixed size and shape. If you want to lengthen a strap, change a pocket depth, reduce a wallet to fit a specific card setup, or print a project at a different scale, the rigid pieces do not adapt without additional drafting.

    Cost is another consideration. A physical template generally costs more than a digital pattern because it must be manufactured, packaged, and shipped. It also takes storage space. One template is easy to keep organized; a growing collection of large bag panels is another matter.

    Acrylic edges deserve care as well. Cutting directly against a template can nick or shave the edge over time, particularly if a blade is angled toward it. Many makers prefer to trace the outline with an awl or silver pen, then cut just outside the line and refine the edge afterward. This protects the template and gives the project a cleaner starting point.

    Why PDF patterns work so well for many makers

    A PDF pattern is a digital file you download and print at home or through a print shop. It may include full-size pattern pieces, cut lists, assembly diagrams, stitch placement notes, and written instructions. Its greatest strength is access: once the file is available, you can print the pieces when you are ready to build.

    For a hobby leatherworker, PDFs make it easier to try new project types without accumulating a drawer full of physical forms. You can move from a small valet tray to a notebook cover or crossbody bag while keeping your upfront cost focused on leather, hardware, and the project itself.

    A good PDF also supports learning. Instructions can explain not just which piece to cut, but when to skive, when to burnish, which edges should remain unfinished until assembly, and how layers come together. A template tells you the shape. A thoughtfully organized pattern can help you understand the build.

    Digital patterns are also easier to customize. You can print another copy, preserve the original file, tape a modified version together, or use the printed shapes as a starting point for your own adjustments. That freedom is useful when you are developing your preferences rather than simply reproducing the same item.

    The preparation step matters

    The trade-off is that a PDF asks for some setup. You need a printer or access to one, paper, and a way to assemble multi-page pattern pieces. You may also want cardstock, chipboard, or a heavier reusable material if you plan to cut the design several times.

    Printing at the correct scale is essential. Before cutting leather, check the pattern’s test square with a ruler. Printer settings such as “fit to page” can quietly change dimensions, which is frustrating to discover after hardware does not fit or a pocket layer comes up short.

    Paper patterns need a little more attention during use. They can shift while tracing and wear out at corners. The practical solution is simple: print a working copy, transfer frequently used pieces to a sturdier material, and keep the original PDF safely stored for future reprints.

    Acrylic templates versus PDF patterns: a bench-level comparison

    The best format becomes clearer when you compare the decision points that actually affect a build.

    For repeat production, acrylic usually wins. If you make the same design often, rigid pieces save preparation time and help maintain consistent dimensions. This is valuable when creating a matching set of gifts or building inventory for a small maker business.

    For variety and experimentation, PDFs usually win. Digital patterns let you explore more projects for less initial expense. They are a practical fit for makers who enjoy trying different styles, learning construction methods, and gradually identifying the kinds of goods they want to make again.

    For customization, PDFs have the advantage. You can alter a printed pattern with a ruler and a little planning. Acrylic templates are most useful when you want the supplied dimensions exactly as designed.

    For fast starts, acrylic has the edge. When the template is already on your bench, there is very little between choosing a hide and making your first mark. A PDF can be just as reliable, but it asks for printing and checking before the leather comes out.

    For long-term durability, acrylic is stronger. A physical template can withstand years of careful use. But a PDF has its own kind of permanence: if a paper copy tears, you print another. The file does not wear out.

    Choosing based on the project, not the trend

    A small, repeatable item often makes a strong case for acrylic. Consider a simple card holder you make every December, a popular coaster set, or a leather tag used across multiple projects. Consistency and speed may matter more than the ability to revise the design.

    A more involved project often benefits from a PDF pattern with clear construction guidance. Bags, cases, organizers, and multi-layer wallets can have sequencing details that are just as important as the outlines of the pieces. The ability to read instructions, review diagrams, and print fresh copies can make the work feel more manageable.

    Your current skill level matters, but it should not limit you. Beginners may appreciate a PDF’s instructions and the freedom to practice on inexpensive leather first. Experienced makers may prefer digital files because they can evaluate proportions and adapt details to their own methods. At the same time, a beginner who wants to make one straightforward item many times may find an acrylic template reassuringly direct.

    A practical way to get the best of both

    Many leatherworkers eventually use both formats. They begin with a well-organized PDF to understand a project, test the fit, and learn the construction. If the design becomes a regular build, they transfer the pieces to reusable material or purchase acrylic templates where that saves meaningful time.

    You can create a durable middle ground without acrylic. Print a PDF at 100 percent, confirm the test square, glue the pieces to chipboard or thin plastic, and cut the reusable shapes carefully. Label each piece with the project name, quantity, and any notes about leather weight or grain direction. It takes a little effort once, then supports future builds without losing the flexibility of the original file.

    The quality of the pattern matters more than the material alone. Look for clear piece labels, accurate scaling, practical cut information, and instructions that respect the order of operations. A good layout reduces uncertainty before your knife reaches the leather. That is the standard Old Line Crafts & Designs builds toward: less time guessing and more time building.

    Choose the format that helps you return to the bench with confidence. A PDF may give you room to learn and adapt. Acrylic may give you a dependable shortcut for a design you already enjoy. Either way, the satisfying part is still ahead of you: turning a clean pattern into a piece of leatherwork made by your own hands.

  • Wallet Construction Sequence Guide for Makers

    Wallet Construction Sequence Guide for Makers

    A wallet can look simple on paper and still create trouble at the bench. One pocket stitched too early can block access to a seam. A skipped skive can leave a corner bulky. A finish applied at the wrong stage can make cleanup harder than it needs to be. This wallet construction sequence guide gives you a practical order of operations so you can spend less time correcting avoidable mistakes and more time building a wallet you are proud to carry.

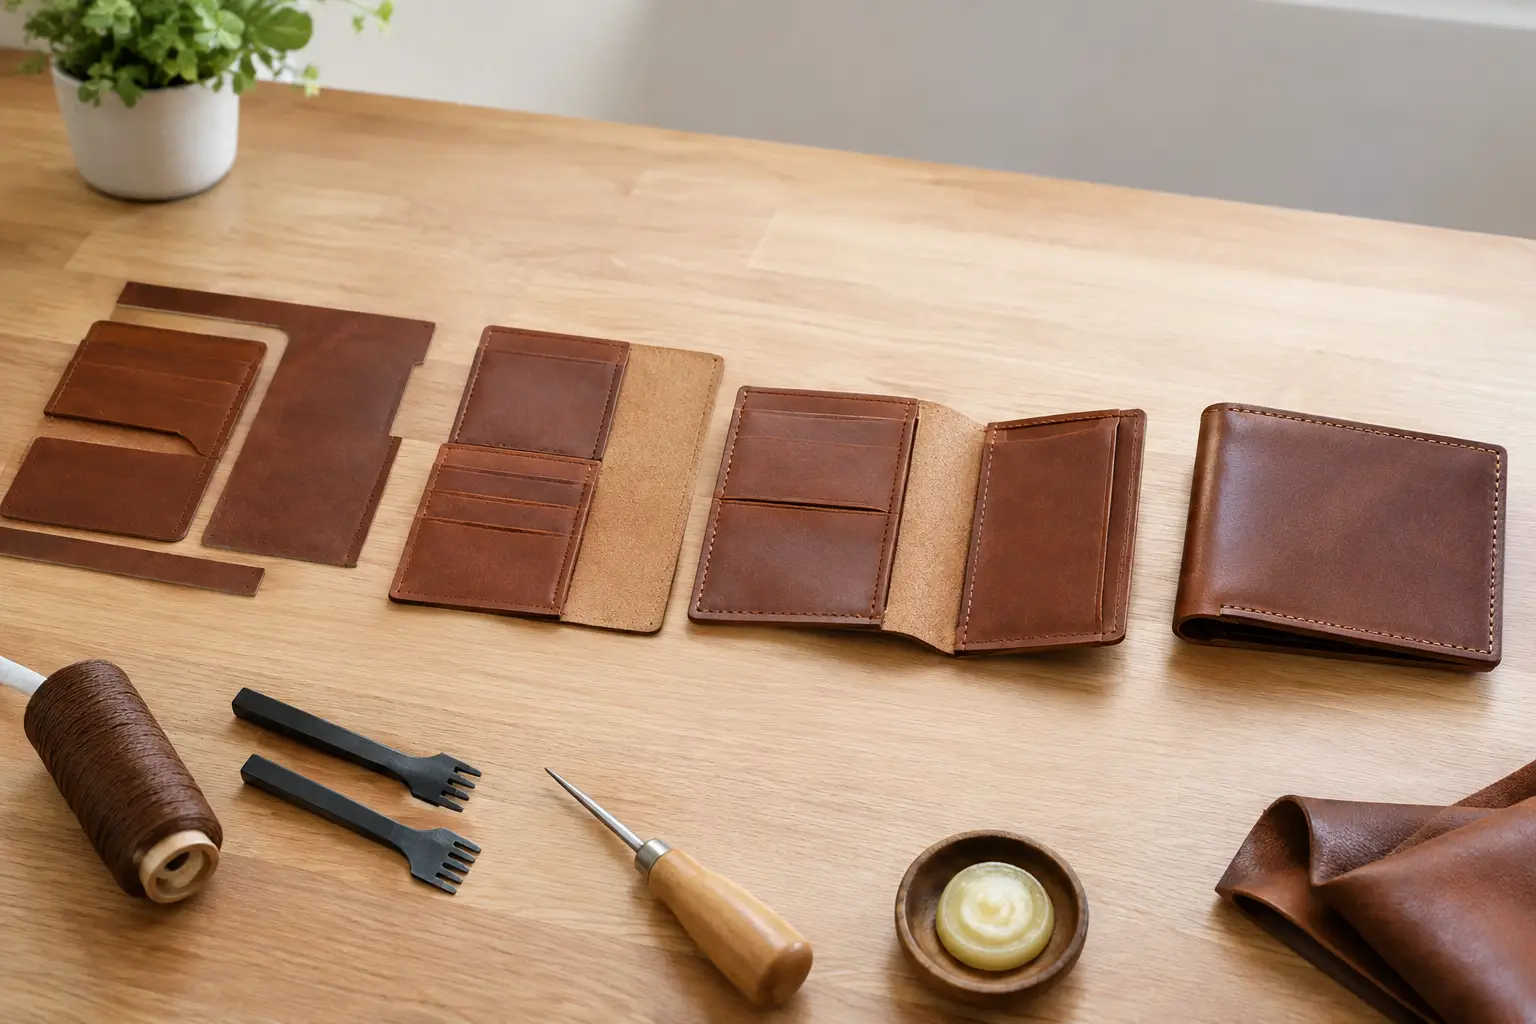
    The exact order will change with the pattern, leather weight, and wallet style. A bifold with stacked card pockets is not assembled like a slim card holder, and a lined wallet asks for more preparation than an unlined design. Still, the working principles stay consistent: prepare every piece before it disappears behind another layer, build small assemblies first, and leave final joining until the last practical moment.

    Start With the Pattern and the Finished Wallet in Mind

    Before cutting leather, read the pattern from beginning to end. Do not only look at the pieces. Look for fold lines, stitch lines, glue zones, skive callouts, and areas that will be inaccessible once layers are assembled. This small pause prevents a common problem: realizing a pocket needs edge paint, a maker’s mark, or a crease after it has already been stitched into the body.

    Lay out the pattern pieces in the approximate position they will occupy in the finished wallet. This is especially useful for card pockets that stack or overlap. You will see which pieces sit deepest in the assembly and which pieces are meant to cover their edges.

    Check the leather selection at this stage, too. Firmer leather can make a clean, structured wallet, but it may need more thoughtful thinning at folds and layered corners. Softer leather can be easier to turn and compress, though it may stretch during glue-up if handled roughly. There is no single right choice. The pattern, intended use, and your preferred finish should guide the decision.

    Wallet Construction Sequence Guide: Prepare Before Assembly

    The cleanest wallet builds are usually won before the glue bottle comes out. Cut all pieces accurately, keeping the knife vertical and the edges clean. If a pattern includes mirrored parts, mark the flesh side lightly so you do not accidentally cut two pieces facing the same direction.

    Once the pieces are cut, complete the preparation work that is easier on flat leather than on a partly assembled wallet. That typically includes crease lines, decorative stamping, maker’s marks, pocket slot cuts, and stitch-hole marking where the pattern calls for it.

    Skive the Areas That Need to Fold or Stack

    Skiving is not simply a way to make leather thinner. In wallet work, it controls bulk. Focus on fold lines, turned edges, the bottoms of layered card pockets, and any point where several seams meet. A gradual skive generally creates a smoother transition than removing thickness abruptly.

    Test the stack with dry-fitted pieces before gluing. If the corners look heavy now, they will look heavier after adhesive, thread, and burnishing add material. It is easier to refine a skive on a loose pocket than to force a finished wallet to close flat.

    Be conservative with thin leathers. Over-skiving can weaken a high-use area such as a card slot or fold. When in doubt, remove a little, check the fit, and make another pass only if needed.

    Finish the Edges That Will Be Hidden Later

    Some interior edges become impossible or awkward to finish after assembly. These may include the top edge of a card pocket, the mouth of a cash sleeve, or an inner divider edge. Burnish, paint, crease, or otherwise finish these exposed edges while the piece is flat.

    This is also the time to apply any lining or reinforcement that belongs on an individual component. Let adhesives cure as directed before moving on. Rushing this stage can lead to stretching, shifting, or uneven edges when you begin stacking pockets.

    Build Interior Components From the Inside Out

    For most wallets, the smallest or deepest pieces go together first. If you are building a stack of card pockets, begin with the pocket that sits farthest back, then add the next pocket over it. Each new layer should cover the construction edge of the layer beneath it.

    Use a dry fit before committing with glue. Confirm that the card openings remain even, the visible pocket height matches the pattern, and the stack aligns with the backing piece. A slight error at the first pocket becomes much more noticeable by the fourth.

    Apply adhesive sparingly and only in the intended glue zones. Excess glue can seep into pocket openings and create a frustrating cleanup job. Press the pieces together carefully from the center outward, then allow the bond to set enough that the stack will not shift under the pricking irons or stitching chisels.

    Stitch the seams that will be covered by later layers while access is still open. For example, a pocket may need stitching at its sides before it is mounted to a larger panel. Follow the pattern’s stitch order when it provides one, because it is usually designed to preserve access and reduce unnecessary backstitching.

    Join the Interior to the Wallet Body

    With interior pocket assemblies complete, move to the larger wallet panels. This is where careful alignment matters most. Use registration marks, centerlines, or a light crease to position the interior assembly before glue-up. A centered layout can still look crooked if the distance from one side is not equal to the other, so check both edges rather than trusting your eye alone.

    For bifolds and long wallets, pay close attention to the spine or fold. The interior should have enough room to bend without pulling hard against the outer panel. Depending on the design, this may mean leaving a small channel, using a separate spine piece, or allowing a controlled gap between interior sections.

    Do not stitch the perimeter immediately. First, check that all openings are clear and that the wallet folds naturally. Slide a few cards into the pockets if the leather is dry and the build allows it. You are checking function, not stretching the wallet to its limits. If a pocket is glued too close to an opening or the fold feels strained, now is the time to correct it.

    Stitch the Perimeter Only After Everything Fits

    Once the internal construction is complete and the wallet closes properly, trim the perimeter if your method calls for it. Some makers prefer cutting oversized panels and trimming them flush after assembly. Others cut every piece precisely from the beginning. Both approaches can work.

    Oversized trimming can produce very even final edges, particularly for beginners or complex stacked builds. It also uses more leather and requires a steady hand with a sharp knife. Pre-cutting saves material, but demands precise alignment throughout the project. Choose the method that suits your current skills and the pattern design.

    Mark or punch the perimeter stitch line after the edges are flush. Then stitch in a direction that lets you maintain consistent tension and a clean appearance at visible corners. Keep an eye on the wallet as a whole, not just the seam in front of you. A twist in the panels can become set in place if you stitch without checking alignment as you go.

    Shape, Refine, and Finish the Wallet

    After stitching, sand the perimeter edges level. Work through your preferred grits with a light touch, especially near thin pocket layers. The goal is an even edge, not a smaller wallet. If you use edge paint, build thin coats and allow adequate drying time between them. If you burnish, use the method that best suits the leather and the finish you want.

    Set the fold gently rather than forcing it. For a bifold, fold the wallet around a suitable form or close it carefully with light contents inside if the pattern and leather thickness allow. This helps the leather learn its working shape without sharply creasing the grain.

    Finally, inspect every pocket opening, stitch line, and edge. Remove stray adhesive, trim loose thread ends, and check that cards enter and leave without catching. These final minutes are part of the build, not an afterthought. They are often what turns a good workshop project into a wallet that feels considered in the hand.

    A reliable sequence gives you room to focus on the enjoyable parts of leatherwork: choosing materials, refining details, and watching a flat set of pieces become something useful. Start with a pattern that fits your bench, follow the construction order with patience, and let each finished wallet teach you what you want to improve on the next one.

  • How to Stitch Leather Gussets Without Guesswork

    How to Stitch Leather Gussets Without Guesswork

    A gusset is what gives a flat leather project its usable depth. It turns two panels into a pouch, gives a bag room to carry more than a few cards, and helps a case hold its intended shape. The challenge is that learning how to stitch leather gussets asks you to manage a curved or folded piece of leather while keeping both stitch lines aligned. A little preparation makes that work far more predictable.

    The goal is not to force the gusset into place. It is to let the pattern, leather thickness, stitch spacing, and assembly order work together. When those details are right, the seam closes cleanly and the finished piece looks intentional from every angle.

    Start With a Gusset That Fits the Pattern

    Before reaching for needles, confirm that the gusset is the correct length and has been prepared for the construction style your project uses. A gusset can be a single continuous strip around the sides and bottom of a pouch, separate side pieces, or a folded piece that creates a boxed bottom. Each style is stitched differently, but they all depend on accurate matching points.

    If you are working from a pattern, transfer every alignment mark before cutting or punching. Center marks, corner marks, and start and stop points are not decoration. They tell you where the gusset needs to meet the body panels so excess leather does not slowly migrate to one end of the seam.

    For a continuous gusset, find and mark the center of the bottom edge on the gusset and on the main panel. Then mark the points where the gusset transitions into each side. On a symmetrical project, these marks provide a simple way to check your progress as you stitch.

    Dry-fit the pieces before punching stitch holes. Lay the gusset against the panel and confirm that the edges meet without stretching, bunching, or coming up short. If the gusset is slightly long, do not trim it immediately. First check whether the pattern calls for final trimming after assembly. If it is short, stop and identify the cause. Stretching leather to make up a length difference often creates distorted corners and uneven tension later.

    Prepare Edges Before Assembly

    Many gusset projects are easier to finish when you complete some edge work before stitching. This depends on the design. A lined bag may hide the seam allowance, while an unlined pouch with exposed edges may need careful burnishing after the seam is closed.

    At minimum, make sure the flesh side is clean and the grain side is free of marks where adhesive will be applied. If the design includes turned edges, skived areas, or a fold line, complete that work before glue enters the process. Trying to skive or crease a gusset after it is sewn to a panel is possible, but it is rarely the cleanest route.

    For most hand-stitched projects, you will want the following at the bench:

    • A sharp knife or shears for final trimming
    • Contact cement or a leather-safe adhesive
    • Stitching chisels or pricking irons
    • Harness needles and appropriately sized thread
    • Clips, a mallet, and a flat stitching surface

    Choose thread and hole spacing that suit the leather. Fine thread in widely spaced holes can make a gusset seam look loose. Heavy thread in tight holes can crowd the edge and make corners difficult to control. For many small goods, a balanced pairing of moderate-weight thread and consistent spacing produces a neat, durable result.

    How to Stitch Leather Gussets Step by Step

    Glue in short, controlled sections

    Apply adhesive to the seam allowance rather than coating the entire gusset at once. Start at a center mark or at the bottom of the project, depending on the pattern instructions. Bring the matching marks together first, then press outward a few inches at a time.

    This approach gives you room to correct alignment before the adhesive grabs. Clips can hold the assembly while the glue sets, but use them carefully on softer leather because they may leave impressions. A small roller or bone folder helps press the seam consistently without overhandling the leather.

    For a gusset that follows rounded corners, work slowly around the curve. The inside edge of the gusset needs to compress slightly as it turns, while the outside edge travels farther. Do not pull the leather tight to make the curve happen. Instead, guide it into position in small increments.

    Punch the holes through both layers

    If your pattern has pre-marked stitch holes, align those marks before punching. If it provides only a stitch line, glue first and then use your pricking irons through both layers. Punching through the assembled seam is one of the most reliable ways to keep holes aligned on a simple unlined gusset project.

    Keep the iron vertical, especially near corners. A tilted chisel can exit too close to the edge on the back side, which weakens the seam and makes the finished stitching look uneven. On a tight curve, use a smaller iron or punch fewer holes at a time so the spacing can follow the shape naturally.

    When a gusset meets a sharp corner, do not assume a full iron will land perfectly. It is often better to place the corner hole deliberately, then fill the remaining distance with a smaller pricking iron or an individual awl. A clean corner is worth more than forcing the same tool into every section.

    Stitch with steady, even tension

    Begin where the pattern recommends, usually at the center bottom, a concealed point, or one side of an opening. Use a saddle stitch and maintain the same thread tension on every hole. Pull each stitch firmly enough to seat the thread, but not so tightly that the seam pinches or the gusset edge begins to ripple.

    The gusset can make the work feel awkward because the project will not always lie flat. Support the piece with your non-stitching hand and rotate it as needed. It is easier to move the project than to twist your wrists or pull the thread at an angle.

    Pause at each alignment mark. If the marks still meet, continue. If the gusset has started to drift, correct it while the difference is small. Continuing several inches in the hope that it will work itself out usually leaves too much material at the final corner.

    Backstitch two or three holes at the end, depending on thread size and project use. Trim the thread close, then melt synthetic thread ends carefully or tuck and hammer linen thread ends according to your preferred finishing method. Keep heat away from the leather surface.

    Handle Curves and Corners With Patience

    Most gusset trouble appears at the corners. A rounded pouch corner may need the gusset eased gradually around the turn. A squared bag corner may require a miter, a folded construction, or a separate side gusset designed to meet the bottom panel. The pattern should tell you which construction is intended, so avoid substituting one method for another unless you have adjusted the measurements.

    If a curve bunches before stitching, remove the affected section from the adhesive and reset it. Forcing wrinkles into the seam will not make them disappear under thread. On thicker leather, a light skive along the flesh side of the gusset near a tight bend can reduce bulk, but only if the pattern allows enough material for it. Over-skiving leaves a weak, floppy edge.

    At a folded bottom gusset, crease the fold accurately before joining it to the body. The fold should be crisp, but not crushed. A poorly located fold changes the depth of the finished piece and can make both side seams look mismatched.

    Common Gusset Problems and What They Mean

    If the gusset is too long at the end of the seam, the issue may be uneven glue-up, skipped alignment marks, or holes that were punched independently on each piece. Small differences accumulate quickly. Starting from the center and working outward helps prevent this on future builds.

    If the gusset comes up short, verify that the main panel was cut to the correct size and that the leather was not stretched during assembly. Some leathers, especially soft chrome-tanned leather, can grow under tension. Firmer vegetable-tanned leather holds its dimensions better but may need more careful shaping around curves.

    Wavy stitching often points to inconsistent pulling tension or a gusset that was stretched as it was glued. Uneven stitch spacing usually comes from trying to force a standard iron around a corner. Neither problem means the project is ruined, but both are useful signals for the next build.

    Finish the Seam After Stitching

    Once the seam is complete, inspect the edge before applying finish. Trim any minor unevenness with a sharp knife, taking light passes rather than trying to remove everything at once. Sand the layers flush if the leather and construction call for it, then bevel and burnish exposed edges as desired.

    A gusset seam does not need to be perfectly invisible. It should be even, secure, and appropriate to the style of the piece. On a handmade pouch or bag, a well-spaced line of stitching and a clean edge often show the care behind the build better than an overly polished surface.

    Give yourself permission to practice on a small card pouch, tray corner, or scrap assembly before committing to a larger bag. Each gusset teaches your hands how the leather wants to bend, and that bench experience carries into every project that follows.

Sign up to receive the
Old Line Workbench
Weekly Newsletter

We don’t spam! Read our privacy policy for more info.