Blog

  • How to Cut Leather Templates With Clean Edges

    How to Cut Leather Templates With Clean Edges

    A pattern can be perfectly designed and still give you a frustrating build if the cut pieces are off by even a small amount. A wandering cut line can change a fold, shift a stitch line, or leave two mirrored panels slightly different. Learning how to cut leather templates carefully is one of the simplest ways to spend less time correcting and more time building.

    The goal is not to make every pass feel precious. It is to create a repeatable setup: a readable pattern, a stable template, a sharp blade, and a cutting sequence that protects both the leather and your accuracy. Once those habits are in place, cutting becomes a calm part of the project rather than the moment you hope turns out well.

    Start With a Pattern You Can Read

    Before putting a knife to leather, review the pattern sheet closely. Confirm the print scale, piece count, grain or direction marks, fold lines, stitch marks, and any notes about mirrored parts. If a pattern includes a one-inch or 50 mm test square, measure it after printing. A printer set to “fit to page” can quietly reduce or enlarge a pattern, and that difference carries through the whole project.

    Print at 100 percent or “actual size.” Then decide whether the printed paper itself will be your cutting guide or whether you will make a reusable template. For a one-time project in softer leather, a carefully cut paper pattern can work well. For repeated builds, firm leather, or pieces with curves and precise corners, transfer the pattern to cardstock, chipboard, template plastic, or acrylic.

    Paper patterns are quick, but they can soften at the edges after repeated tracing. Acrylic and firm template plastic last longer and give a cleaner edge to run against, though they take more time to make. There is no single right material. Choose the option that fits the number of times you expect to use the pattern and the precision the project needs.

    Cut the Template Before You Cut the Leather

    If you are making a physical template, cut it accurately first. Use scissors for broad outside shapes in paper or cardstock, but use a knife and straightedge for long straight lines. Small curves are often easiest with short, controlled cuts rather than one sweeping motion.

    Keep an eye on the line convention in the pattern. Most well-organized patterns are designed to be cut on the outside edge of the printed line unless they say otherwise. If you cut through the center of a thick line on every piece, small inconsistencies can accumulate. Pick one approach and stay consistent.

    Set Up Your Leather for Accurate Cuts

    A clean cutting surface matters. Use a self-healing cutting mat or a suitable poundo board beneath the leather so the blade can pass through without dragging against a hard tabletop. The leather should lie flat and be free of dust, loose hardware, and scraps that can tilt a template.

    Inspect the hide before arranging your pieces. Look for scars, wrinkles, loose grain, deep stretch, and color variation. These are not always defects. A mark may add character to a rustic pouch, while the same mark could distract on a polished wallet front. Place the most visible pieces in the cleanest areas of the leather, and reserve less uniform sections for gussets, tabs, straps, or interior parts where appropriate.

    Pay attention to leather direction. Leather has more stretch in some directions than others, particularly along the belly. Long straps, handles, and structural pieces usually benefit from being cut along the firmer backbone direction. Pattern grain marks are there for a reason. Ignoring them may not ruin the piece immediately, but it can affect how the finished item hangs, folds, and holds its shape.

    For pairs of parts, such as left and right panels, plan the layout before tracing. If the finished outside is meant to show matching grain or color, place both pieces nearby on the hide. When a part must be mirrored, turn the template over before tracing the second piece. This small check prevents the familiar surprise of cutting two pieces that face the same direction.

    How to Cut Leather Templates Without Losing the Line

    Place the template on the flesh side of the leather whenever possible. This keeps trace marks off the finished surface and gives you a clear working side. Use a scratch awl, silver pen, fine pencil, or removable marking tool that shows up on your leather without leaving a permanent visible mark. Test any pen on a scrap first, especially on light-colored vegetable-tanned leather.

    Trace with the tool held upright against the template edge. A tilted awl can push the line outward, creating a piece slightly larger than intended. Mark corners with care, and add any reference points, fold lines, or hardware locations called out by the pattern. Avoid marking every stitch hole unless the design specifically uses marked holes. In most projects, stitching is more accurate when laid out after the pieces are cut and their edges are aligned.

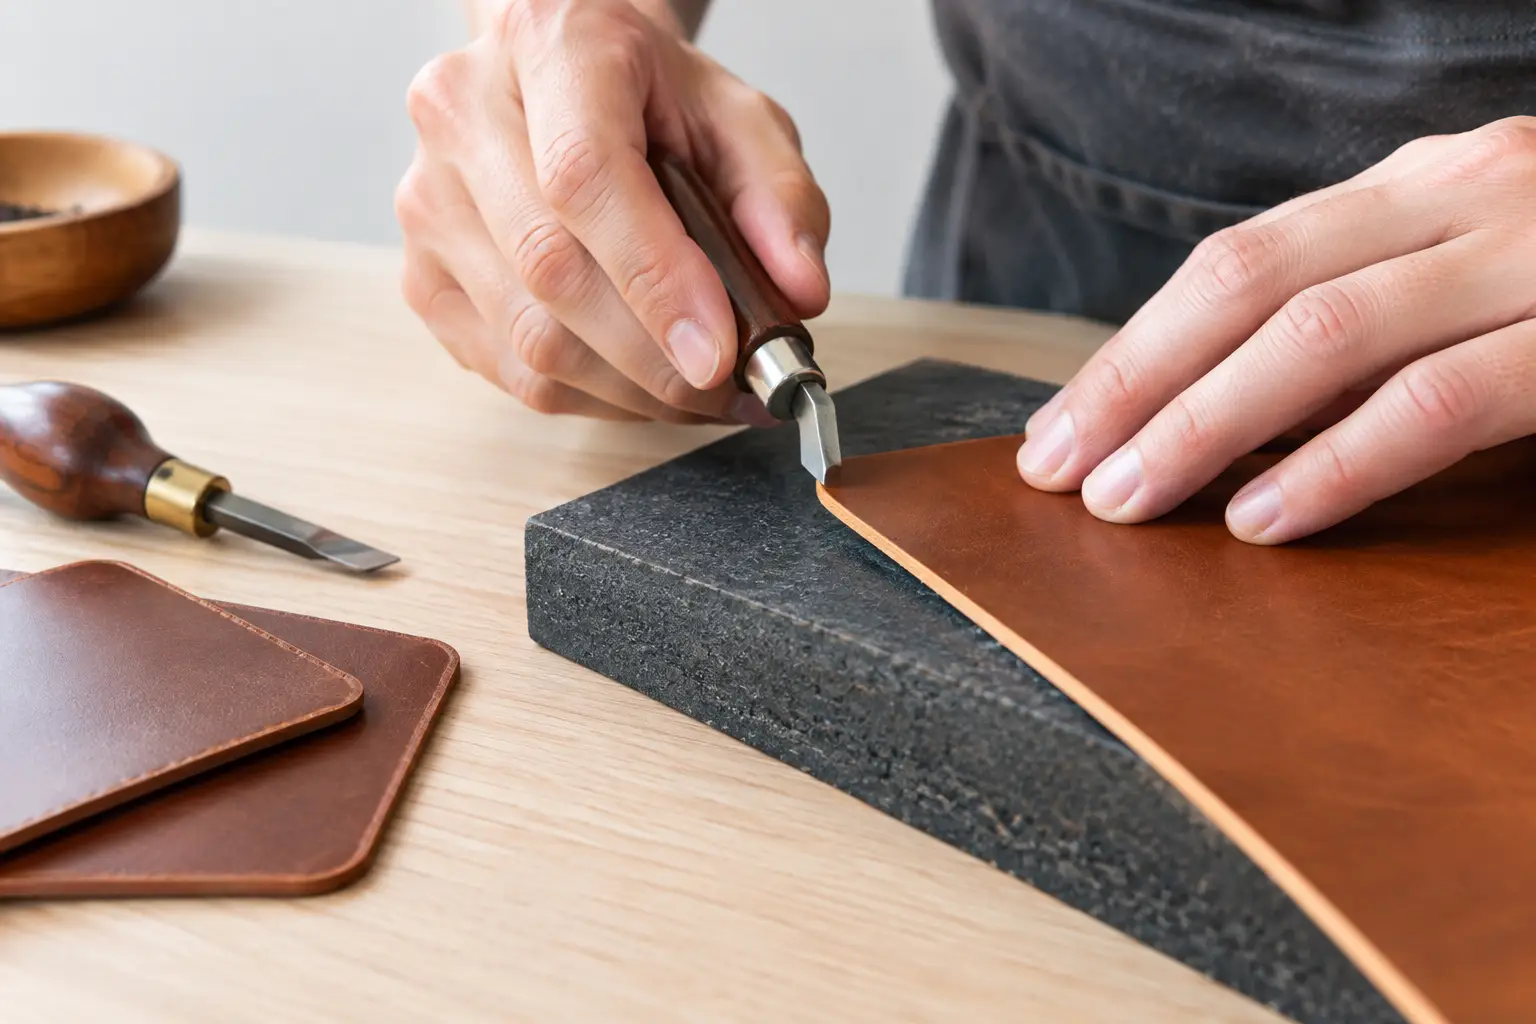
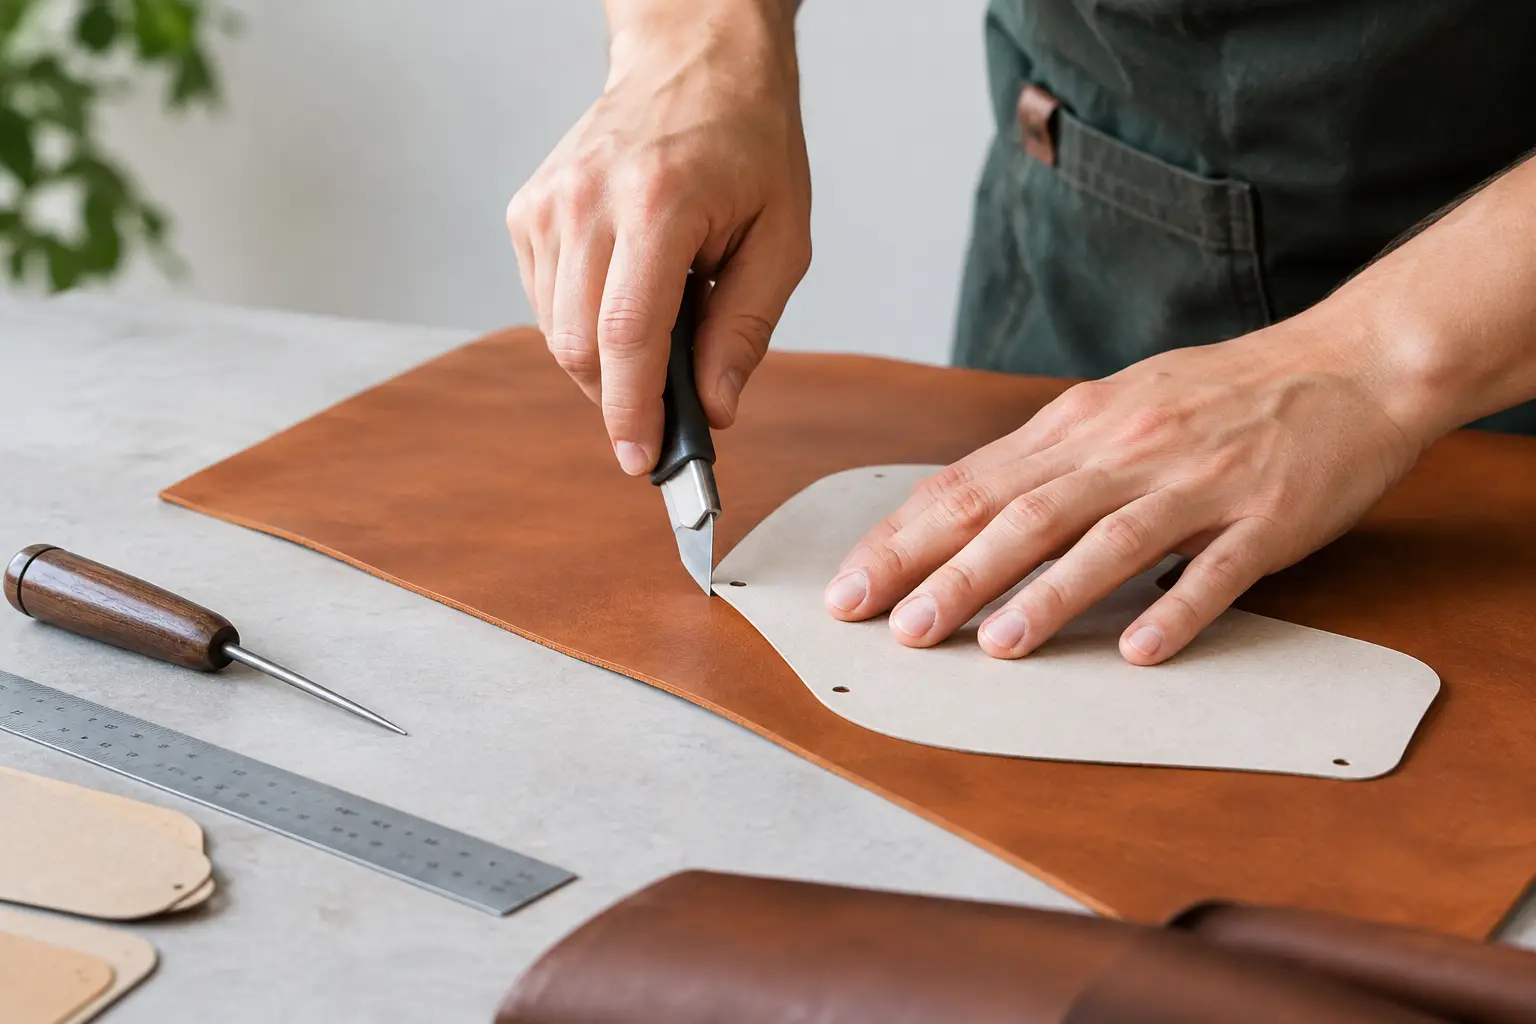
    For straight cuts, place a non-slip metal ruler just beside the traced line, not directly over it. Keep your fingers well away from the blade path. Draw the knife toward you in a controlled pass, using light pressure. Trying to cut thick leather in one forceful stroke is a common cause of curved lines, torn grain, and slips.

    Instead, make two or three light passes. The first establishes the path. Each following pass travels in that groove with less effort and better control. If the cut does not go all the way through, flex the leather slightly along the line and finish it from the opposite side rather than forcing the blade.

    Curves ask for a different approach. Keep the knife hand steady and rotate the leather with your other hand as you cut. This lets the blade maintain a natural angle and reduces the tendency to pivot your wrist. Make short cuts on tight curves, stopping before you feel yourself fighting the line. A fresh blade is especially valuable here.

    Use the Right Blade, and Change It Early

    A utility knife, craft knife, or head knife can all cut pattern pieces effectively when sharp and used with control. What matters most is the edge. A dull blade compresses leather before it cuts it, leaving a fuzzy edge and requiring extra pressure. Extra pressure is where accuracy disappears.

    Keep spare blades at the bench. Change or strop your blade when you notice it skipping, dragging, or requiring you to press harder than usual. This is not wasted material or over-cautiousness. A sharp blade protects the leather, the pattern line, and your hands.

    For very small inside corners, stop the straight cut just short of the corner, then approach it from the adjoining direction. This produces a cleaner intersection than trying to turn a blade sharply while it is buried in the leather. For inside holes or slots, use the punch size specified in the pattern when possible, then connect any straight sections with a knife.

    Check Each Piece Before Moving On

    After cutting, place the leather piece back against the template. Check the corners, curves, and critical edges before you cut the next matching part. Catching a small issue early may allow you to refine one edge before it becomes a mismatch across several components.

    Do not rush to bevel or burnish immediately. First, dry-fit the major pieces and confirm that fold lines, pockets, gussets, and mating edges make sense. Some patterns intentionally include oversized edges that are trimmed flush after gluing. Others require finished edges before assembly. Following the construction order matters as much as cutting accurately, because the right time to refine an edge depends on how the project comes together.

    A few habits make a meaningful difference over time:

    • Cut the largest and most visible pieces first, then use the remaining leather for smaller components.
    • Leave a little space between traced parts so the knife and ruler have room to work cleanly.
    • Keep template labels with each piece until the project is assembled, especially when several parts look similar.
    • Save usable offcuts. Small pieces are useful for pull tabs, reinforcements, test stitches, and trying a finish.

    When a Slightly Imperfect Cut Is Still Usable

    Not every cut needs to be discarded because it is not flawless. A light waviness on an edge that will be trimmed, skived, folded, or covered by a gusset may never be visible. A minor error on a standalone finished edge is more significant. The useful question is not simply, “Is this perfect?” It is, “Will this affect fit, strength, symmetry, or the finished appearance?”

    If an edge is only slightly proud, you can often true it with a ruler and a fresh blade, or sand it carefully after adhesive joins paired layers. If a piece is too small, though, adding material is rarely a satisfying fix. Recutting a critical part can save hours of trying to force an inaccurate component into the build.

    The more patterns you make, the more your cutting process becomes personal: the marking tool you trust, the template material you prefer, the blade that feels right in your hand. Start with clear lines, take light passes, and give each piece a quick check before assembly. That steady attention is what turns a printed pattern into a project that feels good from the first cut to the final edge finish.
  • Why Does Leather Stretch Unevenly A Makers Guide

    Why Does Leather Stretch Unevenly? A Maker’s Guide

    A strap that feels firm at one end and soft at the other can turn a clean build into a frustrating one. If you have asked, why does leather stretch unevenly, the short answer is that leather is natural material with a direction, a history, and different levels of density across every hide. The useful answer is knowing where that variation lives and planning your cuts around it.

    Uneven stretch is not always a sign that you bought poor leather or made a mistake. It is often the expected behavior of a material that once moved over an animal’s body. When you learn to read that behavior before cutting, you can make more reliable straps, wallets, cases, trays, and small goods with less time guessing and more time building.

    Why Does Leather Stretch Unevenly Across a Hide?

    A hide is not uniformly structured like a sheet of plastic or woven fabric. Its fibers are dense and interlocked in some areas, looser and more open in others. That structure changes from the backbone outward, which is why two pieces cut from the same side can respond very differently under tension.

    The back and shoulder areas are often firmer, although shoulders can show wrinkles and natural looseness from movement. The belly is usually the stretchiest part of the hide. It has more give because the animal needed that area to flex and expand. The neck can be strong but irregular, with pronounced wrinkles and variable fiber density.

    This matters most when a project has parts that must stay consistent. A belt, bag strap, watchband, handle, closure tab, or long narrow panel should generally come from the firmer portions of the hide. A small pocket, lining piece, gusset, or decorative accent can often make good use of areas with more stretch, provided the pattern and purpose allow it.

    Leather also has a grain direction. Like wood, it may resist force more effectively in one direction than another. A strip can feel stable when pulled lengthwise yet widen or distort when pulled across its width. If you rotate a pattern piece without considering that direction, two otherwise identical parts may perform differently.

    The Factors That Change How Much Leather Moves

    Hide location is the starting point, but several other details affect stretch. Understanding them helps you choose leather for the job rather than relying only on thickness.

    Tannage and temper

    Vegetable-tanned leather is often valued for its ability to mold, carve, burnish, and hold a clean form. In a firmer temper, it is a dependable choice for structured projects. Still, veg tan can stretch noticeably when wet or heavily worked, especially in thinner weights or softer sections of the hide.

    Chrome-tanned leather can range from firm to very supple. A soft chrome tan may be ideal for a pouch, garment-style piece, or flexible lining, but it can be less predictable for a strap that needs to hold its length. Combination-tanned and retanned leathers sit somewhere in between, so test the specific hide rather than assuming behavior from the tanning label alone.

    Temper describes how soft or firm the leather feels, but it does not tell the whole story. Two leathers with a similar temper can stretch differently because of fiber structure, finish, thickness, and the section of hide you use.

    Thickness and splitting

    Thicker leather usually resists stretching better than thin leather, but thickness is not a guarantee. A thick belly cut may still stretch more than a thinner strip from a dense back section. Splitting can also expose looser fibers on the flesh side, making a piece feel less stable than it did before.

    For parts that need to remain straight and firm, select the best section first, then choose the appropriate weight. Trying to solve a poor cut location only by using heavier leather can add bulk without fully fixing the problem.

    Moisture, heat, and handling

    Water changes leather. Casing vegetable-tanned leather makes it easier to mold and tool because moisture temporarily relaxes the fibers. That is useful when shaping a holster, a fitted case, or a formed tray. It also means the piece can grow, shift, or dry slightly out of shape if it is not controlled during the process.

    Heat, heavy burnishing, repeated flexing, and aggressive handling can have similar effects. A damp strap pulled hard during assembly may dry longer than intended. A pocket opening worked repeatedly with a bone folder may loosen enough to affect fit. These are not reasons to avoid shaping techniques. They are reasons to build allowances and reinforcement into parts that carry stress.

    Cutting and construction choices

    Even a well-chosen piece can stretch unevenly if the construction concentrates force in one place. A long strap with a narrow buckle fold, a bag handle attached by only a few stitches, or a wallet pocket with a tight curved opening all put localized stress on the leather.

    Stitching, adhesives, and hardware can either stabilize the material or create a weak point. A lined strap, for example, distributes tension across more material and usually holds its shape better than a single layer of soft leather. Reinforcement at a snap, rivet, or buckle fold prevents the hole area from elongating over time.

    How to Read Leather Before You Cut

    You do not need laboratory tools to get better at predicting stretch. A few simple bench checks will tell you a great deal about a hide.

    First, look across the grain surface under good light. Notice wrinkles, scars, loose-looking grain, and areas where the surface has a softer, more open appearance. These areas are not automatically unusable. They simply may not be the right place for a load-bearing part.

    Next, gently pull the leather in several directions. Use steady pressure rather than a sharp tug. Compare the response near the backbone, shoulder, and belly. You will often feel the difference immediately. Mark the direction of greatest stretch on the flesh side with a light pencil note if the hide will sit on your bench for more than one session.

    Then bend a small section and watch the grain. A firm, tight grain usually creases in a more controlled way. Loose grain may wrinkle or lift from the fiber layer beneath it. This is especially helpful when selecting leather for fold lines, card pockets, and polished exterior panels.

    If the project must fit another object, make a test piece from the same leather. A short offcut can show whether a snap placement, pocket opening, or folded tab will change size after wet forming or repeated flexing. That small test is usually faster than rebuilding a nearly finished project.

    Plan Pattern Pieces Around Stretch Direction

    Good patterns provide structure, but your hide selection still guides the final result. Before tracing, identify which pieces need stability and which pieces benefit from flexibility.

    Keep long structural parts aligned with the hide’s strongest direction whenever possible. For belts and straps, that generally means cutting long strips along the back rather than across the belly. For bag panels, think about where the weight will pull. A tall tote panel may need its firmer direction running vertically, while a flap may need enough flexibility to close comfortably without becoming limp.

    For wallets and card holders, stability matters at pocket mouths, closure tabs, and fold areas. A little give can help a card pocket break in, but too much can make the opening loose early. Use firmer leather for visible exterior pieces and high-wear edges, while saving softer sections for hidden layers or low-stress components.

    When a pattern includes mirrored pieces, cut both from similar areas of the hide and keep their grain direction consistent. A left and right strap keeper cut from opposite regions may look alike on day one but age differently. Matching the material is one of the quieter details behind a refined finished result.

    Practical Ways to Control Stretch

    You cannot remove leather’s natural variation, and you would not want to. That variation gives handmade work its character. You can, however, control how much it affects the build.

    For parts under steady tension, use reinforcement. A lining, a firm interlining, or a properly chosen reinforcement strip can keep a strap from lengthening and help handles retain their shape. Choose reinforcement carefully, though. Too much stiffness can make a project uncomfortable to use or difficult to turn and finish.

    At hardware points, use washers, backing pieces, or additional layers where the design permits. Punch clean holes that match the hardware size rather than forcing oversized hardware through undersized openings. A hole that is stretched during installation often continues to elongate with use.

    During wet forming, shape evenly and let the leather dry in the form that matters. Avoid pulling one side harder than the other. If a project requires a snug fit, allow for the fact that damp leather may relax while you work, then tighten slightly as it dries.

    Finally, do not treat every offcut as scrap. Softer belly sections can become excellent practice pieces, small gussets, pull tabs, lining components, or compact projects where flexibility is welcome. Efficient leathercraft is not about demanding that every square inch behave the same. It is about giving each section a job that suits it.

    A well-made project begins before the first cut. Take a moment to feel the hide, identify its firm and flexible areas, and place each pattern piece with purpose. That habit builds confidence at the bench and gives the finished piece a better chance to wear exactly as you intended.

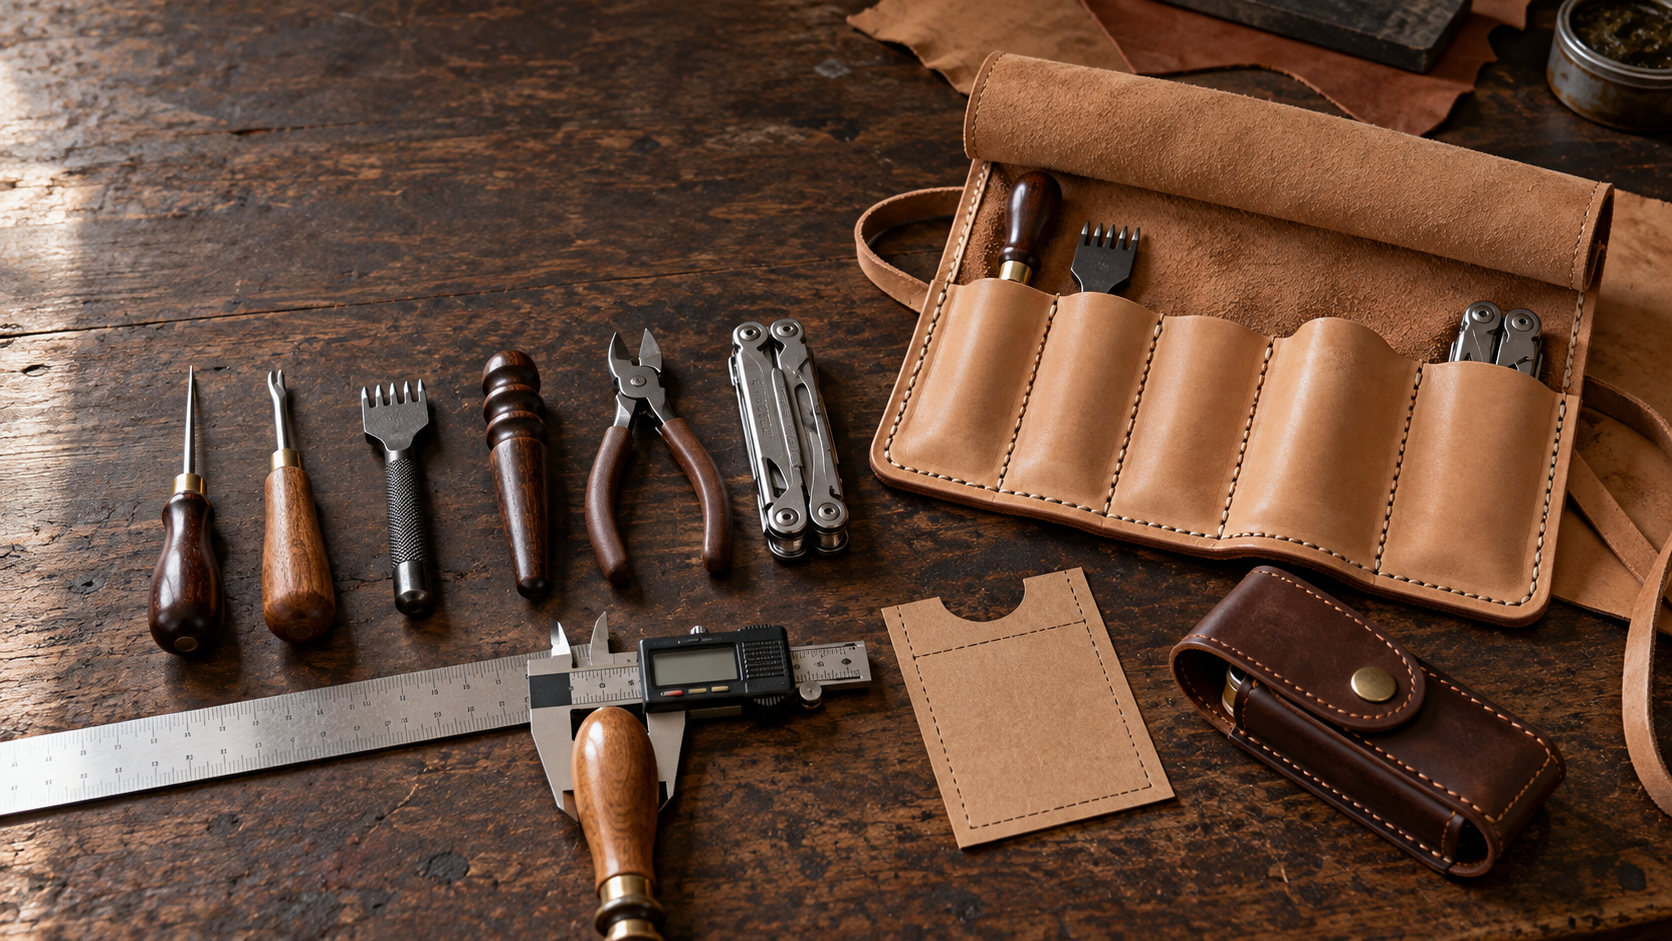
  • Leathercraft tools beside a ruler caliper paper pocket mock up leather tool roll and multitool sheath on a workbench

    How to Measure Tools for a Leather Tool Roll or Sheath

    A tool roll looks great laid flat. The real test comes when you fill its pockets, fold the guard, and tie it closed. A sheath faces a similar test: the multitool must slide in without a fight, stay secure, and leave room for its closure.

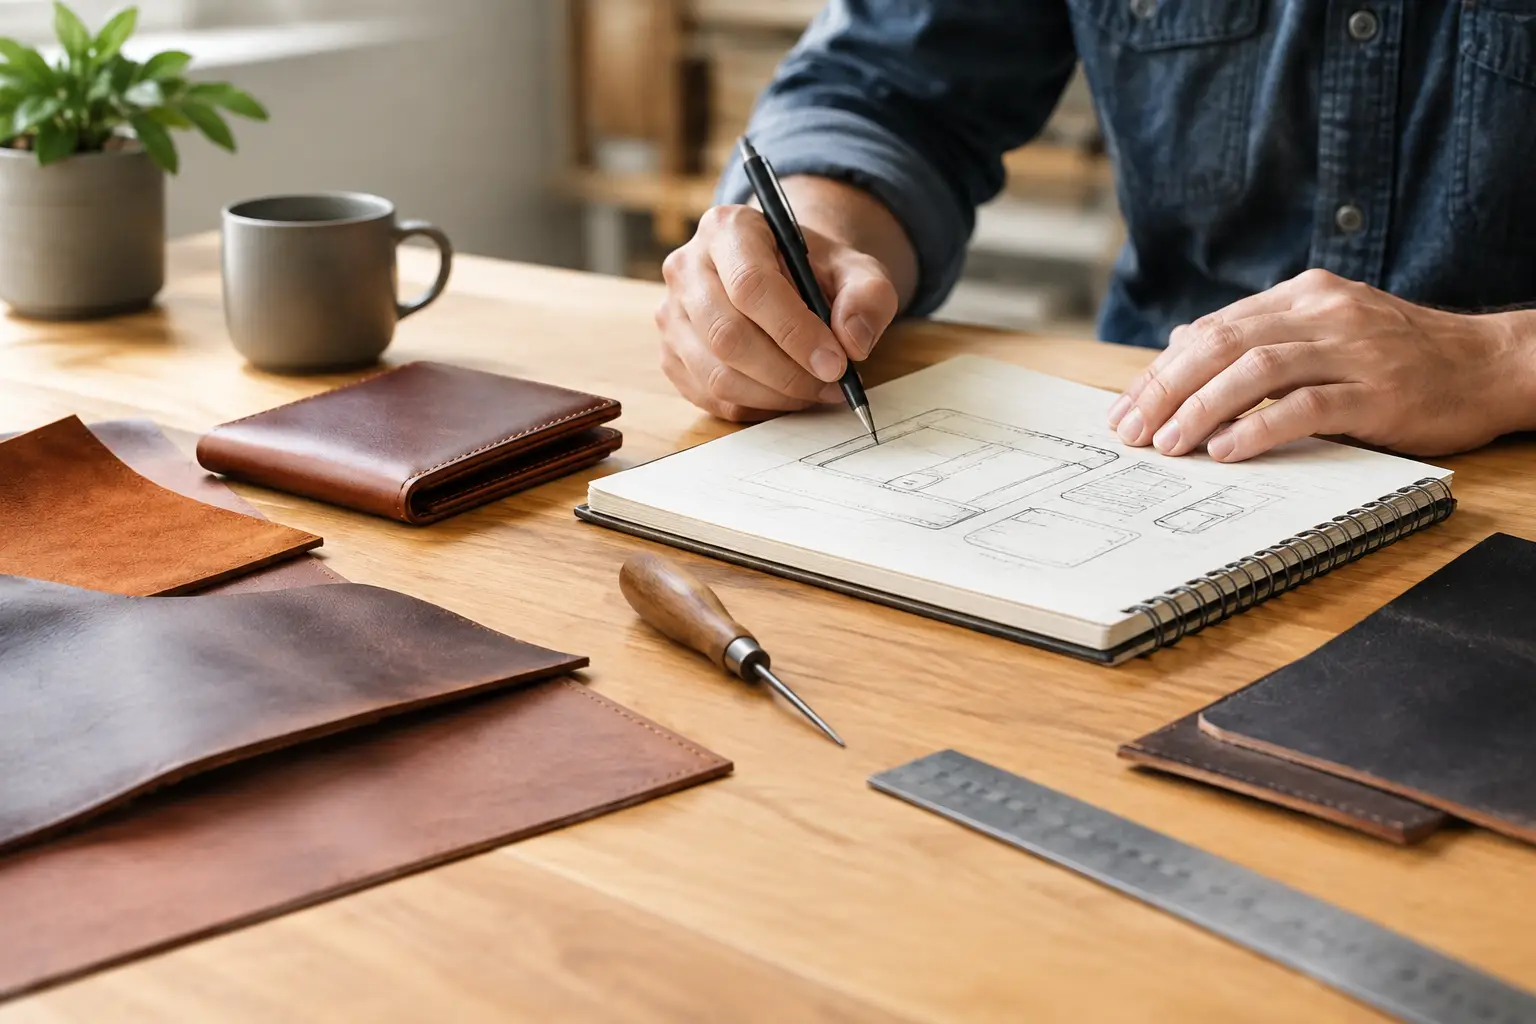
    Before you cut leather, measure the tools you intend to carry. A ruler, a few notes, and a paper mock-up can save you from pockets that are too tight, handles you cannot reach, or a sheath that closes only when empty.

    Measure the Tools You Actually Carry

    Start with the set that will live in the carrier. For a workshop roll, that might be an awl, stitching irons, an edge beveler, a burnisher, and compact pliers. For a sheath, use the specific multitool you plan to carry—not the dimensions of a similar model found online.

    Record four things for each tool:

    MeasurementWhere to measureWhy it matters
    Overall lengthFrom the furthest point of the handle to the furthest point of the working endDetermines pocket depth and guard coverage
    Widest pointAcross the broadest part that must pass into the pocketDetermines whether the tool can enter
    Thickness or diameterThrough the bulkiest part of the handle or folded toolAffects pocket volume and how the carrier closes
    Grip pointThe part you naturally grab to remove the toolTells you how much handle should remain exposed

    A tapered awl and a round handled burnisher can have the same overall length but need very different pockets. Measure the bulky section, not just the narrow shaft.

    Plan Pocket Depth Around Access and Protection

    A pocket must cover enough of the tool to keep it in place while leaving enough exposed to pull it out comfortably. Lay the tool on a sheet of paper and draw a line where you want the pocket top to land. Pick it up from that position. If you have to pinch at the very end of the handle, lower the pocket line.

    Check the other end, too. A sharp awl point or stitching iron teeth should not press into a vulnerable seam or poke beyond the carrier. A fold-over guard can help cover exposed working ends when a roll is closed.

    For a mixed tool set, identical pockets are rarely the best fit. The Benchline Leather Tool Roll Pattern uses seven graduated bays, a fold-over guard, and an optional way to change the divider seams. Arrange your tools by size before deciding which bay should hold each one.

    Allow for the Tool’s Shape, Not Just Its Width

    A flat ruler takes little pocket volume. Pliers and thick handles push the leather outward. That curve uses material that a flat measurement does not show.

    Make a quick pocket from folded paper or thin cardstock. Tape its sides where the future stitch lines would sit, then insert the real tool. Check three things:

    1. Does the widest part enter without forcing it?
    2. Can you pull the tool out with one hand?
    3. Does the pocket hold it when you lift the mock-up vertically?

    If the tool binds, widen the paper pocket and test again. If it rattles or falls out, narrow it or change the pocket depth. Use the result to guide any pattern adjustment; there is no single clearance measurement that suits every leather, handle, and tool shape.

    Measure a Multitool in Its Closed Position

    For a fitted multitool sheath, measure the tool while it is fully closed. Note its length, width, and thickness at the largest points. Look for clips, screws, or raised edges that may catch on the sheath opening. If you will carry it with an accessory, account for that item separately.

    Then make the cardstock fit test before cutting your final leather. The Waypoint Crosscarry Multi-Tool Sheath Pattern includes a cardstock fit check and guidance for adjusting its gusset width. Its published dimensions are a starting point for a full-size multitool, not a promise that every model will fit without adjustment.

    Test the closure with the tool inside the mock-up. A flap or retaining strap that reaches its snap on an empty sheath may sit differently once the pocket has thickness.

    Check Your Leather Thickness and the Closed Fit

    Leather takes up space. A pocket made from thicker leather may feel tighter and make a roll bulkier than the same pattern built from thinner leather. Several layers meeting at a seam or fold matter as much as the thickness of one piece.

    Follow the leather recommendations in your chosen pattern, then test a small folded stack of the leather you plan to use. Weaver Leather Supply’s leather thickness chart is a useful external reference for converting leather weights: one ounce is approximately 1/64 inch thick, although actual hides can vary.

    For a tool roll, place your tools in the paper or cardstock layout and roll it closed. Check whether the guard folds over the tallest tools and whether the wrap strap reaches comfortably around the packed roll. For a sheath, check insertion, removal, and closure with the actual multitool inside.

    Check the Printed Pattern Scale

    Before transferring a PDF pattern to leather, print at 100% or Actual Size and measure its calibration square. Printer settings that shrink a page can quietly change every pocket and strap. Make your fit adjustments only after you know the printed pattern is at the intended scale.

    Build for Your Bench

    Write down your tool measurements, choose their positions, and test the carrier in paper. It is a short job that makes the leatherwork far more predictable.

    For a set of workshop hand tools, start with the Benchline Tool Roll pattern. For a belt carried multitool, explore the Waypoint Crosscarry Multi-Tool Sheath pattern. Measure first, fit the paper version, then make the leather version your tools deserve.

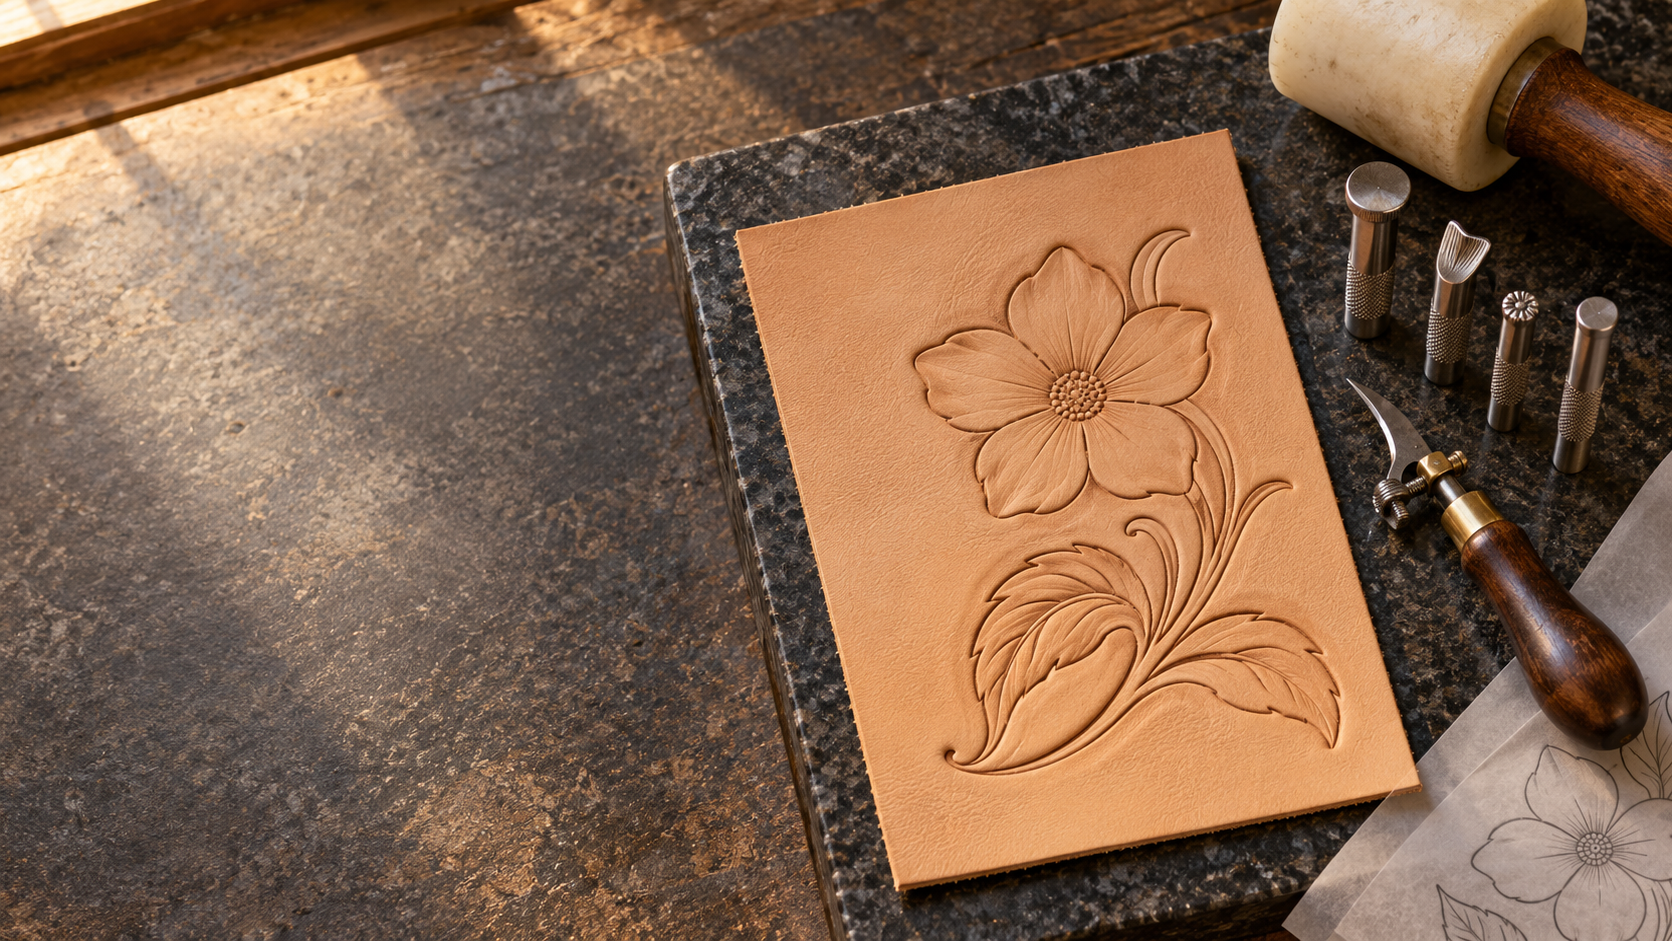
  • A leather floral practice panel on a tooling slab with the stamps swivel knife mallet and tracing film nearby

    Your First Floral Leather Tooling Practice Panel

    A Beginner’s Guide

    A finished floral carving can look intimidating. Every petal has shape, every leaf has movement, and the background seems to make the whole design rise out of the leather.

    You do not have to master all of that in one afternoon. Start with a small practice panel. It gives you room to learn how damp leather responds to a cut, a stamp, and a change in striking force—without worrying about ruining a wallet or bag.

    Here is a practical way to begin.

    Gather a Small, Useful Tool Kit

    For this exercise, you will need:

    • A scrap of unfinished vegetable-tanned tooling leather
    • A simple floral tracing pattern and tracing film
    • A stylus or ballpoint pen for transferring the design
    • A swivel knife
    • A smooth beveler and pear shader
    • A camouflage stamp, veiner, seeder, and backgrounder
    • A stamping mallet and a firm stone or tooling slab

    You can work through the design in stages if you do not own every stamp yet. The swivel knife, beveler, and pear shader will teach you the most about creating shape. The other stamps add detail and contrast.

    Prepare the Leather Before You Trace

    Tooling leather needs moisture, but a soaked surface will not hold a clean impression. Dampen the leather evenly with clean water, then give the moisture time to move through it. You are looking for leather that feels cool and accepts a crisp mark without water pooling on the surface.

    Test a corner before starting the design. If your stamp leaves a muddy impression, let the leather rest a little longer. If it barely marks the surface, add a small amount of moisture and wait for it to distribute.

    Keep a scrap from the same piece of leather beside your panel. It is the best place to test each tool before using it on the design.

    Transfer a Design You Can Actually Finish

    Choose a pattern with one flower, a few leaves, and enough open space to see where each line goes. Put the tracing film over the design and trace it first. Then place the film on the prepared leather and follow those lines with your stylus.

    Use steady pressure. You want visible guide lines, not deep grooves. Before lifting the film, check that you transferred the flower, leaves, stems, and any border marks.

    For your first panel, keep the design modest. Finishing a small pattern teaches you more than abandoning a crowded one halfway through.

    Cut the Main Lines

    Hold the swivel knife upright and make smooth, controlled cuts along the main outlines. Turn the leather when you need a better angle; do not force your wrist around a tight curve.

    Start with the longest, clearest lines. Use lighter control on short petal and leaf details. Your goal is a clean guide for the stamping that follows, not the deepest possible cut.

    If a curve wanders, keep going. A practice panel is where you learn to recognize that movement and improve it on the next one.

    Give the Design Its Shape

    Work through the stamps in a deliberate order:

    1. Beveler: Place its working edge beside a cut line on the side you want to push down. Overlap successive impressions so the bevel looks continuous. This makes the flower or leaf appear raised.
    2. Pear shader: Use it within a petal or leaf to press down selected areas and suggest a gentle curve. Build the shading with controlled impressions rather than one heavy strike.
    3. Camouflage stamp: Add repeating texture near the base or edge of a petal where the pattern calls for it. Test the angle and spacing on scrap first.
    4. Veiner: Add short vein or accent marks to leaves. Follow the leaf’s direction so the marks support its shape.
    5. Seeder: Place small, distinct seed impressions in the flower center. Leave enough space between them to keep each mark readable.
    6. Backgrounder: Lower and texture the open areas around the main design. Work carefully near the carved edges so you do not flatten the flower or leaves.

    The stamps have different jobs. You do not need to use every tool in every small space. If an impression makes the design harder to read, leave that area alone.

    Practice Consistency, Then Add Detail

    Look at the panel from arm’s length after each stage. Can you see where the flower ends and the background begins? Do the shaded petals still look like parts of the same flower? Are your seeder impressions distinct?

    Those checks matter more than packing in extra marks. On your next panel, try improving just one thing: smoother beveling, steadier swivel knife curves, or more even stamp spacing. Keep both panels so you can see the progress.

    Ready for the Next Panel?

    A repeatable pattern gives you a clear way to practice and compare results. Explore the Old Line Crafts & Designs leathercraft patterns for your next project. If you are building your first tool kit, our free Beginner’s Leathercraft Quick Reference Guide is a useful bench companion.

    Start with one flower. Learn what each mark does. Then make the next panel stronger.

  • Beginner Leathercraft Project Planning Guide

    Beginner Leathercraft Project Planning Guide

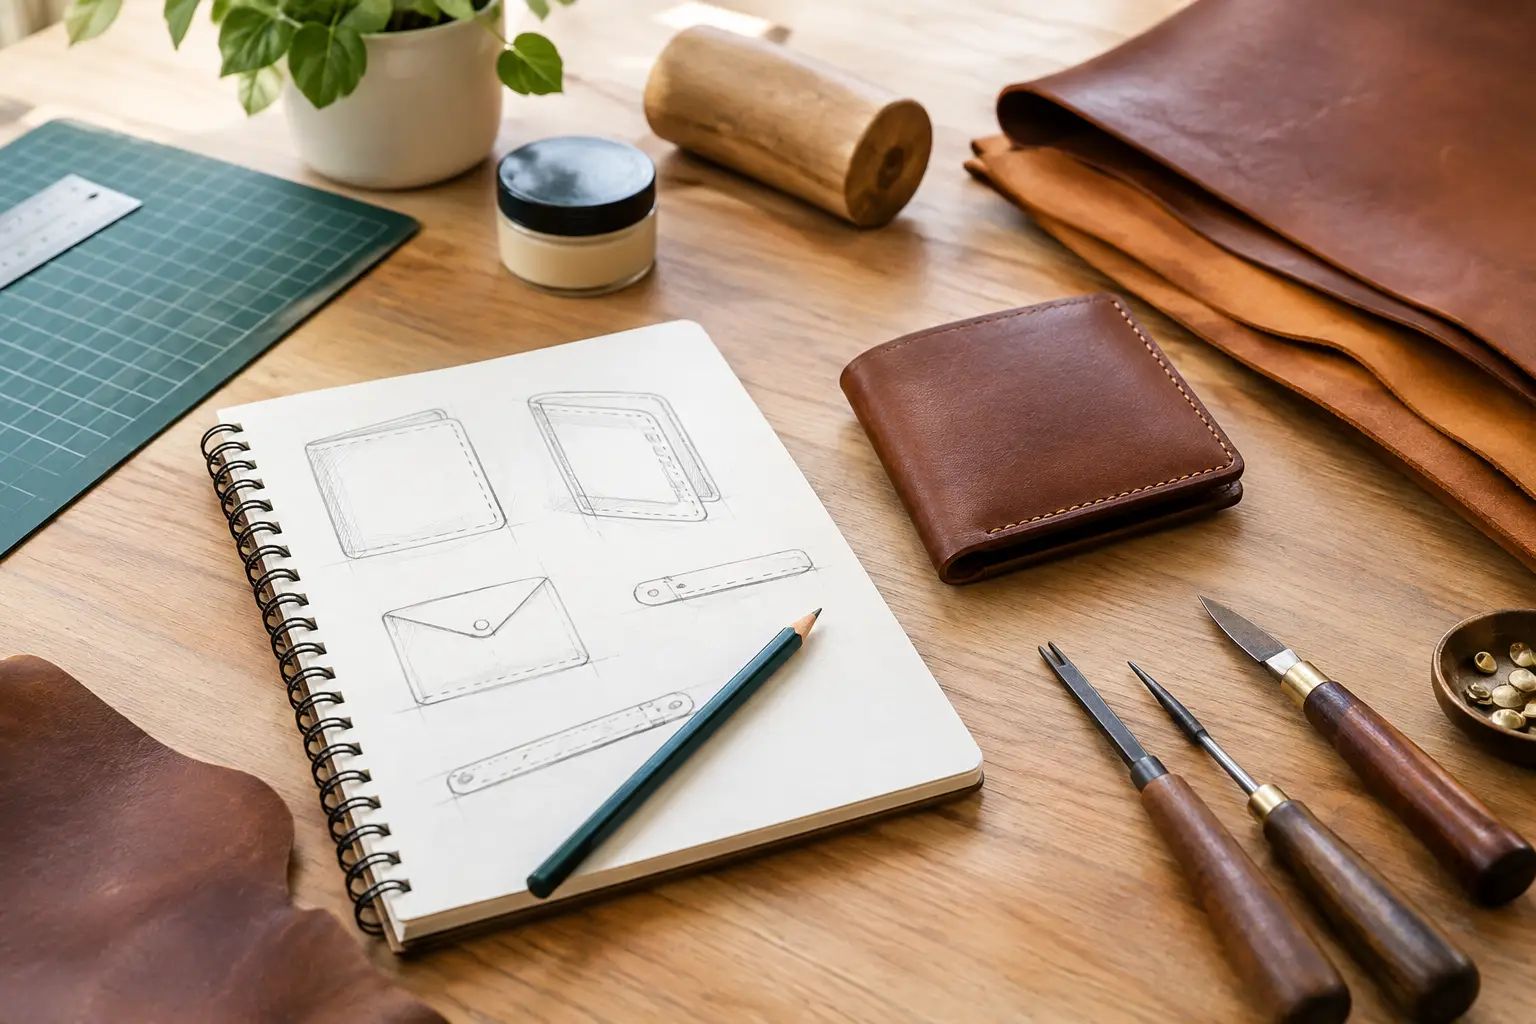
    A clean stitch line and a good edge finish begin before the knife touches the leather. This beginner leathercraft project planning guide is built around that simple idea: choose a project that fits your current skills, understand what it asks of your materials, and make a few decisions at the bench before small surprises become expensive ones.

    Planning does not take the enjoyment out of leatherworking. It gives your build a calmer starting point, so you can spend less time second-guessing and more time working through each step with purpose.

    Start With a Project You Can Finish

    The best first projects are usually small, useful, and forgiving. A valet tray, card holder, key fob, simple notebook cover, or basic belt gives you repeatable skills without requiring a large hide, specialized hardware, or complicated construction.

    Choose a project based on the techniques you want to practice, not only the finished item you want to own. If your goal is to improve hand stitching, a card holder with several straight seams is a better choice than a one-piece tray. If you want to learn edge finishing, look for a build with visible, accessible edges rather than a design that folds or lines every edge.

    Be honest about your current tools as well. A pattern that calls for a skiving knife, strap cutter, or press is not automatically out of reach, but it may require an alternate method or a few additional purchases. There is no advantage in forcing a project to fit a bench that is not ready for it. A well-chosen simple project can teach more than an ambitious one that stalls halfway through.

    Read the Pattern Before Buying Leather

    Treat the instruction sheet and pattern layout as part of your material list. Before selecting leather, read through the full project and look for the details that shape the build: leather weights, lining requirements, stitch spacing, hardware sizes, fold lines, and any areas that need to be skived.

    This is also when you should notice whether the project is designed for hand stitching, machine stitching, or either method. A pattern may look straightforward at first glance but include a gusset, turned edge, or layered pocket that adds difficulty. That does not make it a poor beginner project. It simply means you should plan enough time and material to learn the process without rushing.

    Clear, workshop-ready patterns reduce a great deal of uncertainty here. They show you what needs to happen before assembly begins, rather than leaving you to discover the construction order after pieces have already been cut.

    Build a Materials Plan, Not a Shopping Pile

    Leathercraft supplies add up quickly when every project becomes an excuse to buy another tool. Start with what the pattern truly requires, then separate those essentials from tools that would be convenient but are not necessary for this particular build.

    For a first project, the essential categories are usually leather, thread, needles, adhesive, a cutting tool, a straightedge, a punch or stitching chisel, and a method for finishing edges. Depending on the pattern, you may also need hardware such as snaps, rivets, rings, or a buckle. The exact choices matter less than making sure they work together.

    Leather weight deserves special attention. A wallet pocket cut from heavy belt leather will become bulky and difficult to stitch. A tray made from thin, soft leather may not hold its shape. Patterns commonly state an appropriate weight range because the material affects more than appearance. It changes how a project folds, how easily it burnishes, how well it takes a crease, and how much thickness builds up at seams.

    If you are unsure, buy a little extra leather in the recommended weight rather than cutting it close. You need room for test cuts, practice holes, and the occasional piece that does not come out as planned. A small scrap can save the main panel.

    Match Hardware Before You Cut

    Hardware has measurements, and those measurements need to match the leather and the pattern. A snap post must be long enough to pass through all layers, but not so long that it sets loosely. Rivets need the same consideration. Buckles, D-rings, and swivel clips must fit the strap width called for in the design.

    Lay the actual hardware on the printed pattern before cutting leather. Check that the hardware fits the marked locations and that the parts sit in the direction you expect. This takes only a minute, but it catches common errors such as ordering a 3/4-inch buckle for a 1-inch strap or placing a snap cap on the wrong side of a flap.

    Use the Beginner Leathercraft Project Planning Guide at the Bench

    Once you have selected a pattern and gathered materials, turn your plan into a simple bench sequence. You do not need a complicated project spreadsheet. A written checklist beside your cutting mat is often enough.

    Start by printing and checking the pattern. Confirm that any scale reference measures correctly, especially if your printer settings can shrink or enlarge pages. Cut out the paper pieces carefully and arrange them on your leather before tracing. Pay attention to grain direction, surface marks, and the best areas of the hide. A natural scar may look handsome on a tray exterior but distracting on a clean wallet front.

    Then plan the order of operations. Most projects follow a familiar rhythm: cut pieces, mark fold and stitch lines, prepare edges that will later be inaccessible, attach pockets or hardware, glue and assemble, punch or chisel stitch holes, stitch, trim if needed, and finish exposed edges. Your pattern may vary, but thinking through the sequence prevents the classic mistake of stitching a layer that needed a snap or a pocket installed first.

    Keep parts organized as you cut. Painter’s tape labels or small paper notes work well for identifying left and right pieces, lining panels, pockets, and exterior parts. This matters most when components look nearly identical. The more deliberate you are early on, the less likely you are to glue a good piece in the wrong position.

    Make a Test Piece Before the Real One

    A test piece is not wasted leather. It is one of the least expensive ways to improve a finished project.

    Use a scrap from the same leather to test your stitch spacing, adhesive, dye or finish, crease line, edge paint, and burnishing method. If the project includes a tight fold, make that fold on scrap first. If it uses a snap, set one through the same number of layers you will use in the project.

    These tests reveal useful things that instructions alone cannot always predict. Vegetable-tanned leather may darken more than expected when burnished. A chosen thread color may disappear against the leather. Your stitching chisel may create holes that are too close to an edge for your comfort. Adjusting on scrap is easy. Adjusting after a front panel is cut is much harder.

    Plan for Time, Not Just Materials

    Leatherworking is often slower than it looks, especially while you are building new habits. Cutting, edge preparation, glue drying, stitching, and finishing all take time. Plan your first build as two or three short bench sessions rather than a single rushed afternoon.

    A sensible schedule might include one session for reading the pattern, printing, choosing leather, and cutting. The next can cover edge preparation, hardware, and assembly. The final session can be reserved for stitching, final edge work, and inspection. Some adhesives and finishes need drying or curing time, so follow the product directions rather than pushing ahead because the project feels nearly done.

    Good lighting is part of the plan, too. Stitching and edge work are easier when you can clearly see your marks, hole alignment, and glue placement. A clear bench helps just as much. Put away tools you do not need for the current step, and keep a small trash container nearby for thread ends and leather scraps.

    Decide What “Finished” Means Before You Begin

    For a beginner, a finished project does not need to be flawless. It should be functional, structurally sound, and complete enough that you are proud to use it or give it away. A slight variation in stitch angle or an edge that is not perfectly glassy is part of learning, not a reason to abandon the build.

    Before you start, decide which details deserve your closest attention. On a card holder, that may be even pocket placement and tidy stitching. On a tray, it may be clean corner hardware and smooth edges. Put your effort where the eye and the hand will notice it most.

    When the project is complete, take a moment to inspect it with a maker’s eye. Check that hardware is secure, stitches are backstitched or otherwise locked, edges feel comfortable, and any moving parts work cleanly. Make a quick note about what you would change next time. That small record becomes your most useful planning tool for the next build.

    A thoughtful pattern and a few minutes of preparation can turn a first project from a guessing game into a satisfying bench session. Choose a design that fits your skills, prepare the details before assembly, and give yourself room to learn. The leather will teach you plenty along the way, but a clear plan helps you hear the lesson.

  • How to Bevel Leather Corners for a Clean Finish

    How to Bevel Leather Corners for a Clean Finish

    A leather edge can be neatly cut, dyed, and burnished, yet still look unfinished if the corners are left sharp. Learning how to bevel leather corners gives trays, wallets, key fobs, and small goods that small but noticeable sense of care. The goal is not to round every corner heavily. It is to remove the hard, square ridge consistently so the edge feels comfortable and takes a better finish.

    Corner beveling is a short operation, but it rewards patience. A light, controlled pass usually looks better than trying to remove too much material at once. Once you understand how the tool behaves as it enters, travels around, and exits a corner, the process becomes a dependable part of your bench routine.

    Start with the right corner and tool

    An edge beveler removes a narrow strip from the top edge of leather. It is different from a skiving knife, which thins a larger area, and from a corner-rounding punch, which changes the shape of the pattern itself. For most projects, an edge beveler is the tool you want after cutting, sanding, and before final edge finishing.

    Beveler sizes vary by maker, so the number stamped on one tool does not always match another brand exactly. Instead of focusing only on the number, match the bevel to the leather weight and the look of the project. Thin leather generally needs a fine bevel. Medium-weight vegetable-tanned leather often accepts a moderate bevel well. Thick belt leather can take a larger bevel, especially when you want a softer, more rounded edge.

    A bevel that is too large can make a corner look hollowed out or uneven. A bevel that is too small may leave the edge feeling sharp after burnishing. If you are using leather from a new hide or trying an unfamiliar beveler, test on an offcut from the same leather first. That small test tells you more than a tool number alone.

    A sharp tool matters just as much as the size. A dull beveler drags fibers, skips at curves, and makes you push harder than you should. The result is usually a rough cut that takes extra sanding to correct. Keep the cutting channel clean, strop the tool when it begins to feel resistant, and let the edge guide the cut rather than forcing it.

    How to bevel leather corners without digging in

    Place the leather flesh-side down on a firm, flat surface. Hold the beveler so its guide rides against the edge and its cutting channel captures the corner. Begin a short distance before the corner rather than starting directly at the point. This gives the tool time to settle into a clean, even cut.

    Use a gentle forward pull or push, depending on the beveler design and what feels stable in your hand. Maintain light downward pressure. As you approach the curve, rotate the leather with your free hand instead of twisting the beveler sharply. The tool should travel along the edge in one smooth motion while the workpiece turns beneath it.

    Continue a short distance past the corner before lifting away. Starting and stopping exactly on the corner is one of the most common causes of a visible divot. Entering before the turn and exiting after it keeps the bevel continuous.

    For a rounded outside corner, keep your pace slow and your pressure even. The tighter the radius, the more gradually you should turn the leather. If the corner is very small, it can be cleaner to use two or three short, overlapping passes than one rushed pass. Overlap them lightly and inspect the edge before moving on.

    Square corners need a slightly different approach. Bevel one edge toward the corner, then bevel the adjacent edge into it. Do not try to swing the tool around a sharp 90-degree turn. That often removes a chunk from the tip. A tiny bit of hand sanding after both passes can blend the meeting point and preserve the crisp shape.

    Treat inside corners carefully

    Inside corners are where many makers overcut. An edge beveler is designed to follow an outside edge, so forcing it into a tight inside angle can leave a deep notch or cause the tool to jump.

    When an inside corner is broad and gently curved, use a small beveler with very light pressure. Work toward the corner from each direction and stop just before the point. Then blend the remaining fibers with fine sandpaper or an edge burnisher.

    For a tight inside corner, especially on a pattern with a narrow slot or a sharply cut opening, it is often better not to bevel it at all. Sanding, light crease work, or careful finishing may give a cleaner result without weakening the area. This is one of those places where a perfectly uniform bevel is less important than keeping the leather strong and the pattern shape clear.

    Set yourself up for a clean edge finish

    Corner beveling works best as part of an edge-prep sequence, not as an isolated fix at the end. On many vegetable-tanned leather projects, cut the pieces accurately, glue and stitch where required, then trim or sand the joined edge flush. Bevel after the edge is level. If you bevel before final sanding, you may remove the bevel while trying to correct the seam.

    After beveling, lightly sand the edge to blend any small transitions. Start with a grit that corrects the surface without creating deep scratches, then move finer as needed. You are not trying to reshape the whole corner. You are simply smoothing the line left by the tool.

    From there, use the finish that suits the leather and project. Water and gum-based compounds are common choices for vegetable-tanned leather, followed by burnishing with canvas, wood, or a powered burnisher. Edge paint can work well on some projects, but it needs a smooth, stable base and usually benefits from several thin coats. Wax can add a final slick feel after burnishing.

    Chrome-tanned leather may not burnish in the same way as firmer vegetable-tanned leather. On soft or heavily finished chrome-tan, a small bevel and a controlled edge paint process may be more appropriate. Let the leather guide the method rather than applying the same finish to every hide.

    Fix common corner-beveling problems

    If the corner has a deep gouge, the cause is usually too much pressure, a beveler that is too large, or turning too sharply. Sand the area gently to soften the damage. If there is enough leather remaining, make a lighter pass around the full corner to blend it. On a small piece, though, aggressive repair can create a larger problem. Sometimes the best lesson is to set that piece aside as a shop sample and start again.

    If the bevel looks fuzzy, inspect the tool first. A sharp beveler should leave a clean channel. Fuzzy fibers can also mean the leather is too dry or the cut is being made against the grain in an awkward direction. A little moisture can help firm vegetable-tanned leather cut more cleanly, but avoid soaking it. The leather should feel barely cased, not wet.

    If one side of a corner looks larger than the other, check your hand position. Makers often press harder as they approach a turn because they expect resistance. Slow down, reduce pressure, and keep the guide seated against the edge. Consistency comes from control, not force.

    Practice on the projects you already build

    A simple tray, card holder, or key fob is an excellent place to practice because the corners are visible and the stakes are low. Cut a few extra pieces from scrap, mark the beveler size used, and compare the result after burnishing. You will quickly see how a small change in pressure affects the final edge.

    Well-organized project patterns help here because the cut shapes and construction order are already settled. That leaves more attention for the hands-on details that make a build feel personal, including clean corners and a finish you are proud to handle.

    A carefully beveled corner will rarely call attention to itself. That is exactly the point. It lets the shape of the project, the stitch line, and the leather do their work, while your hand recognizes a smooth edge every time you pick it up.

  • A Leather Tray Project Worth Building This Weekend

    A Leather Tray Project Worth Building This Weekend

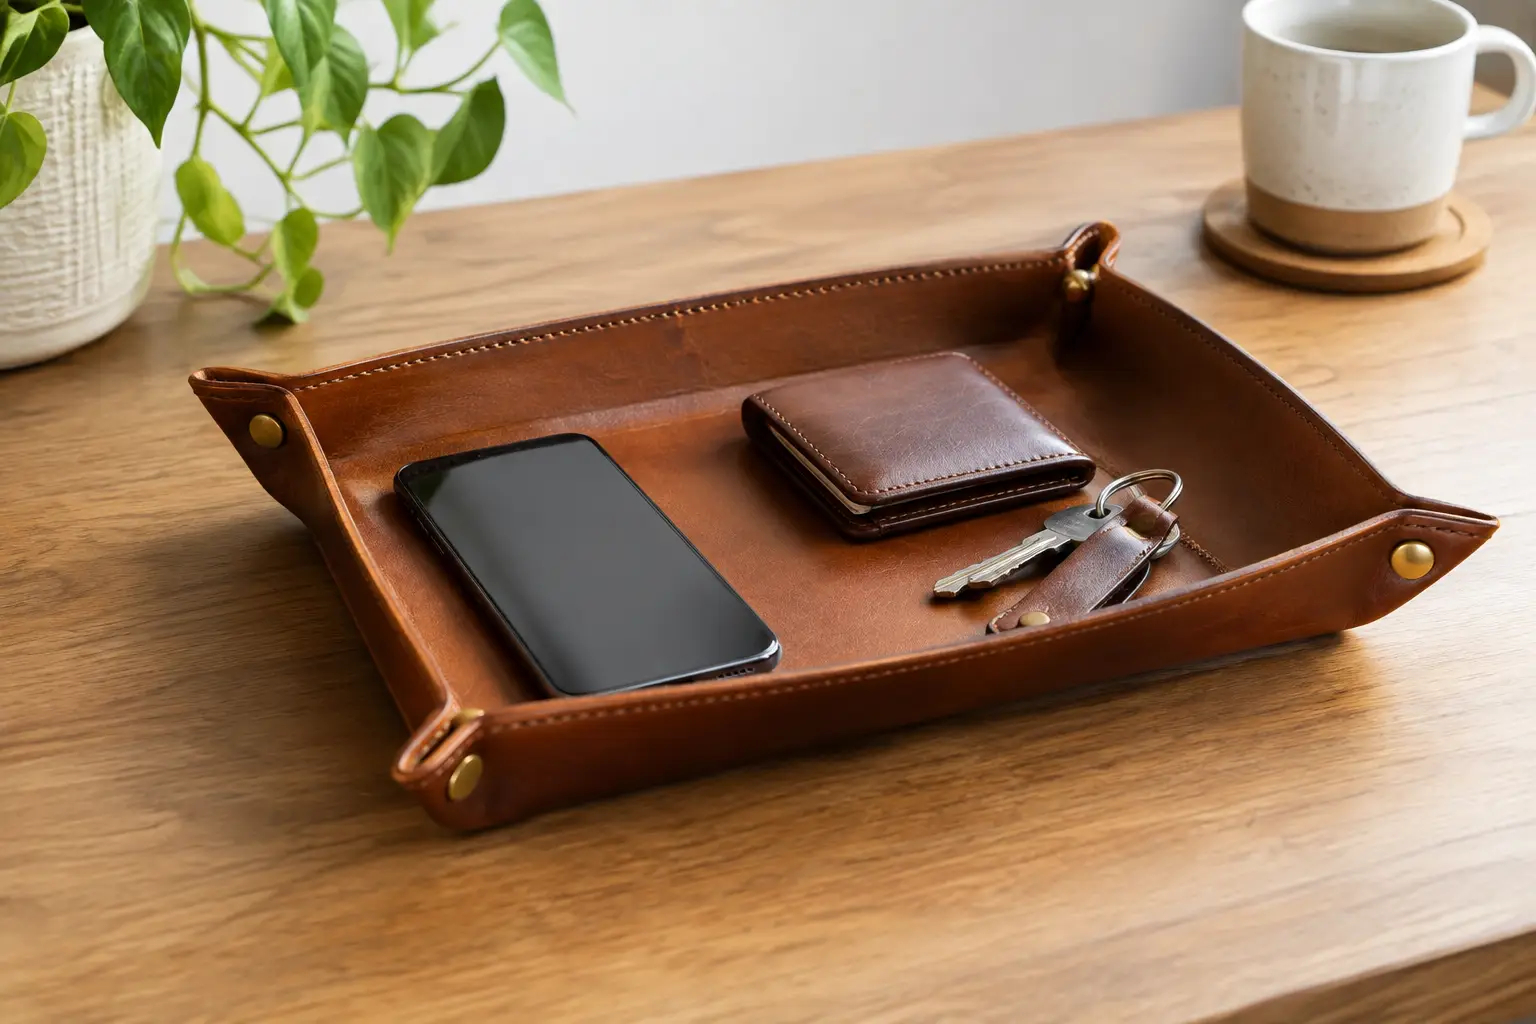
    A good leather tray project earns its place on the bench long after the last stitch is finished. It can hold keys by the door, keep hardware from rolling away during a build, or give a watch, wallet, and pocketknife a proper landing spot. It is a small project, but it asks you to make the same thoughtful decisions that shape larger leather goods: material selection, clean layout, dependable hardware, and careful finishing.

    That makes the leather tray a strong choice for a newer maker building confidence and for an experienced maker who wants a useful weekend project. The goal is not simply to turn a flat piece of leather into a container. The goal is to make something that sits squarely, folds cleanly, and looks considered every time you reach for it.

    Start Your Leather Tray Project With Its Job

    Before choosing a hide or cutting a pattern, decide where the tray will live and what it needs to hold. A small valet tray for a nightstand has different requirements than a larger catchall for a workbench. The first can be light and refined. The second may need firmer leather, wider corners, and enough depth to contain rivets, snaps, or edge tools.

    Size affects more than capacity. A larger tray creates longer folds, which can make soft leather feel loose at the corners. A shallow tray keeps a clean profile but may not hold bulkier everyday items. For many makers, a finished footprint around 6 to 8 inches square is a comfortable starting point. It is large enough to be useful without requiring a large piece of leather or becoming awkward to form.

    Think about the tray’s visual role, too. Natural vegetable-tanned leather can develop character with use and works well in a workshop or warm home setting. Black, brown, or richly dyed leather offers a more tailored look for a desk or entry table. Neither approach is better. The right choice depends on whether you want a tray that records its use or one that stays visually uniform.

    Choose Leather That Will Hold Its Shape

    For a structured snap-corner tray, vegetable-tanned leather in the 4 to 6 ounce range is often a practical choice. It has enough body to stand up at the sides while still bending neatly at the corners. A firmer temper will give you a crisp, architectural tray. A medium temper creates a slightly more relaxed shape that can feel equally intentional when the pattern and hardware suit it.

    Chrome-tanned leather can work well, especially if you want a softer hand or a specific color. The trade-off is that very soft chrome tan may collapse at the edges or stretch around hardware over time. If you use it, consider a smaller tray, a lined construction, or reinforcement at the snap locations.

    Pay attention to the flesh side as well as the grain. A clean, finished flesh side can make an unlined tray feel polished from every angle. If the underside is loose or fuzzy, you can burnish it, apply a suitable finish, or line the tray. Lining adds material and construction time, but it can elevate a simple project into a more formal piece.

    Hardware should match both the leather weight and the tray’s purpose. Line 20 snaps are common for medium-weight leather trays, while rivets can create a more permanent corner construction. Snaps make the tray easy to flatten for travel or storage. Rivets are quick, secure, and well suited to a tray that will remain assembled. If you are still refining your process, snaps also give you a little more flexibility to test the fold before setting the final hardware.

    Build the Shape Before You Commit to Hardware

    A precise pattern removes much of the guesswork from this project. The corner cutouts, fold lines, and hardware locations need to work together. A tray can look simple on paper, but even a small error in spacing can leave one corner twisting higher than the others.

    After cutting the body, inspect the edges before moving on. This is the best time to correct a rough curve or uneven corner. A sharp knife and steady cuts matter more than speed. If your pattern includes rounded corners, take a moment to make each curve consistent. Matching curves will make the folded tray look balanced from above.

    Mark fold lines lightly and accurately. On firmer vegetable-tanned leather, a gentle crease on the flesh side can encourage a clean fold without cutting deeply into the material. Avoid heavy scoring. The fold line is there to guide the leather, not weaken it.

    Then dry-fit the corners. Bring each pair together and check that the hardware marks align naturally. The sides should rise without pulling the base out of square. If a corner feels strained, stop before punching holes. Check whether the fold is landing where it should and whether the leather thickness calls for a slightly different hardware setting.

    This short pause saves material. It is much easier to adjust a crease or recheck a mark than to remove a poorly set snap.

    Keep Hardware Placement Consistent

    When you are ready to punch holes, use the same orientation at every corner. Measure from the edge rather than relying only on a visual estimate. If one snap sits closer to the edge than the others, the difference will be noticeable once the tray is assembled.

    Test the hardware on a scrap from the same leather first. This confirms that your hole size is right and lets you check how firmly the snap closes. A snap that is too loose can open when the tray is picked up. One that is excessively tight can make the corners difficult to fasten and may stress the leather with repeated use.

    For a clean presentation, make sure the visible snap caps or rivet heads face the same direction on every corner. Small consistency choices are what make a straightforward leather project feel finished rather than improvised.

    Give the Edges the Attention They Deserve

    On a leather tray, the edges are always in view. They frame the base, define the corners, and often become the first detail someone notices when they pick it up. That is why edge work should happen before final assembly whenever possible.

    Start by beveling the grain-side edges if the leather weight supports it. A light bevel softens the profile and makes burnishing easier. Sand gradually, using a progression that removes cut marks without rounding the edge too aggressively. Then burnish with your preferred method, whether that is water, gum tragacanth, wax, or another finish suited to the leather.

    There is no single correct edge treatment. Natural burnished edges fit vegetable-tanned leather and show the material honestly. Edge paint can create a more modern, uniform look, especially on lined trays or chrome-tanned leather. Paint requires patience and multiple thin coats, so it may not be the best choice when you want a quick, casual build. Choose the finish that supports the project rather than adding steps for their own sake.

    If you plan to dye the leather, test your color and topcoat on scrap first. Dye can darken around folds and hardware holes, particularly on absorbent veg tan. That variation may be part of the appeal, but it should be a choice you make rather than a surprise after the tray is assembled.

    Make the Tray Your Own Without Overcomplicating It

    A leather tray offers room for personal detail, but restraint usually serves the design. A maker’s mark in the center of the base, a subtle border line, or contrasting snaps can add character without competing with the tray’s function. If you add tooling or stamping, do it while the leather is flat. Trying to decorate after the corners are assembled makes placement harder and can distort the shape.

    You can also use this project to practice a construction detail you want to carry into future work. Add a stitched reinforcement tab at each corner, line the base with a thin contrasting leather, or use a hand-applied antique finish to bring out a stamped design. Just remember that each addition changes the behavior of the leather. A lined tray may need longer hardware posts. A tooled tray may become firmer at the folds. Build with those changes in mind.

    For makers who would rather spend their bench time cutting and building than drafting corner geometry from scratch, a clearly organized leather tray pattern can be a worthwhile starting point. It lets you focus on material choices and craftsmanship while giving the project a dependable foundation.

    Set your finished tray where it will be used, then let it do its work. The best handmade pieces are not saved for display. They become part of the daily rhythm of the shop or home, gathering the small essentials that would otherwise drift out of reach.

  • Can Beginners Use Pricking Irons Successfully

    Can Beginners Use Pricking Irons Successfully?

    A first set of pricking irons can make leather stitching feel more precise almost immediately – or leave a new maker staring at a row of uneven marks and wondering what went wrong. So, can beginners use pricking irons? Absolutely. They are one of the most useful tools a beginner can bring to the bench, provided you understand what they do, choose a sensible size, and practice on scrap before committing to a finished project.

    Pricking irons are not a shortcut around hand stitching. They are a layout tool that gives your stitches consistent spacing and a clean, deliberate rhythm. That structure is especially helpful when you are building from a well-organized pattern and want less time guessing and more time building.

    Can Beginners Use Pricking Irons Without Frustration?

    Yes, but start with the right expectation: the iron marks or punches the spacing for your stitches; it does not create a polished stitch line on its own. Your cutting, glue-up, edge preparation, thread tension, and saddle-stitch technique still matter. The good news is that consistent hole placement removes one major variable while you learn the rest.

    A beginner does not need a large collection of irons. One workable set, a stable striking surface, a mallet or maul, and a little scrap leather are enough to build familiarity. The goal at first is not speed. It is learning to place the teeth squarely, strike with control, and continue a line without drifting.

    Pricking irons also make it easier to read a project pattern. When a pattern calls for a stitch line near an edge, you can use a wing divider to mark that line, then follow it with the iron. Instead of estimating every stitch position, you establish a repeatable spacing that carries through the build.

    What Pricking Irons Actually Do

    The name can be confusing because leatherworkers use several related tools. Traditional pricking irons are often used to mark angled stitch positions, while stitching chisels or hole-punching irons are driven through the leather to create holes or slots. In everyday leathercraft, many makers use the term “pricking irons” for both.

    For a beginner, the practical question is simple: does the tool leave a clear mark, or does it punch all the way through? Either approach can work.

    A marking iron is useful when you prefer to open each hole with an awl. This method offers control and works well for traditional hand stitching, but it adds a skill to learn. A punch-through iron is more direct. It creates ready-to-stitch holes and can make early projects feel more manageable, especially in lighter veg-tan leather.

    Neither choice is automatically better. If you want a straightforward path to wallets, trays, key fobs, and small accessories, punch-through irons are often the easier starting point. If you are interested in traditional saddlery-style work and want maximum control over hole shape, a marking iron and awl may be worth learning over time.

    Stitch Spacing Matters More Than Beginners Expect

    Iron spacing is usually measured by the distance from one tooth to the next. A larger number means wider spacing and fewer stitches per inch. For many beginner projects, a spacing around 3.5 mm to 4 mm is forgiving and versatile. It produces a stitch line that is visible, balanced, and not overly crowded.

    Tighter spacing, such as 2.7 mm or 3 mm, can look refined on smaller goods, but it requires more accuracy. The holes sit close together, thread can fill the line quickly, and any inconsistency becomes easier to see. Wider spacing can suit heavier leather and rugged work, though it may look too open on a small card holder.

    If you are buying only one size, choose the spacing that fits the projects you expect to make most often rather than chasing a universal answer. A tidy 4 mm stitch line is better than a cramped fine stitch line that makes the project harder to complete.

    Choosing a Beginner-Friendly Set

    Look for an iron set with at least a two-tooth and a six- or eight-tooth iron. The longer iron handles straight runs efficiently. The two-tooth iron is essential for curves, corners, and short areas where a larger tool will not fit cleanly.

    Tooth shape affects the appearance of the stitch line. Diamond-shaped teeth create the familiar angled marks associated with traditional hand stitching. Flat or slotted teeth tend to create a cleaner, more modern look. Both are valid choices, and the best option depends on the style you enjoy making.

    Avoid choosing solely by the lowest price. Very inexpensive irons can have rough edges, inconsistent tooth spacing, or teeth that are difficult to remove from leather. That does not mean a beginner needs premium tools on day one. It means the tool should be cleanly made enough to give you a fair chance at learning the technique.

    A basic setup also benefits from a dense striking surface. Use a proper punching board or a firm surface designed for leatherwork. Do not punch directly onto a hard workbench, concrete floor, or metal surface. You can damage the teeth, distort the holes, and create an unpleasant amount of bounce.

    How to Make Clean, Even Stitch Marks

    The first rule is to prepare the leather before you pick up the iron. Cut your pieces accurately, glue layers securely when the design calls for it, and trim any mismatched edges. Pricking irons cannot compensate for pieces that shift during construction.

    Mark your stitch line with a wing divider. For many projects, placing the line about 1/8 inch from the edge gives a practical balance between appearance and durability, though leather thickness and pattern instructions should guide the final distance. Keep the divider pressure light enough to leave a visible guide without gouging the grain.

    Set the first iron carefully. Place it on the guide line, hold it upright, and make sure the teeth are not leaning toward or away from the edge. A few controlled strikes are better than a hard swing. On thinner leather, you may only need enough force to mark the locations. On thicker leather, strike until the teeth pass through into the punching board.

    For the next impression, use the last tooth or two from the previous row as your registration point. This overlap is what keeps the spacing consistent. Keep your eye on the guide line as well. If you only follow the previous holes, a small early drift can slowly pull the whole stitch line off course.

    On curves, switch to the two-tooth iron. Take shorter, more deliberate steps, rotating the tool gradually to follow the line. Trying to force a long iron around a curve usually creates awkward spacing and visible kinks.

    Common Beginner Problems and Simple Fixes

    Crooked holes usually come from holding the iron at an angle. Slow down and check the tool from the front and side before striking. If your bench height makes this difficult, adjust your work position rather than trying to compensate with your wrist.

    Uneven depth is often a striking issue. Use consistent, moderate blows and let the punching board support the leather. If the iron gets stuck, pull it straight up with a gentle rocking motion. Twisting aggressively can enlarge holes and mark the leather surface.

    Misaligned stitch lines often begin before punching. Check that your glued layers are flush and that your divider line follows the intended edge. A clear project pattern with stitch lines and assembly order can prevent much of this frustration before it reaches the bench.

    Crowded or bulky stitches may mean your iron spacing is too tight for the leather and thread combination. Try a slightly wider iron, thinner thread, or a smaller needle setup on scrap. Testing these choices before starting a finished build is time well spent.

    A Good First Practice Routine

    Before using new irons on a project, cut a few strips of scrap leather and make straight lines, gentle curves, and a rounded corner. Punch one set with light strikes and another with full punch-through force. Then stitch both samples. You will quickly see how hole shape, spacing, and thread weight affect the finished result.

    Practice starting and ending a stitch line near an edge. These areas reveal whether your spacing is planned well. It is also useful to practice joining two layers, since glued leather behaves differently than a single scrap piece.

    Keep your first finished project modest. A leather tray, key organizer, simple card holder, or small pouch gives you enough stitching to learn without turning each mistake into a major setback. Old Line Crafts & Designs patterns are designed to give makers a clear build sequence, so you can focus your attention on tool control rather than drafting every detail from scratch.

    Pricking irons become familiar through repetition, not perfect first attempts. Start with a spacing that suits your project, keep your stitch line visible, and give yourself permission to use scrap leather as part of the process. Every straight row and carefully managed curve builds the hand skills that make the next project more satisfying.

  • Leather Project Planning for a Better Build

    Leather Project Planning for a Better Build

    A clean finished edge starts long before edge paint, burnishing, or a final coat of wax. It starts when you decide what the project needs to do, what leather will support that job, and how the pieces will come together. Good leather project planning is not about taking the spontaneity out of the craft. It is what gives your time at the bench a clear direction.

    A project can look simple on paper and still create trouble halfway through. A wallet that becomes too thick to fold comfortably, a tray with corners that will not form cleanly, or a bag panel cut from leather that is too soft for its structure can turn a promising build into a frustrating one. A few practical decisions before cutting help you avoid those problems and leave more room to enjoy the work.

    Start With the Job Your Project Must Do

    Before choosing a pattern or pulling leather from the shelf, define the purpose of the finished piece. A key tray, card holder, belt pouch, journal cover, and everyday tote may all use familiar techniques, but they ask different things of the material and construction.

    Think about how the item will be handled. Will it flex often? Carry weight? Sit on a desk? Need to fit a specific object? A slim card holder needs controlled bulk and a clean fold. A valet tray benefits from leather that will shape at the corners without fighting you. A tool roll needs enough body to protect its contents, but it also needs to roll without becoming stiff and awkward.

    This step also helps you choose an appropriate first project. If you are building confidence, select a project with a limited number of parts, straightforward stitch lines, and forgiving construction. That does not mean the result has to look basic. A well-planned tray or case can be a useful, refined piece while giving you room to practice cutting, gluing, stitching, and finishing.

    Choose a Pattern That Fits Your Bench

    A pattern should answer questions before they become problems. It should make clear what gets cut, where holes or stitch lines belong, which edges are prepared before assembly, and the order in which components come together. When those details are left open to interpretation, makers often lose time solving preventable issues at the most inconvenient moment.

    Review the full pattern before printing or cutting. Check the finished dimensions, the suggested leather weight, required hardware, and any specialty tools. If the build uses multiple layers, look at the cross-sections and assembly notes closely. This is where you can catch a mismatch between the project and what you have available.

    A good pattern is a structure, not a restriction. You may choose a different color, thread, lining, or hardware finish, but make those changes with the construction in mind. Changing from thin chrome-tanned leather to heavier vegetable-tanned leather, for example, can affect folding, skiving, stitch length, and overall fit. Personal details work best when the foundation is sound.

    For makers who would rather build than draft from scratch, a workshop-ready pattern can remove a great deal of uncertainty. Old Line Crafts & Designs creates patterns with that bench experience in mind: clear layouts, practical build order, and enough guidance to help you focus on the making.

    Check Print Scale Before You Commit

    Digital patterns depend on accurate printing. Print the test square or scale guide first, then measure it with a ruler. Printer settings such as “fit to page” can quietly change every dimension in the pattern.

    Once the scale is confirmed, decide whether you will cut out the paper pieces, trace them onto template material, or transfer the outlines directly to leather. Reusable templates take a little more preparation, but they are especially helpful for projects you expect to make again.

    Match Leather to Construction, Not Just Appearance

    Leather is often chosen for color first. Color matters, but temper, thickness, finish, and fiber structure have a larger effect on how a project behaves.

    Vegetable-tanned leather is a natural choice for many structured goods. It cuts cleanly, accepts tooling and dye, burnishes well, and can be molded or formed. It is often a strong fit for trays, sheaths, cases, and projects that benefit from crisp edges. But it can be less forgiving when folded thick, and it may require skiving to keep layered areas manageable.

    Chrome-tanned leather is commonly softer and more flexible. It can be excellent for pouches, soft bags, and linings, especially when a supple hand is part of the design. Its softer temper may not hold the sharp shape required for a structured tray or firm case without reinforcement.

    Leather weight needs the same attention. Heavier leather can make a project feel substantial, but too much thickness creates bulky seams and difficult turns. Lighter leather may fold easily, yet it can feel weak or collapse where the design needs support. If a pattern suggests a weight range, treat it as a useful starting point rather than a random detail.

    Before cutting your best hide, make a small test. Fold two layers, glue a scrap seam, punch sample stitch holes, and finish an edge. Ten minutes with offcuts can tell you whether your thread, stitch spacing, adhesive, and edge treatment will work together.

    Plan the Build Order Before the First Cut

    The most expensive mistake in leatherwork is often cutting a good piece of leather before you have thought through the sequence. Read the instructions from beginning to end and identify the moments that must happen before assembly.

    Some edges are much easier to bevel, dye, stamp, paint, or burnish while the piece is flat. Stitch holes may need to be punched before a gusset or pocket blocks access. Hardware sometimes has to be installed before two layers are glued together. Planning the order prevents the familiar realization that the next necessary step is now physically impossible.

    Lay out the parts on the hide with grain direction and visible marks in mind. Put the cleanest areas where they will be most visible. Avoid deep scars, loose grain, and thin spots on straps, tabs, or high-stress areas. If the project includes matching panels, consider how the leather’s pull-up, texture, and color variation will look side by side.

    Keep a little extra material around curved pieces and long straps until you are sure of placement. Leather does not always present its best face in the first open space you find.

    Build in Dry Fits and Checkpoints

    Dry fitting is one of the simplest habits a maker can develop. Place components together without glue to confirm orientation, fit, and hardware placement. On projects with pockets or layered panels, stack every piece in order before adhesive enters the picture.

    Set checkpoints during the build. After cutting, compare the parts to the pattern. After skiving, check that folds and layered areas lie as expected. After gluing, inspect alignment before stitching. These pauses are brief, but they are far easier than correcting a crooked pocket after the thread is locked in place.

    Prepare Tools and Materials in Reach

    A well-organized bench makes careful work easier. You do not need a large workshop, but you do need a clear working surface and the tools required for the next stage close at hand. Stopping mid-glue-up to search for thread or a setter creates rushed decisions.

    Gather the pattern, leather, thread, needles, adhesive, cutting tools, edge tools, hardware, and a ruler before you begin. Then check the small supplies that are easy to overlook: extra blades, sandpaper, scrap leather for testing, clean cloths, and something to protect the work surface.

    It also helps to plan around the materials that need time. Adhesive has an open time, dye needs to dry, and some finishes benefit from curing before handling. A project does not need to be completed in one sitting. Splitting the work across a few focused sessions often produces cleaner results than forcing every step into a single afternoon.

    Let the Plan Support Your Own Style

    Planning should make a project feel more personal, not less. Once you understand the demands of the pattern, you can make thoughtful choices: contrast thread for a sharper graphic look, a neutral edge finish for a quieter result, or a stamped initial placed where it will not interfere with construction.

    The key is to change one or two variables at a time, particularly on a new build. If you are testing unfamiliar leather, unusual hardware, and a new finishing method all at once, it becomes difficult to know what caused a problem. Repeating a successful pattern with one deliberate variation is one of the best ways to build skill.

    Your next project does not need to be more complicated. It only needs to be chosen with care, prepared with intention, and built at a pace that lets you notice the details. Put a sound plan beside your cutting mat, make the first cut with confidence, and give yourself the satisfying kind of bench time that ends with a piece you will want to use.

  • Leatherworking Tools That Earn a Place on Your Bench

    Leatherworking Tools That Earn a Place on Your Bench

    A good set of leatherworking tools should make the next step clearer, not make your bench feel crowded. Whether you are cutting your first small tray or building wallets, belts, and cases, the right tools help you work accurately, repeat a process, and enjoy the time spent at the bench.

    The useful question is not, “What tools do I need to own?” It is, “What does this project ask me to do?” A well-organized pattern answers part of that question by showing the cuts, holes, and assembly order. Your tools should support that plan without adding unnecessary complexity.

    Start with leatherworking tools for the work you do

    Leathercraft has a way of encouraging tool collecting. There is always another stamp, edge attachment, specialty knife, or finishing aid that looks useful. Some tools will eventually earn their place. But when you are building foundational skills, a smaller kit is usually the better choice.

    Start by considering the operations that appear in most projects: measuring and marking, cutting, preparing stitch holes, stitching, shaping edges, and finishing. If a tool helps you perform one of those jobs cleanly and safely, it is likely a practical purchase. If it only supports a project style you have not tried yet, it can wait.

    A simple card holder and a lined bag do not need the same setup. Thin leather goods often reward precise cutting and tidy edge work. Heavier belts and holsters may call for more force, heavier punches, and different stitching irons. Buy for the projects you want to make over the next few months, not every project you might make someday.

    The core bench setup

    Measure, mark, and cut with accuracy

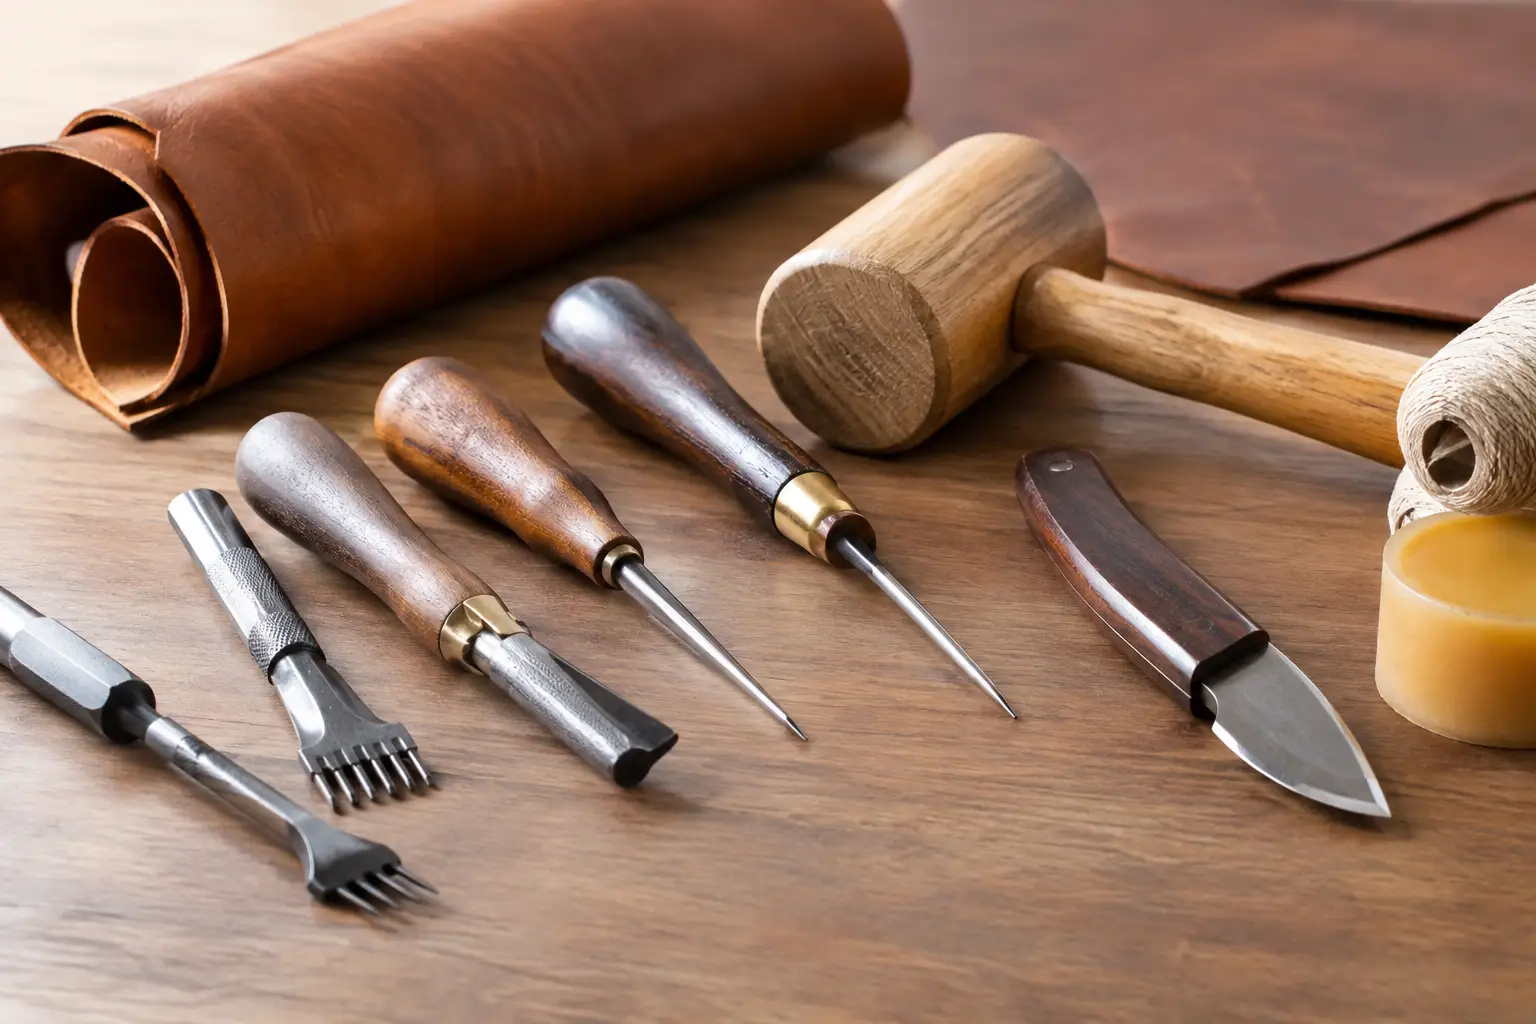
    A steel ruler, scratch awl, cutting mat, and sharp knife form the working center of many benches. The ruler gives you a dependable straightedge for both pattern work and trimming. A scratch awl is useful for transferring marks and locating holes without leaving oversized marks in the leather.

    For cutting, a utility knife with fresh blades is a sensible starting point. It is affordable, easy to control, and suitable for many pattern pieces. A round knife or head knife can be an excellent long-term tool, particularly for makers who enjoy skiving and curved cuts, but it comes with a learning curve and requires thoughtful sharpening. There is no need to begin there.

    Sharpness matters more than prestige. A dull blade pulls at fibers, wanders from the line, and turns a straightforward cut into a frustrating correction. Replace disposable blades early, and keep any sharpened blade properly maintained. Clean cuts make every later step easier.

    Prepare stitch holes consistently

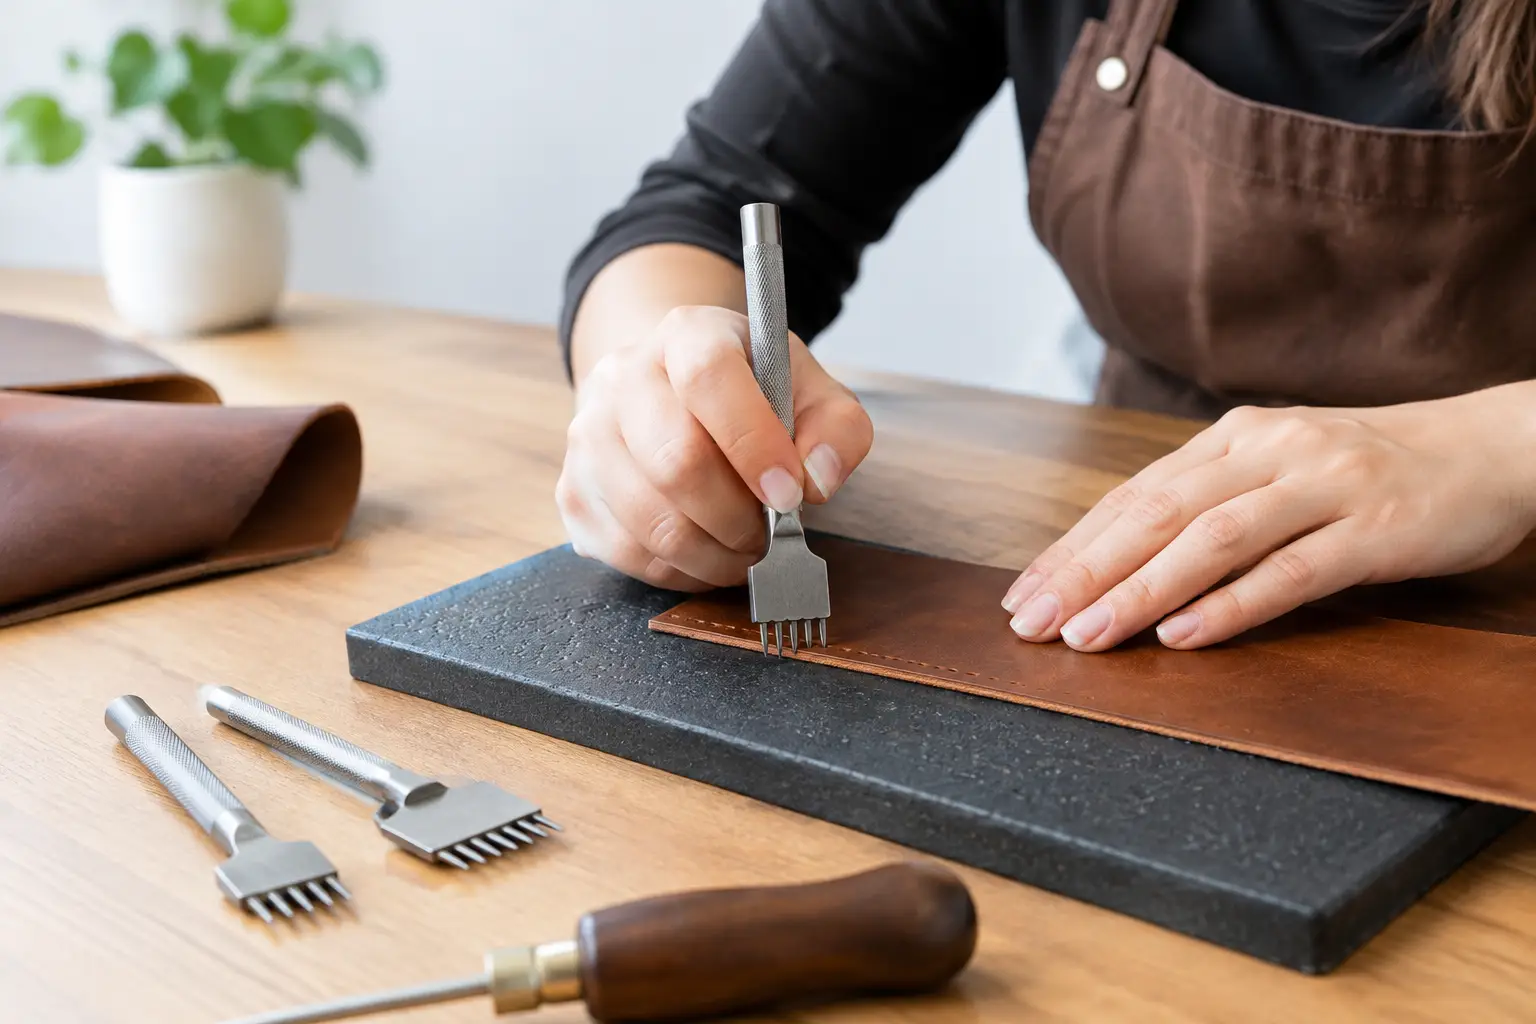
    Hand stitching is one of the details that gives leather goods their lasting character. For many makers, stitching irons are the clearest route to evenly spaced holes. Choose a spacing that suits the scale of your work, then stay consistent while you learn. A medium spacing is often approachable for wallets, trays, and small goods because it balances a refined look with manageable stitching time.

    You will also want a sturdy mallet or maul and a firm punching surface. A non-metal striking tool protects your irons better than a steel hammer, while a dense cutting board or punch pad absorbs the impact underneath. A stitching pony or clamp is not essential on day one, but it quickly becomes useful once you are regularly saddle stitching. Holding the work at a comfortable height frees both hands and makes tension easier to control.

    Pricking irons and stitching irons are sometimes used interchangeably in casual conversation, but they can behave differently. Some mark or pierce partway through the leather, while others punch through more completely. Follow the method recommended by your pattern or instruction set, and test the tool on scrap leather before committing to the project pieces.

    Make edge work part of the build

    A clean edge can make a modest project feel considered. The basic tools are an edge beveler, sandpaper, burnisher, and a small amount of burnishing compound or water, depending on the leather. Beveling removes the sharp corner. Sanding levels uneven layers. Burnishing compresses and smooths the fibers.

    This process takes patience. Thin vegetable-tanned leather can burnish beautifully, while chrome-tanned leather often responds better to edge paint or a different finishing approach. Stacked edges, especially on lined projects, may need glue, trimming, sanding, and several passes before they look even. The right tool helps, but the sequence matters just as much.

    If your edges look rough, resist the urge to solve everything with more product. First check whether the pieces were cut evenly, glued securely, and sanded flat. Edge finishing usually reveals the quality of the preparation beneath it.

    Use adhesives and hardware tools with purpose

    Leather glue keeps layers from shifting while you stitch, but it is not a substitute for careful alignment. Apply a thin, even coat within the intended seam area, allow it to become tacky if the product calls for it, then press and position the pieces deliberately. A roller or smooth bone folder helps create a consistent bond without marking the grain.

    For hardware, a small selection of hole punches, a drive punch, and the correct setter for your snaps, rivets, or eyelets can cover a lot of ground. Hardware is not universal. A setter must match the hardware style and size, so confirm the pairing before striking it into a finished piece. Test on scraps cut to the same thickness as your project.

    What not to buy yet

    Some leatherworking tools are genuinely valuable, but they are best added when your work gives them a clear job. A splitter, skiving machine, clicker press, elaborate stamping set, or large collection of specialty punches can be worthwhile for a committed direction in the craft. They are not a requirement for making handsome, useful goods.

    It is also wise to avoid buying the cheapest version of every tool. A poor-quality stitching iron that bends or a beveler that tears the leather can make practice feel harder than it needs to be. At the same time, expensive does not automatically mean right for your bench. Aim for dependable tools in the categories you use most, then improve individual pieces as your preferences become clear.

    Build your kit around a project

    A project pattern is a practical way to choose tools because it turns a broad hobby into a specific sequence of work. Before starting, read through the entire pattern and set out what it calls for. Notice the leather weight, hardware, thread, adhesive, and tools before you cut anything.

    This small preparation step prevents common bench interruptions. You may discover that your punch is the wrong size for a snap, your thread is too heavy for the stitch holes, or your chosen leather will not produce the edge finish you expected. Finding that out before assembly saves material and keeps the build enjoyable.

    For a first project, choose something with a limited number of pieces and a clear construction order. A valet tray, card holder, key fob, or simple notebook cover gives you repeated practice with essential techniques without asking you to solve too many design problems at once. You can focus on straight cuts, aligned holes, even stitches, and finished edges.

    As your skills grow, let completed projects guide the next purchase. If you repeatedly wish you could thin fold lines more cleanly, a skiving tool may be next. If hand punching becomes the slowest part of your process, a press may make sense. Your bench should develop in response to your work, not ahead of it.

    Care for the tools you already have

    Tool care is part of leatherworking, not an extra chore. Wipe metal tools dry after use, especially if water, dye, or burnishing products are on the bench. Keep cutting tools covered or stored safely. Clear leather dust from stitching irons and punches, and inspect their points before each project.

    Give yourself a small, consistent reset at the end of a build. Put blades away, collect hardware, return adhesives to their lids, and brush scraps off the cutting surface. A clear bench makes it easier to start the next session with confidence.

    The best leatherworking tools are the ones you understand well enough to reach for without hesitation. Choose a project that fits your current skills, prepare the few tools it truly requires, and let each finished piece show you what belongs on your bench next.

Sign up to receive the
Old Line Workbench
Weekly Newsletter

We don’t spam! Read our privacy policy for more info.