A Beginner’s Guide
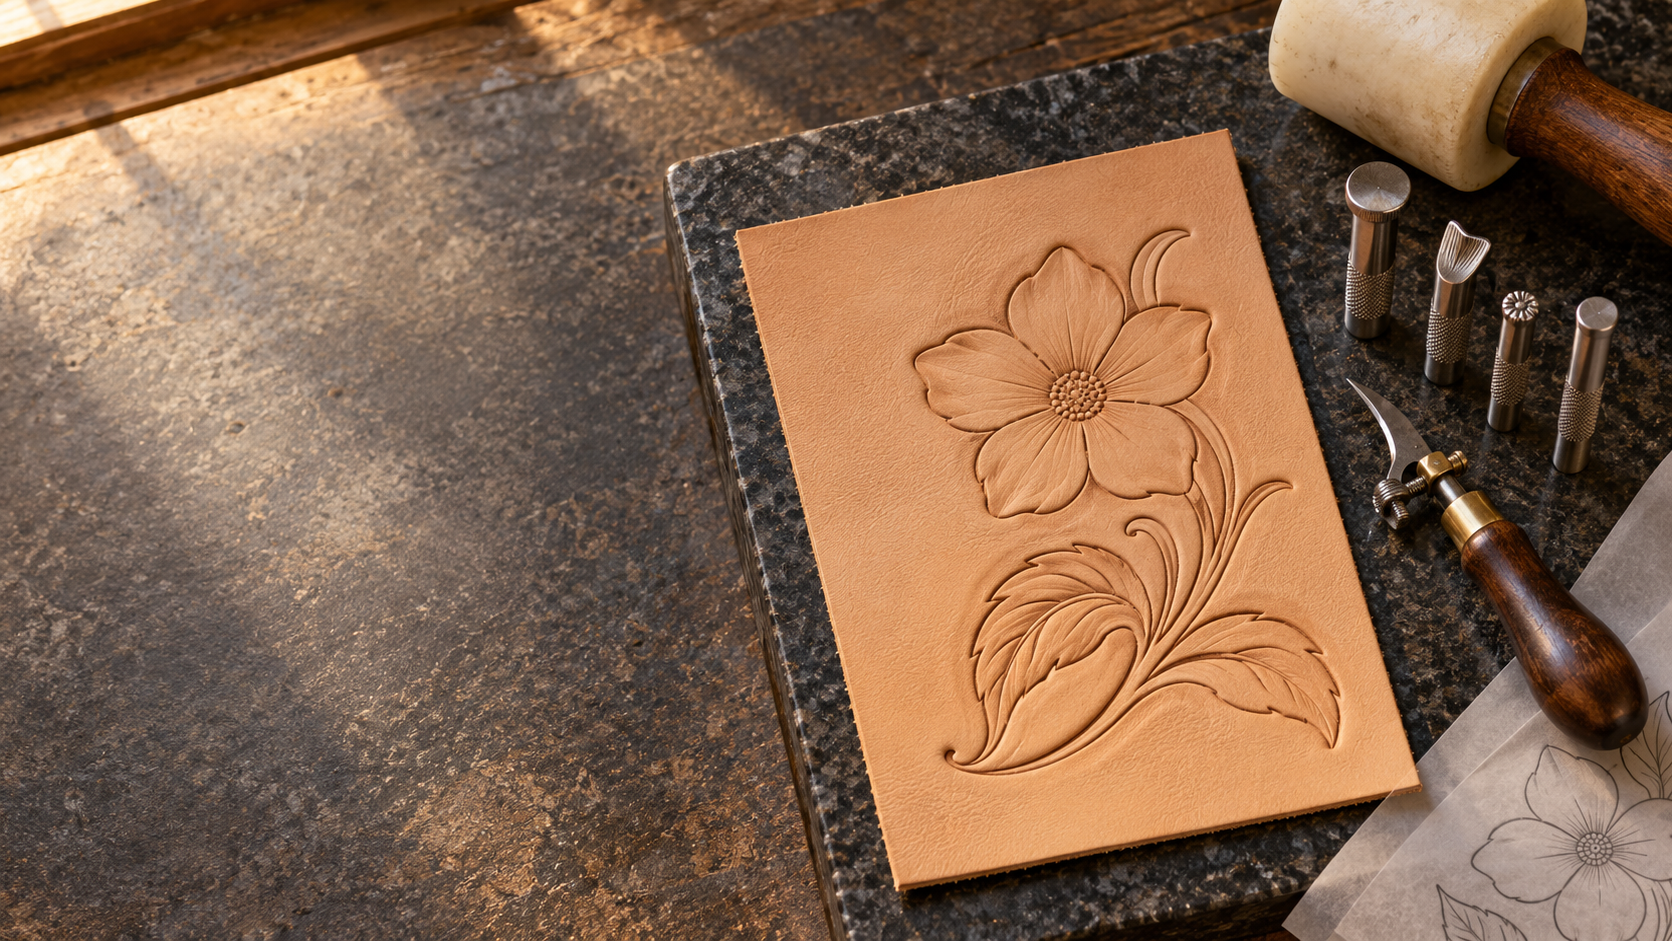
A finished floral carving can look intimidating. Every petal has shape, every leaf has movement, and the background seems to make the whole design rise out of the leather.
You do not have to master all of that in one afternoon. Start with a small practice panel. It gives you room to learn how damp leather responds to a cut, a stamp, and a change in striking force—without worrying about ruining a wallet or bag.
Here is a practical way to begin.
Gather a Small, Useful Tool Kit
For this exercise, you will need:
- A scrap of unfinished vegetable-tanned tooling leather
- A simple floral tracing pattern and tracing film
- A stylus or ballpoint pen for transferring the design
- A swivel knife
- A smooth beveler and pear shader
- A camouflage stamp, veiner, seeder, and backgrounder
- A stamping mallet and a firm stone or tooling slab
You can work through the design in stages if you do not own every stamp yet. The swivel knife, beveler, and pear shader will teach you the most about creating shape. The other stamps add detail and contrast.
Prepare the Leather Before You Trace
Tooling leather needs moisture, but a soaked surface will not hold a clean impression. Dampen the leather evenly with clean water, then give the moisture time to move through it. You are looking for leather that feels cool and accepts a crisp mark without water pooling on the surface.
Test a corner before starting the design. If your stamp leaves a muddy impression, let the leather rest a little longer. If it barely marks the surface, add a small amount of moisture and wait for it to distribute.
Keep a scrap from the same piece of leather beside your panel. It is the best place to test each tool before using it on the design.
Transfer a Design You Can Actually Finish
Choose a pattern with one flower, a few leaves, and enough open space to see where each line goes. Put the tracing film over the design and trace it first. Then place the film on the prepared leather and follow those lines with your stylus.
Use steady pressure. You want visible guide lines, not deep grooves. Before lifting the film, check that you transferred the flower, leaves, stems, and any border marks.
For your first panel, keep the design modest. Finishing a small pattern teaches you more than abandoning a crowded one halfway through.
Cut the Main Lines
Hold the swivel knife upright and make smooth, controlled cuts along the main outlines. Turn the leather when you need a better angle; do not force your wrist around a tight curve.
Start with the longest, clearest lines. Use lighter control on short petal and leaf details. Your goal is a clean guide for the stamping that follows, not the deepest possible cut.
If a curve wanders, keep going. A practice panel is where you learn to recognize that movement and improve it on the next one.
Give the Design Its Shape
Work through the stamps in a deliberate order:
- Beveler: Place its working edge beside a cut line on the side you want to push down. Overlap successive impressions so the bevel looks continuous. This makes the flower or leaf appear raised.
- Pear shader: Use it within a petal or leaf to press down selected areas and suggest a gentle curve. Build the shading with controlled impressions rather than one heavy strike.
- Camouflage stamp: Add repeating texture near the base or edge of a petal where the pattern calls for it. Test the angle and spacing on scrap first.
- Veiner: Add short vein or accent marks to leaves. Follow the leaf’s direction so the marks support its shape.
- Seeder: Place small, distinct seed impressions in the flower center. Leave enough space between them to keep each mark readable.
- Backgrounder: Lower and texture the open areas around the main design. Work carefully near the carved edges so you do not flatten the flower or leaves.
The stamps have different jobs. You do not need to use every tool in every small space. If an impression makes the design harder to read, leave that area alone.
Practice Consistency, Then Add Detail
Look at the panel from arm’s length after each stage. Can you see where the flower ends and the background begins? Do the shaded petals still look like parts of the same flower? Are your seeder impressions distinct?
Those checks matter more than packing in extra marks. On your next panel, try improving just one thing: smoother beveling, steadier swivel knife curves, or more even stamp spacing. Keep both panels so you can see the progress.
Ready for the Next Panel?
A repeatable pattern gives you a clear way to practice and compare results. Explore the Old Line Crafts & Designs leathercraft patterns for your next project. If you are building your first tool kit, our free Beginner’s Leathercraft Quick Reference Guide is a useful bench companion.
Start with one flower. Learn what each mark does. Then make the next panel stronger.
