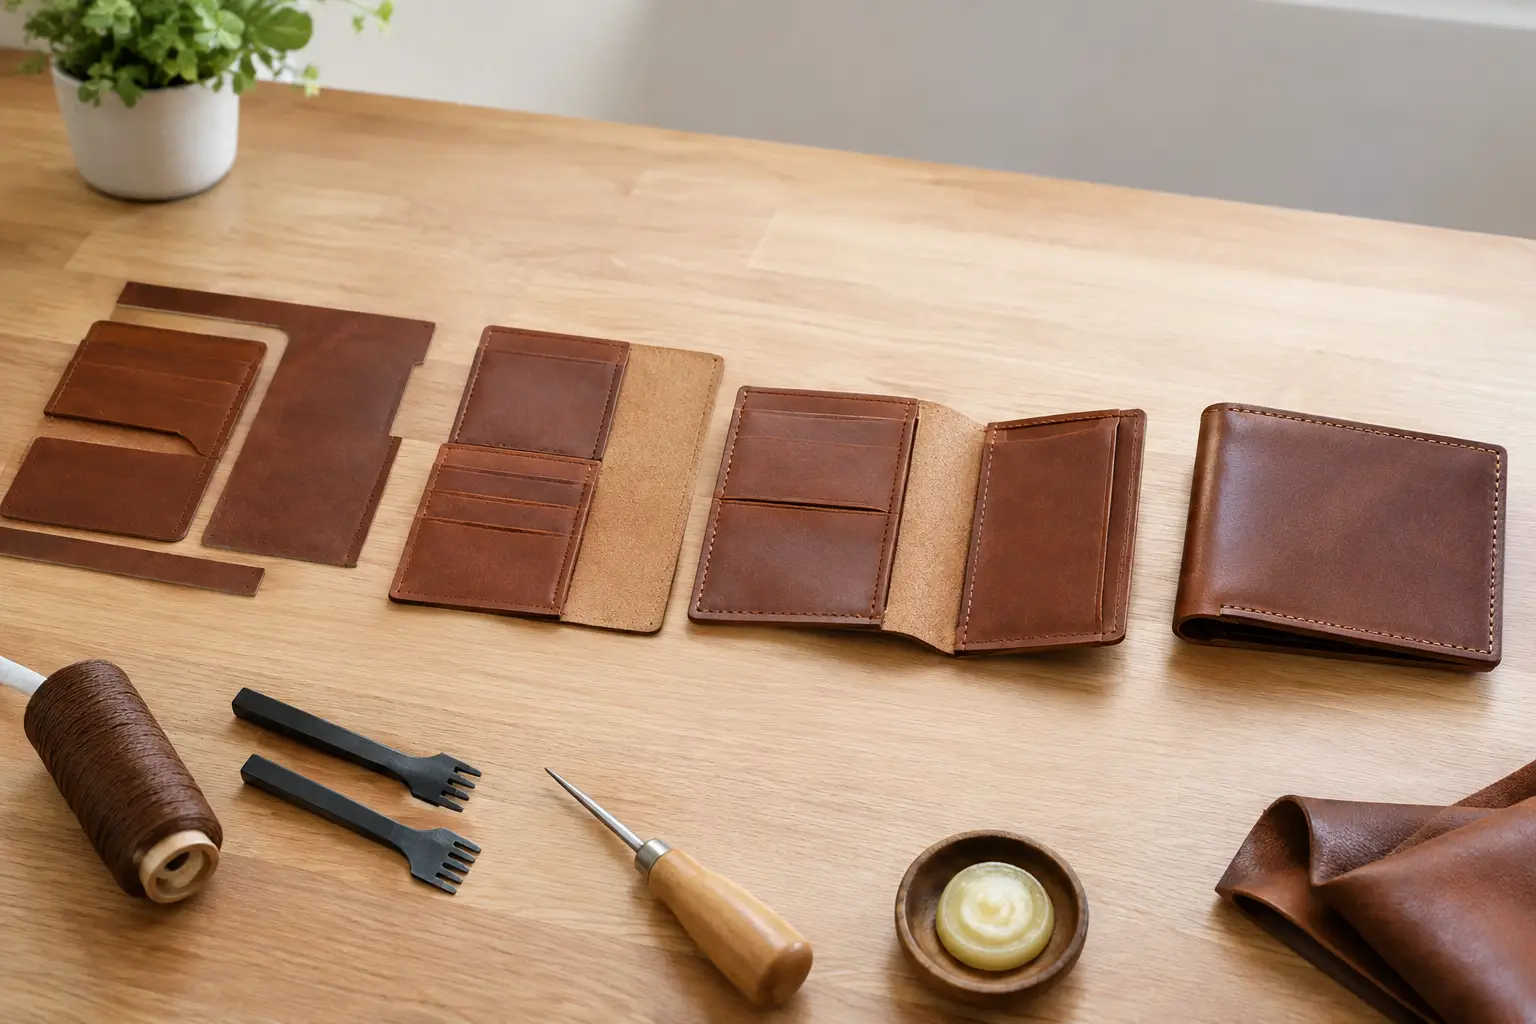
A wallet can look simple on paper and still create trouble at the bench. One pocket stitched too early can block access to a seam. A skipped skive can leave a corner bulky. A finish applied at the wrong stage can make cleanup harder than it needs to be. This wallet construction sequence guide gives you a practical order of operations so you can spend less time correcting avoidable mistakes and more time building a wallet you are proud to carry.
The exact order will change with the pattern, leather weight, and wallet style. A bifold with stacked card pockets is not assembled like a slim card holder, and a lined wallet asks for more preparation than an unlined design. Still, the working principles stay consistent: prepare every piece before it disappears behind another layer, build small assemblies first, and leave final joining until the last practical moment.
Start With the Pattern and the Finished Wallet in Mind
Before cutting leather, read the pattern from beginning to end. Do not only look at the pieces. Look for fold lines, stitch lines, glue zones, skive callouts, and areas that will be inaccessible once layers are assembled. This small pause prevents a common problem: realizing a pocket needs edge paint, a maker’s mark, or a crease after it has already been stitched into the body.
Lay out the pattern pieces in the approximate position they will occupy in the finished wallet. This is especially useful for card pockets that stack or overlap. You will see which pieces sit deepest in the assembly and which pieces are meant to cover their edges.
Check the leather selection at this stage, too. Firmer leather can make a clean, structured wallet, but it may need more thoughtful thinning at folds and layered corners. Softer leather can be easier to turn and compress, though it may stretch during glue-up if handled roughly. There is no single right choice. The pattern, intended use, and your preferred finish should guide the decision.
Wallet Construction Sequence Guide: Prepare Before Assembly
The cleanest wallet builds are usually won before the glue bottle comes out. Cut all pieces accurately, keeping the knife vertical and the edges clean. If a pattern includes mirrored parts, mark the flesh side lightly so you do not accidentally cut two pieces facing the same direction.
Once the pieces are cut, complete the preparation work that is easier on flat leather than on a partly assembled wallet. That typically includes crease lines, decorative stamping, maker’s marks, pocket slot cuts, and stitch-hole marking where the pattern calls for it.
Skive the Areas That Need to Fold or Stack
Skiving is not simply a way to make leather thinner. In wallet work, it controls bulk. Focus on fold lines, turned edges, the bottoms of layered card pockets, and any point where several seams meet. A gradual skive generally creates a smoother transition than removing thickness abruptly.
Test the stack with dry-fitted pieces before gluing. If the corners look heavy now, they will look heavier after adhesive, thread, and burnishing add material. It is easier to refine a skive on a loose pocket than to force a finished wallet to close flat.
Be conservative with thin leathers. Over-skiving can weaken a high-use area such as a card slot or fold. When in doubt, remove a little, check the fit, and make another pass only if needed.
Finish the Edges That Will Be Hidden Later
Some interior edges become impossible or awkward to finish after assembly. These may include the top edge of a card pocket, the mouth of a cash sleeve, or an inner divider edge. Burnish, paint, crease, or otherwise finish these exposed edges while the piece is flat.
This is also the time to apply any lining or reinforcement that belongs on an individual component. Let adhesives cure as directed before moving on. Rushing this stage can lead to stretching, shifting, or uneven edges when you begin stacking pockets.
Build Interior Components From the Inside Out
For most wallets, the smallest or deepest pieces go together first. If you are building a stack of card pockets, begin with the pocket that sits farthest back, then add the next pocket over it. Each new layer should cover the construction edge of the layer beneath it.
Use a dry fit before committing with glue. Confirm that the card openings remain even, the visible pocket height matches the pattern, and the stack aligns with the backing piece. A slight error at the first pocket becomes much more noticeable by the fourth.
Apply adhesive sparingly and only in the intended glue zones. Excess glue can seep into pocket openings and create a frustrating cleanup job. Press the pieces together carefully from the center outward, then allow the bond to set enough that the stack will not shift under the pricking irons or stitching chisels.
Stitch the seams that will be covered by later layers while access is still open. For example, a pocket may need stitching at its sides before it is mounted to a larger panel. Follow the pattern’s stitch order when it provides one, because it is usually designed to preserve access and reduce unnecessary backstitching.
Join the Interior to the Wallet Body
With interior pocket assemblies complete, move to the larger wallet panels. This is where careful alignment matters most. Use registration marks, centerlines, or a light crease to position the interior assembly before glue-up. A centered layout can still look crooked if the distance from one side is not equal to the other, so check both edges rather than trusting your eye alone.
For bifolds and long wallets, pay close attention to the spine or fold. The interior should have enough room to bend without pulling hard against the outer panel. Depending on the design, this may mean leaving a small channel, using a separate spine piece, or allowing a controlled gap between interior sections.
Do not stitch the perimeter immediately. First, check that all openings are clear and that the wallet folds naturally. Slide a few cards into the pockets if the leather is dry and the build allows it. You are checking function, not stretching the wallet to its limits. If a pocket is glued too close to an opening or the fold feels strained, now is the time to correct it.
Stitch the Perimeter Only After Everything Fits
Once the internal construction is complete and the wallet closes properly, trim the perimeter if your method calls for it. Some makers prefer cutting oversized panels and trimming them flush after assembly. Others cut every piece precisely from the beginning. Both approaches can work.
Oversized trimming can produce very even final edges, particularly for beginners or complex stacked builds. It also uses more leather and requires a steady hand with a sharp knife. Pre-cutting saves material, but demands precise alignment throughout the project. Choose the method that suits your current skills and the pattern design.
Mark or punch the perimeter stitch line after the edges are flush. Then stitch in a direction that lets you maintain consistent tension and a clean appearance at visible corners. Keep an eye on the wallet as a whole, not just the seam in front of you. A twist in the panels can become set in place if you stitch without checking alignment as you go.
Shape, Refine, and Finish the Wallet
After stitching, sand the perimeter edges level. Work through your preferred grits with a light touch, especially near thin pocket layers. The goal is an even edge, not a smaller wallet. If you use edge paint, build thin coats and allow adequate drying time between them. If you burnish, use the method that best suits the leather and the finish you want.
Set the fold gently rather than forcing it. For a bifold, fold the wallet around a suitable form or close it carefully with light contents inside if the pattern and leather thickness allow. This helps the leather learn its working shape without sharply creasing the grain.
Finally, inspect every pocket opening, stitch line, and edge. Remove stray adhesive, trim loose thread ends, and check that cards enter and leave without catching. These final minutes are part of the build, not an afterthought. They are often what turns a good workshop project into a wallet that feels considered in the hand.
A reliable sequence gives you room to focus on the enjoyable parts of leatherwork: choosing materials, refining details, and watching a flat set of pieces become something useful. Start with a pattern that fits your bench, follow the construction order with patience, and let each finished wallet teach you what you want to improve on the next one.
Leave a Reply