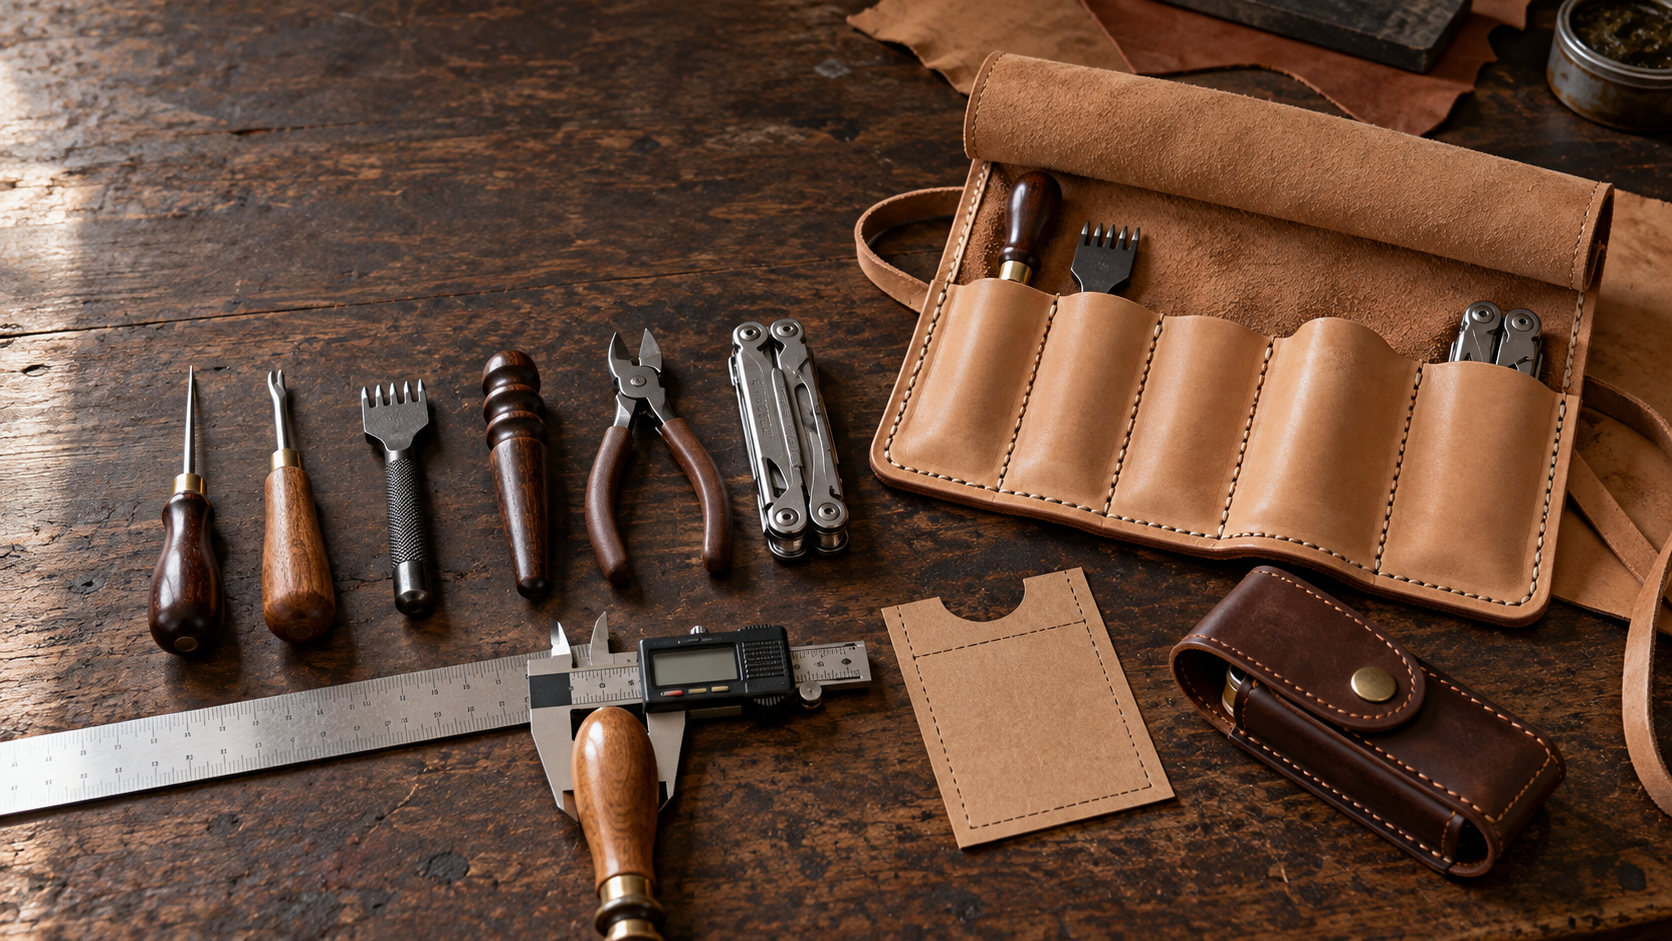
A tool roll looks great laid flat. The real test comes when you fill its pockets, fold the guard, and tie it closed. A sheath faces a similar test: the multitool must slide in without a fight, stay secure, and leave room for its closure.
Before you cut leather, measure the tools you intend to carry. A ruler, a few notes, and a paper mock-up can save you from pockets that are too tight, handles you cannot reach, or a sheath that closes only when empty.
Measure the Tools You Actually Carry
Start with the set that will live in the carrier. For a workshop roll, that might be an awl, stitching irons, an edge beveler, a burnisher, and compact pliers. For a sheath, use the specific multitool you plan to carry—not the dimensions of a similar model found online.
Record four things for each tool:
| Measurement | Where to measure | Why it matters |
|---|---|---|
| Overall length | From the furthest point of the handle to the furthest point of the working end | Determines pocket depth and guard coverage |
| Widest point | Across the broadest part that must pass into the pocket | Determines whether the tool can enter |
| Thickness or diameter | Through the bulkiest part of the handle or folded tool | Affects pocket volume and how the carrier closes |
| Grip point | The part you naturally grab to remove the tool | Tells you how much handle should remain exposed |
A tapered awl and a round handled burnisher can have the same overall length but need very different pockets. Measure the bulky section, not just the narrow shaft.
Plan Pocket Depth Around Access and Protection
A pocket must cover enough of the tool to keep it in place while leaving enough exposed to pull it out comfortably. Lay the tool on a sheet of paper and draw a line where you want the pocket top to land. Pick it up from that position. If you have to pinch at the very end of the handle, lower the pocket line.
Check the other end, too. A sharp awl point or stitching iron teeth should not press into a vulnerable seam or poke beyond the carrier. A fold-over guard can help cover exposed working ends when a roll is closed.
For a mixed tool set, identical pockets are rarely the best fit. The Benchline Leather Tool Roll Pattern uses seven graduated bays, a fold-over guard, and an optional way to change the divider seams. Arrange your tools by size before deciding which bay should hold each one.
Allow for the Tool’s Shape, Not Just Its Width
A flat ruler takes little pocket volume. Pliers and thick handles push the leather outward. That curve uses material that a flat measurement does not show.
Make a quick pocket from folded paper or thin cardstock. Tape its sides where the future stitch lines would sit, then insert the real tool. Check three things:
- Does the widest part enter without forcing it?
- Can you pull the tool out with one hand?
- Does the pocket hold it when you lift the mock-up vertically?
If the tool binds, widen the paper pocket and test again. If it rattles or falls out, narrow it or change the pocket depth. Use the result to guide any pattern adjustment; there is no single clearance measurement that suits every leather, handle, and tool shape.
Measure a Multitool in Its Closed Position
For a fitted multitool sheath, measure the tool while it is fully closed. Note its length, width, and thickness at the largest points. Look for clips, screws, or raised edges that may catch on the sheath opening. If you will carry it with an accessory, account for that item separately.
Then make the cardstock fit test before cutting your final leather. The Waypoint Crosscarry Multi-Tool Sheath Pattern includes a cardstock fit check and guidance for adjusting its gusset width. Its published dimensions are a starting point for a full-size multitool, not a promise that every model will fit without adjustment.
Test the closure with the tool inside the mock-up. A flap or retaining strap that reaches its snap on an empty sheath may sit differently once the pocket has thickness.
Check Your Leather Thickness and the Closed Fit
Leather takes up space. A pocket made from thicker leather may feel tighter and make a roll bulkier than the same pattern built from thinner leather. Several layers meeting at a seam or fold matter as much as the thickness of one piece.
Follow the leather recommendations in your chosen pattern, then test a small folded stack of the leather you plan to use. Weaver Leather Supply’s leather thickness chart is a useful external reference for converting leather weights: one ounce is approximately 1/64 inch thick, although actual hides can vary.
For a tool roll, place your tools in the paper or cardstock layout and roll it closed. Check whether the guard folds over the tallest tools and whether the wrap strap reaches comfortably around the packed roll. For a sheath, check insertion, removal, and closure with the actual multitool inside.
Check the Printed Pattern Scale
Before transferring a PDF pattern to leather, print at 100% or Actual Size and measure its calibration square. Printer settings that shrink a page can quietly change every pocket and strap. Make your fit adjustments only after you know the printed pattern is at the intended scale.
Build for Your Bench
Write down your tool measurements, choose their positions, and test the carrier in paper. It is a short job that makes the leatherwork far more predictable.
For a set of workshop hand tools, start with the Benchline Tool Roll pattern. For a belt carried multitool, explore the Waypoint Crosscarry Multi-Tool Sheath pattern. Measure first, fit the paper version, then make the leather version your tools deserve.
