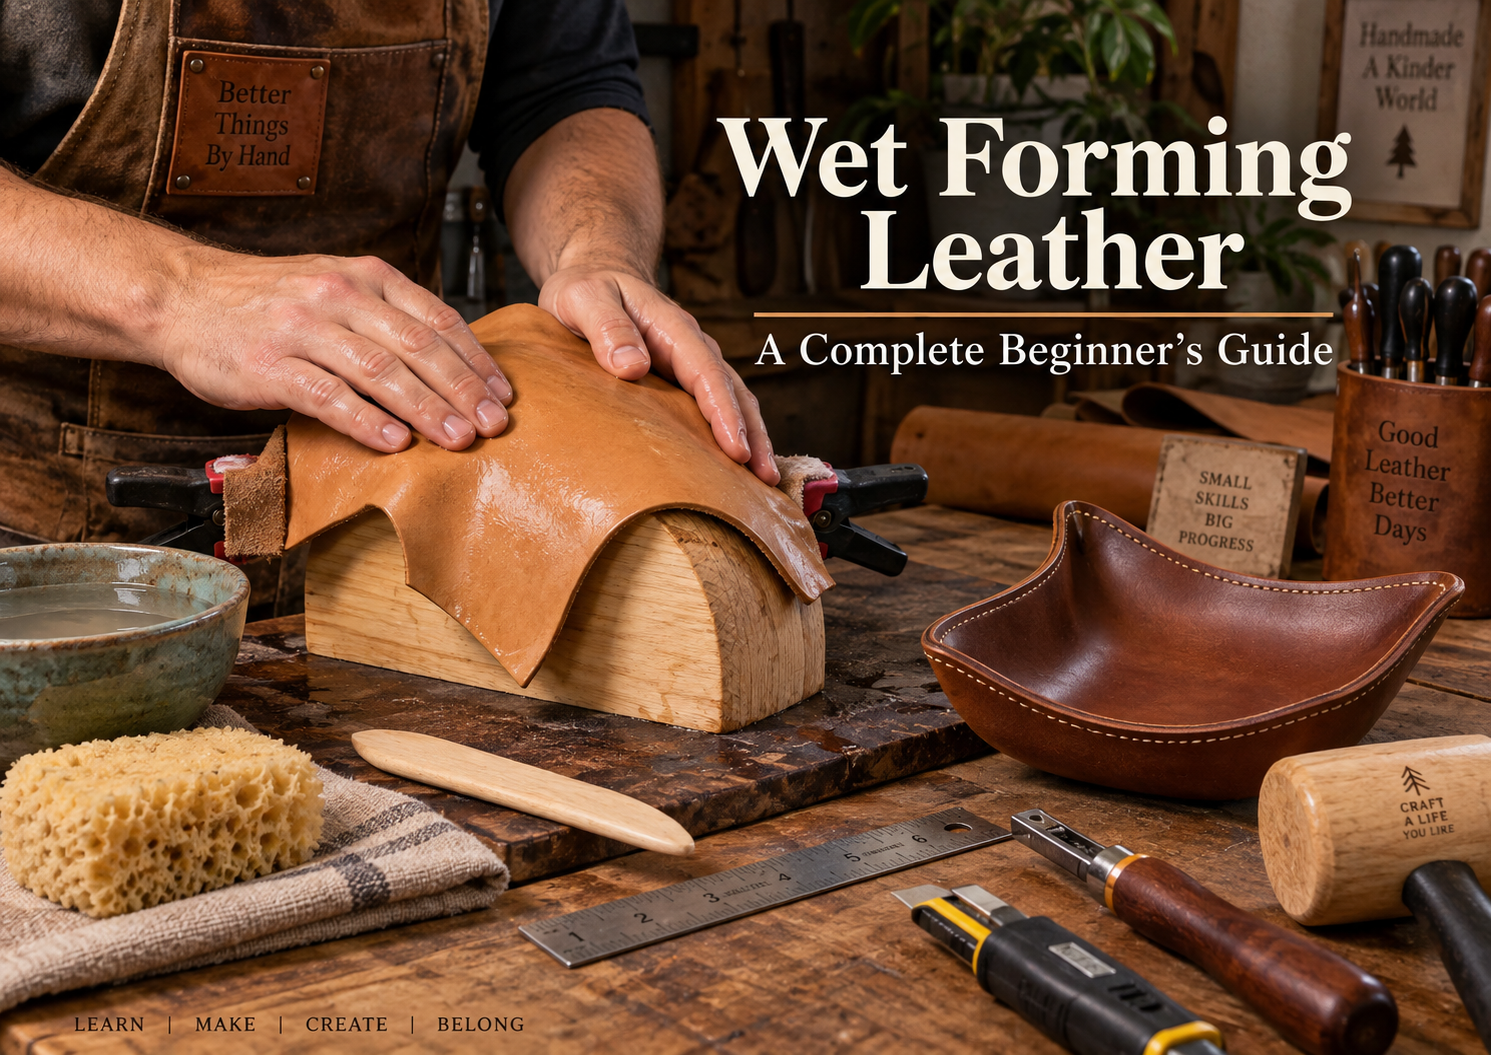
One of the most interesting things about leather is that it does not have to remain flat.
With the right leather, a little water, and some controlled pressure, you can turn an ordinary piece of hide into a curved bracer, fitted pouch, molded case, shaped armor panel, tray, sheath, mask, or countless other three-dimensional objects.
That process is called wet forming, sometimes called wet molding.
It sounds complicated when you first encounter it.
It isn’t.
Wet forming is actually one of the most approachable traditional leatherworking techniques a beginner can learn because you do not need expensive machinery or a workshop full of specialized equipment.
What you do need is an understanding of how leather responds to moisture.
And patience.
Quite a bit of patience.
In this guide, we’ll cover what wet forming is, which leather works best, how much water to use, how to make or choose a mold, how to shape leather by hand, how long to let it dry, common mistakes to avoid, and several projects that are particularly good for learning the technique.
What Is Wet Forming Leather?
Wet forming is the process of adding moisture to leather so that its fibers become temporarily more flexible, shaping the leather into a new form, and then allowing it to dry while held in that shape.
Once dry, suitable leather will retain much of the new shape.
That simple behavior opens an enormous range of possibilities.
A flat piece of leather can become:
- A curved wrist bracer
- A structured pouch
- A fitted knife or tool sheath
- A molded pocket
- A glasses case
- A dice cup
- A tray
- A mask
- A helmet component
- Shoulder armor
- A bottle or flask cover
- A fitted case for an everyday-carry item
The basic sequence is surprisingly simple:
Wet → Wait → Shape → Hold → Dry → Finish
Learning what happens during each of those stages is what turns wet forming from an experiment into a repeatable leatherworking skill.
Why Does Wet Leather Hold a Shape?
Leather is made from a network of natural fibers.
When suitable leather absorbs water, those fibers become more flexible and can move relative to one another more easily.
That is why damp vegetable-tanned leather can bend, stretch, compress, and accept shapes that dry leather would resist.
As the leather dries, the fibers settle into their new arrangement.
The important idea for a beginner is this:
Water does not simply make the leather softer. It temporarily makes the structure easier to reshape.
That is why moisture control is so important.
Too little water and the leather fights you.
Too much water and the leather can become excessively soft, stretchy, marked, or difficult to control.
The goal is not to drown the leather.
The goal is to get enough moisture into the fibers to make them workable.
What Leather Is Best for Wet Forming?
For traditional wet forming, vegetable-tanned leather is usually the best starting point.
Vegetable-tanned leather—often simply called veg tan—responds particularly well to moisture and is commonly used for leather that will be shaped, carved, stamped, dyed, beveled, or burnished.
If you are learning wet forming for the first time, natural or lightly finished vegetable-tanned leather gives you one of the most predictable materials to practice with.
What About Chrome-Tanned Leather?
Chrome-tanned leather is excellent for many leathercraft projects, particularly bags, upholstery, garments, linings, and soft goods.
But most chrome-tanned leathers do not retain molded shapes in quite the same way as traditional vegetable-tanned leather.
Some can certainly be shaped to a degree, but if your goal is a firm, defined three-dimensional form, vegetable-tanned leather is generally the easier material to learn with.
What Thickness of Leather Should You Wet Form?
There is no single correct thickness.
The right choice depends on the object you are making and how much structure the finished piece needs.
As a rough starting point:
| Leather Weight | Approx. Thickness | Wet-Forming Uses |
|---|---|---|
| 3–4 oz | 1.2–1.6 mm | Small molded pockets, lightweight cases, decorative shapes |
| 4–5 oz | 1.6–2.0 mm | Small cases, trays, masks, light structured pieces |
| 5–6 oz | 2.0–2.4 mm | Bracers, pouches, sheaths, many general molded projects |
| 6–8 oz | 2.4–3.2 mm | Heavy bracers, armor pieces, substantial cases |
| 8 oz+ | 3.2 mm+ | Heavy structural projects and specialized armor components |
Thinner leather generally becomes easier to manipulate, but it may not hold as much structure.
Heavier leather can produce a stronger finished form but requires more effort to shape.
If you are completely new to wet forming, leather around the middle of the range is often easier to learn with than extremely thin or extremely heavy material.
For more detail on leather weight and thickness, see our Leather Thickness Guide.
What Tools Do You Need to Wet Form Leather?
One reason wet forming is so accessible is that the basic tool list is short.
You may already own most of what you need.
Basic Wet-Forming Kit
For a simple beginner project, gather:
- Vegetable-tanned leather
- Clean water
- A bowl, tray, spray bottle, or sponge
- The object or mold you want to form around
- Your normal leather cutting tools
- Smooth-edged clamps, straps, or another way to hold the leather
- Scrap leather, cork, wood, or other padding for clamp points
- A bone folder, modeling spoon, or smooth burnishing tool
- Clean towels
- A well-ventilated place for the leather to dry
For many projects, your fingers are among the most useful shaping tools you have.
You do not need a hydraulic press.
You do not need a vacuum former.
You do not need a set of expensive commercial molds.
Those can become useful if you eventually produce repeated molded pieces, but they are not necessary to understand the technique.
Your Most Important Tool Is the Mold
When beginners hear the word mold, they sometimes picture an expensive machined form.
A mold can be much simpler than that.
It is merely the shape that the leather is being asked to follow.
Depending on the project, your mold might be:
- A wooden block
- A section of PVC pipe
- A dowel
- A bowl
- A glass jar
- A bottle
- A rounded wooden form
- A purpose-built two-piece wooden mold
- A plastic object
- A protected version of the actual object the case will hold
For a leather bracer, for example, a suitably sized cylinder can provide the basic curvature.
For a molded pouch, you might make a simple wooden block shaped to the desired internal dimensions.
For a tray, a dish or wooden form may provide the curve.
The mold does not need to be beautiful.
It needs to be:
Smooth, strong, properly sized, and able to tolerate moisture.
A Beginner Tip: Round the Corners of Your Mold
Very sharp mold corners can create problems.
Leather has thickness.
When you force heavy leather around an extremely sharp 90-degree corner, the outside surface must stretch while material on the inside compresses.
That can create wrinkles, stretch marks, or excessive stress.
Slightly rounded corners are often more forgiving, particularly when you are learning.
You can still produce a crisp-looking molded piece without asking the leather to behave like sheet metal.
If you are making your own wooden mold, sand it thoroughly.
Any dent, splinter, ridge, screw head, or rough texture in the mold can potentially transfer to damp leather.
Wet leather remembers things.
Sometimes more faithfully than we would like.
Before You Wet the Leather: Do a Dry Test
Do not make the first fit test after the leather is wet.
Place the dry leather over or around the mold first.
Ask:
- Is the blank large enough?
- Is there enough material around the edges?
- Where will the leather need to stretch?
- Where might wrinkles develop?
- Where will clamps go?
- Will the mold come back out after the leather dries?
- Is there enough allowance for trimming?
That last question is especially important.
Wet forming can move material in ways that are difficult to predict perfectly.
Whenever possible, leave a little extra leather around a molded area and trim the final outline after forming.
It is much easier to remove leather later than add it back.
Should You Cut the Final Shape Before or After Wet Forming?
It depends on the project.
For something like a bracer, armor panel, or shaped strap, you may cut the finished outline first and then form it.
For a deep molded pocket, sheath, case, or pouch, leaving extra material around the perimeter can be helpful.
You can mold the leather first, allow it to dry, and then trim the flange or surrounding leather to its final dimensions.
A good pattern will usually tell you which approach the construction expects.
This is one of the benefits of learning a technique within an actual project: the pattern gives the technique a purpose.
Step 1: Prepare the Leather
Start with your leather cut roughly to the required size.
If the project includes holes or other details, check the instructions before punching them.
Some holes should be created before forming.
Others are easier to locate after the leather has been shaped.
Likewise, decorative tooling may occur before or after certain forming operations depending on the design.
There is no universal order for every project.
Read the entire construction sequence before you begin.
If you are using a downloadable pattern, also make sure it has been printed at the correct scale before transferring anything to leather.
Step 2: Add Water
There are several ways to introduce moisture.
For small or moderate pieces you can:
- Wipe the leather repeatedly with a damp sponge
- Mist it with a spray bottle
- Briefly immerse it in clean water
- Wet both sides evenly when appropriate
The exact method is less important than achieving reasonably even moisture through the area being formed.
Watch the leather as it absorbs water.
Natural vegetable-tanned leather usually darkens when wet.
At first, the surface may look obviously saturated.
Then the moisture begins moving deeper into the leather.
Step 3: Do Not Start Forming Immediately
This is one of the easiest beginner mistakes.
You wet the leather.
It becomes soft.
So you immediately start pulling on it.
Instead, give the moisture a little time to distribute through the fibers.
Leatherworkers often refer to controlling moisture in leather as casing.
What you want is leather that is pliable throughout the thickness rather than simply dripping wet on the surface.
The ideal feel is something you will learn through experience.
The leather should bend and respond noticeably more easily than when dry while still feeling like leather—not like a soaked sponge.
How Wet Is Too Wet?
If water is pouring from the leather while you are trying to shape it, you probably have more surface water than you need.
Excessively wet leather can:
- Stretch too easily
- Lose definition
- Pick up fingerprints
- Develop unwanted marks
- Become difficult to control
- Take substantially longer to dry
If the leather feels nearly as stiff as it did when dry, you may need more moisture or more time for the moisture to penetrate.
The correct condition falls somewhere between those extremes.
This is why scrap leather is so valuable.
Before wet forming the important piece, take a scrap from the same hide and wet it.
Bend it.
Press it.
Stretch it.
Let it dry over something curved.
That ten-minute experiment begins teaching you how that particular leather behaves.
Step 4: Place the Leather Over the Mold
Position the damp leather carefully.
If the project has a centerline, align it.
If one edge must remain straight, establish that edge first.
Do not casually pull the leather into position and assume you can correct everything later.
Wet leather stretches.
Once a section has been stretched noticeably, moving it back does not necessarily restore the original geometry.
Work deliberately.
For symmetrical projects, constantly compare the left and right sides.
Step 5: Start With Broad Curves
Do not immediately attack every small corner and detail.
Begin by getting the leather to accept the general shape.
Use your palms, fingers, and thumbs to ease the material over the broad curves.
Think of the process as gradually persuading the leather into position.
Avoid pulling violently on one point.
Instead, distribute your pressure.
Move around the piece.
Push.
Smooth.
Return.
Push again.
As the general shape develops, begin working toward smaller details.
Step 6: Work the Details
Once the leather has accepted the basic form, you can define edges, grooves, transitions, corners, and recesses.
Useful tools include:
- Your fingers
- Thumbs
- Knuckles
- A bone folder
- Modeling spoons
- Rounded wood tools
- Smooth plastic tools
Avoid anything sharp enough to cut or deeply scratch the wet grain surface unless the design specifically requires it.
A tool that seems harmless on dry leather may leave a permanent mark on wet leather.
Use smooth tools and controlled pressure.
The Secret to Good Wet Forming: Work Gradually
One of the best habits you can develop is to stop trying to achieve the entire shape in one pass.
Shape the leather.
Secure it.
Wait a little.
Come back.
Refine it.
As moisture begins leaving the leather, it may become slightly more resistant—and sometimes easier to define.
You may discover that the sharpest details appear after several rounds of gentle refinement rather than one aggressive forming session.
Leather rewards patience.
Step 7: Hold the Leather in Shape
Once you have the form where you want it, the leather must remain there while drying.
Depending on the project, you might use:
- Clamps
- Spring clamps
- Straps
- Elastic bands
- A second mating mold
- A wooden frame
- Temporary fasteners
- The object’s own hardware
Be careful with clamping pressure.
A clamp can leave a permanent impression in damp leather.
Use scrap leather, wood blocks, cork, or another protective material between the clamp and the project’s visible surface.
Think about clamp placement before getting the leather wet.
You do not want to discover that the only available clamping point is directly in the center of the finished piece.
Two-Part Molds for Sharper Results
Once you understand basic hand forming, a simple two-part mold can make repeated pieces considerably easier.
A common arrangement has:
A male form representing the shape you want the leather to wrap around.
and
A female frame or matching form that presses the leather around it.
The damp leather is placed between them and clamped.
This can produce:
- More consistent shapes
- Sharper transitions
- Repeatable dimensions
- Better control of wrinkles
- Easier batch production
This is especially useful if you eventually make several versions of the same molded product.
But learn the behavior of leather by hand first.
Understanding the material will make every mold you build later more effective.
Step 8: Let the Leather Dry Naturally
Once the leather is shaped and secured, resist the temptation to speed things up.
Avoid placing your project directly against:
- A space heater
- A heat gun
- A hair dryer on high heat
- A radiator
- An oven
- Intense direct heat
Rapid heating can cause uneven drying, shrinkage, excessive hardening, curling, color changes, and other unpredictable results.
Let the leather dry with normal airflow.
Depending on leather thickness, how wet it became, your climate, and the complexity of the form, this may take many hours.
For beginner work, leaving a molded piece secured overnight is often a good habit.
Do not judge dryness only from the outer surface.
Thicker leather can feel dry on the grain side while still containing moisture deeper inside.
Patience here protects all the work you just did.
Can You Leave Leather on the Mold Too Long?
Usually, giving a normal wet-formed vegetable-tanned leather project extra drying time is far less troublesome than removing it too soon.
The bigger concern is the mold itself.
If the mold traps moisture, provides poor airflow, or contains material that reacts poorly with damp leather, leaving everything wet for a prolonged period can create problems.
Make sure the project has reasonable airflow and use clean, appropriate mold materials.
If you are using metal anywhere near damp natural leather, be cautious. Some metals can react with tannins and moisture and create dark discoloration.
Step 9: Remove the Leather From the Mold
When the leather is fully dry, remove clamps or retaining pieces gradually.
Do not pry the piece off aggressively.
Deep molds sometimes grip the object tightly.
If you planned the mold correctly, the leather should release without destroying the form.
This brings us to an important design lesson:
Make Sure Your Mold Can Actually Come Out
Imagine molding leather tightly around a shape that is wider at the bottom than at the top.
Once the leather dries, you may discover that you have effectively locked the mold inside.
Professional mold designs often include draft angles, removable sections, or split molds for exactly this reason.
For your first wet-forming projects, keep mold geometry simple.
Save complicated trapped shapes for later.
Step 10: Trim and Refine
Once the leather is dry, inspect it.
Now may be the time to:
- Trim excess material
- Square the edges
- Sand transitions
- Bevel exposed edges
- Punch final holes
- Add stitching
- Install hardware
- Dye the leather
- Apply finishes
Do not be surprised if the finished molded part does not look impressive the moment it comes off the form.
Trimming and edge finishing often transform it.
A rough flange around a beautifully formed pocket can make the whole thing look unfinished.
Trim that flange cleanly, bevel and burnish the edge, and suddenly the shape looks intentional.
Finishing matters.
Should You Dye Leather Before or After Wet Forming?
For many beginner projects, forming natural vegetable-tanned leather first and dyeing afterward is the simpler approach.
Why?
Wet forming can:
- Alter surface appearance
- Move dye
- Produce water marks
- Stretch pre-finished surfaces
- Affect some applied finishes
Working with natural leather removes one more variable while you learn the forming process.
However, some projects and leather types are successfully formed after coloring.
The important rule is the same one we return to again and again in leathercraft:
Test the complete process on scrap first.
Use scrap from the same hide.
Apply the same dye.
Use the same amount of water.
Form it.
Dry it.
Finish it.
Then decide whether you like the result.
What About Tooling?
Vegetable-tanned leather that responds well to wet forming also responds well to traditional carving and stamping.
That means tooling and forming can work beautifully together.
But order matters.
Tooling can become distorted if a heavily carved area is later stretched aggressively across a mold.
If your design contains decorative tooling, think about where the leather will stretch and compress during forming.
A decorative border near a high-stretch area may not remain perfectly consistent.
For an early project, keep tooling away from the most dramatically formed sections or use restrained designs until you understand how the leather moves.
Wet Forming Wearable Leather
Wearable leather adds another consideration:
comfort and fit.
Bracers are one of the best examples.
A flat bracer can certainly be wrapped around the arm each time it is worn.
But adding a gentle permanent curve makes the piece feel more intentional and helps it naturally follow the body.
The goal is usually not to create a rigid cast of someone’s arm.
You simply want to introduce the general anatomical curve.
A cylindrical or slightly tapered form can work well for this purpose.
For a beginner interested in armor or Renaissance-faire leatherwork, a bracer is an excellent first wet-forming project because it combines manageable geometry with a very visible result.
Our beginner leather bracer pattern was designed around exactly that type of skill progression: tracing, cutting, punching, hardware installation, fitting, finishing, and simple wet forming.
The project gives the technique a purpose rather than asking you to practice shaping leather without knowing what the finished result should become.
Never Wet Form Tight Leather Directly Around Your Body
This deserves its own section.
Do not soak heavy vegetable-tanned leather, tightly secure it directly around your arm, wrist, head, torso, or another body part, and simply wait for it to dry.
Leather can tighten and stiffen as it dries.
Use a suitable form or mold instead.
If you are creating wearable leather, use measurements and fitting tests to develop the correct shape, then form the leather safely away from the body.
Cardboard and paper mockups are extremely useful here.
Fit first.
Form second.
Wet Forming Leather Armor
Wet forming becomes especially useful when you move from flat leather goods into armor-inspired projects.
Leather armor often looks convincing because flat panels have been given intentional curvature.
Examples include:
- Helmets
- Bracers
- Vambraces
- Pauldrons
- Greaves
- Cuirass components
- Decorative guards and reinforcement plates
Even a relatively gentle curve can dramatically change how an armor component looks.
Flat leather tends to look like a cut piece of hide.
Shaped leather begins to look like equipment.
That is one reason larger projects are such effective skill builders.
They teach you that leather construction is not merely about cutting outlines and connecting holes.
You are building in three dimensions.
If armor is where your interests are heading, our guide to making leather Spartan armor explains how shaping fits into the larger construction process.
How to Avoid Wrinkles While Wet Forming
Wrinkles usually appear because the leather has more material in an area than the shape can accommodate smoothly.
Imagine wrapping a flat sheet around a compound curve.
Some areas must stretch.
Others must compress.
You cannot always eliminate every wrinkle simply by pressing harder.
Instead:
Work from the center outward
Establish the main form and gradually move excess material toward edges that will later be trimmed.
Use gentle tension
A little controlled stretching can help, but excessive pulling can thin or distort the leather.
Smooth repeatedly
Work small changes over time rather than forcing one large correction.
Adjust your pattern
Sometimes the problem is geometry, not technique.
If a shape consistently produces large folds, the pattern may need darts, separate panels, relief cuts, or a different construction method.
Wet forming is powerful.
It cannot repeal geometry.
What If the Leather Springs Back?
A little spring-back is normal.
Leather does not always remain at precisely the angle it had while clamped.
If the piece relaxes more than expected, several things may have happened:
- It was removed before fully dry
- The leather was not evenly conditioned
- The material is not well suited to wet forming
- The desired bend was too extreme
- The piece was not held securely enough
- The leather needs to be formed slightly past the final intended curve
That last technique is called overforming.
If experience tells you a piece relaxes slightly after release, you can sometimes form it a little beyond the final desired shape so that it settles where you want it.
Do this conservatively.
You are learning the behavior of a natural material, not programming a machine.
Why Did My Leather Get Dark Spots?
Wet vegetable-tanned leather is extremely receptive to contamination.
Dark marks may come from:
- Dirty work surfaces
- Metal particles
- Rust
- Certain metal clamps
- Contaminated water
- Dirty hands
- Adhesive
- Oils
- Previously used sponges or towels
Cleanliness matters much more when leather is damp.
Before wet forming light natural veg tan, clean the work surface and your hands.
Use clean water and clean tools.
A beautiful molded piece with one mysterious black fingerprint across the front is a lesson most leatherworkers only need once.
Why Is My Leather Cracking?
Cracking can have several causes.
The leather may be:
- Extremely dry
- Low quality
- Heavily finished
- Unsuitable for the degree of forming
- Being bent too sharply
- Forced before moisture has penetrated properly
If dry leather resists a curve, do not simply increase force.
That resistance is telling you something.
Stop.
Check the moisture.
Check the radius.
Check the leather.
Leathercraft is easier when you listen to the material rather than trying to overpower it.
Common Beginner Wet-Forming Mistakes
1. Using the Wrong Leather
Not every leather wants to retain a molded shape.
Start with vegetable-tanned leather when learning traditional wet forming.
2. Using Too Much Water
More water does not automatically mean more formability.
Aim for controlled moisture.
3. Starting Before the Water Penetrates
Give the leather time to condition evenly.
4. Pulling Too Hard
Distribute your pressure instead of stretching one small area aggressively.
5. Using a Rough Mold
Every defect in the mold has a chance to become a defect in the leather.
6. Forgetting Clamp Marks
Protect visible leather from clamp jaws and concentrated pressure.
7. Removing the Piece Too Soon
Surface-dry is not necessarily fully dry.
8. Drying With Excessive Heat
Fast is not always better.
Let the leather dry naturally whenever possible.
9. Cutting Away All Your Extra Material Before Forming
Leave trimming allowance where the construction permits it.
10. Skipping the Scrap Test
Scrap leather exists so the finished project does not have to become the experiment.
An Easy Wet-Forming Practice Exercise
Before attempting a complicated molded case, try this exercise.
Take a piece of 4–6 oz vegetable-tanned scrap roughly several inches square.
Find a clean wooden block with slightly rounded edges.
Wet and condition the leather.
Lay it over one corner of the block.
Use your fingers to begin forming the leather down the sides.
Pay attention to what happens.
Where does the leather stretch?
Where does it bunch?
How does the corner sharpen as you continue working?
Secure it and let it dry.
The next day, remove it.
You have now learned more about wet forming than you could learn by simply reading another ten pages about it.
Leathercraft is a hands-on skill.
Eventually, the leather needs to reach the bench.
Beginner Projects That Teach Wet Forming Well
Once you understand the basic exercise, choose a real project.
Good next steps include:
Leather Bracer
A gentle curve, relatively little leather, and a wearable result make bracers excellent practice.
Valet Tray
Introduces controlled corners and dimensional shaping without requiring extreme depth.
Molded Pocket
Teaches deeper forming around a block or form.
Small Tool Case
Introduces fitting something to an actual object.
Leather Mask
Introduces compound curves and more organic shaping.
Armor Components
Bracers, pauldrons, helmets, and related pieces help you understand how several individually shaped components can work together.
You can browse the Old Line Crafts & Designs leathercraft patterns when you’re ready to find a project that turns the technique into something useful, wearable, or worth displaying.
Choose a project that adds one new challenge, not six.
That is how you build skills without making the hobby unnecessarily frustrating.
Wet Forming Is About Learning the Material
This may be the most important lesson in the entire guide.
There is no timer that can tell you exactly when every piece of leather is ready.
There is no universal amount of water that works for every hide.
There is no single drying time that applies to every weight, climate, and mold.
Leather is a natural material.
One hide can feel different from another.
Different areas of the same hide can behave differently.
Thickness varies.
Temper varies.
Absorption varies.
That variability is not a defect in leathercraft.
It is part of the craft.
Over time, your hands begin to recognize when leather is ready.
You feel how much resistance is appropriate.
You learn how far a curve can be pushed.
You recognize when a corner needs another few minutes of attention.
That knowledge cannot be downloaded.
It is earned one project at a time.
Keep a Few Notes
Here is a simple habit that can dramatically shorten your learning curve.
When you finish a wet-formed project, write down:
- Leather type
- Leather weight
- Forming method
- Approximate moisture method
- Mold used
- What worked
- What did not
- How much spring-back occurred
- Anything you would change next time
You do not need a complicated workshop log.
A few sentences are enough.
Six months later, those notes become your personal reference manual.
The Goal Is Not Perfection
Your first wet-formed piece may not have perfectly symmetrical corners.
You may leave a thumb mark.
One edge may stretch slightly more than the other.
That is okay.
Make another one.
On the second piece, you will already know more about moisture than you did on the first.
On the third, your hands will begin anticipating where wrinkles appear.
By the fifth, you may find yourself adjusting the mold or pattern because you now understand why the leather behaved the way it did.
That progression is leathercraft.
You are not simply learning how to follow steps.
You are learning how material, pattern, tools, and technique interact.
Where to Go Next
If you have never wet formed leather before, do not begin with the most complicated object you can imagine.
Take a piece of scrap vegetable-tanned leather.
Wet it.
Give the moisture time to penetrate.
Wrap it around a simple form.
Shape it with your fingers.
Hold it there.
Let it dry.
Then remove the mold and look at what happened.
You just turned a flat piece of leather into a three-dimensional object using little more than water and your hands.
Once you understand that process, a surprising number of leather projects suddenly make more sense.
A bracer is no longer simply a flat pattern.
A pouch is no longer simply two pieces stitched together.
A helmet is no longer a collection of strange curved panels.
You begin seeing leather as a material that can be cut, stitched, folded, stretched, compressed, curved, and shaped.
That is when leathercraft becomes especially interesting.
At Old Line Crafts & Designs, our goal is to create original leathercraft patterns that give makers somewhere useful to apply those skills—from manageable beginner projects to larger builds that introduce more complex construction.
Learn one technique.
Use it in a project.
Then build something a little more ambitious.
That is how a beginner becomes a leatherworker.
Crafted by hand. Built to last.
Old Line Crafts & Designs — Original Leathercraft Patterns. Made for Makers.
