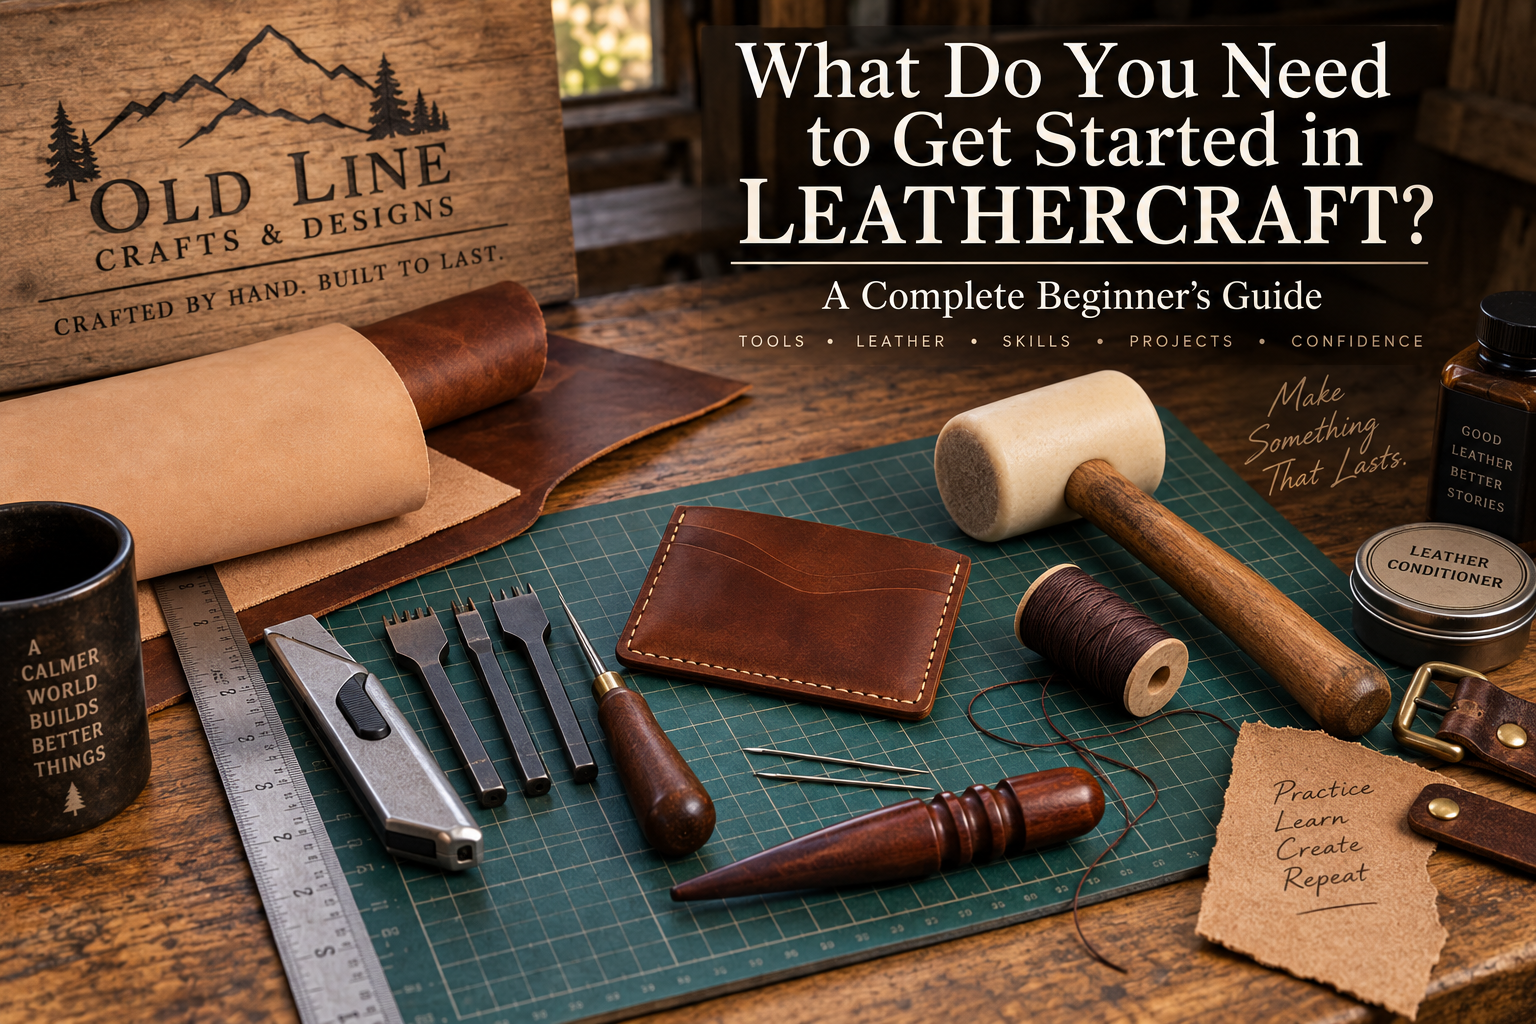
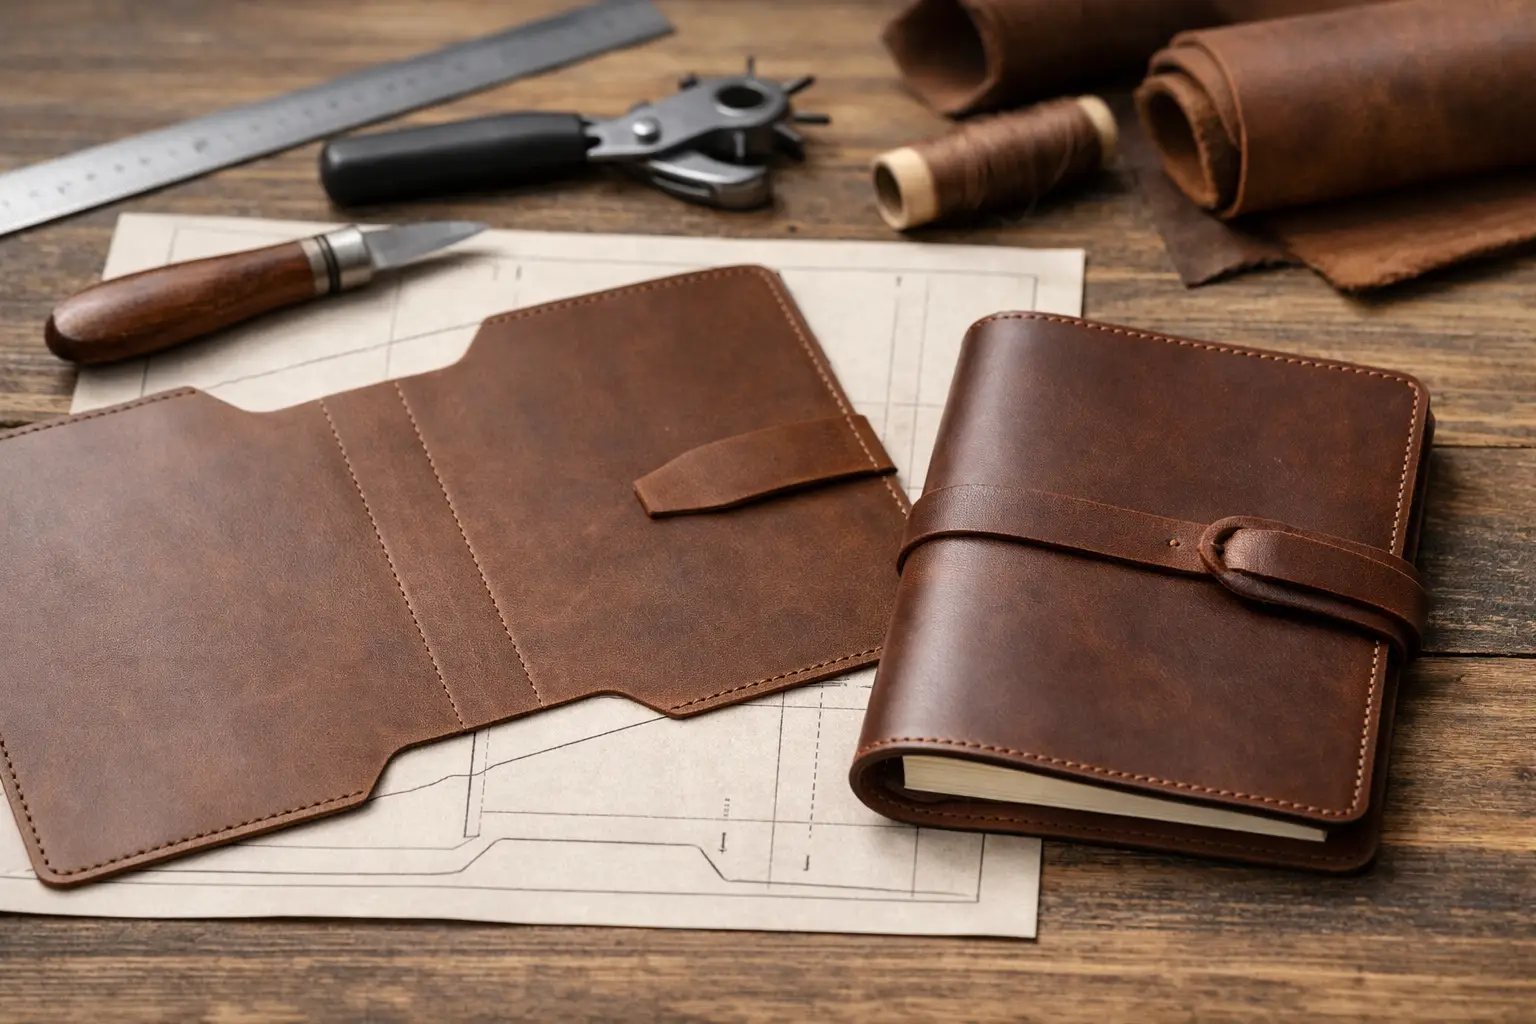
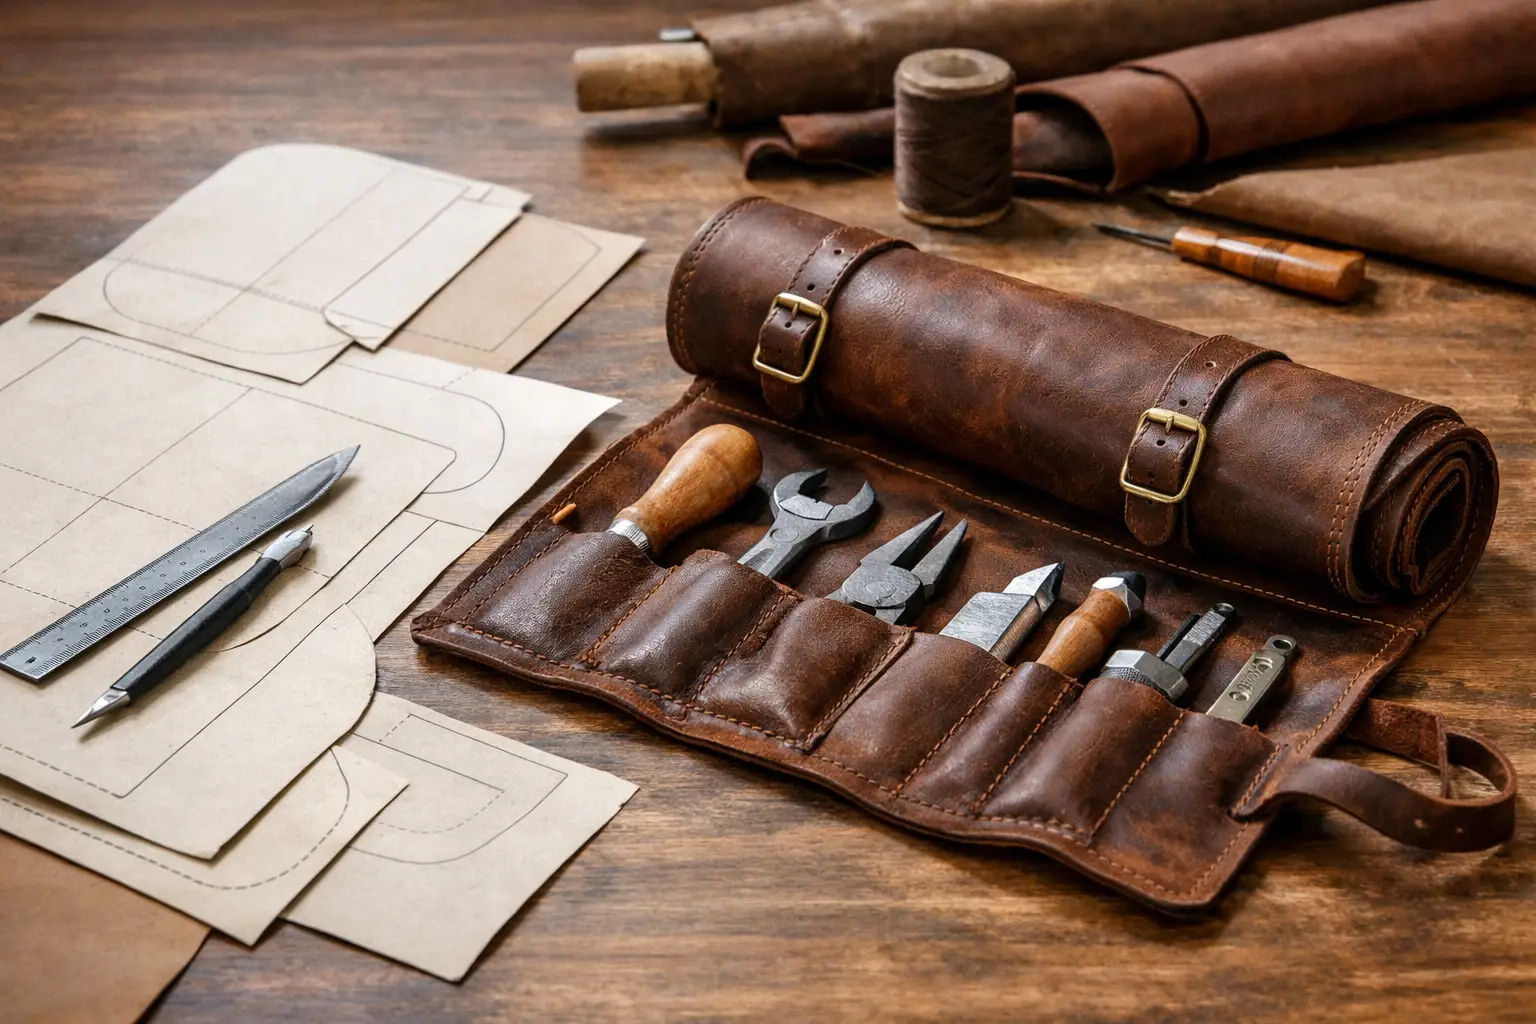
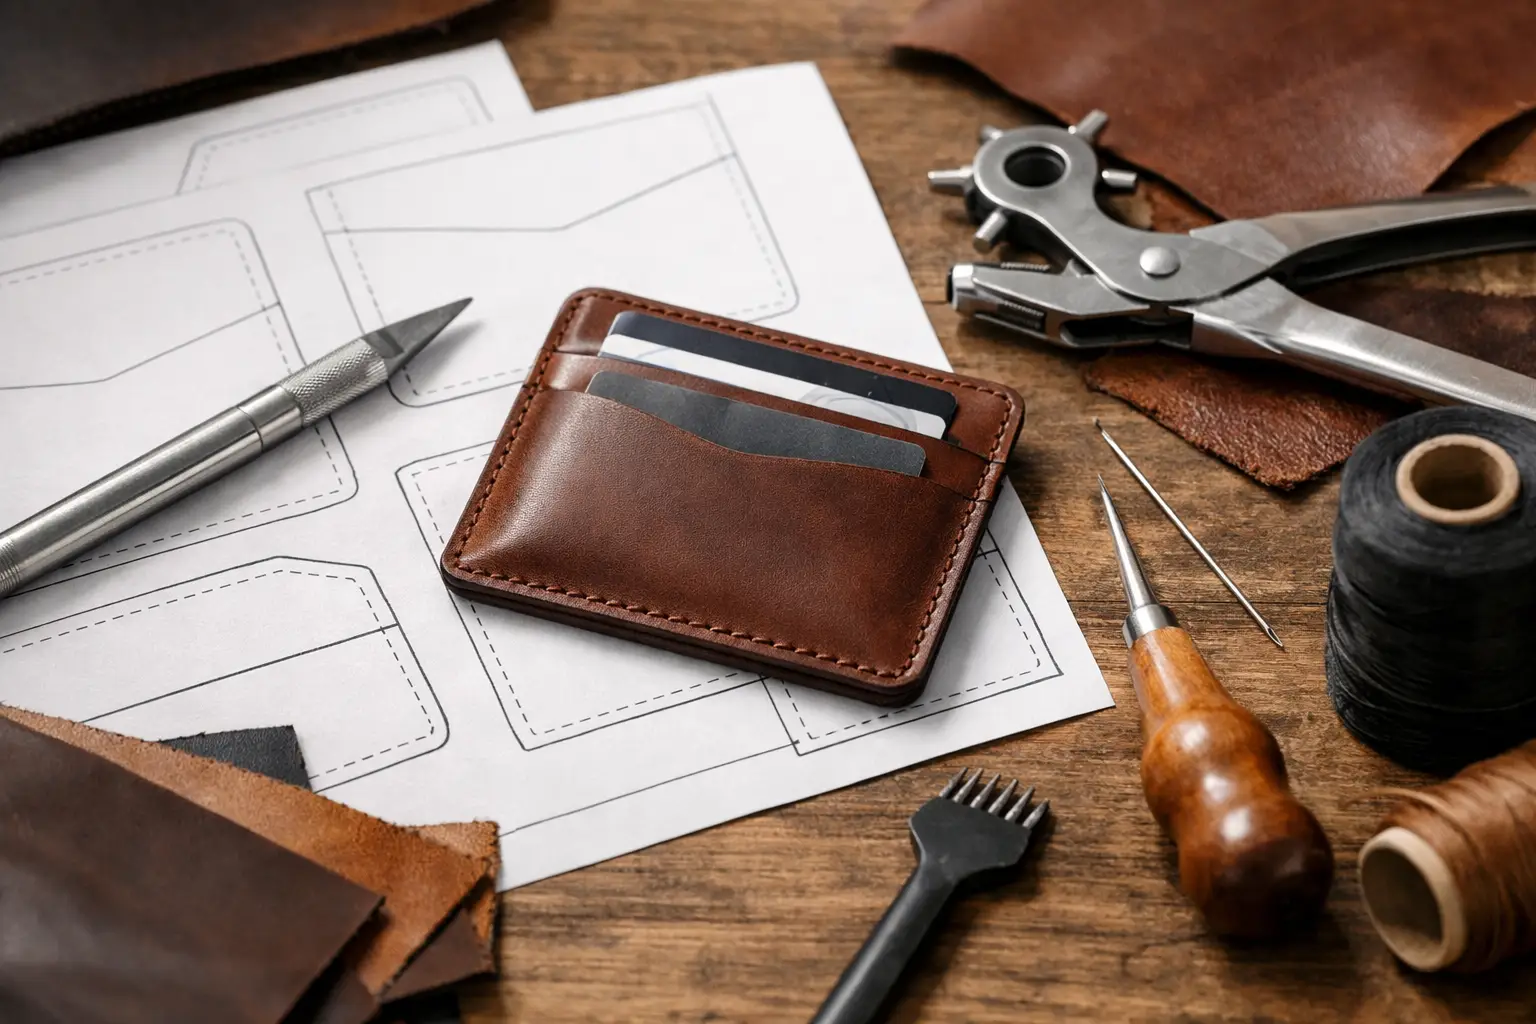
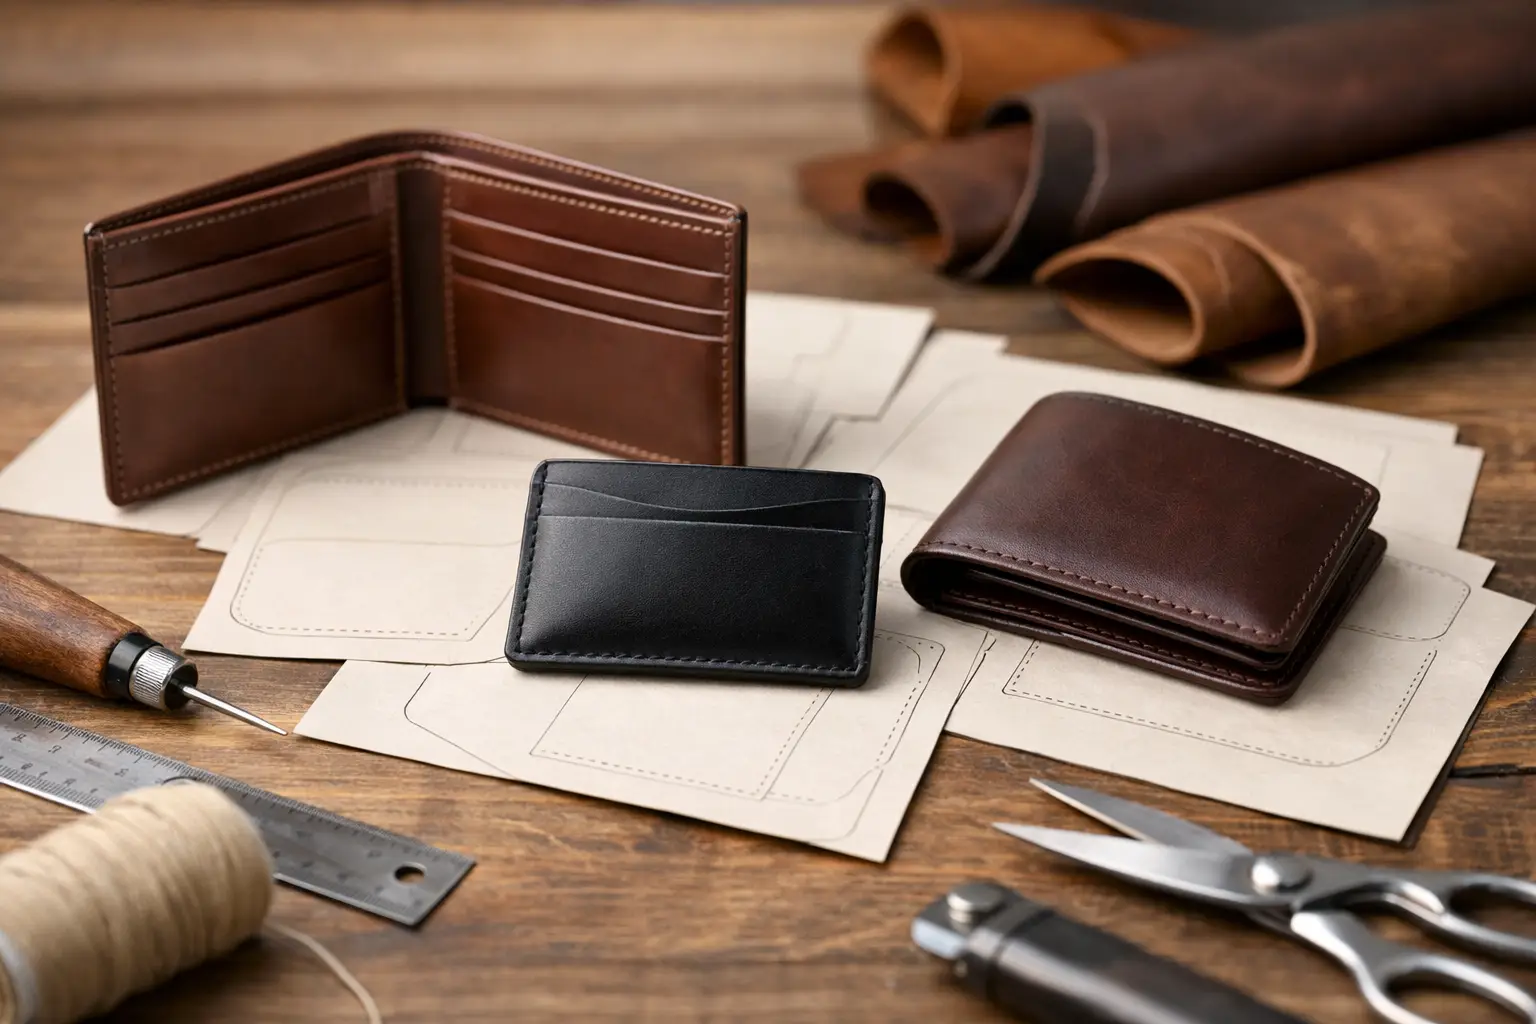
Leathercraft is one of those hands-on skills that becomes more rewarding with every project. You do not need a full workshop to begin. A small set of dependable tools, a piece of vegetable-tanned leather, and a clear pattern are enough to make your first useful item.
Choose Beginner-Friendly Leather
For early projects, choose vegetable-tanned leather in a manageable weight. It cuts cleanly, accepts tooling and dye well, and gives you a chance to learn how leather responds to folding, stitching, and finishing. Start with a small project such as a key fob, card holder, or simple pouch so you can focus on clean fundamentals.
Build a Basic Tool Kit
Sharp utility knife or craft knife
Metal ruler and cutting mat
Scratch awl for marking
Stitching chisels and needles
Waxed thread
Edge beveler, sandpaper, and burnishing cloth
Buy the best version of the tools you will use often, but keep your first kit practical. Good lighting, a stable work surface, and a sharp blade will make a bigger difference than a crowded bench.
Let the Pattern Guide You
A well-designed PDF pattern takes the guesswork out of layout and sizing. Print it at 100 percent, confirm the test square before cutting, and transfer every stitch line and fold mark carefully. Take your time at the cutting stage: accurate pieces make assembly much easier.
Measure twice, cut once, and enjoy the process. Every project teaches you something useful for the next one.
Practice the Core Skills
Focus on a few repeatable skills: straight cuts, even stitch spacing, consistent saddle stitching, smooth edges, and tidy finishing. Do not worry if your first piece is not perfect. Keep it, note what you would change, and use that knowledge on your next build.
Ready for Your First Build?
Explore our original PDF leathercraft patterns for approachable projects you can download and make at your own pace.
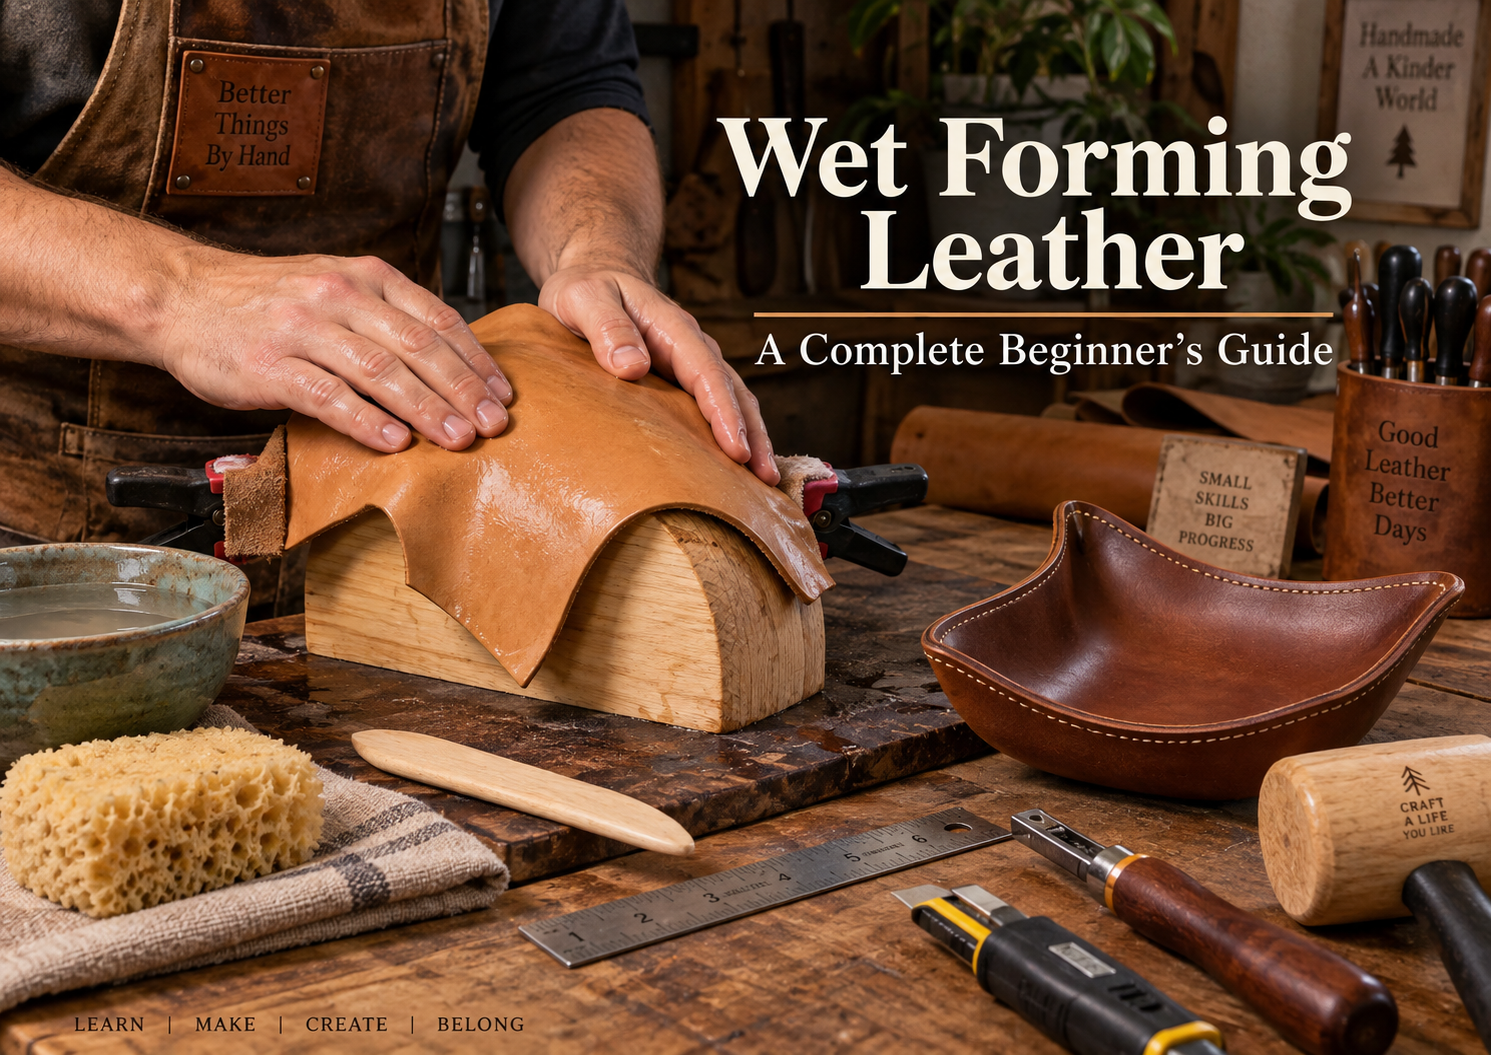
One of the most interesting things about leather is that it does not have to remain flat.
With the right leather, a little water, and some controlled pressure, you can turn an ordinary piece of hide into a curved bracer, fitted pouch, molded case, shaped armor panel, tray, sheath, mask, or countless other three-dimensional objects.
That process is called wet forming, sometimes called wet molding.
It sounds complicated when you first encounter it.
It isn’t.
Wet forming is actually one of the most approachable traditional leatherworking techniques a beginner can learn because you do not need expensive machinery or a workshop full of specialized equipment.
What you do need is an understanding of how leather responds to moisture.
And patience.
Quite a bit of patience.
In this guide, we’ll cover what wet forming is, which leather works best, how much water to use, how to make or choose a mold, how to shape leather by hand, how long to let it dry, common mistakes to avoid, and several projects that are particularly good for learning the technique.
What Is Wet Forming Leather?
Wet forming is the process of adding moisture to leather so that its fibers become temporarily more flexible, shaping the leather into a new form, and then allowing it to dry while held in that shape.
Once dry, suitable leather will retain much of the new shape.
That simple behavior opens an enormous range of possibilities.
A flat piece of leather can become:
A curved wrist bracer
A structured pouch
A fitted knife or tool sheath
A molded pocket
A glasses case
A dice cup
A tray
A mask
A helmet component
Shoulder armor
A bottle or flask cover
A fitted case for an everyday-carry item
The basic sequence is surprisingly simple:
Wet → Wait → Shape → Hold → Dry → Finish
Learning what happens during each of those stages is what turns wet forming from an experiment into a repeatable leatherworking skill.
Why Does Wet Leather Hold a Shape?
Leather is made from a network of natural fibers.
When suitable leather absorbs water, those fibers become more flexible and can move relative to one another more easily.
That is why damp vegetable-tanned leather can bend, stretch, compress, and accept shapes that dry leather would resist.
As the leather dries, the fibers settle into their new arrangement.
The important idea for a beginner is this:
Water does not simply make the leather softer. It temporarily makes the structure easier to reshape.
That is why moisture control is so important.
Too little water and the leather fights you.
Too much water and the leather can become excessively soft, stretchy, marked, or difficult to control.
The goal is not to drown the leather.
The goal is to get enough moisture into the fibers to make them workable.
What Leather Is Best for Wet Forming?
For traditional wet forming, vegetable-tanned leather is usually the best starting point.
Vegetable-tanned leather—often simply called veg tan—responds particularly well to moisture and is commonly used for leather that will be shaped, carved, stamped, dyed, beveled, or burnished.
If you are learning wet forming for the first time, natural or lightly finished vegetable-tanned leather gives you one of the most predictable materials to practice with.
What About Chrome-Tanned Leather?
Chrome-tanned leather is excellent for many leathercraft projects, particularly bags, upholstery, garments, linings, and soft goods.
But most chrome-tanned leathers do not retain molded shapes in quite the same way as traditional vegetable-tanned leather.
Some can certainly be shaped to a degree, but if your goal is a firm, defined three-dimensional form, vegetable-tanned leather is generally the easier material to learn with.
What Thickness of Leather Should You Wet Form?
There is no single correct thickness.
The right choice depends on the object you are making and how much structure the finished piece needs.
As a rough starting point:
Leather Weight
Approx. Thickness
Wet-Forming Uses
3–4 oz
1.2–1.6 mm
Small molded pockets, lightweight cases, decorative shapes
4–5 oz
1.6–2.0 mm
Small cases, trays, masks, light structured pieces
5–6 oz
2.0–2.4 mm
Bracers, pouches, sheaths, many general molded projects
6–8 oz
2.4–3.2 mm
Heavy bracers, armor pieces, substantial cases
8 oz+
3.2 mm+
Heavy structural projects and specialized armor components
Thinner leather generally becomes easier to manipulate, but it may not hold as much structure.
Heavier leather can produce a stronger finished form but requires more effort to shape.
If you are completely new to wet forming, leather around the middle of the range is often easier to learn with than extremely thin or extremely heavy material.
One reason wet forming is so accessible is that the basic tool list is short.
You may already own most of what you need.
Basic Wet-Forming Kit
For a simple beginner project, gather:
Vegetable-tanned leather
Clean water
A bowl, tray, spray bottle, or sponge
The object or mold you want to form around
Your normal leather cutting tools
Smooth-edged clamps, straps, or another way to hold the leather
Scrap leather, cork, wood, or other padding for clamp points
A bone folder, modeling spoon, or smooth burnishing tool
Clean towels
A well-ventilated place for the leather to dry
For many projects, your fingers are among the most useful shaping tools you have.
You do not need a hydraulic press.
You do not need a vacuum former.
You do not need a set of expensive commercial molds.
Those can become useful if you eventually produce repeated molded pieces, but they are not necessary to understand the technique.
Your Most Important Tool Is the Mold
When beginners hear the word mold, they sometimes picture an expensive machined form.
A mold can be much simpler than that.
It is merely the shape that the leather is being asked to follow.
Depending on the project, your mold might be:
A wooden block
A section of PVC pipe
A dowel
A bowl
A glass jar
A bottle
A rounded wooden form
A purpose-built two-piece wooden mold
A plastic object
A protected version of the actual object the case will hold
For a leather bracer, for example, a suitably sized cylinder can provide the basic curvature.
For a molded pouch, you might make a simple wooden block shaped to the desired internal dimensions.
For a tray, a dish or wooden form may provide the curve.
The mold does not need to be beautiful.
It needs to be:
Smooth, strong, properly sized, and able to tolerate moisture.
A Beginner Tip: Round the Corners of Your Mold
Very sharp mold corners can create problems.
Leather has thickness.
When you force heavy leather around an extremely sharp 90-degree corner, the outside surface must stretch while material on the inside compresses.
That can create wrinkles, stretch marks, or excessive stress.
Slightly rounded corners are often more forgiving, particularly when you are learning.
You can still produce a crisp-looking molded piece without asking the leather to behave like sheet metal.
If you are making your own wooden mold, sand it thoroughly.
Any dent, splinter, ridge, screw head, or rough texture in the mold can potentially transfer to damp leather.
Wet leather remembers things.
Sometimes more faithfully than we would like.
Before You Wet the Leather: Do a Dry Test
Do not make the first fit test after the leather is wet.
Place the dry leather over or around the mold first.
Ask:
Is the blank large enough?
Is there enough material around the edges?
Where will the leather need to stretch?
Where might wrinkles develop?
Where will clamps go?
Will the mold come back out after the leather dries?
Is there enough allowance for trimming?
That last question is especially important.
Wet forming can move material in ways that are difficult to predict perfectly.
Whenever possible, leave a little extra leather around a molded area and trim the final outline after forming.
It is much easier to remove leather later than add it back.
Should You Cut the Final Shape Before or After Wet Forming?
It depends on the project.
For something like a bracer, armor panel, or shaped strap, you may cut the finished outline first and then form it.
For a deep molded pocket, sheath, case, or pouch, leaving extra material around the perimeter can be helpful.
You can mold the leather first, allow it to dry, and then trim the flange or surrounding leather to its final dimensions.
A good pattern will usually tell you which approach the construction expects.
This is one of the benefits of learning a technique within an actual project: the pattern gives the technique a purpose.
Step 1: Prepare the Leather
Start with your leather cut roughly to the required size.
If the project includes holes or other details, check the instructions before punching them.
Some holes should be created before forming.
Others are easier to locate after the leather has been shaped.
Likewise, decorative tooling may occur before or after certain forming operations depending on the design.
There is no universal order for every project.
Read the entire construction sequence before you begin.
If you are using a downloadable pattern, also make sure it has been printed at the correct scale before transferring anything to leather.
Step 2: Add Water
There are several ways to introduce moisture.
For small or moderate pieces you can:
Wipe the leather repeatedly with a damp sponge
Mist it with a spray bottle
Briefly immerse it in clean water
Wet both sides evenly when appropriate
The exact method is less important than achieving reasonably even moisture through the area being formed.
Watch the leather as it absorbs water.
Natural vegetable-tanned leather usually darkens when wet.
At first, the surface may look obviously saturated.
Then the moisture begins moving deeper into the leather.
Step 3: Do Not Start Forming Immediately
This is one of the easiest beginner mistakes.
You wet the leather.
It becomes soft.
So you immediately start pulling on it.
Instead, give the moisture a little time to distribute through the fibers.
Leatherworkers often refer to controlling moisture in leather as casing.
What you want is leather that is pliable throughout the thickness rather than simply dripping wet on the surface.
The ideal feel is something you will learn through experience.
The leather should bend and respond noticeably more easily than when dry while still feeling like leather—not like a soaked sponge.
How Wet Is Too Wet?
If water is pouring from the leather while you are trying to shape it, you probably have more surface water than you need.
Excessively wet leather can:
Stretch too easily
Lose definition
Pick up fingerprints
Develop unwanted marks
Become difficult to control
Take substantially longer to dry
If the leather feels nearly as stiff as it did when dry, you may need more moisture or more time for the moisture to penetrate.
The correct condition falls somewhere between those extremes.
This is why scrap leather is so valuable.
Before wet forming the important piece, take a scrap from the same hide and wet it.
Bend it.
Press it.
Stretch it.
Let it dry over something curved.
That ten-minute experiment begins teaching you how that particular leather behaves.
Step 4: Place the Leather Over the Mold
Position the damp leather carefully.
If the project has a centerline, align it.
If one edge must remain straight, establish that edge first.
Do not casually pull the leather into position and assume you can correct everything later.
Wet leather stretches.
Once a section has been stretched noticeably, moving it back does not necessarily restore the original geometry.
Work deliberately.
For symmetrical projects, constantly compare the left and right sides.
Step 5: Start With Broad Curves
Do not immediately attack every small corner and detail.
Begin by getting the leather to accept the general shape.
Use your palms, fingers, and thumbs to ease the material over the broad curves.
Think of the process as gradually persuading the leather into position.
Avoid pulling violently on one point.
Instead, distribute your pressure.
Move around the piece.
Push.
Smooth.
Return.
Push again.
As the general shape develops, begin working toward smaller details.
Step 6: Work the Details
Once the leather has accepted the basic form, you can define edges, grooves, transitions, corners, and recesses.
Useful tools include:
Your fingers
Thumbs
Knuckles
A bone folder
Modeling spoons
Rounded wood tools
Smooth plastic tools
Avoid anything sharp enough to cut or deeply scratch the wet grain surface unless the design specifically requires it.
A tool that seems harmless on dry leather may leave a permanent mark on wet leather.
Use smooth tools and controlled pressure.
The Secret to Good Wet Forming: Work Gradually
One of the best habits you can develop is to stop trying to achieve the entire shape in one pass.
Shape the leather.
Secure it.
Wait a little.
Come back.
Refine it.
As moisture begins leaving the leather, it may become slightly more resistant—and sometimes easier to define.
You may discover that the sharpest details appear after several rounds of gentle refinement rather than one aggressive forming session.
Leather rewards patience.
Step 7: Hold the Leather in Shape
Once you have the form where you want it, the leather must remain there while drying.
Depending on the project, you might use:
Clamps
Spring clamps
Straps
Elastic bands
A second mating mold
A wooden frame
Temporary fasteners
The object’s own hardware
Be careful with clamping pressure.
A clamp can leave a permanent impression in damp leather.
Use scrap leather, wood blocks, cork, or another protective material between the clamp and the project’s visible surface.
Think about clamp placement before getting the leather wet.
You do not want to discover that the only available clamping point is directly in the center of the finished piece.
Two-Part Molds for Sharper Results
Once you understand basic hand forming, a simple two-part mold can make repeated pieces considerably easier.
A common arrangement has:
A male form representing the shape you want the leather to wrap around.
and
A female frame or matching form that presses the leather around it.
The damp leather is placed between them and clamped.
This can produce:
More consistent shapes
Sharper transitions
Repeatable dimensions
Better control of wrinkles
Easier batch production
This is especially useful if you eventually make several versions of the same molded product.
But learn the behavior of leather by hand first.
Understanding the material will make every mold you build later more effective.
Step 8: Let the Leather Dry Naturally
Once the leather is shaped and secured, resist the temptation to speed things up.
Avoid placing your project directly against:
A space heater
A heat gun
A hair dryer on high heat
A radiator
An oven
Intense direct heat
Rapid heating can cause uneven drying, shrinkage, excessive hardening, curling, color changes, and other unpredictable results.
Let the leather dry with normal airflow.
Depending on leather thickness, how wet it became, your climate, and the complexity of the form, this may take many hours.
For beginner work, leaving a molded piece secured overnight is often a good habit.
Do not judge dryness only from the outer surface.
Thicker leather can feel dry on the grain side while still containing moisture deeper inside.
Patience here protects all the work you just did.
Can You Leave Leather on the Mold Too Long?
Usually, giving a normal wet-formed vegetable-tanned leather project extra drying time is far less troublesome than removing it too soon.
The bigger concern is the mold itself.
If the mold traps moisture, provides poor airflow, or contains material that reacts poorly with damp leather, leaving everything wet for a prolonged period can create problems.
Make sure the project has reasonable airflow and use clean, appropriate mold materials.
If you are using metal anywhere near damp natural leather, be cautious. Some metals can react with tannins and moisture and create dark discoloration.
Step 9: Remove the Leather From the Mold
When the leather is fully dry, remove clamps or retaining pieces gradually.
Do not pry the piece off aggressively.
Deep molds sometimes grip the object tightly.
If you planned the mold correctly, the leather should release without destroying the form.
This brings us to an important design lesson:
Make Sure Your Mold Can Actually Come Out
Imagine molding leather tightly around a shape that is wider at the bottom than at the top.
Once the leather dries, you may discover that you have effectively locked the mold inside.
Professional mold designs often include draft angles, removable sections, or split molds for exactly this reason.
For your first wet-forming projects, keep mold geometry simple.
Save complicated trapped shapes for later.
Step 10: Trim and Refine
Once the leather is dry, inspect it.
Now may be the time to:
Trim excess material
Square the edges
Sand transitions
Bevel exposed edges
Punch final holes
Add stitching
Install hardware
Dye the leather
Apply finishes
Do not be surprised if the finished molded part does not look impressive the moment it comes off the form.
Trimming and edge finishing often transform it.
A rough flange around a beautifully formed pocket can make the whole thing look unfinished.
Trim that flange cleanly, bevel and burnish the edge, and suddenly the shape looks intentional.
Finishing matters.
Should You Dye Leather Before or After Wet Forming?
For many beginner projects, forming natural vegetable-tanned leather first and dyeing afterward is the simpler approach.
Why?
Wet forming can:
Alter surface appearance
Move dye
Produce water marks
Stretch pre-finished surfaces
Affect some applied finishes
Working with natural leather removes one more variable while you learn the forming process.
However, some projects and leather types are successfully formed after coloring.
The important rule is the same one we return to again and again in leathercraft:
Test the complete process on scrap first.
Use scrap from the same hide.
Apply the same dye.
Use the same amount of water.
Form it.
Dry it.
Finish it.
Then decide whether you like the result.
What About Tooling?
Vegetable-tanned leather that responds well to wet forming also responds well to traditional carving and stamping.
That means tooling and forming can work beautifully together.
But order matters.
Tooling can become distorted if a heavily carved area is later stretched aggressively across a mold.
If your design contains decorative tooling, think about where the leather will stretch and compress during forming.
A decorative border near a high-stretch area may not remain perfectly consistent.
For an early project, keep tooling away from the most dramatically formed sections or use restrained designs until you understand how the leather moves.
Wet Forming Wearable Leather
Wearable leather adds another consideration:
comfort and fit.
Bracers are one of the best examples.
A flat bracer can certainly be wrapped around the arm each time it is worn.
But adding a gentle permanent curve makes the piece feel more intentional and helps it naturally follow the body.
The goal is usually not to create a rigid cast of someone’s arm.
You simply want to introduce the general anatomical curve.
A cylindrical or slightly tapered form can work well for this purpose.
For a beginner interested in armor or Renaissance-faire leatherwork, a bracer is an excellent first wet-forming project because it combines manageable geometry with a very visible result.
Our beginner leather bracer pattern was designed around exactly that type of skill progression: tracing, cutting, punching, hardware installation, fitting, finishing, and simple wet forming.
The project gives the technique a purpose rather than asking you to practice shaping leather without knowing what the finished result should become.
Never Wet Form Tight Leather Directly Around Your Body
This deserves its own section.
Do not soak heavy vegetable-tanned leather, tightly secure it directly around your arm, wrist, head, torso, or another body part, and simply wait for it to dry.
Leather can tighten and stiffen as it dries.
Use a suitable form or mold instead.
If you are creating wearable leather, use measurements and fitting tests to develop the correct shape, then form the leather safely away from the body.
Cardboard and paper mockups are extremely useful here.
Fit first.
Form second.
Wet Forming Leather Armor
Wet forming becomes especially useful when you move from flat leather goods into armor-inspired projects.
Leather armor often looks convincing because flat panels have been given intentional curvature.
Examples include:
Helmets
Bracers
Vambraces
Pauldrons
Greaves
Cuirass components
Decorative guards and reinforcement plates
Even a relatively gentle curve can dramatically change how an armor component looks.
Flat leather tends to look like a cut piece of hide.
Shaped leather begins to look like equipment.
That is one reason larger projects are such effective skill builders.
They teach you that leather construction is not merely about cutting outlines and connecting holes.
You are building in three dimensions.
If armor is where your interests are heading, our guide to making leather Spartan armor explains how shaping fits into the larger construction process.
How to Avoid Wrinkles While Wet Forming
Wrinkles usually appear because the leather has more material in an area than the shape can accommodate smoothly.
Imagine wrapping a flat sheet around a compound curve.
Some areas must stretch.
Others must compress.
You cannot always eliminate every wrinkle simply by pressing harder.
Instead:
Work from the center outward
Establish the main form and gradually move excess material toward edges that will later be trimmed.
Use gentle tension
A little controlled stretching can help, but excessive pulling can thin or distort the leather.
Smooth repeatedly
Work small changes over time rather than forcing one large correction.
Adjust your pattern
Sometimes the problem is geometry, not technique.
If a shape consistently produces large folds, the pattern may need darts, separate panels, relief cuts, or a different construction method.
Wet forming is powerful.
It cannot repeal geometry.
What If the Leather Springs Back?
A little spring-back is normal.
Leather does not always remain at precisely the angle it had while clamped.
If the piece relaxes more than expected, several things may have happened:
It was removed before fully dry
The leather was not evenly conditioned
The material is not well suited to wet forming
The desired bend was too extreme
The piece was not held securely enough
The leather needs to be formed slightly past the final intended curve
That last technique is called overforming.
If experience tells you a piece relaxes slightly after release, you can sometimes form it a little beyond the final desired shape so that it settles where you want it.
Do this conservatively.
You are learning the behavior of a natural material, not programming a machine.
Why Did My Leather Get Dark Spots?
Wet vegetable-tanned leather is extremely receptive to contamination.
Dark marks may come from:
Dirty work surfaces
Metal particles
Rust
Certain metal clamps
Contaminated water
Dirty hands
Adhesive
Oils
Previously used sponges or towels
Cleanliness matters much more when leather is damp.
Before wet forming light natural veg tan, clean the work surface and your hands.
Use clean water and clean tools.
A beautiful molded piece with one mysterious black fingerprint across the front is a lesson most leatherworkers only need once.
Why Is My Leather Cracking?
Cracking can have several causes.
The leather may be:
Extremely dry
Low quality
Heavily finished
Unsuitable for the degree of forming
Being bent too sharply
Forced before moisture has penetrated properly
If dry leather resists a curve, do not simply increase force.
That resistance is telling you something.
Stop.
Check the moisture.
Check the radius.
Check the leather.
Leathercraft is easier when you listen to the material rather than trying to overpower it.
Common Beginner Wet-Forming Mistakes
1. Using the Wrong Leather
Not every leather wants to retain a molded shape.
Start with vegetable-tanned leather when learning traditional wet forming.
2. Using Too Much Water
More water does not automatically mean more formability.
Aim for controlled moisture.
3. Starting Before the Water Penetrates
Give the leather time to condition evenly.
4. Pulling Too Hard
Distribute your pressure instead of stretching one small area aggressively.
5. Using a Rough Mold
Every defect in the mold has a chance to become a defect in the leather.
6. Forgetting Clamp Marks
Protect visible leather from clamp jaws and concentrated pressure.
7. Removing the Piece Too Soon
Surface-dry is not necessarily fully dry.
8. Drying With Excessive Heat
Fast is not always better.
Let the leather dry naturally whenever possible.
9. Cutting Away All Your Extra Material Before Forming
Leave trimming allowance where the construction permits it.
10. Skipping the Scrap Test
Scrap leather exists so the finished project does not have to become the experiment.
An Easy Wet-Forming Practice Exercise
Before attempting a complicated molded case, try this exercise.
Take a piece of 4–6 oz vegetable-tanned scrap roughly several inches square.
Find a clean wooden block with slightly rounded edges.
Wet and condition the leather.
Lay it over one corner of the block.
Use your fingers to begin forming the leather down the sides.
Pay attention to what happens.
Where does the leather stretch?
Where does it bunch?
How does the corner sharpen as you continue working?
Secure it and let it dry.
The next day, remove it.
You have now learned more about wet forming than you could learn by simply reading another ten pages about it.
Leathercraft is a hands-on skill.
Eventually, the leather needs to reach the bench.
Beginner Projects That Teach Wet Forming Well
Once you understand the basic exercise, choose a real project.
Good next steps include:
Leather Bracer
A gentle curve, relatively little leather, and a wearable result make bracers excellent practice.
Valet Tray
Introduces controlled corners and dimensional shaping without requiring extreme depth.
Molded Pocket
Teaches deeper forming around a block or form.
Small Tool Case
Introduces fitting something to an actual object.
Leather Mask
Introduces compound curves and more organic shaping.
Armor Components
Bracers, pauldrons, helmets, and related pieces help you understand how several individually shaped components can work together.
Choose a project that adds one new challenge, not six.
That is how you build skills without making the hobby unnecessarily frustrating.
Wet Forming Is About Learning the Material
This may be the most important lesson in the entire guide.
There is no timer that can tell you exactly when every piece of leather is ready.
There is no universal amount of water that works for every hide.
There is no single drying time that applies to every weight, climate, and mold.
Leather is a natural material.
One hide can feel different from another.
Different areas of the same hide can behave differently.
Thickness varies.
Temper varies.
Absorption varies.
That variability is not a defect in leathercraft.
It is part of the craft.
Over time, your hands begin to recognize when leather is ready.
You feel how much resistance is appropriate.
You learn how far a curve can be pushed.
You recognize when a corner needs another few minutes of attention.
That knowledge cannot be downloaded.
It is earned one project at a time.
Keep a Few Notes
Here is a simple habit that can dramatically shorten your learning curve.
When you finish a wet-formed project, write down:
Leather type
Leather weight
Forming method
Approximate moisture method
Mold used
What worked
What did not
How much spring-back occurred
Anything you would change next time
You do not need a complicated workshop log.
A few sentences are enough.
Six months later, those notes become your personal reference manual.
The Goal Is Not Perfection
Your first wet-formed piece may not have perfectly symmetrical corners.
You may leave a thumb mark.
One edge may stretch slightly more than the other.
That is okay.
Make another one.
On the second piece, you will already know more about moisture than you did on the first.
On the third, your hands will begin anticipating where wrinkles appear.
By the fifth, you may find yourself adjusting the mold or pattern because you now understand why the leather behaved the way it did.
That progression is leathercraft.
You are not simply learning how to follow steps.
You are learning how material, pattern, tools, and technique interact.
Where to Go Next
If you have never wet formed leather before, do not begin with the most complicated object you can imagine.
Take a piece of scrap vegetable-tanned leather.
Wet it.
Give the moisture time to penetrate.
Wrap it around a simple form.
Shape it with your fingers.
Hold it there.
Let it dry.
Then remove the mold and look at what happened.
You just turned a flat piece of leather into a three-dimensional object using little more than water and your hands.
Once you understand that process, a surprising number of leather projects suddenly make more sense.
A bracer is no longer simply a flat pattern.
A pouch is no longer simply two pieces stitched together.
A helmet is no longer a collection of strange curved panels.
You begin seeing leather as a material that can be cut, stitched, folded, stretched, compressed, curved, and shaped.
That is when leathercraft becomes especially interesting.
At Old Line Crafts & Designs, our goal is to create original leathercraft patterns that give makers somewhere useful to apply those skills—from manageable beginner projects to larger builds that introduce more complex construction.
Learn one technique.
Use it in a project.
Then build something a little more ambitious.
That is how a beginner becomes a leatherworker.
Crafted by hand. Built to last.
Old Line Crafts & Designs — Original Leathercraft Patterns. Made for Makers.
There is something different about making something from leather with your own hands.
You begin with a flat piece of material. A few cuts, holes, stitches, folds, and carefully finished edges later, you may be holding a wallet, journal cover, key holder, pouch, pair of bracers, bag, or another useful object that could last for years. This is a basic skill in leathercraft.
That transformation is a big part of what makes leathercraft so satisfying.
It can also make leatherworking look intimidating from the outside.
Search for “leatherworking tools” and you can quickly find workbenches covered with dozens—sometimes hundreds—of specialized tools. There are knives, groovers, punches, bevelers, skiving tools, stitching irons, edge creasers, mauls, burnishers, stamps, presses, dyes, finishes, and tools whose purpose may not be obvious to someone who has never worked with leather before.
Here is the good news:
You do not need most of them to begin.
In fact, one of the easiest ways to make leathercraft unnecessarily expensive is to try to build a complete workshop before completing your first project.
A much better approach is to choose a manageable project, acquire the few tools needed to complete it properly, and allow your workshop to grow along with your skills.
This guide for leathercraft beginners will walk you through what a beginner actually needs. Additionally, it covers what can wait, how to choose your first leather, and essential skills. Finally, it explains common beginner mistakes to avoid.
Start With a Project, Not a Shopping Cart
One of the most useful pieces of advice for someone new to leathercraft is also one of the simplest:
Decide what you want to make before deciding what you need to buy.
Leathercraft is an enormous category.
Someone making a hand-stitched card holder needs a different collection of tools than someone carving Sheridan floral designs, making leather armor, constructing handbags, or producing heavy belts.
Buying tools before choosing a project often results in spending money on things you do not actually need.
Instead, pick a first project with a clear purpose.
A card holder might teach accurate cutting, stitching, edge finishing, and pocket alignment.
A leather key fob might teach cutting, punching, edge finishing, folding, and hardware installation.
A journal cover can introduce larger pattern pieces, pockets, stitching, snaps, and fitting.
A pair of simple leather bracers can introduce heavier leather, straps, rivets, fitting, and light wet forming.
Each project creates its own short tool list.
That is a much more affordable—and far less overwhelming—way to build a workshop.
Understanding Leather Before You Buy It
Your tools matter, but the leather itself will have an even greater effect on how your first project behaves.
Not all leather is the same.
A piece of soft upholstery leather and a piece of firm vegetable-tanned tooling leather may both be genuine leather, but trying to use them interchangeably can make a project extremely frustrating.
Before ordering your first piece, understand three basic characteristics: tanning method, thickness, and temper.
Vegetable-Tanned Leather
Vegetable-tanned leather—often shortened to veg tan—is one of the most useful materials for learning traditional leatherworking skills.
It is generally firmer than many chrome-tanned leathers and works especially well for projects where you want defined edges, clean cuts, stamping, carving, dyeing, wet forming, or burnishing.
Veg tan is commonly used for items such as wallets, belts, sheaths, notebook covers, bracers, straps, pouches, and costume leather armor.
If you have seen someone carve a decorative pattern into leather and then bevel, shade, dye, or antique the design, there is a good chance they were working with vegetable-tanned leather.
For many beginner projects, it is an excellent starting material.
Chrome-Tanned Leather
Chrome-tanned leather is frequently softer and more flexible.
It is widely used for bags, upholstery, garments, soft pouches, footwear, and other projects where flexibility and drape are useful.
Chrome-tanned leather certainly belongs in leathercraft, but it behaves differently from vegetable-tanned leather.
Its edges usually do not burnish the same way, and very soft leather can actually be more difficult for a beginner to cut accurately because it wants to stretch or move under the knife.
Neither tanning method is inherently better.
The question is whether the leather suits the project.
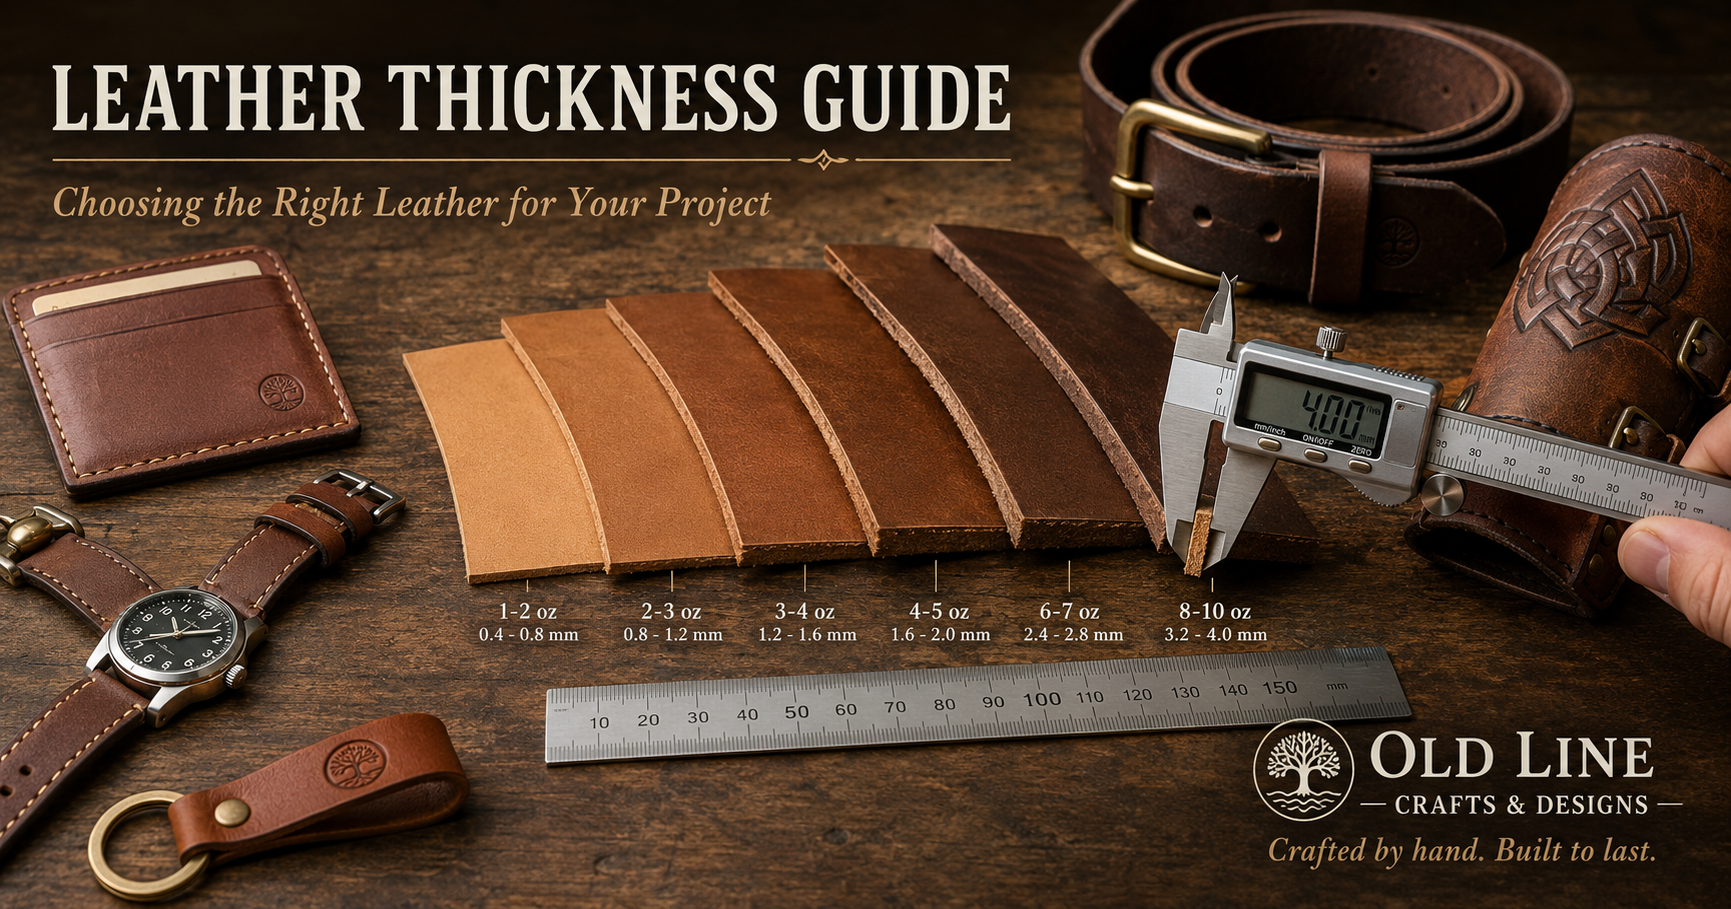
Leather Thickness: What Do the Ounces Mean?
Leather is commonly sold by weight in ounces, but in leatherworking an ounce describes thickness rather than the total weight of the piece.
As a practical rule, one ounce of leather thickness is approximately 1/64 inch, or about 0.4 millimeter.
Here is a useful starting reference:
Leather Weight
Approx. Thickness
Common Uses
2–3 oz
0.8–1.2 mm
Wallet pockets, liners, small accessories
3–4 oz
1.2–1.6 mm
Card holders, wallets, watch straps
4–5 oz
1.6–2.0 mm
Small cases, journal covers, pouches
5–6 oz
2.0–2.4 mm
Key fobs, heavier accessories, light straps
6–8 oz
2.4–3.2 mm
Bracers, structured pieces, heavier straps
8–10 oz
3.2–4.0 mm
Belts and some heavy structural projects
These are starting points, not rigid rules.
Construction matters.
A wallet made from four overlapping layers of 5-ounce leather can become surprisingly bulky. On the other hand, a project that needs to hold a three-dimensional shape may feel weak if made from leather that is too thin.
Before buying leather, read the project’s material recommendations.
A firm-tempered leather holds its shape more strongly.
This matters because two pieces of leather of exactly the same thickness can behave very differently.
Imagine making a structured tool pouch from extremely soft leather. The thickness might technically be correct, but the pouch may collapse instead of holding the intended shape.
Likewise, making a soft drawstring pouch from rigid leather could turn a simple project into a battle.
When shopping, do not look at thickness alone.
Ask yourself:
Does this project need to bend, drape, fold, or hold its shape?
That question will often tell you as much as the ounce measurement.
You Do Not Need to Buy an Entire Hide
Another common beginner assumption is that getting into leathercraft means buying an entire side of leather.
Usually, it does not.
For smaller projects, leather panels, remnants, shoulders, or project-sized pieces may be more economical.
Buying for a specific project also lets you experiment with different leather weights and types without accumulating hundreds of dollars of material.
And always buy or save a little scrap.
Scrap leather is one of the most valuable supplies in your workshop.
Before trying something new on your project, test it on scrap first.
Test your stitch spacing.
Test your hole punch.
Test a rivet.
Test your dye.
Test your edge finish.
Test your stamp.
Test your burnishing method.
A small scrap can save a much larger piece of expensive leather.
The Beginner Leathercraft Tool Kit
You could spend thousands of dollars outfitting a leather workshop.
You do not need to.
A surprisingly small collection of tools can complete a large number of projects.
Tool
Why You Need It
Buy Now or Later?
Cutting mat
Protects your table and knife edge
Essential
Metal ruler
Guides straight cuts safely and accurately
Essential
Sharp utility or craft knife
Cuts leather and patterns
Essential
Scratch awl
Transfers marks and hole locations
Very useful
Poly/rawhide mallet or maul
Drives punches and stitching chisels
Essential for punched work
Stitching chisels
Creates evenly spaced stitching holes
Essential for hand stitching
Harness needles
Used for saddle stitching
Essential for hand stitching
Waxed thread
Forms your leather seams
Essential for hand stitching
Hole punches
Creates hardware, lace, and strap holes
Project dependent
Edge beveler
Removes sharp corners from exposed edges
Highly recommended
Sandpaper
Trues and smooths edges
Essential and inexpensive
Edge burnisher
Polishes suitable leather edges
Recommended
Leather adhesive
Holds pieces during assembly
Project dependent
Wing divider
Marks consistent stitch or border lines
Useful upgrade
Stitching pony
Holds work while saddle stitching
Optional at first
Skiving knife
Reduces leather thickness in selected areas
Learn later
Tooling stamps
Decorative carving and stamping
Only if your project needs them
Notice what is missing.
You do not need an industrial sewing machine.
You do not need a clicker press.
You do not need fifty stamping tools.
You do not need an electric edge burnisher.
You do not need an expensive French skiving knife before you know whether you enjoy skiving.
Start with tools that solve problems you actually have.
The Most Important Tool May Be Your Knife
Accurate leatherwork begins with accurate cutting.
You do not need an expensive custom leather knife to begin. A quality utility knife or craft knife with a fresh blade can produce excellent results.
The important word is fresh.
Leather quickly reveals a dull blade.
Instead of slicing cleanly, a dull knife may drag, wander, compress the edge, or require excessive force.
Trying to save a worn blade can easily cost more in damaged leather than replacing the blade would have cost.
For long straight cuts, use a metal ruler.
For curves, work slowly and make multiple controlled passes rather than trying to force the knife through the full thickness at once.
And whenever possible, move the leather rather than twisting your wrist into an awkward cutting position.
A clean cut makes nearly every later step easier.
Learn to Mark Before You Cut
Professional-looking leatherwork begins before the knife touches the leather.
Take time to transfer the pattern accurately.
Hold or secure the pattern so that it cannot shift. Mark important corners, stitch lines, hole centers, fold lines, and hardware locations.
If your pattern includes a calibration square, verify it before tracing anything.
A PDF pattern that prints several percent too small may still look correct while producing strap widths, stitching holes, overlaps, or hardware locations that no longer match.
A few minutes checking paper can prevent an expensive mistake in leather.
Hand Stitching: You Do Not Need a Sewing Machine
One of the things that surprises many newcomers is that beautifully stitched leather goods can be made entirely by hand.
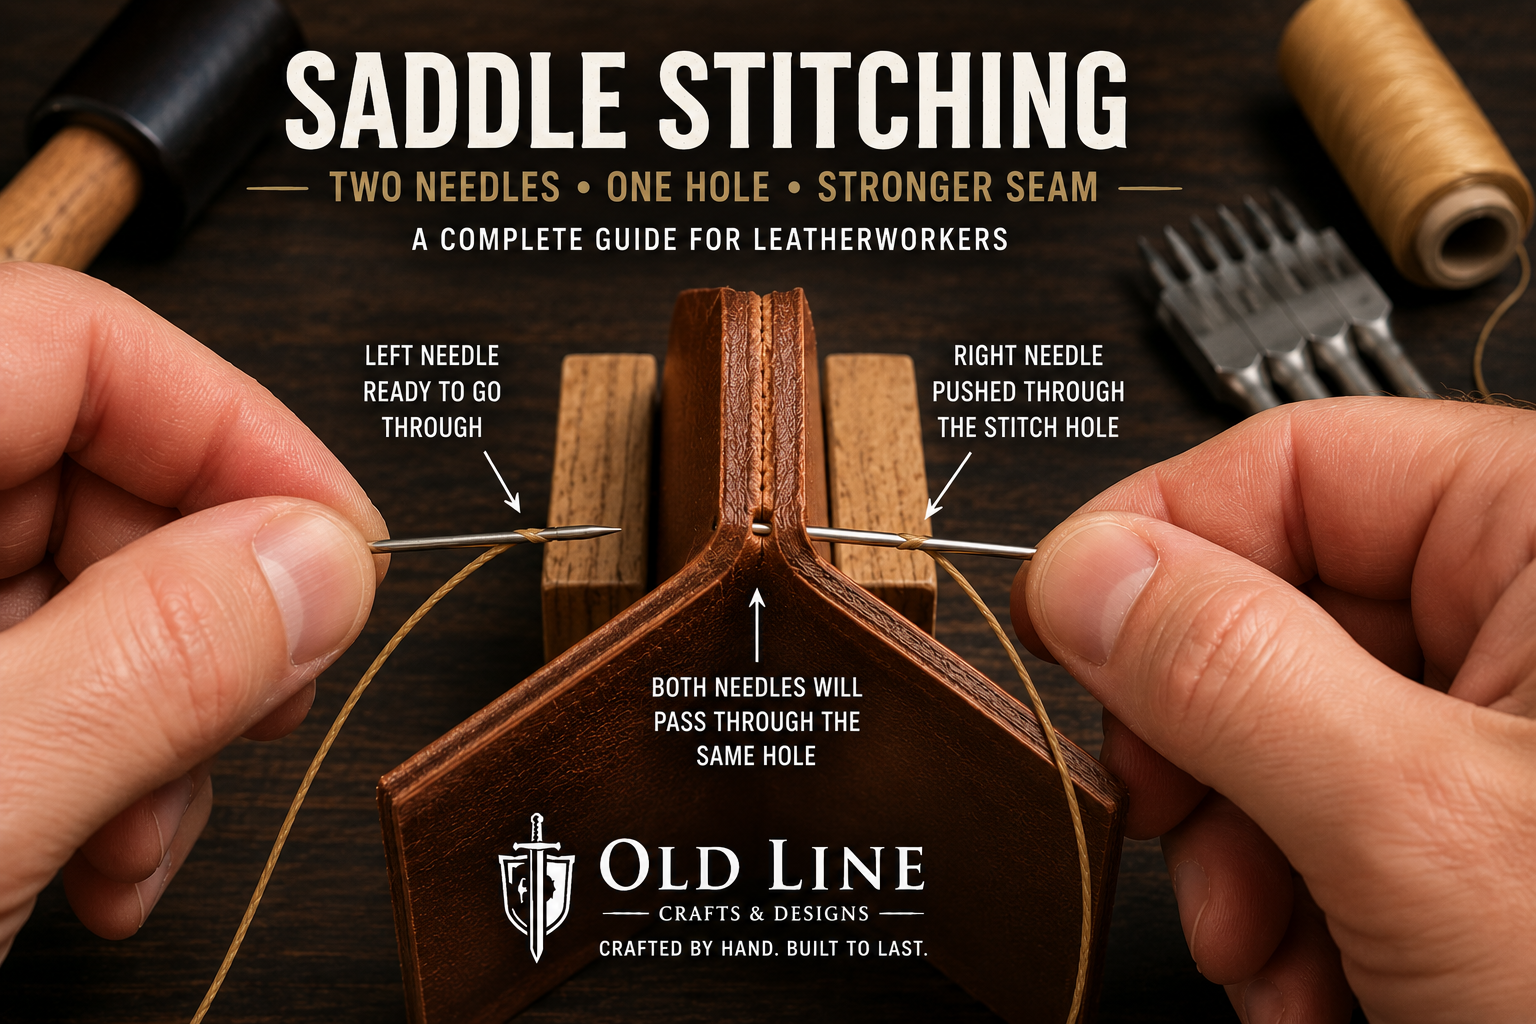
Traditional leather hand stitching commonly uses a technique called saddle stitching.
Instead of sewing with one needle, you use one length of thread with a needle on each end. Both needles pass through every stitching hole.
The result is a strong, attractive seam and an especially useful skill for hobby leatherworkers because it requires very little equipment.
A practical beginner setup is a set of stitching chisels, two harness needles, waxed polyester thread, and eventually a stitching pony if you find yourself doing a lot of sewing.
For many everyday projects, chisels somewhere around the 3.5–4 mm spacing range provide a useful general-purpose starting point. Thread around 0.6 mm produces a relatively clean appearance, while thicker thread creates a more rugged visual style.
Do not become overly concerned with finding the “perfect” combination immediately.
Consistency matters more.
Make straight holes.
Use the same needle sequence every time.
Pull each stitch with similar tension.
Your tenth stitching line will almost certainly look better than your first.
Edge Finishing Is What Makes a Beginner Project Look Finished
A beginner can cut and stitch a technically functional leather item fairly quickly.
The difference between something that looks like a first experiment and something that looks intentionally handmade is often found in the edges.
Freshly cut vegetable-tanned leather can look rough and fibrous.
A basic edge-finishing process usually involves trimming or aligning the layers, sanding the edge smooth, lightly beveling the sharp corners, applying an appropriate burnishing agent or small amount of moisture, and rubbing the edge with a burnisher until the fibers compact.
It is repetitive.
It also makes an enormous visual difference.
Do not rush this stage because the project seems “finished” once the stitching is complete.
Leathercraft rewards patience in the final ten percent.
What About Glue?
Leather adhesive is often misunderstood by beginners.
In many stitched projects, glue does not replace the stitching.
Instead, it keeps the layers from moving while you trim the edges and punch the stitching holes.
That makes your final alignment considerably more accurate.
Apply adhesive sparingly and according to the manufacturer’s directions.
More glue is not better.
You want the layers secured, not saturated.
And keep adhesive away from any exposed surface where it may interfere with dye, finishing, or appearance.
Punching Holes Without Ruining Your Tools
If you will be using stitching chisels, rivet punches, oblong punches, or drive punches, do not strike them directly onto your nice cutting mat or a hard tabletop.
Use a suitable punching surface beneath the leather.
Dense punch boards are inexpensive compared with replacing damaged tools.
Your striking tool matters too.
Avoid using an ordinary steel claw hammer directly on leather punches and stitching chisels. A poly, rawhide, or other suitable leatherworking mallet protects the tool better and is generally more pleasant to use.
Leatherworking tools are meant to cut leather—not your workbench.
Hardware: Rivets, Snaps, Buckles, and Chicago Screws
Hardware gives leathercraft an entirely different vocabulary.
Sooner or later you may use double-cap rivets, snaps, buckles, D-rings, swivel hooks, Chicago screws, eyelets, or other fasteners.
Do not buy a giant assortment simply because it looks useful.
Buy the hardware your chosen project requires.
Then buy a few extras.
Why extras?
Because setting hardware is a skill.
A rivet can bend.
A snap can be installed backward.
A post can be too long.
A setter can slip.
Practice the exact hardware on scrap before installing it in the finished project.
That five-minute habit can save hours of work.
What Should Your First Leathercraft Project Be?
Your first project should be interesting enough that you want to finish it, but simple enough that you can concentrate on technique.
The ideal first project has relatively few pieces, clear construction, modest material requirements, and a finished purpose you understand.
Good beginner projects include card holders, key fobs, valet trays, simple journal covers, coasters, small pouches, and straightforward wearable pieces such as bracers.
The goal is not to prove how complicated a project you can survive.
The goal is to finish something.
Finishing teaches you far more than starting.
When you complete a small project, you see the entire leatherworking sequence:
pattern → leather selection → tracing → cutting → preparation → assembly → stitching or hardware → edge finishing → final result
That complete cycle is where confidence begins.
Old Line Crafts & Designs has a growing collection of original leathercraft patterns ranging from practical everyday projects to larger medieval and armor-inspired builds. Some are intentionally designed as approachable projects for newer makers, while others give you somewhere to go as your skills develop.
That progression matters.
Your first project does not need to be your dream project.
It simply needs to teach you enough to make the next project possible.
Why Using a Pattern Is Particularly Helpful When You Are Learning
There is sometimes an idea that “real” leatherworkers should design everything from scratch.
Eventually, designing your own pieces can be one of the most rewarding parts of the craft.
But learning leatherworking and learning product design simultaneously can create unnecessary frustration.
Imagine trying to diagnose a wallet that will not close properly.
Did you cut inaccurately?
Is the leather too thick?
Is the pocket geometry wrong?
Is the stitch allowance incorrect?
Were the pieces assembled in the wrong order?
Is the design itself flawed?
When you begin with a well-planned pattern, many of those variables have already been resolved.
That means you can concentrate on learning the craft itself.
You learn how to guide a knife.
How much pressure a punch requires.
How leather responds to water.
How tightly to pull a saddle stitch.
How much sanding produces a clean edge.
How a correctly set rivet feels.
Over time, those skills give you the experience to modify patterns—and eventually design your own.
A pattern is not a substitute for craftsmanship.
It gives craftsmanship a reliable place to begin.
That is the philosophy behind the patterns we develop at Old Line Crafts & Designs: give the maker clear geometry and a logical construction path, while leaving the actual craftsmanship in the maker’s hands.
A Pattern Cannot Replace a Paper Mockup
Even when working with a proven pattern, paper remains one of the cheapest tools in your workshop.
Before cutting good leather—especially for wearable, fitted, folded, or multi-piece projects—make a paper or cardstock version.
Does it fit?
Do the pieces overlap where expected?
Is the closure in the correct place?
Can you reach the hardware?
Does the wallet fold?
Does the strap fit the buckle?
Does the wearable piece allow movement?
Cardstock costs very little.
Good leather does not.
This is especially important when body size, hardware dimensions, or personal preference can affect the final fit.
The Beginner Tool Trap: Cheap Kits Versus Good Individual Tools
Starter kits can be useful.
They can also be misleading.
A large tool count printed on the box does not necessarily mean you are receiving more useful equipment.
Sometimes a 40-, 50-, or 60-piece kit contains many specialized tools you will not use while compromising on the quality of the few tools you use constantly.
A better beginner purchasing strategy is to prioritize the tools that touch nearly every project:
a reliable knife, a sturdy metal ruler, a proper cutting and punching surface, decent stitching chisels if you plan to sew, suitable needles and thread, and a useful edge beveler.
You can upgrade almost anything later.
But a tool that cuts poorly or produces inconsistent holes can make learning unnecessarily difficult.
Buy fewer tools.
Learn them well.
Then let your projects tell you what the next purchase should be.
How Much Does It Cost to Start Leathercraft?
There is no single correct answer because you may already own several useful items.
If you already have a utility knife, metal ruler, work surface, sandpaper, and basic measuring tools, your initial investment may be surprisingly modest.
A simple hand-stitching setup adds stitching chisels, needles, thread, a mallet, and a suitable punching surface.
A project using rivets may require only a punch and setter beyond the basic cutting tools.
Rather than setting a goal of owning a “complete leatherworking kit,” set a simpler goal:
Own everything required to finish Project #1.
Then Project #2 can justify the next tool.
After several projects, you will notice that your workshop has grown naturally around the kind of leatherworking you actually enjoy.
That is far better than discovering a year later that half of an expensive starter kit has never left the box.
Create a Small, Comfortable Workspace
You do not need a dedicated workshop.
Many leatherworkers begin on a kitchen table, folding workbench, basement desk, or corner of a garage.
You do need a stable work surface and good lighting.
Leathercraft involves sharp tools, small alignment marks, narrow edges, and detailed stitching. Being able to clearly see your work makes a measurable difference.
Keep the area around your cutting path clear.
Store knives safely when not in use.
Cut away from your hands and body.
Use a non-slip ruler arrangement where possible.
Keep fingers out of the path of punches and blades.
And if you use adhesives, dyes, finishes, or other chemical products, follow the manufacturer’s ventilation, handling, and disposal instructions.
Craftsmanship is never improved by rushing.
Your First Month in Leathercraft
If you want to turn leathercraft into a lasting hobby rather than a weekend experiment, resist the urge to learn everything at once.
A simple progression works well:
Week One — Learn to cut. Practice straight cuts, gentle curves, and accurate pattern tracing on inexpensive leather or scrap. Learn how a sharp blade feels and how little force a good cut actually requires.
Week Two — Learn holes and stitching. Practice punching straight stitching lines on scrap and saddle stitch them repeatedly. Focus on consistency rather than speed.
Week Three — Learn edges and hardware. Sand, bevel, and burnish several scraps. Practice setting the exact rivets, snaps, or hardware you expect to use.
Week Four — Complete a real project. Use a clear pattern and combine the skills you have practiced. Take your time and finish every step rather than abandoning the project when something is slightly imperfect.
At the end of that month, keep your first completed project.
Do not hide it because a stitch wandered or an edge is not perfect.
Put it somewhere you will see it.
Six months later, compare it with what you are making then.
That comparison is one of the most satisfying parts of learning a craft.
Common Beginner Leathercraft Mistakes
Nearly everyone makes the same handful of mistakes while learning.
The first is buying too much equipment too soon.
The second is using the wrong leather for the project.
The third is working with a dull knife because the blade “still cuts.”
The fourth is skipping practice on scrap.
The fifth is rushing edge finishing.
The sixth is cutting leather before verifying the pattern and dimensions.
The seventh is expecting the first project to look like something made by a craftsperson with ten years of experience.
That last mistake matters.
Leathercraft is a physical skill.
Your hands learn pressure, angle, rhythm, and feel through repetition.
You can read about saddle stitching for hours, but twenty minutes stitching scrap will teach you something a paragraph cannot.
Read.
Watch.
Learn.
Then put leather on the bench.
Do You Need Leather Tooling Stamps to Begin?
No.
Leather tooling is a wonderful branch of the craft, but it is not required to make high-quality leather goods.
A simple project with accurate cuts, clean stitching, smooth edges, and well-set hardware can be beautiful without a single decorative stamp.
If tooling interests you, add it after you are comfortable with basic construction.
Starting with a small number of versatile stamps is often better than purchasing an enormous assortment.
Tooling is another area where scrap leather becomes invaluable.
Practice impressions before committing them to your project.
Every piece of leather absorbs moisture and accepts a stamp a little differently.
Should You Dye Your First Project?
You can, but you do not have to.
Natural vegetable-tanned leather has its own appeal and will change in appearance as it ages and develops a patina.
Pre-dyed leather can simplify your first build by removing an entire finishing variable.
If you want to learn dyeing, test the complete finishing process on scrap from the same leather before touching your project.
Do not merely test the dye.
Test the dye and whatever conditioner, antique, resist, oil, or topcoat you expect to use afterward.
The final color may look different from the initial dye application.
Leather has a habit of reminding us that testing is cheaper than guessing.
How Do You Know When You Are Ready for a Bigger Project?
Probably sooner than you think.
You do not need perfect stitching before attempting something larger.
You need a basic understanding of the techniques the project requires.
If you can trace accurately, cut reasonably cleanly, punch holes consistently, understand basic stitching or hardware installation, and follow an assembly sequence, you already have the foundation for a surprising range of leather projects.
The next project should stretch one or two skills—not ten.
If you have built a card holder, try a journal cover.
If you have made a key fob, try a pouch.
If you have made simple bracers, perhaps move into a more structured wearable piece.
If you have completed a flat project, try something that forms into three dimensions.
Leatherworking becomes much easier when you build ability in layers.
A Few Beginner Rules Worth Keeping
If you remember nothing else from this guide, remember these ideas:
Choose the project before the tools.
Buy leather for the project, not for an imaginary future workshop.
A sharp knife is safer and more accurate than a dull one.
Practice unfamiliar operations on scrap.
Check the pattern before cutting leather.
Take finishing as seriously as construction.
Your first project is allowed to look like your first project.
And perhaps the most important:
Finish things.
A completed imperfect project will teach you more than six perfect projects you only planned.
Where to Go From Here
If leathercraft has been something you have been thinking about trying, you do not need to wait until you own every tool or understand every technique.
Choose one useful project.
Buy the correct leather.
Gather the handful of tools it requires.
Practice on scrap.
Then start cutting.
When you run into a skill you have not learned yet, learn that skill because your project now gives it context.
That is how a collection of unfamiliar tools begins to make sense.
It is also how leathercraft stops feeling like something other people know how to do and starts becoming something you do.
Old Line Crafts & Designs was created around that same idea.
Leathercraft is one of those hobbies that feels rewarding right from the start. With a few basic tools, a simple pattern, and a little patience, you can make projects that are useful, durable, and genuinely satisfying to finish.
If you are brand new, the best approach is to keep things simple. Start with beginner-friendly projects, learn a few core techniques well, and build confidence one piece at a time.
Start With Simple Tools
A sharp utility knife or craft knife
A metal ruler
A cutting surface
Stitching needles and thread
An awl or stitching chisels
Edge finishing supplies
You do not need a huge workshop to begin. A small, reliable set of tools is enough to learn clean cuts, neat stitching, and basic finishing.
Choose the Right First Project
Look for projects that teach one or two skills at a time. Card holders, small pouches, simple sheaths, and compact organizers are all great starting points. PDF patterns are especially helpful because they give you a clear template and reduce guesswork.
A good first project should help you practice, not overwhelm you.
Learn the Core Skills
Measuring and cutting accurately
Punching clean stitch lines
Saddle stitching by hand
Setting simple hardware
Burnishing and finishing edges
These basics show up in almost every leather project. Once they feel comfortable, moving into more detailed builds becomes much easier.
Expect a Learning Curve
Your first few projects may have uneven stitches, rough edges, or small layout mistakes. That is normal. Leathercraft improves quickly with repetition, and every project teaches you something useful for the next one.
Use Patterns to Build Confidence
Well-made patterns can save time and help you focus on technique instead of drafting from scratch. At Old Line Crafts & Designs, our PDF leathercraft patterns are made to help makers move from first projects into more confident builds at their own pace.
Ready to Make Something
If you are ready to get started, browse our pattern collection or head straight to the shop to find beginner- and intermediate-friendly PDF downloads.
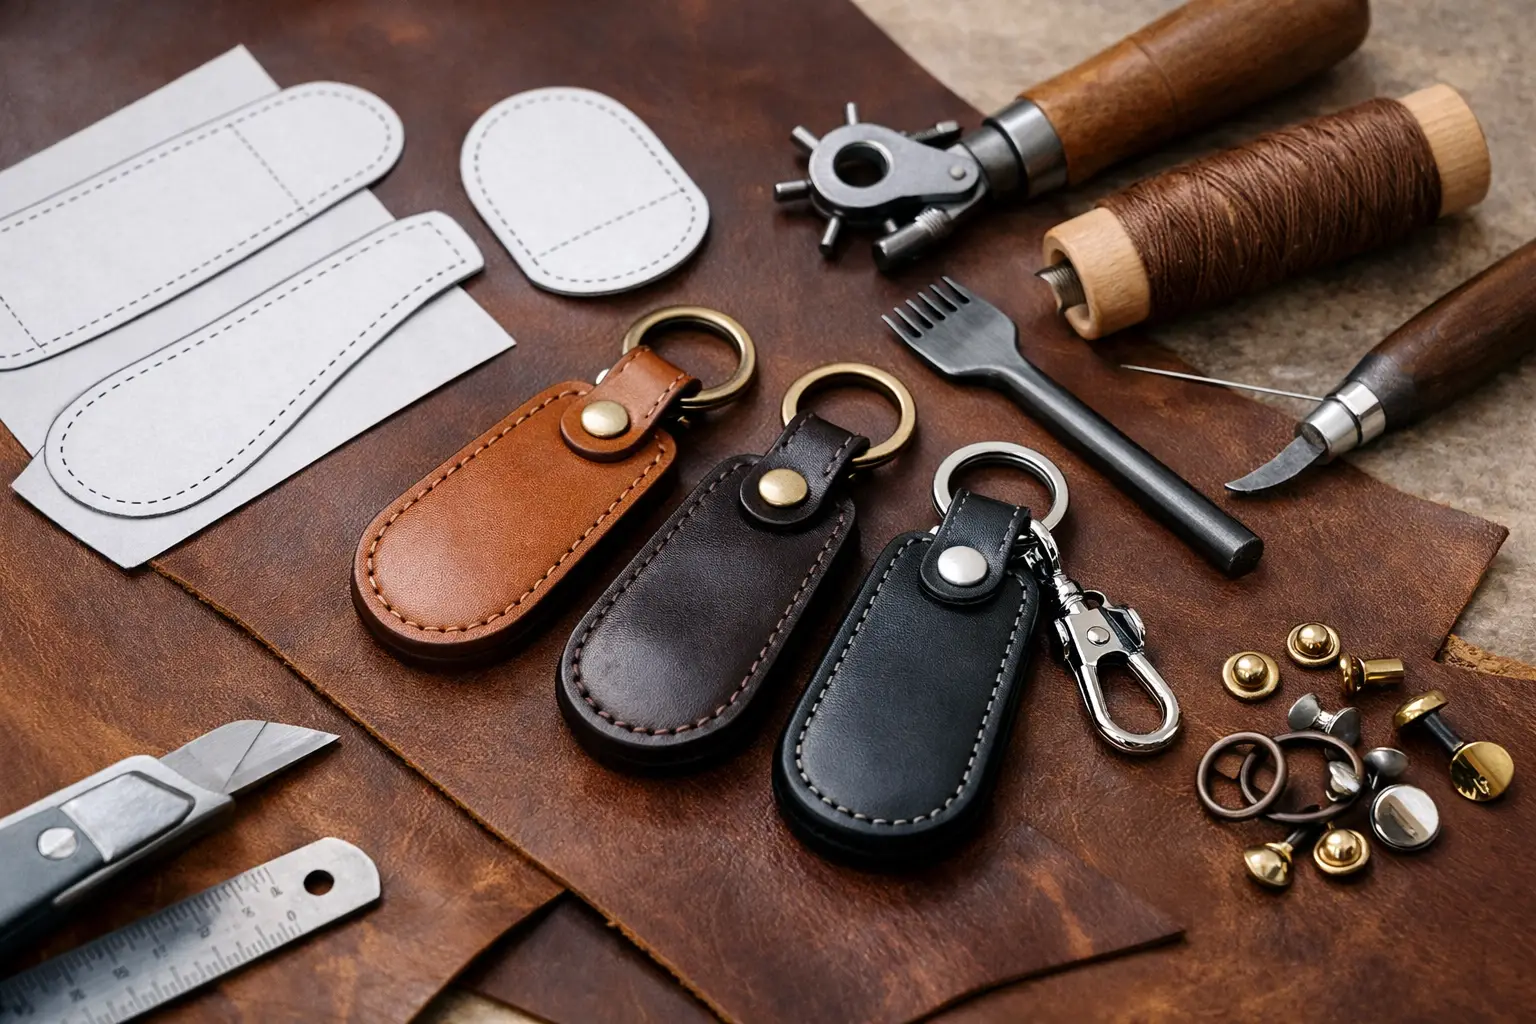
A key fob is small enough to finish in an afternoon, but it reveals nearly every part of your leatherworking process. Uneven cuts, crowded hardware, loose stitching, and rough edges all show up quickly on a project that spends its life in someone’s hand. The right leather key fob pattern PDF gives that small project the structure it deserves, so you can spend less time correcting proportions and more time building a piece you will be glad to carry or give away.
For a newer maker, a key fob is a practical way to practice the basics without committing a full hide or an entire weekend. For an experienced leatherworker, it is a useful shop project for testing a new leather, hardware finish, edge treatment, or stamp. The pattern matters in both cases because good proportions are not accidental. A fob has to feel substantial without becoming bulky, fit the selected ring or clasp cleanly, and leave enough room for stitching and finishing.
What a Leather Key Fob Pattern PDF Should Solve
A downloadable pattern should remove the drafting work, not create another round of questions at the bench. The most useful layouts show a clear cut line, identify fold or stitch locations when needed, and account for the space required by the hardware. On a compact item, even a small measurement error can make a snap sit too close to the edge or leave a key ring pinched in place.
Look for a design that has a purpose beyond being a strip of leather with a ring attached. A well-considered fob may use a tapered end, a shaped body, a layered strap, or a practical closure that creates a more finished silhouette. Those details can be simple, but they should support the way the item is used.
Clarity matters just as much as the outline. Before printing, you should be able to understand what each piece does and how the project comes together. If a PDF leaves you guessing about orientation, stitch placement, or hardware size, it may save no time at all.
Full-size printing is worth checking
Most leather patterns are intended to print at full scale. Open the file settings and select actual size or 100 percent scale rather than fit to page. If the pattern includes a test square, measure it before cutting leather. This takes less than a minute and can prevent a frustrating build, especially when a pattern is designed around a specific key ring, swivel clasp, or snap.
Paper assembly is another consideration. A small key fob pattern often fits on one page, which makes it especially convenient for a quick build. If a design spans multiple pages, clear registration marks and simple assembly instructions are helpful. The pattern should make your bench easier to organize, not bury a small project under unnecessary prep.
Choose a Design That Fits Your Bench
The best first project is not always the most decorative one. A straightforward folded key fob can teach clean cutting, crease work, edge beveling, adhesive control, and saddle stitching in a compact format. It is also forgiving in the right places: if your first edge coat is not perfect, you have a manageable surface to refine and try again.
A layered or stitched fob adds visual weight and can be a better fit if you already have basic stitching tools. These designs allow for contrasting leather, a lining layer, or a stamped panel. The trade-off is thickness. Once leather is folded or stacked around hardware, the project can become stiff quickly. Choose a pattern that considers the finished stack, not just the flat pieces on the page.
Hardware-driven designs, such as wristlet keychains or fobs with swivel clips, are useful when function is the priority. They provide a larger grip and can be easier to find at the bottom of a bag. They also demand more attention to hardware measurements. A 1-inch ring, for example, needs a different strap opening and fold allowance than a 3/4-inch ring.
Before selecting a pattern, think about the tools you enjoy using. If you prefer hand stitching, choose a design with enough stitch length to make the work satisfying. If you want a fast build with rivets or snaps, look for a pattern that places those components safely away from stressed edges. There is no single best construction method. The right one is the method that matches your materials, tools, and intended use.
Materials That Keep a Small Project Looking Refined
Leather key fobs do not require much material, which is one reason they are excellent for using quality remnants. Vegetable-tanned leather in the 4 to 6 ounce range is a dependable choice for many designs. It cuts crisply, accepts stamping and dye well, and develops character with use. For a simple single-layer fob, this weight usually provides enough body without feeling overly rigid.
Chrome-tanned leather can work beautifully when you want a softer hand or a particular color, but it depends on the temper. Very soft leather may stretch near the hardware or make a folded strap feel floppy. If you use it, consider a pattern with a lining or reinforcement layer. Firmer bridle, harness, or latigo-style leather can make a durable fob, though thick leather may need skiving where it folds around a ring.
Match your thread, hardware, and finishing choices to the project rather than treating them as separate decisions. Brass hardware and warm brown leather make a classic combination, while nickel hardware can suit black, navy, or natural leather. A contrasting thread adds a deliberate handmade detail, but only if your stitch spacing and tension are consistent. When you are practicing, a thread close to the leather color can be more forgiving.
For hardware, use components made for repeated pulling and movement. A lightweight split ring may be fine for a simple fob, while a heavier ring or solid clasp better suits a wristlet-style piece. Test the fit with a scrap before committing to the finished leather. The fold should close comfortably around the hardware without forcing the leather to buckle.
Build Cleanly From Cut Line to Edge
Start by cutting carefully. A sharp blade, a stable cutting surface, and a straightedge where appropriate will do more for the final result than rushing into decoration. If the pattern calls for rounded ends or a shaped outline, take your time and make controlled cuts. Small curves look cleaner when cut in a few deliberate passes than when chased with a blade.
Dry-fit the pieces and hardware before glue, stitching, or setting rivets. This is the moment to confirm that the ring sits where it should, the finished length feels right in the hand, and any stamped or personalized area remains visible after assembly. A key fob may look balanced flat on the bench but feel awkward once folded, so handle it before making the construction permanent.
If you are stitching, mark or punch the holes consistently and keep the stitch line far enough from the edge to protect it from wear. A groove or crease line can help guide the layout, but it should support the design rather than become a heavy visual border. On such a small project, restraint usually looks more polished.
Edge finishing deserves extra attention because it is one of the first things people notice. Bevel the edges if the leather weight allows, sand through a few grits, then burnish or apply your preferred edge finish in light, controlled layers. Let each step do its job. Trying to force a glossy edge too quickly often leaves residue, dark spots, or an uneven finish.
Make the Pattern Your Own Without Losing Its Balance
A leather key fob pattern PDF gives you a proven foundation, but it does not have to produce identical results every time. Initials, a short name, a maker’s mark, or a small geometric stamp can turn a useful item into a personal gift. Keep personalization scaled to the project. Large lettering can overpower the fob and become distorted near a fold.
Color is another easy way to create variety. Natural vegetable-tanned leather can be left to develop a patina, dyed for a more dramatic result, or paired with colored thread. You can also make a small batch from coordinated scraps. This works well for gifts, market preparation, or simply building repetition into your practice.
If you change the leather thickness or hardware size, pause before changing the pattern itself. Some adjustments are simple, such as widening a strap opening for a larger ring. Others affect the whole construction, including fold length, stitch placement, and finished bulk. Make a paper or scrap-leather test first. That small trial protects your good material and helps you build with confidence.
A key fob may be a modest project, but a clean one carries the same care as any larger piece of leatherwork. Choose a pattern with clear decisions already built in, bring your own materials and details to the bench, and give the final edges the attention they deserve. The result is a useful daily item and a quiet reminder that good craftsmanship is often found in the details people touch most.
A journal cover can look simple on the finished side of the bench: a clean wrap, a few straight stitch lines, and a notebook tucked neatly inside. The fit is where the real work lives. A well-made leather journal cover template PDF gives you a dependable starting point for that fit, so you can spend less time correcting paper measurements and more time building a cover you will want to carry.
For hobby makers, a journal cover is also a useful project because it asks for several foundational skills without becoming overwhelming. You will cut long, visible edges, form pockets or flaps, mark consistent stitch lines, and make choices about leather weight and closure style. The right template keeps those decisions organized while leaving room for your own material and finishing preferences.
What a Leather Journal Cover Template PDF Should Include
A journal cover pattern is more than an outside rectangle. It needs to account for the notebook itself, the leather thickness, the way the cover bends at the spine, and the amount of material required for interior pockets or sleeves. If one of those measurements is missing, the project can look correct on the cutting mat and still feel too tight once assembled.
Start by checking whether the pattern names the notebook size it is designed to fit. Common formats such as pocket, A6, A5, B5, and standard composition notebooks are not interchangeable. Even notebooks with the same labeled size can vary in thickness, corner shape, and spine construction. A template should tell you the intended insert dimensions and, ideally, the maximum thickness it can accommodate.
Clear cut lines matter just as much. Look for a full-size print layout, a scale check or test square, and labels that distinguish the exterior panel from interior pieces. A pattern that leaves you guessing about which edge folds inward can create an expensive mistake before you ever thread a needle.
Construction guidance should also match the project. You do not need a lengthy manual for every cover, but helpful notes should explain assembly order, pocket placement, stitch-hole spacing when applicable, and where to burnish or finish edges before final stitching. Those details reduce the awkward moments that happen when a part is technically cut correctly but impossible to finish cleanly after it is sewn in place.
Full-size templates versus measurement plans
A full-size template prints at actual dimensions and is cut out or traced directly onto leather. It is often the most comfortable choice for a newer maker because the layout is already resolved. Print at 100% or “actual size,” then measure the test square before tracing anything.
A measurement plan provides dimensions and lets you draw the pattern yourself. This can be a good fit for an experienced maker who wants to adjust the design or work around a particular notebook. It also takes more care. A small drafting error at the spine or pocket can change how the finished cover closes.
Neither format is automatically better. Full-size patterns save setup time, while measurement-based plans can make customization easier. What matters is that the PDF states its format clearly and gives you enough information to verify the scale.
Choose the Right Journal Before You Cut Leather
The easiest way to get a satisfying result is to begin with the exact notebook you plan to use. Set it on the bench, measure its height, width, and thickness, and note whether it has rounded corners, a hard cover, spiral binding, or an elastic closure. These features affect what kind of leather cover will work best.
A slim stitched notebook usually fits comfortably inside a cover with simple slip pockets. A thicker hardcover journal may need deeper pockets, a roomier spine allowance, or a wrap style that does not rely on tight sleeves. Spiral-bound notebooks need special consideration because the coil can prevent the cover from lying flat and may rub against the leather over time.
If a template is made for replaceable inserts, do not assume it will fit a permanently bound journal. Replaceable-cover designs often use flexible flaps, elastic cords, or a notebook sleeve system. They are practical for daily use, but their measurements are built around a particular type of insert.
Before cutting leather, make a paper mockup. Cardstock, poster board, or even a cereal box works well for this step. Tape the pieces together, insert the journal, and open and close it several times. You are checking for a cover that holds the notebook securely without forcing it to bow or making the front flap spring open.
Match Leather Weight to the Construction
Leather selection has a direct effect on fit. A pattern designed around lightweight to medium-weight leather may become stiff and bulky when cut from heavy veg-tan. In particular, interior pockets can stack up quickly at the fold and create a thick ridge along the spine.
For a flexible everyday cover, many makers prefer leather that bends easily and does not fight the journal. Chrome-tanned leather, oil-tanned leather, and lighter veg-tan can all work, depending on the look and finishing process you want. A firmer veg-tan cover gives you a crisp, structured result and provides a good surface for tooling or stamping, but it may need more break-in time.
Think about the project as a whole rather than choosing leather by appearance alone. A soft pull-up exterior paired with thick, stiff interior pockets can make assembly harder than necessary. A lighter lining leather or a pocketless design may be the better choice when you want a slim cover.
If the PDF includes a recommended leather weight, treat it as useful guidance rather than a restriction. You can substitute materials, but adjust your expectations. Heavier leather may require a wider spine allowance, thinner pocket leather, or a simpler construction.
Build With a Clean Order of Operations
Journal covers reward preparation. Long edge work is easier before assembly, and pockets are much easier to finish before they are attached to the exterior. Read the entire pattern once, then lay out your leather pieces in their finished orientation before making any holes.
A dependable order usually looks like this: cut and inspect the pieces, bevel and burnish the accessible edges, mark fold lines, position pockets or closures, then punch and stitch. The exact sequence depends on the design, but the principle stays the same. Complete the work you cannot reach later before you commit the layers together.
Take extra care when marking stitch lines near the journal spine. A stitch line placed too close to a fold can restrict movement and make the cover feel rigid. One placed too far away can leave a loose, untidy pocket. A thoughtfully drafted leather journal cover template PDF should establish that relationship for you, but it is still worth checking with your paper mockup and the actual leather thickness.
For hand stitching, keep your spacing consistent and your tension firm but controlled. Pulling too hard can pucker softer leather or distort a long edge. If you use a pricking iron or stitching chisel, practice on a scrap from the same leather first. The leather’s firmness changes how cleanly holes open and how the finished stitch line sits.
Make the Design Your Own Without Changing the Fit
Once the base pattern is working, small choices can make the cover feel personal. A pen loop, a snap tab, a wrap strap, a card slot, or a stamped initial can add function without requiring a complete redesign. Add these features thoughtfully, especially if the cover is meant to stay slim.
A closure is a good example of a trade-off. An elastic band is simple, forgiving, and practical for notebooks that expand over time. A snap tab creates a more tailored look but needs accurate placement and can add bulk at the edge. A long wrap strap suits a rustic or field-notes style build, though it uses more leather and changes the cutting layout.
Decorative work deserves the same planning as construction. Tooling, carving, dyeing, and stamping are usually best completed on the exterior panel before the cover is assembled. Test dye color and finish on a scrap first. Leather can darken, absorb unevenly, or show more contrast than expected once a finish is applied.
A Pattern Should Leave Room for Good Craft
A reliable template does not remove the maker from the project. It handles the repeatable geometry – panel sizes, pocket depths, stitch placement, and construction order – so you can focus on clean cuts, thoughtful material choices, and the small details that make the cover yours.
If you are building your first cover, choose a design with a straightforward notebook fit and minimal hardware. If you already have a few projects behind you, look for a pattern that gives you a fresh construction detail without asking you to draft every piece from scratch. Old Line Crafts & Designs creates patterns with that bench-ready balance in mind: enough structure to build with confidence, and enough creative space to make a finished piece you will be proud to use.
Print the template, check the scale, mock up the fit, and let the leather tell you what it needs. A journal cover is made to gather marks, notes, and miles over time. Starting with a clear pattern gives it the considered beginning it deserves.
A good leather tool roll earns its place quickly. It keeps your most-used tools together, protects edges from knocking into one another, and makes it easier to move from the bench to a class, market setup, or weekend project. The right leather tool roll pattern PDF gives you more than a cutting outline. It gives you a clear plan for building something you will reach for often.
Tool rolls look simple at first glance, but the details decide whether they feel useful or frustrating. Pocket spacing, leather weight, closure placement, and the order of assembly all affect the finished roll. Starting with a thoughtfully organized pattern means less time guessing and more time building.
What a leather tool roll pattern PDF should show
A workshop-ready pattern begins with accurate full-size pieces or clearly marked dimensions. You should be able to print the pages, confirm the scale using a test square, and understand how the pieces join before cutting into good leather. If a pattern requires tiling across multiple pages, page alignment marks make that process far easier.
Look for a layout that identifies each component: the main body, pocket panel, flap if included, straps, and any reinforcement pieces. Clear labels prevent a surprisingly common mistake: cutting a small strap or pocket from the wrong leather before you have considered stretch, thickness, or grain direction.
Construction notes matter just as much as the template. A useful pattern explains where to glue, when to mark or punch stitch holes, and when to install hardware. It does not need to teach every basic leatherworking skill from the ground up, but it should make the project sequence easy to follow for a maker with basic cutting, stitching, and finishing experience.
Start with the tools you actually use
Before choosing a design, set out the tools you want the roll to carry. Not the full collection in your drawer. Choose the tools you regularly bring to the bench: perhaps a skiving knife, edge beveler, scratch awl, stitching chisels, wing dividers, a small ruler, and a few hand tools.
Measure their width and length, then consider the handle shapes. A row of equal narrow pockets may suit edge tools and slim awls, but it will not comfortably hold a round maul handle or a thicker knife. A roll with varied pocket widths is often more practical than one with many identical slots.
Also consider height. Tool pockets should expose enough handle to grab easily while covering sharp points and working edges. If the pockets are too shallow, tools can shift or fall out when the roll is carried vertically. If they are too tall, you may have to tug at every tool to remove it. There is no single perfect measurement because tool sets vary, but a pattern should give you a sensible starting proportion.
A good test is to place paper strips over your tools before cutting leather. Fold and tape the strips into approximate pocket shapes, then roll them around the tools. This small bench test can reveal whether a pocket needs more width, a flap needs more length, or a closure needs to sit farther from the edge.
Choose leather that supports the design
Most leather tool rolls benefit from vegetable-tanned leather because it cuts cleanly, takes a burnished edge well, and gives the project a structured feel. For a lighter everyday roll, medium-weight leather can keep bulk under control. For a larger roll carrying heavy hand tools, a firmer main body and reinforced strap area may be the better choice.
Thickness is a trade-off. Heavy leather offers protection and presence, but several folded pocket layers can become difficult to stitch and stiff to roll. Lighter leather creates a more flexible result, though it may need support at stress points. The pattern’s recommended leather weight is useful guidance, especially if it accounts for how many layers meet at the pocket base and closure.
Soft chrome-tanned leather can work well as a lining or for a relaxed tool wrap, but it behaves differently from veg tan. It may stretch more, burnish less predictably, and require more care when marking and gluing. If you are building your first tool roll, following the leather type and weight suggested by the pattern usually produces the most predictable result.
Pay attention to pocket construction
The pocket panel is the working center of the project. In many designs, it is stitched along vertical lines to create individual slots, then attached at the bottom to the main body. The order matters. Stitching pocket divisions after the panel is fully attached can leave you fighting excess material under the presser foot or stitching pony.
Mark stitch lines carefully and check the spacing a second time before punching. Small variations become obvious across a row of pockets. If you are hand stitching, use a stitching chisel size that fits the scale of the project. Very large spacing can look coarse on narrow tool pockets, while extremely fine spacing may add unnecessary work and crowd the leather.
Pocket depth should also allow for the curve created when the roll closes. Tools and leather take up more room in a rolled position than they do laid flat. A pattern designed around this reality will leave enough clearance so the pocket panel does not pull, wrinkle, or force the closure out of alignment.
Closures and carry styles change the experience
A simple leather tie is quiet, repairable, and fitting for a traditional shop roll. It also allows some flexibility if the roll carries a different number of tools from one day to the next. A buckle strap gives a more structured look and can feel secure, but it adds hardware work and requires accurate placement. Snaps are quick to use, although they are less forgiving if the packed roll becomes much thicker or thinner than planned.
Some makers prefer a flap that folds over the tool handles before the roll closes. This helps keep tools contained and adds protection, particularly if the roll will travel in a bag. Others prefer an open-top design for faster access at the bench. Neither is automatically better. Choose based on whether the roll is primarily for storage, transport, or daily use beside your work.
Print, check, and prepare before you cut
Print the pattern at 100 percent scale, not “fit to page.” Then measure the included reference square with a ruler. This takes less than a minute and can save an entire project from being slightly undersized. If your printer changes scale, check its settings and print again before proceeding.
Cut out the paper pieces and arrange them on your leather with grain direction in mind. Long straps should generally run along the stronger direction of the hide, and visible pieces deserve a clean area with character that suits the project. Natural marks can add personality, but avoid weak spots, deep scars, or loose grain where the strap bends and pulls.
Mark only what you need. Cut lines, fold lines, stitch lines, and hardware centers are useful. Too many marks can clutter the grain side and create opportunities for error. A disciplined pattern helps here by separating cutting information from construction information rather than placing every instruction on one crowded page.
Build confidence through the small steps
A tool roll is an approachable project, but it rewards patience. Square cuts, even pocket divisions, clean edges, and a closure that lands in the right place create the polished result people notice. Take time to dry-fit the pieces before glue-up, especially around the pocket panel and straps.
Old Line Crafts & Designs approaches project patterns with that bench reality in mind: clear structure should support your decisions without taking the satisfaction out of making. You can still choose the leather, edge treatment, thread color, and hardware that make the project your own.
If you want a more personal fit, adjust with care. Widening one pocket may require shifting every pocket line that follows. Adding a flap changes the amount of leather needed and may affect strap length. Make changes on paper first, then test them with your own tools before committing to the hide.
A well-made tool roll does not need to hold everything you own. It only needs to hold the tools that help you sit down, get to work, and enjoy the next project with a clearer bench.
A card holder is a small project, but it leaves very little room for uncertainty. A pocket set that is a fraction too tight, a fold line that lands in the wrong place, or a template printed off-scale can turn good leather into a frustrating build. The right printable leather card holder template gives you a dependable starting point, so you can spend less time guessing and more time building a piece you will want to carry.
For a first wallet project, a card holder is also one of the best ways to practice the details that make leatherwork feel refined: accurate cutting, clean edge preparation, even stitch spacing, and thoughtful finishing. For an experienced maker, it is a quick, useful build that can become a reliable gift, market item, or personal everyday carry.
What a Good Printable Leather Card Holder Template Should Do
A printable template should do more than provide an outline. It should help you understand how the finished piece comes together before you make the first cut. At minimum, the layout needs clear cut lines, stitch locations or a stitching guide, fold references where needed, and dimensions that remain accurate when printed.
Scale is the first detail to check. A pattern designed for US Letter paper should include a one-inch test square or another clear scale reference. Print the page at 100 percent or Actual Size, then measure that reference before transferring anything to leather. Avoid settings such as Fit to Page, Shrink Oversized Pages, or automatic scaling. They are convenient for documents, but they can change a close-fitting card pocket enough to affect the finished result.
The design itself should also account for real cards, not just flat measurements on paper. Standard payment cards are roughly 3.37 by 2.13 inches, yet a holder needs room for leather thickness, stitched seams, and cards sliding in and out without a fight. Pocket allowances are one of the places where a well-considered pattern saves time. You can certainly draft your own, but it often takes a few test versions to get that fit right.
Clear construction order matters just as much. A simple card holder may have only a few pieces, but the order of operations still affects the outcome. Pocket tops are easier to burnish before assembly. Decorative tooling, stamping, or maker marks usually belong on the panels before stitching. Glue-up, punching, stitching, and final edge work each have their place. A pattern with practical guidance helps keep those steps from becoming an afterthought.
Choose a Card Holder Design That Fits Your Bench
Not every card holder template suits every maker or use case. Before choosing a design, think about what the holder needs to carry and how you want to build it.
A slim front-pocket card holder is often the most approachable option. It may use a back panel and two or three layered pockets, creating a compact piece for a few cards and folded bills. This format is a good choice when you want to practice aligned layers and perimeter stitching without adding complex folds.
A folded card wallet adds capacity and offers a more traditional profile. It can include interior slots, a center pocket, or room for cash, but it also introduces a crease or fold that needs to be planned around leather temper and thickness. If you use firm vegetable-tanned leather, skiving the fold area or choosing a thinner weight can make a noticeable difference.
Minimal one-piece or two-piece designs are fast and satisfying, especially for gifts or batch work. Their simplicity is part of the appeal, though it means every visible detail carries more weight. Cut edges, stitch lines, and corner shaping need to be especially clean because there is nowhere for rough work to hide.
For a first build, choose a template with a construction method that matches the tools already on your bench. If you hand stitch with pricking irons, a pattern that provides stitch marks or spacing guidance will be useful. If you prefer a sewing machine, make sure the design leaves a practical seam allowance and does not depend on hand-punched holes. The best project is not necessarily the most detailed one. It is the one you can complete with confidence using the materials and tools you have.
Leather Weight Changes the Pattern Fit
A printable leather card holder template is a plan, not a rule that ignores material. Leather thickness has a direct effect on pocket capacity, edge bulk, and how neatly the holder closes or lies flat.
For many card holders, leather in the 2 to 3 ounce range works well for pockets, while a slightly firmer 3 to 4 ounce leather can suit a back panel. That is a starting point rather than a fixed formula. A soft chrome-tanned leather may need reinforcement or a more structured lining. A dense, firm vegetable-tanned leather can create beautiful edges and crisp shape, but it may become bulky quickly when several layers meet.
If you want to use heavier leather than the pattern suggests, consider skiving pocket edges, fold areas, and stacked seam allowances. Skiving reduces bulk where it matters most while preserving the strength of the main panel. It is worth practicing on a scrap from the same hide first. A few controlled passes are easier to manage than trying to remove too much leather at once.
Leather temper also affects the experience of using the holder. Firmer leather holds a sharp silhouette and can develop character with use. Softer leather feels broken-in sooner and may accept cards more easily, but it can stretch over time. Neither choice is wrong. Match the material to the look, feel, and durability you want from the finished piece.
Make a Test Piece When Fit Matters
A paper mockup is one of the simplest ways to prevent an avoidable mistake. Print the pattern, cut it out, and tape the pieces into their approximate finished form. Slide in the cards you expect the holder to carry. This reveals whether the format feels too tall, too wide, or too shallow before leather enters the equation.
For an unfamiliar template or a thicker hide, make a quick prototype from inexpensive leather, craft foam, or heavy cardstock. You do not need to fully finish it. The purpose is to check pocket depth, stitch placement, and the way the layers stack. This short test is especially helpful if you plan to modify the pattern with additional pockets, a thumb notch, or a different corner shape.
Print, Transfer, and Cut With Care
Once the pattern has printed at the correct scale, keep the paper template accurate. Cut directly on the template lines with scissors or a utility knife, then place it on the leather in a way that respects the grain and any visible character marks. For a polished exterior panel, avoid placing a deep scar or loose grain in the most visible area unless that natural feature is part of the look you want.
Some makers trace around templates with a scratch awl or silver pen; others use pattern weights and cut around the paper. Both approaches can work well. The important part is consistency. Mark stitch lines, pocket tops, and alignment references lightly enough that they will not show after assembly.
Take extra care when cutting matching pocket pieces. Stack-cutting can save time, but only if your knife stays vertical and the leather does not shift. For a first attempt, cutting each piece separately may be slower but easier to control. A clean cut edge makes every later step, from gluing to burnishing, more predictable.
Before glue-up, dry fit the full layout. Check that pocket openings sit level, side edges align, and any decorative elements face the intended direction. Then prepare the edges that will be inaccessible after stitching. This is often the difference between a card holder that feels thoughtfully finished and one that feels rushed.
Small Details Create a Finished Look
A card holder earns its character through details. Rounded corners can feel classic and forgiving in a pocket. Sharper corners create a more architectural look but demand precise trimming. A contrast thread highlights the stitch line, while tonal thread lets the leather take center stage. Burnished natural edges suit vegetable-tanned leather, while painted edges can create a clean, modern finish on certain leathers.
Keep the project focused. One well-placed stamp, a simple maker mark, or a carefully chosen thread color usually does more than several competing details. If you are making the holder as a gift, initials can be meaningful, but place them where they will not interfere with pocket flex or stitching.
Old Line Crafts & Designs patterns are built for makers who want a clear path from printed page to finished project. Whether you choose a simple card sleeve or a layered wallet, the goal remains the same: a design that fits your bench and leaves room for your own material choices and finish work.
Print at the right scale, check the fit before cutting, and let the quality of your preparation carry through the final stitch. A well-made card holder may be small, but every time it is used, the care you put into it will be easy to see.
A wallet can look like a small project right up until you begin cutting. Then the questions arrive: Will the pockets hold cards without stretching out? Is there enough room for stitching? Which layers should be skived, and which should stay firm? A well-designed leather wallet pattern answers those questions before your leather reaches the cutting mat.
For hobby makers, that structure matters. You still get the satisfaction of choosing the leather, thread, edge treatment, and final character of the piece. But you spend less time correcting avoidable fit problems and more time building a wallet you will actually want to carry.
What a Good Leather Wallet Pattern Should Solve
A wallet pattern is more than an outline to trace. It is a construction plan for a compact item where every fraction of an inch affects the finished result. Pocket placement, fold allowance, stitch-line spacing, leather thickness, and assembly order all work together.
The strongest patterns make those decisions visible. They show each piece clearly, identify what gets cut from leather, and account for the overlap needed to secure a card pocket or create a clean fold. They also give you a workable sequence, so you are not trying to stitch a section that should have been finished earlier.
This is especially useful with wallets because the project has little room for error. A slightly narrow pocket can make cards difficult to remove. A stack of thick leather at the center fold can keep the wallet from closing comfortably. Stitching too close to an edge can weaken a high-use area. The pattern does not replace good bench habits, but it gives those habits a sound starting point.
Choose a Leather Wallet Pattern for Your Carry
Before selecting a design, think about the wallet you want to use, not just the wallet you want to make. A clean card holder is satisfying to build, but it may not serve someone who carries several cards, folded bills, receipts, or an ID every day.
Start with the wallet style
A card holder is often a good first wallet project. It uses fewer pieces, has fewer layers, and lets you focus on accurate cutting, gluing, stitching, and edge finishing. It is a practical choice if you want to build confidence with small leather goods.
A bifold gives you more storage and a classic everyday format. It also introduces more planning. You may need multiple interior pockets, a long fold, and careful control of leather thickness near the spine. The finished piece can be rewarding, but it asks more from your material selection and assembly process.
Minimalist bifolds, vertical wallets, and money clips sit somewhere in between. Their layouts are often simpler than a traditional bifold, yet they still teach useful lessons about pocket geometry and carrying comfort. Choose the format that fits the intended use first. A wallet that looks refined but does not suit the owner’s daily carry will spend more time in a drawer than a pocket.
Match the pattern to your current skills
A beginner does not need to avoid wallets, but it helps to choose a project with a manageable number of pieces and straightforward stitch runs. Look for clear markings, practical instructions, and a construction order that does not assume you already know how to solve every detail.
More experienced makers may prefer a design with layered interiors, turned edges, or opportunities for customization. Even then, a thoughtfully organized pattern saves time. Drafting from scratch has its place, but using a ready-to-build design can let you focus on leather selection, refinement, and your own finishing choices.
Check your tools before you begin
Most wallet patterns can be built with a modest set of hand tools, but the details matter. Confirm whether the project calls for a punch size you own, a specific stitch spacing, skiving, rivets, snaps, or hardware. If a pattern includes a fold line, make sure you have a method for creasing or lightly grooving it without damaging the grain.
Do not treat a tool list as a challenge to buy everything at once. Often, a simpler pattern is the better choice if it allows you to build well with the tools already on your bench. Clean cuts, consistent glue placement, and careful stitching will do more for the finished wallet than an elaborate tool collection.
Read the Pattern Before Cutting Leather
Printing and cutting immediately is tempting, especially when a new project is waiting. Take a few minutes to review the entire pattern first. That short pause can save a good hide from a frustrating mistake.
Confirm the print scale according to the pattern instructions. Many printable patterns include a reference square or measurement line for this reason. If that reference is off, every pocket and panel will be off with it.
Next, identify each pattern piece and note whether it needs to be cut once, twice, or mirrored. This is a common point of confusion with interior pockets and side panels. If you are using leather with a pronounced grain, pull-up effect, or color variation, plan the orientation of each piece before tracing. A pocket cut in the opposite direction may still function, but it can change the visual balance of the wallet.
Finally, walk through the assembly order in your head. Notice which edges need to be beveled and burnished before they are covered by another layer. Mark stitch lines and crease lines where needed. A good build feels calmer when these small decisions happen early.
Use a Test Fit for Pockets and Folds
Paper templates are useful, but a quick test fit with scrap leather or heavy cardstock can reveal what a flat pattern cannot. Place actual cards in the pocket layout and check the reveal at the top. You want enough card exposed to remove it easily, without leaving so much exposed that it feels insecure.
Remember that leather thickness changes the final dimensions. A pattern designed for thinner interior leather may feel tight if every layer is cut from firm, heavy vegetable-tanned leather. For many wallets, a firmer outer shell paired with thinner pocket leather creates a more comfortable result. The right combination depends on the pattern, the wallet style, and the look you want.
Test the fold, too. On a bifold, the center area needs enough room for the layers to bend naturally. If the fold feels bulky during a dry fit, it will not improve after stitching. Skiving or thinning selected areas can help, but it is better to make that decision before glue and thread make the assembly permanent.
Build in an Order That Keeps Edges Clean
Wallet construction rewards patience because some of the best-looking details become inaccessible later. Interior pocket edges are the clearest example. Once a pocket is glued beneath another panel, you may no longer be able to bevel, burnish, or apply edge paint neatly.
Start by cutting accurately and labeling pieces lightly on the flesh side. Then complete any required skiving, crease work, or interior edge finishing before glue-up. Dry fit the layers once more, especially if you have adjusted leather weight or made a small personalization change.
When it is time to assemble, use light, controlled glue coverage. Excess adhesive near pocket openings can create a messy edge or interfere with burnishing. Let glued sections set as directed by your adhesive, then stitch with a consistent rhythm. On compact projects, uneven stitch spacing stands out quickly, so take the time to keep your awl or irons aligned.
After stitching, trim and refine the outer edge only if the pattern and construction method allow it. Then bevel, sand, burnish, or paint according to the finish you prefer. There is no single correct edge treatment. A burnished veg-tan edge has a different character from a painted chrome-tan edge, and both can look excellent when they suit the leather and the build.
Signs a Wallet Pattern Is Ready for Your Bench
Before committing to a design, look for practical signals that it has been organized with the maker in mind:
Clearly labeled pattern pieces with usable cut lines and measurements
A defined assembly order, including notes for folds, pockets, or hardware
Material guidance that helps you choose workable leather weights
Stitching and edge-finishing details that account for the finished construction
Clarity does not mean every creative decision is made for you. The best patterns leave room for your own leather, thread color, stamp work, lining choice, and finish. They simply remove the uncertainty that does not add anything useful to the project.
At Old Line Crafts & Designs, that is the purpose behind a workshop-ready pattern: give makers a clean layout and practical guidance, while leaving the craft itself in their hands.
Make the Pattern Your Own, One Change at a Time
Once you understand the construction, customization becomes more enjoyable and less risky. You might change thread color, add a maker’s mark, choose a contrasting pocket leather, or alter the edge finish. These are small choices, but they can give a familiar design a distinct personality.
Be cautious with dimensional changes. Widening a pocket, shortening a panel, or substituting thicker leather can affect several connected pieces. If you want to modify the layout, make a paper mockup first and test it with real cards and bills. That simple step protects your leather and helps you learn why the original dimensions were chosen.
A good wallet project should leave you with more than a finished accessory. It should teach you something useful for the next build: how leather weight affects a fold, how much pocket reveal feels right, or how a better assembly sequence makes the whole process easier. Choose a design that fits your bench now, build it with care, and let the next one carry a little more of your own experience.
One of the first questions new leatherworkers encounter is also one of the most important:
What thickness of leather should I use?
Buy leather that is too thin and a project that should be firm may feel floppy and weak. Buy leather that is too heavy and a wallet can become bulky, a strap may resist folding, and a detailed project can become unnecessarily difficult to assemble.
The challenge is that leather is commonly sold by weight in ounces, even though what most beginners really want to know is how thick it is.
This guide explains leather weights in straightforward terms and gives practical starting points for everything from card holders and straps to leather bracers and cosplay armor.
Understanding Leather Weight
In leathercraft, an ounce is a measurement of thickness, not the weight of the entire hide.
As a practical approximation:
1 oz leather ≈ 1/64 inch ≈ 0.4 mm thick
Because leather is a natural material, thickness varies across a hide. That is why suppliers frequently list a range such as 4–5 oz rather than one exact measurement.
Here is a useful workbench reference:
Leather Weight
Approx. Thickness
Typical Uses
2–3 oz
0.8–1.2 mm
Wallet pockets, linings, lightweight details
3–4 oz
1.2–1.6 mm
Card holders, wallet components, small accessories
4–5 oz
1.6–2.0 mm
Wallet exteriors, pouches, light straps, general projects
5–6 oz
2.0–2.4 mm
Heavier accessories, bracers, structured projects
6–7 oz
2.4–2.8 mm
Belts, straps, heavier bracers, armor components
7–8 oz
2.8–3.2 mm
Belts, sheaths, structured armor
8–9 oz
3.2–3.6 mm
Heavy belts, sheaths, substantial armor pieces
9–10 oz
3.6–4.0 mm
Heavy-duty and rigid leather projects
These are starting points rather than absolute rules. A design, construction method, desired flexibility, and number of leather layers can all change the ideal choice.
What Type of Leather Should a Beginner Buy?
For many traditional leathercraft projects, vegetable-tanned leather, commonly called veg-tan, is an excellent material to learn with.
It can be cut, punched, stamped, carved, dyed, burnished, wet-formed, and finished in many different ways. Current beginner guidance likewise commonly recommends vegetable-tanned leather because of its firmness, ability to accept tooling and finishing, and suitability for developing core leatherworking skills.
That versatility is particularly useful when you are learning because one piece of leather can teach you several techniques.
Chrome-tanned leather is also useful, but it tends to be softer and is often better suited to projects where flexibility is desirable, such as soft bags, garments, linings, and certain accessories.
Neither tanning method is universally “better.” The correct choice depends on what you are making.
A card holder needs enough structure to retain cards without becoming unnecessarily bulky.
For many designs, 3–4 oz vegetable-tanned leather is a useful starting point. Current leather selection references similarly place three-slot card holders around this range.
Remember that multiple layers add up quickly.
Three layers of 4 oz leather stacked together create a much thicker edge than a single 4 oz piece.
For a layered card holder, you might therefore combine:
3–4 oz exterior leather
2–3 oz pocket leather
This is one reason experienced leatherworkers often use different weights within the same project.
Wallets present the same problem on a larger scale.
A beautiful piece of 8 oz leather may be excellent for a belt, but several layers of it would create an extremely bulky wallet.
A practical combination might use:
Exterior: approximately 3–5 oz Interior pockets: approximately 2–3 oz
The exact combination depends on the design.
When evaluating a wallet pattern, think about the finished stack, not just the thickness of each individual piece.
Best Leather for Keychains and Small Accessories
Keychains can tolerate somewhat heavier leather because they normally contain fewer stacked layers.
Approximately 4–6 oz works well for many designs, although folded keychains may benefit from lighter leather depending on how many layers overlap.
This is an excellent place to use scraps left from larger projects.
Best Leather for Watch Straps
Watch straps need an interesting combination of strength, comfort, and flexibility.
A strap that is too thin can feel insubstantial. One that is too thick may not bend comfortably around the wrist or fit correctly through the buckle and hardware.
Approximately 3–4 oz leather can provide a useful starting point, although lined straps may use thinner individual layers. Leather-selection references likewise commonly place watch straps around this range.
Always consider the dimensions of your buckle and watch adapters before selecting leather.
Best Leather Thickness for Belts and Heavy Straps
Belts require substantially more structure than wallets.
Approximately 7–9 oz is a common range for a single-layer leather belt, although the desired style and construction can change that considerably.
Heavy straps used on bags, armor, and equipment may fall into a similar range.
If two pieces will be laminated together, lighter leather can be used to achieve the desired finished thickness.
What Leather Should You Use for Leather Armor?
Armor introduces another variable: structure.
A costume bracer does not need the same flexibility as a wallet pocket. A breastplate needs even more structure.
Vegetable-tanned leather is particularly useful because moisture allows it to be shaped and molded. Once dry, appropriately selected veg-tan can retain considerably more form than soft garment leather.
For many cosplay and LARP projects, useful starting ranges are:
These should not be treated as safety specifications. They are construction guidance for costume, cosplay, Renaissance Faire, and appropriate LARP projects—not certified protective equipment.
Commercial leather-armor patterns likewise vary considerably by design. For example, Tandy Leather recommends 4–5 oz firm-tempered leather for one chest-armor pattern, illustrating why the pattern’s construction matters as much as a generic weight rule.
If you want to learn leather armor construction, you do not need to start with a full cuirass.
Bracers are an excellent first armor project because they require relatively little leather while teaching techniques that transfer directly to larger builds:
Pattern tracing
Accurate cutting
Hole punching
Edge finishing
Rivet setting
Strap installation
Optional stitching
Wet forming
Fitting
Old Line Crafts & Designs’ Wayfarer Bracers were designed around exactly this progression. The pattern recommends 5–8 oz vegetable-tanned leather for the main bracer and overlays, with optional lighter leather or suede for details.
This is also a natural entry point into the Armor for the Commoner collection.
What Leather Should You Use for Spartan-Style Armor?
A Spartan-inspired helmet, pauldrons, greaves, and other structured pieces generally need more body than small everyday-carry goods.
For these projects, vegetable-tanned leather provides another advantage: it can accept tooling, decorative borders, dye, antiquing, and molded shaping.
That allows one basic pattern to produce very different finished appearances.
A maker might choose:
Natural veg-tan + antique finish for an aged historical-fantasy appearance.
Dark brown dye + brass hardware for a rugged campaign-worn look.
Black dye + contrasting edges for a darker fantasy interpretation.
The pattern should always take priority over a generic leather-weight chart because its geometry and assembly method were designed around a particular material range.
Why Leather Thickness Changes Your Hardware Choice
Leather thickness also affects your hardware.
A rivet post needs enough length to pass through every leather layer while leaving enough material to set correctly.
The same principle applies to:
Chicago screws
Snaps
Buckles
Rivets
Sam Browne studs
This becomes especially important with armor because an assembly may contain a base layer, decorative overlay, strap, and hardware at the same connection point.
Do not choose hardware before calculating the total assembled thickness.
Thickness Also Changes Your Stitching
Leather thickness affects hand stitching too.
As projects become heavier, you may choose different:
Thread diameters
Needle sizes
Stitch spacing
Edge offsets
Hole sizes
A delicate card holder and a heavy leather armor component should not necessarily use identical stitching.
This is particularly important for wearable leather projects.
Before cutting expensive leather, print the pattern at the specified scale and make a paper or cardstock mockup.
Check:
Overall dimensions
Wrist or arm circumference
Strap positions
Buckle locations
Range of movement
Overlap
Symmetry
Paper costs pennies.
Good leather does not.
For downloadable patterns, also verify the pattern’s calibration square before assembling the pages.
Buy for the Project, Not for Your Future Workshop
Beginners sometimes think they need an entire side of leather before they can begin.
You usually don’t.
For a first card holder, bracer, keychain, or small accessory, a correctly sized panel or shoulder can be a much more practical purchase.
Choose the project first.
Read its materials list.
Determine the leather weight.
Then buy enough material to complete the project plus some extra for testing.
That extra material is valuable.
Use it to test:
Dye
Stitch spacing
Rivets
Snaps
Edge burnishing
Tooling
Wet forming
Never make the first strike of a new stamp—or the first application of an unfamiliar dye—on your finished project.
Keep a Leather Scrap Library
One of the easiest ways to become better at choosing leather is to keep labeled scraps.
Write the weight on the flesh side:
3 oz 5 oz 7 oz 9 oz
Over time, you will stop thinking only in numbers.
You’ll be able to pick up a piece of leather and immediately understand how it will behave.
That experience is far more useful than memorizing a chart.
Quick Leather Selection Cheat Sheet
If you’re standing at the workbench wondering where to begin, use this as a starting point:
Wallet pockets: 2–3 oz Card holders: 3–4 oz Wallet exteriors: 3–5 oz Watch straps: 3–4 oz Keychains: 4–6 oz General beginner projects: 4–6 oz Bracers: 5–8 oz Belts: 7–9 oz Structured costume armor: approximately 6–10 oz depending on design
Then check the pattern instructions before purchasing your leather.
The Right Leather Makes the Project Easier
Leathercraft becomes much easier when the material is working with the design rather than against it.
The correct leather doesn’t guarantee a perfect project. You still need accurate cutting, good hole placement, consistent stitching or hardware installation, and careful finishing.
But choosing the appropriate leather gives all those skills a better foundation.
If you’re just beginning, start small.
Make a card holder.
Build a keychain.
Try a pair of bracers.
Learn how different leather weights cut, punch, stitch, burnish, and form.
Then move on to the larger project you’ve been thinking about.
At Old Line Crafts & Designs, our downloadable leathercraft patterns are designed to help makers turn those developing skills into finished projects—from practical everyday leather goods to wearable fantasy and medieval-inspired armor.
Start with the right leather. Follow the pattern. Build something of your own.