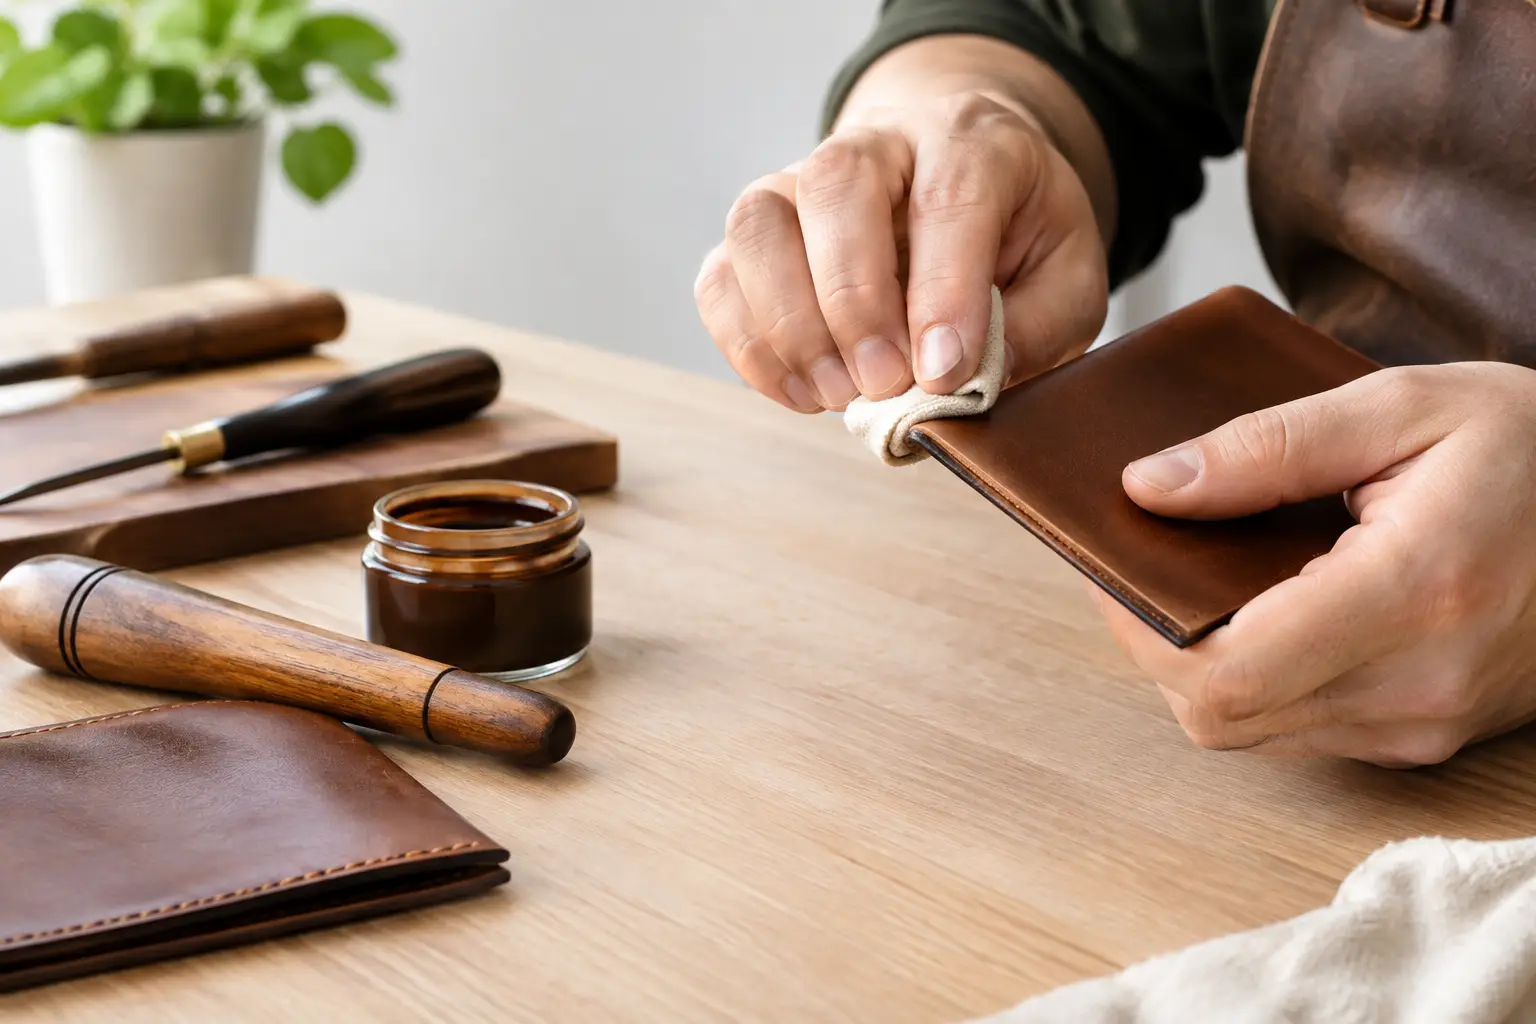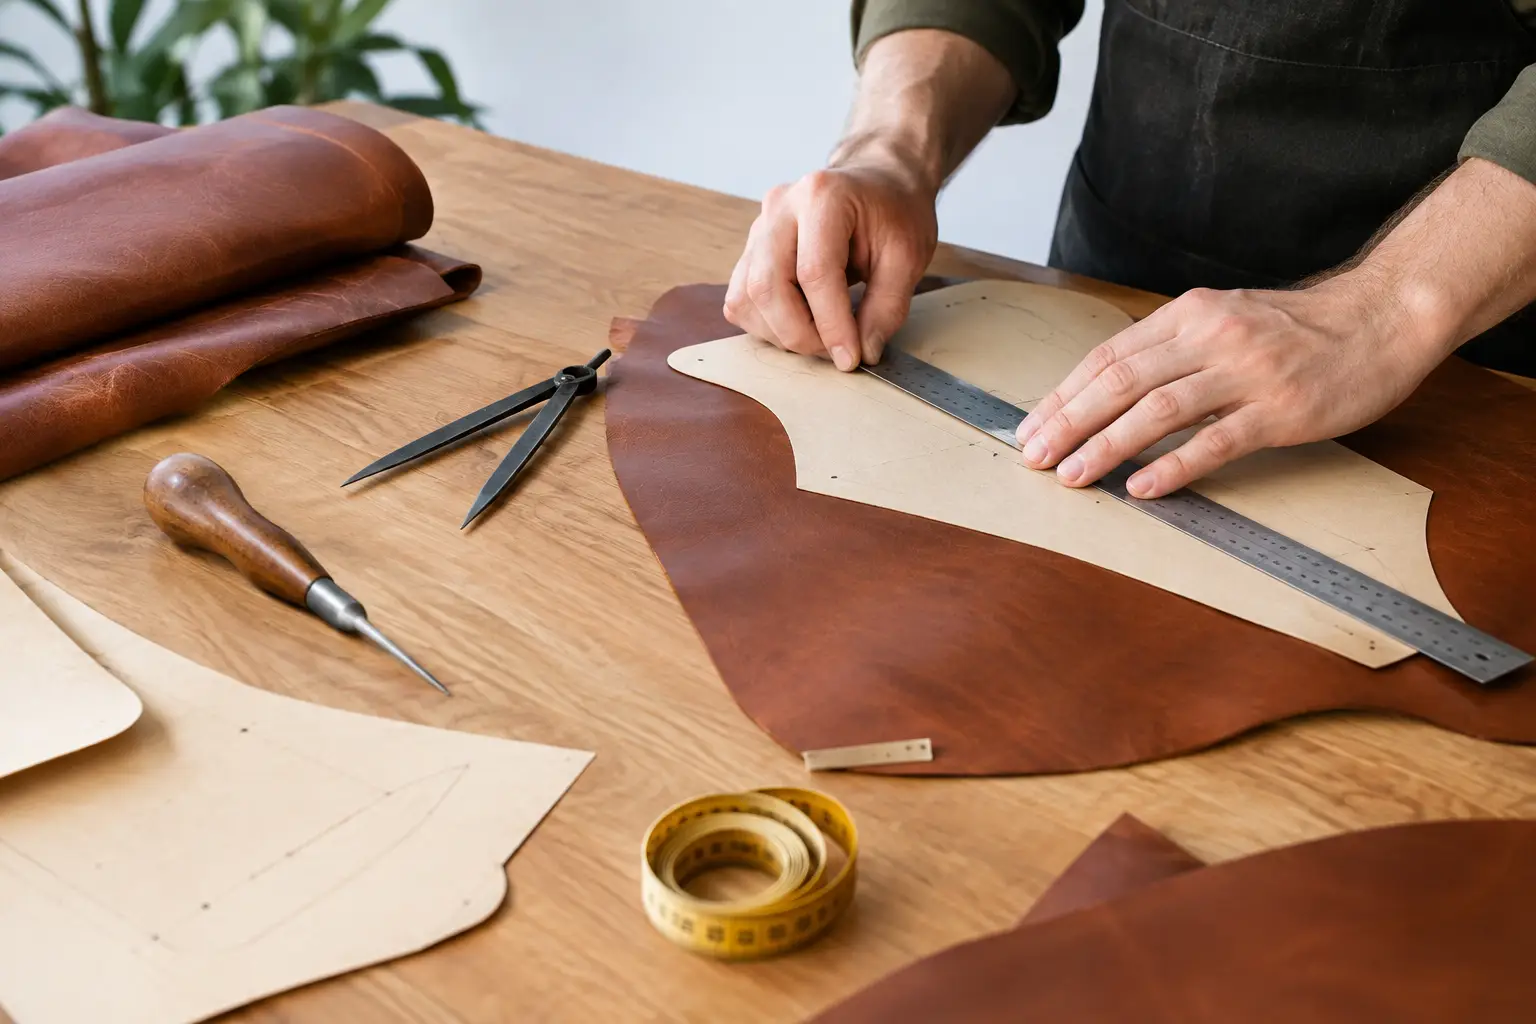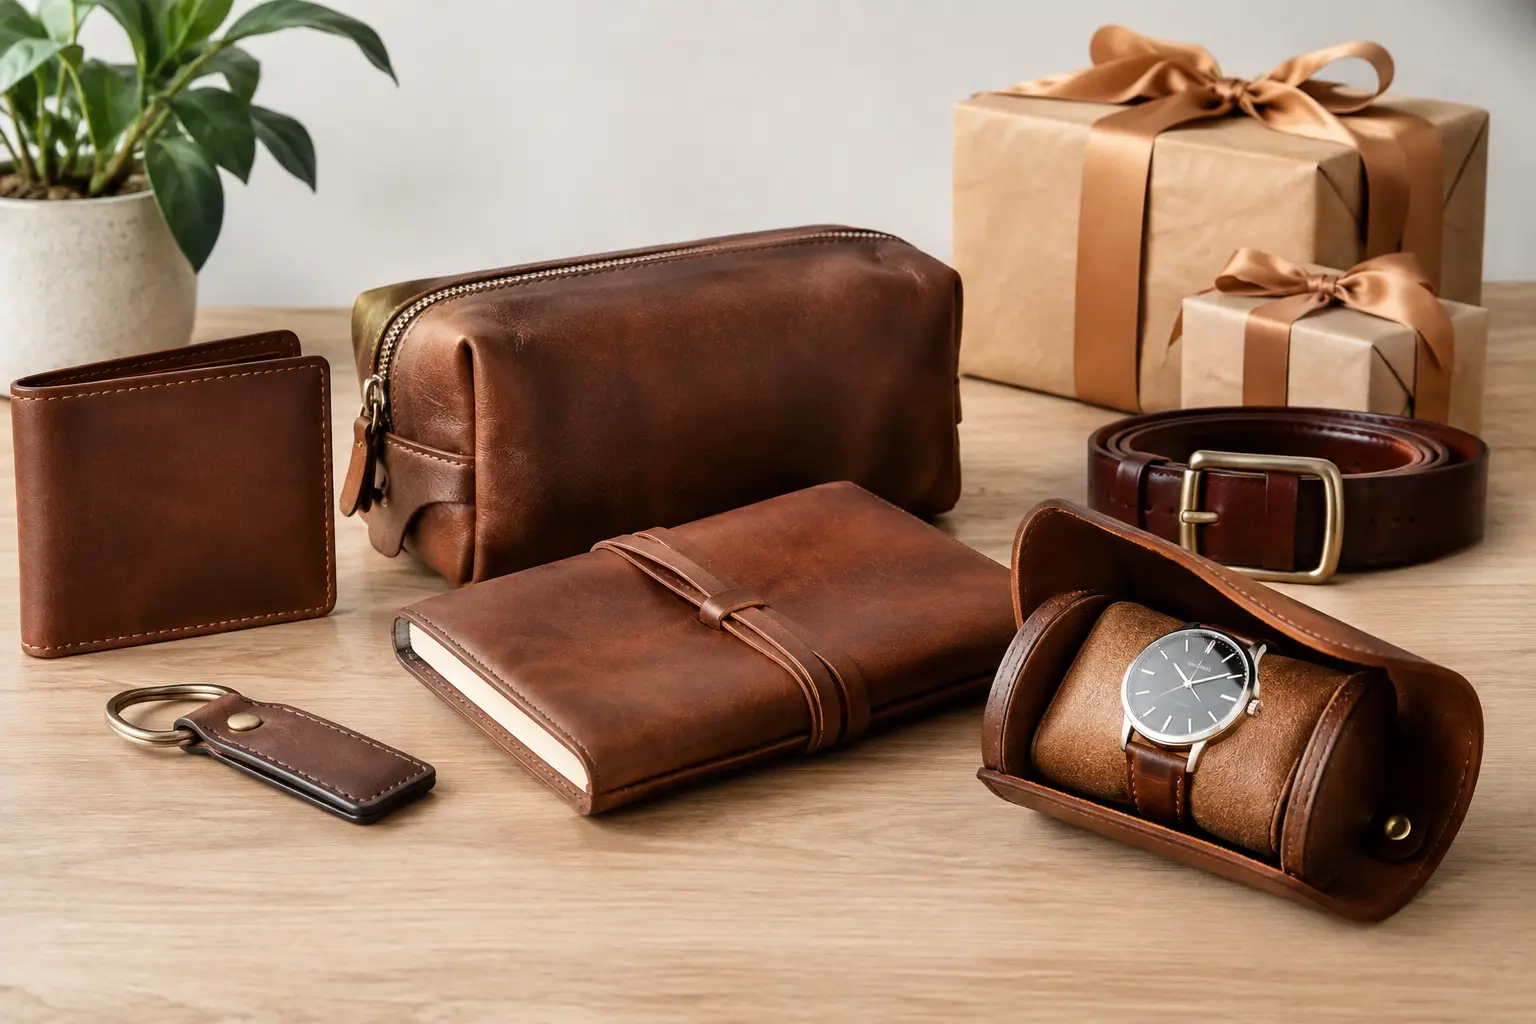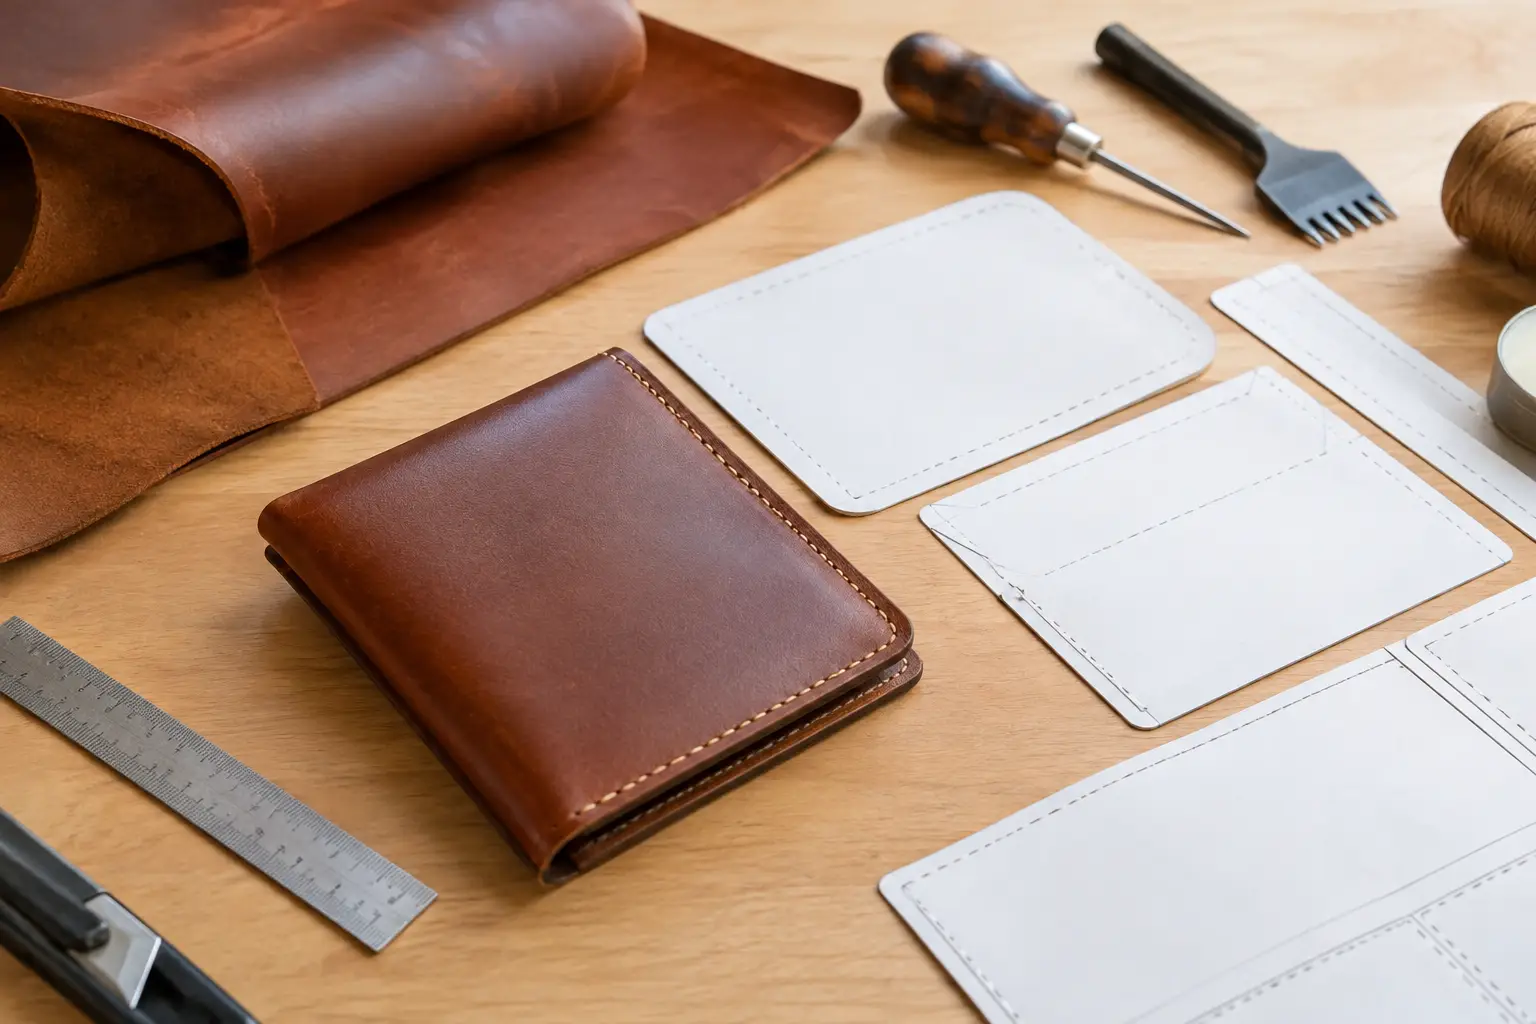
Category: Leathercraft

  • What Leather Thickness for Wallets Works Best?

    What Leather Thickness for Wallets Works Best?

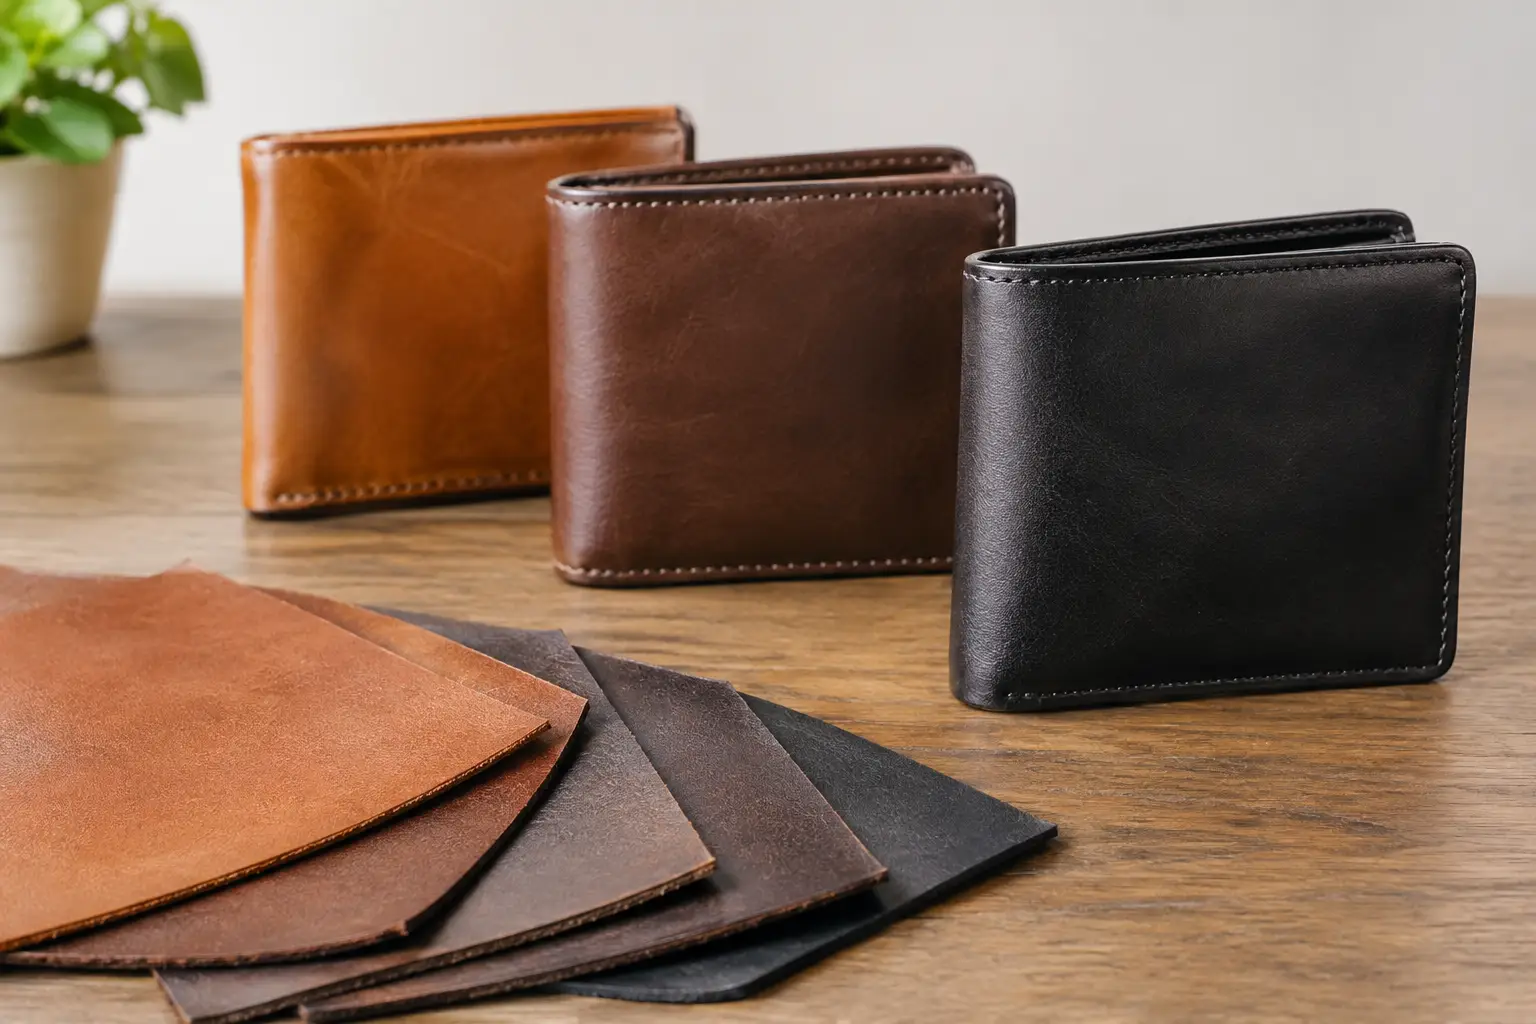
    A wallet can look clean on the cutting mat and still feel like a brick once the pockets, lining, thread, and cards are in place. That is why what leather thickness for wallets is one of the first decisions worth making before you cut a pattern. The right weight supports the design. The wrong weight can make a well-planned build difficult to fold, stitch, and carry.

    For most handmade wallets, the goal is not simply durability. It is controlled structure: enough body to protect the contents and hold a crisp shape, with thin enough layers that the finished piece stays practical in a pocket.

    What leather thickness for wallets should you use?

    A dependable starting point is 3 to 4 oz leather for the exterior and 2 to 3 oz leather for interior card pockets. That combination works well for many bifolds, card wallets, and compact designs because it gives the outer shell presence without adding unnecessary bulk inside.

    Leather weight is commonly described in ounces, with 1 oz equaling roughly 1/64 inch. Leather is a natural material, so a hide marked 3 oz may not measure exactly the same in every area. Check the actual leather, especially when a project has several layers meeting at one fold or stitched edge.

    | Wallet component | Useful starting weight | Why it works | |—|—:|—| | Exterior panels | 3-4 oz | Holds shape and wears well without feeling overly stiff | | Card pockets | 2-3 oz | Keeps pocket stacks manageable and cards easier to use | | Linings or hidden reinforcements | 1.5-2.5 oz | Adds a finished look with minimal thickness | | Heavier utility wallet exterior | 4-5 oz | Works when a more rugged, structured feel is intentional |

    These are starting ranges, not fixed rules. A minimalist card holder may use 2 to 3 oz leather throughout. A larger bifold with a cash sleeve may need a slightly firmer exterior or a thoughtful reinforcement at the fold. Let the intended shape, pocket count, and leather temper guide the final choice.

    Thickness is about the full stack, not one panel

    The most common wallet mistake is choosing a reasonable leather weight for each individual piece but overlooking what happens when those pieces overlap. A 3 oz exterior sounds moderate. Add a 2 oz lining, two 2 oz card pockets, thread, folded edges, and a few stored cards, and the result can become noticeably thick.

    Look closely at the areas where layers meet. Card-pocket bottoms, center folds, gusseted sections, and perimeter seams deserve the most attention. If a pattern calls for multiple pocket tiers, thinner pocket leather often matters more than making the exterior lighter.

    This is also why skiving is such a useful wallet-making skill. Reducing the flesh side at pocket bottoms, seam allowances, folds, and turned edges can remove bulk where it matters while preserving strength in the visible areas. A clean skive lets a wallet close naturally instead of fighting against its own construction.

    Before committing to a full hide, stack small offcuts in the same order your pattern uses. Fold them, clip them, and place a few cards between the layers. This quick bench test reveals more than a thickness number alone. You will feel whether the fold wants to sit flat and whether the pockets are becoming too tight.

    Match the leather to the wallet style

    A slim card wallet and a traditional bifold ask different things of the leather. Using the same weight for both can work, but it may not produce the best result.

    For a minimalist card holder, 2 to 3 oz vegetable-tanned leather is often enough for the full build, particularly if the design has two or three pockets and no lining. A firmer leather can keep a small wallet tidy even at a lighter weight. If the leather is very soft, you may want a slightly heavier exterior or a reinforcing layer so the wallet does not collapse around the cards.

    For a standard bifold, 3 to 4 oz on the exterior with 2 to 3 oz pockets is a practical balance. If you are adding a full lining, consider dropping the lining to 1.5 to 2 oz. A full 3 oz lining behind several 2 oz pocket layers can make the wallet feel much thicker than expected.

    For a rugged field-style wallet or a long wallet meant to have a more substantial feel, 4 to 5 oz can be appropriate on the outside. Use that choice deliberately. Heavier leather will need more careful skiving at folds and seams, and it may require a longer break-in period before it becomes comfortable to carry.

    Temper matters as much as ounce weight

    Two leathers with the same listed weight can behave very differently. A firm 3 oz vegetable-tanned leather may offer more structure than a soft, stretchy 4 oz chrome-tanned leather. Neither is automatically better, but they belong in different kinds of builds.

    Vegetable-tanned leather is a favorite for wallets because it can be tooled, burnished, molded, and finished with crisp edges. In a medium temper, it makes clean card pockets and well-defined folds. It can also feel stiff at first, especially in thicker weights, so account for that when designing a wallet with many layers.

    Chrome-tanned leather often feels softer and more immediately flexible. It can be excellent for lined wallets, soft-folding interiors, and builds where comfort is the priority. However, loose temper leather may need reinforcement at pocket openings or exterior panels to prevent stretching over time.

    When selecting leather, handle it the way the wallet will be handled. Bend it sharply. Press a card against it. Fold a sample back on itself. A leather that feels beautiful as a flat panel may not be the right choice once it becomes a working pocket.

    Plan for cards, stitching, and the break-in period

    Most wallet patterns are drafted around standard card dimensions, but thickness changes how those cards fit. A pocket that seems generously sized before stitching can become snug after the stitch line, edge finishing, and leather compression are complete.

    Avoid compensating by making every pocket oversized. Loose pockets can allow cards to shift or slide out. Instead, use leather thin enough for the pocket stack, maintain accurate stitch placement, and remember that vegetable-tanned leather often relaxes slightly with use. Test one pocket first if you are using an unfamiliar hide or making changes to a pattern.

    Thread contributes to the finished profile as well. Thick thread can look handsome on a rugged exterior, but it occupies space at every seam. On a refined wallet with thin layers, a more moderate thread size usually creates a cleaner result and helps the pockets sit flatter.

    Common thickness choices that cause trouble

    Using 4 oz leather for every piece is tempting because it feels durable, but it is rarely the best choice for a multi-pocket wallet. The build can become difficult to stitch at the edges, stiff at the fold, and uncomfortable in a front pocket.

    Going too thin has its own trade-off. Leather below 1.5 oz can stretch, wrinkle, or wear quickly when used for an unreinforced exterior or a high-use card pocket. It is useful as a lining or selected reinforcement, but it needs support in areas that take regular stress.

    Another issue is mixing leathers without considering their behavior. A firm vegetable-tanned exterior paired with very soft, stretchy pockets can create uneven wear. The exterior may remain crisp while the pocket openings loosen. Choose materials that work together, or reinforce the softer leather where it needs stability.

    A few practical questions from the bench

    Can I make a wallet with 5 oz leather?

    Yes, especially for a simple card case or a rugged, unlined design. For a bifold with several pockets, use 5 oz sparingly or be prepared to skive key areas substantially. The challenge is less about cutting the leather and more about managing the layered construction.

    Is 2 oz leather too thin for a wallet exterior?

    Not always. A 2 oz exterior can work nicely for a slim wallet, particularly when it is lined or made from a firm leather. On its own, it may feel too flexible for a larger wallet that carries cash and several cards.

    Should interior pockets be thinner than the exterior?

    Usually, yes. Interior pockets multiply quickly, so reducing their weight is one of the most effective ways to keep a wallet comfortable. A thinner interior also makes pocket openings easier to use after the wallet is stitched and broken in.

    A good wallet feels considered before it is even finished. Start with a small stack test, pay attention to every overlap, and choose leather that fits the design you want to carry. That extra few minutes at the bench can save hours of trying to force a bulky build into shape.
  • Leather Stitching Guide for Clean, Strong Seams

    Leather Stitching Guide for Clean, Strong Seams

    A good seam does more than hold a project together. It sets the pace of the whole piece: clean stitch spacing makes a simple card holder feel considered, while uneven holes can distract from otherwise careful cutting and finishing. This leather stitching guide focuses on the bench decisions that produce straighter, stronger hand-sewn seams without turning a relaxing build into a complicated exercise.

    For most hobby leatherworkers, the goal is not perfect machine-like uniformity. It is a seam that looks intentional, lies flat, and stays secure through regular use. That comes from preparation as much as stitching technique.

    Start With a Stitching Plan

    Before marking a single hole, decide where the seam belongs and what it needs to do. A decorative perimeter stitch can sit closer to the edge than a seam holding the gusset of a pouch or the stress point on a key fob. For many projects, a stitch line set about 1/8 inch from the edge is a dependable starting point. Heavier leather, bulky assemblies, and high-stress areas may benefit from a slightly wider margin.

    Keep that distance consistent around corners and along curves. A wing divider is useful here because it leaves a light, visible track for your stitching chisel or pricking iron to follow. If the project includes multiple layers, glue and align them before marking the stitch line. Trying to correct shifting layers after holes are punched rarely produces the clean result you wanted.

    Project patterns are especially helpful at this stage because they remove the guesswork around seam placement. A clear layout tells you which edges are stitched, which stay open, and where construction order matters. You can spend your attention on the work in front of you rather than redrawing the design at the bench.

    Choose Tools That Fit the Project

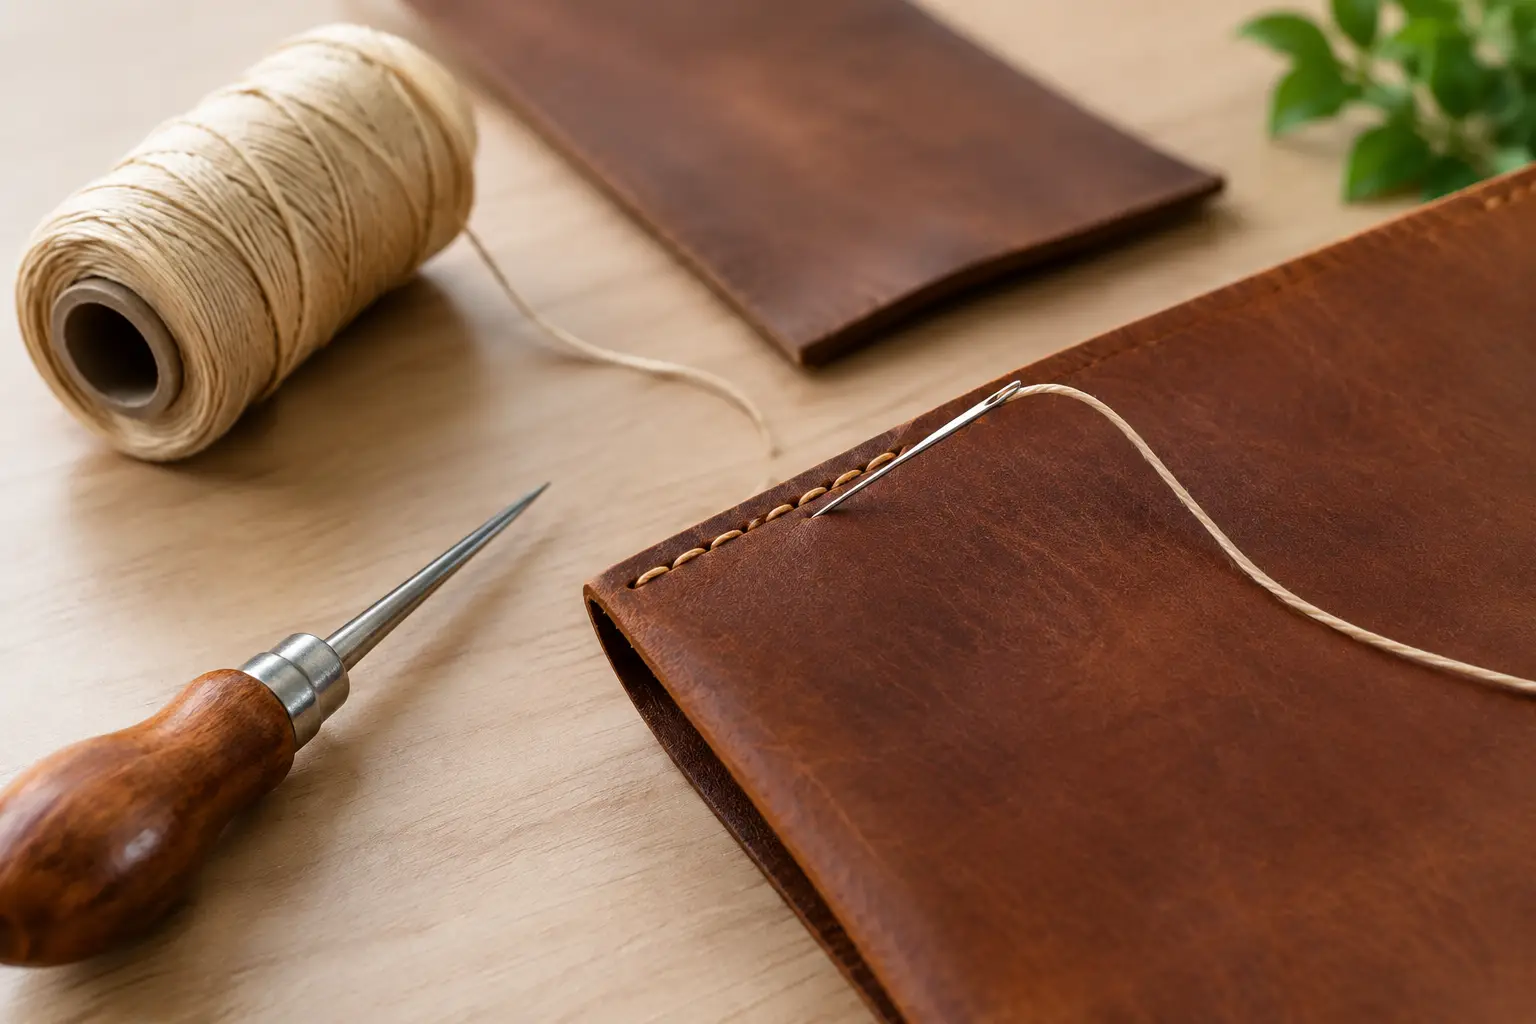
    You do not need every stitching tool available to make dependable seams. A solid basic setup includes stitching chisels or pricking irons, a mallet or maul, harness needles, waxed thread, an awl, a divider, and something firm to punch into. A poly cutting board, dense poundo board, or purpose-made punching surface protects both your tools and your workbench.

    The important part is matching the tool scale to the leather and the project. Fine spacing can look excellent on a slim wallet, but it may crowd a thick work belt or create more holes than the leather needs. Wider spacing suits heavier goods and gives the thread more visual presence. Many makers find that around 3.38 to 4 mm spacing is a comfortable range for general small goods, though there is no single correct choice.

    Thread should support the scale of the stitch line. Thin thread in large holes can look loose, while heavy thread forced through fine holes can distort the leather. Test a short sample on the same leather stack before committing to the project. That five-minute test can reveal whether the chisel spacing, thread size, and needle choice are working together.

    Chisels, Pricking Irons, and Awls

    Diamond-point stitching chisels create angled holes that suit the traditional slanted appearance of saddle stitching. They are a practical choice for beginners because they establish spacing and form the hole in one step. Pricking irons mark or partially pierce the leather and are often followed by an awl, offering more control but requiring more practice.

    An awl becomes particularly useful when stitching through thick assemblies, reinforcing a hole after gluing, or working around tight curves. Keep it sharp and use it deliberately. An oversized awl hole weakens the visual crispness of the seam and can leave thread sitting without enough tension.

    Prepare the Leather Before You Stitch

    Clean stitching begins before the first needle passes through. Trim pieces accurately, bevel edges that will be finished before assembly if the design calls for it, and dry-fit the components. When you are satisfied with the fit, apply adhesive carefully and allow it to become tacky before joining the layers.

    Use a roller, bone folder, or light hammering to secure the glued seam. Then trim and sand the joined edge if needed. A smooth, flush edge gives your stitching chisels a stable path and makes the finished seam look far more intentional.

    Mark the stitch line with the divider, then punch the corner holes first. Corners are where spacing decisions become visible. Rather than forcing a full chisel into a tight turn, use a two-tooth chisel, a single-tooth chisel, or an awl to keep the spacing even. On a rounded corner, shorter tool lengths make it easier to follow the curve without drifting outside the guide line.

    When punching through several layers, hold the chisel upright. Leaning it even slightly can cause holes to exit at an angle on the back side. Punch in controlled strikes rather than trying to drive the tool through with one hard blow. For thicker leather, punch from one side, use the marks on the back as a guide, and finish the holes from the opposite side when necessary.

    Saddle Stitch With a Consistent Rhythm

    The saddle stitch is well suited to handmade leather goods because each stitch is formed with two needles. If one section of thread is damaged later, the entire seam is less likely to unravel than a typical lockstitch. It also gives hand-sewn work its recognizable strength and texture.

    Cut a length of thread that is roughly three to four times the seam length for a straightforward run. Longer seams may require a little more, but avoid working with an excessive length of thread. It tangles easily, catches on tools, and makes maintaining tension harder.

    Thread a harness needle onto each end. Begin with two or three backstitches, then pass the first needle through the next hole. Place the second needle through that same hole from the opposite direction, taking care not to pierce the thread already inside. Pull both ends snug, using the same direction and tension every time.

    That repeated order matters more than speed. If you always send the same needle through first and pull tension consistently, the slant of the stitch becomes more uniform. Some makers cast the back needle under or over the front thread to create a more pronounced angle. This can produce a neat look, but consistency is more valuable than copying a particular method. Try both on scraps and choose the result you prefer.

    Avoid pulling hard enough to pucker the leather. The thread should settle into the holes and bring the layers together, not carve a channel into the grain. If one stitch looks loose, correct it immediately while the thread is still accessible. Small adjustments are easy during stitching and frustrating after the seam is finished.

    Backstitching and Thread Ends

    At the end of the seam, backstitch two or three holes depending on the project and thread thickness. Do not overdo it. Too many backstitches create a bulky patch that draws attention for the wrong reason.

    Trim the thread ends close to the leather, then gently melt synthetic thread ends if appropriate for your thread type. Press the softened end into the stitch recess with a metal tool or a dampened fingertip, taking care not to mark the leather. Natural fiber threads should be trimmed neatly and secured according to the thread and project requirements rather than melted.

    Finish the Seam So It Looks Settled

    Once the stitching is complete, lightly tap the seam with a smooth-faced hammer or cobbler’s hammer. This seats the thread, flattens minor irregularities, and helps the stitch line look integrated with the leather. Use a controlled touch. Heavy hammering can mark the grain, especially on softer leathers.

    Finish the edges only after considering the construction sequence. Some projects are easier to burnish before stitching; others benefit from final sanding and edge work once every layer is sewn together. If you are using edge paint, take time to sand between coats. If you are burnishing, work gradually with appropriate moisture, gum, or wax for the leather you chose.

    A clean edge and a consistent seam reinforce each other. Neither needs to be flawless to look professional, but both should show that the maker was working with a plan.

    Common Stitching Problems and Simple Fixes

    If your holes look ragged, the chisel may be dull, the leather may be unsupported, or the tool may be twisting as you punch. If the back side of the project looks uneven, check that your chisel is vertical and that the layers are firmly glued before punching.

    Loose stitches usually come from inconsistent tension or holes that are too large for the thread. Start by practicing on two small scraps glued together. Make six to eight stitches, inspect the front and back, then adjust one variable at a time. Changing the chisel, thread, tension, and technique all at once makes it difficult to know what solved the problem.

    Thread that frays or catches may be scraping against rough hole edges, overly sharp leather corners, or the first needle already in the hole. Withdraw slightly, keep the needles aligned with the hole, and resist forcing them through. A deliberate pace is often faster than repairing damaged thread halfway through a seam.

    The most satisfying leather projects are built from a series of small, repeatable choices: a measured stitch line, aligned layers, clean holes, and steady tension. Give each seam that attention, and even a simple project will leave your bench looking like something worth carrying, using, or giving away.

  • Leather Edge Burnishing for a Cleaner Finish

    Leather Edge Burnishing for a Cleaner Finish

    A crisp stitch line can make a project look carefully built, but leather edge burnishing is often what makes it feel finished in the hand. A rough, fuzzy edge catches light, collects wear, and can make an otherwise solid wallet, tray, or sheath look unfinished. A smooth edge does the opposite: it gives the piece a clean outline and a more durable surface where the leather will be handled most.

    Burnishing is not difficult, but it rewards patience and preparation. The goal is not to rub an edge until it shines. The goal is to compress and bond the leather fibers into a firm, even surface without darkening, scorching, or rounding the edge more than the project calls for.

    What Leather Edge Burnishing Actually Does

    Leather edge burnishing uses friction, light moisture, and sometimes a finishing compound to compact the exposed fibers along a cut edge. As those fibers lay down and tighten together, the edge becomes smoother and more resistant to everyday abrasion.

    Vegetable-tanned leather is the usual choice for this process because its fibers respond well to water and friction. Firm, natural veg tan tends to produce the cleanest result. Chrome-tanned leather, soft garment leather, and heavily coated leather can be harder to burnish because their fibers may stay loose or the surface finish may resist the moisture needed for compression.

    That does not mean every leather edge must be burnished. Some projects call for painted edges, folded edges, raw edges, or a more rugged look. The right finish depends on the leather, the item’s use, and the design you want to build. A structured card holder may benefit from a tight burnished edge, while a soft tote may look better with a carefully painted or turned edge.

    Start With an Edge Worth Burnishing

    Most burnishing problems begin before the burnisher touches the leather. An uneven cut, visible glue line, or misaligned stack cannot be hidden by extra friction. Burnishing will emphasize the shape already there.

    Trim the assembled edge cleanly with a sharp knife or a well-set edge trimmer. If you have layered leather, make sure the pieces are fully bonded before trimming. Any gaps between layers will show up as dark lines or weak spots after finishing.

    Sand the edge to level it. Start with a grit that corrects the problem without leaving deep scratches, then move finer. For many projects, 220 grit followed by 400 grit is enough. A heavier edge with several layers may need a coarser first pass, while a thin wallet pocket might only need a light sanding. Sand with a flat backing block when possible. Fingers follow dips and contours, which can leave a wavy profile.

    Once the edge is smooth, bevel it lightly. A small edge beveler removes the sharp corners that tend to fray first. The bevel should fit the leather weight. On thin leather, a large bevel can make the edge look overly rounded. On thicker leather, too small a bevel can leave the finished edge feeling square and abrupt.

    The Tools That Make the Work Easier

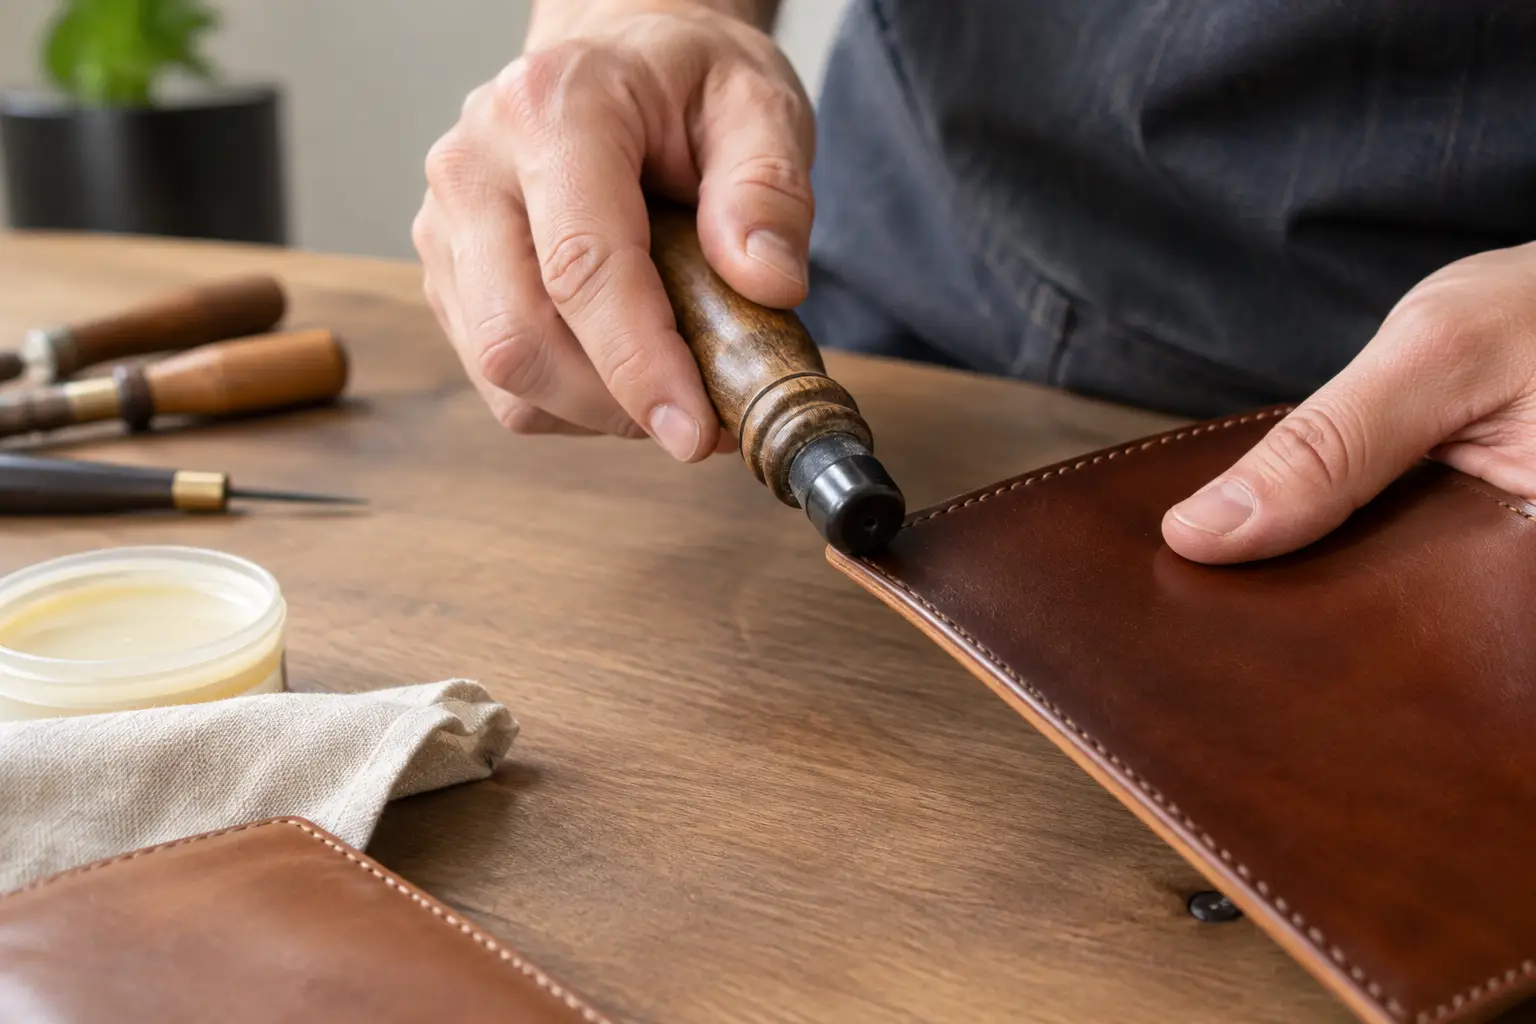
    You can burnish with a simple piece of canvas, but a few basic tools make the process more consistent. A wooden hand burnisher with grooves sized for your leather thickness is a dependable starting point. A cocobolo, hardwood, or plastic burnisher all work well when used with control.

    For straight runs, a canvas cloth, denim scrap, or firm piece of leather can create a clean finish. A powered burnisher can save time on larger batches, but it is not required for quality work. In fact, hand burnishing helps newer makers feel how the leather changes as it tightens and warms.

    You will also want a small applicator for water or burnishing agent, fine sandpaper, and a clean cloth. Gum tragacanth, saddle soap, beeswax, and commercial edge compounds can all have a place at the bench. They do not produce identical results, so choose based on the effect you want rather than assuming one product is best for every project.

    Water is the simplest option and often all firm vegetable-tanned leather needs. Gum tragacanth can help control loose fibers and create a polished surface. Beeswax adds a smooth feel and some moisture resistance, but it works best as a final treatment after the edge is already compacted. Too much wax too early can make an edge slick without truly tightening the fibers underneath.

    A Reliable Leather Edge Burnishing Process

    After sanding and beveling, lightly dampen the edge. The key word is lightly. The leather should feel slightly cool and darkened, not wet enough to leave moisture on your fingers. Excess water softens the fibers too much and can lead to a muddy, uneven edge.

    Run the burnisher along the edge with steady pressure and a brisk, controlled motion. On a wood burnisher, keep the edge seated in the groove rather than allowing it to ride against one side. The friction will begin to warm the leather. After several passes, stop and inspect the surface instead of continuing automatically.

    If the edge is smoothing but still has a few raised fibers, let it dry briefly, sand it lightly with fine grit, and repeat with a small amount of moisture or compound. Two or three restrained passes usually look better than one aggressive attempt. A well-finished edge is built in thin stages.

    For a final polish, apply a very small amount of wax or finishing compound if it suits the project. Rub with canvas until the edge feels firm and smooth. On natural leather, this may create a gentle darkening that adds character. Test on a scrap first if color consistency matters, especially on light-colored leather.

    Watch the Corners and Curves

    Corners are easy to overwork. Friction builds quickly in a small area, and a rounded corner can become noticeably darker than the rest of the edge. Use lighter pressure and shorter strokes there.

    Curves need the same attention. A burnisher groove may not fit a tight inside curve, so switch to canvas, a bone folder, or a smaller hand tool. Keep your motion aligned with the edge rather than rubbing across it. That helps prevent fuzzy fibers from lifting back up.

    Common Problems and What They Usually Mean

    A fuzzy edge usually needs better preparation, not more product. Check for a rough cut, insufficient sanding, or leather that is too dry to compress. Add a small amount of water or gum tragacanth, burnish briefly, then reassess.

    An edge that turns very dark may have been burnished too hard, too fast, or with too much friction in one spot. Darkening is not always a flaw, particularly on natural veg tan, but uneven color can distract from clean construction. Slow down, use less pressure, and keep the burnisher moving.

    If the edge remains soft and spongy, the leather may be too wet or too soft for a traditional burnish. Let it dry fully before trying again. If it still will not compact, consider an edge paint or another finishing approach that better matches that leather.

    Visible layer lines on a wallet or multi-piece project often point to glue-up rather than finishing. Make sure the layers are pressed together firmly, trimmed flush after bonding, and sanded as one edge. A good pattern gives you clean construction order and accurate piece alignment, but careful assembly at the bench still matters.

    Match the Finish to the Project

    For items handled every day, such as card holders, key fobs, and notebook covers, a firm burnished edge offers a pleasing feel and holds up well when properly maintained. For trays, a slightly softer satin finish can look more natural and is often quicker to achieve across long perimeter edges.

    A highly polished edge is not automatically the best edge. It can look right on a refined small good, but a field notebook cover or work belt may benefit from a more understated finish. Let the leather weight, color, hardware, stitch spacing, and intended use guide the decision.

    This is especially useful when building from a new project pattern. Before committing to the full build, use the same leather and finishing process on a small offcut. It takes only a few minutes and can prevent surprises after the final stitches are in place.

    Give the Edge Time

    Good leatherwork often looks simple because the preparation is quiet and deliberate. Leather edge burnishing follows that same rule: square the edge, sand it level, add only enough moisture, and build the finish in controlled passes. The result does not need to be glossy to look professional. It only needs to feel intentional, smooth, and suited to the piece you made.

  • How to Finish Leather Edges That Look Clean

    How to Finish Leather Edges That Look Clean

    A leather project can be cut accurately, stitched neatly, and still look unfinished at the edges. That small strip of exposed leather is where uneven cutting, loose fibers, and rushed work tend to show first. Learning how to finish leather edges gives wallets, trays, cases, and straps the clean, intentional look that makes a handmade piece feel complete.

    The best method depends on the leather, the project, and the look you want. Vegetable-tanned leather responds beautifully to a traditional burnished edge. Chrome-tanned leather, soft leathers, and layered pieces often look better with edge paint. The goal is not to force every project into one technique. It is to choose a finish that suits the build and take the time to prepare the edge before adding any product.

    Start With a Clean, Even Edge

    A polished edge begins long before burnishing or painting. If the layers are not flush, no amount of gum, wax, or paint will fully hide the problem. Trim your piece carefully after glue-up, especially on projects made from multiple layers such as card holders, belts, and small cases.

    Use a sharp knife, a trim jig, or a belt sander to bring the layers into alignment. Work slowly around curves and corners. A slightly proud layer may not seem significant at first, but it becomes obvious once color or shine is applied to the edge.

    After trimming, sand the edge flat. Start with a coarser grit only when necessary, then move to finer grits as the surface evens out. For many projects, 220 grit followed by 400 grit is a practical place to start. Thick stacks of leather may need more shaping, while a single-layer strap may only need a light pass.

    Keep the sanding block square to the edge. Sanding at an angle can round over one face of the project or create a wavy profile. Check your work often under good light. The edge should feel level from one layer to the next before you move on.

    How to Finish Leather Edges by Burnishing

    Burnishing is the classic choice for firm, vegetable-tanned leather. It compresses the exposed fibers and creates a smooth edge with a natural shine. It works especially well on natural, dyed, or oil-tanned veg-tan projects where you want the leather itself to remain visible.

    Before burnishing, bevel the corners of the edge. An edge beveler removes the sharp corners on both the front and back of the leather, making the finished edge more comfortable and less likely to catch or fray. Use a beveler sized for the leather weight. A heavy bevel on a thin wallet panel can look overdone, while a tiny bevel may disappear on a thick belt.

    Apply a small amount of water, gum tragacanth, saddle soap, or a purpose-made burnishing compound. You need just enough moisture or lubricant to help the fibers compress. Too much can darken the leather unevenly, soften the edge excessively, or leave residue that is difficult to smooth out.

    Rub the edge briskly with a wooden slicker, canvas, or a motorized burnishing tool. Friction and pressure do the work. On a small project, hand burnishing gives you plenty of control and lets you feel when the edge is becoming smooth. A powered tool saves time on straps and larger runs, but it can scorch leather or create uneven spots if you press too hard.

    Let the edge dry, then inspect it. A good burnished edge should feel smooth rather than fuzzy, with a gentle sheen instead of a thick coating. If fibers remain raised, sand lightly with fine grit, apply a little more burnishing agent, and repeat. Finish with a light application of beeswax or edge wax if you want added luster and some moisture resistance.

    When Burnishing Is the Right Choice

    Burnishing is a strong fit for firm vegetable-tanned leather, exposed natural edges, and projects with a traditional leathercraft feel. It is also approachable for beginners because the tools are simple and mistakes can often be corrected with another light sanding pass.

    It is less effective on loose-fibered chrome-tanned leather, very soft leather, or edges with a lot of contrasting layers. You can still improve those edges with sanding and a conditioning product, but trying to force a glassy burnish may lead to frustration. That is where edge paint becomes useful.

    Use Edge Paint for a More Uniform Finish

    Edge paint creates a coated, consistent edge rather than a compressed natural one. It is commonly used on refined bags, accessories, and small leather goods, particularly when the leather has a soft temper or a finished surface that does not burnish well.

    Preparation still matters. Glue and trim the layers flush, sand them smooth, and bevel lightly if the design calls for it. Some makers leave the edge more square for a modern painted look, while others use a subtle bevel to make the coating feel softer in the hand. Either choice can work if it is consistent around the project.

    Apply edge paint in thin coats. A roller pen, edge-paint applicator, fine brush, or small metal tool can all work, depending on the shape of the piece. Focus on laying down an even first coat rather than trying to create full coverage immediately. Thick paint tends to pool at corners, form ridges, or crack as the leather flexes.

    Allow each coat to dry according to the product instructions. Then sand lightly with fine grit to remove dust, bumps, and high spots. Apply another thin coat and repeat as needed. Two to four coats is common, but the leather and paint system will decide the final number. A thin, carefully leveled finish usually outperforms one heavy coat.

    Some edge paints are designed to be heat set or lightly creased with a heated tool. This can help level the surface and improve the finished appearance, but only use heat when the product calls for it. Too much heat can bubble the paint, discolor the leather, or leave a hard, brittle edge.

    Choose Your Finish Before You Cut

    Edge finishing should influence project planning, not become an afterthought at the end. A folded edge construction hides the raw edge entirely. A turned edge may need skiving and careful glue work but avoids burnishing or paint. An exposed edge asks more from your preparation and finishing skills, so choose leather that suits the result you have in mind.

    For a first build, a vegetable-tanned leather tray, valet dish, or simple card holder is a useful place to practice. The edges are accessible, the shapes are manageable, and you can compare different approaches on test pieces before committing to the final project. A small scrap of the same leather tells you far more than a product label about how it will sand, burnish, or accept paint.

    Color also changes the decision. Natural and darker veg-tan edges can look excellent with a burnished finish. Brightly dyed leather, pale chrome tan, or a project made from contrasting layers may benefit from matching or contrasting edge paint. There is no single premium finish. The better choice is the one that fits the leather and supports the design.

    Common Edge-Finishing Problems

    Fuzzy edges usually point to insufficient sanding, leather with loose fibers, or not enough compression during burnishing. Return to fine sanding, use a modest amount of burnishing compound, and work the edge again with firm pressure. If the fibers continue to lift, consider switching to paint rather than adding more product.

    Dark blotches often come from too much water or burnishing agent. Apply less on the next pass and distribute it evenly. Test on scrap first, particularly with light-colored leather where moisture marks are easier to see.

    Cracked edge paint is usually caused by coats that are too thick, poor drying time between layers, or an edge that flexes more than the paint can handle. Thin coats and proper cure time help, but project design matters too. A sharply folded wallet spine will always be a demanding place for a rigid coating.

    Uneven shine is often a preparation issue. If one section looks dull, do not immediately add more wax or paint. Check whether the edge is actually level. A few careful passes with fine sandpaper can bring the whole edge back into balance.

    A clean edge is built in stages: accurate cutting, careful glue-up, patient sanding, and a finish chosen for the leather in your hands. Give that final inch of the project the same attention you gave the stitch line, and your next build will feel better every time you pick it up.

  • Leather Pattern Sizing Guide for Better-Fitting Builds

    Leather Pattern Sizing Guide for Better-Fitting Builds

    A pattern can be beautifully drawn and still lead to a disappointing build if it prints at the wrong scale. This leather pattern sizing guide will help you move from a digital file to accurately cut leather, with less time guessing and more time building. Whether you are making a simple tray, wallet, sheath, or bag, sizing affects more than the finished dimensions. It affects how pieces meet, how folds behave, and whether hardware lands where it should.

    Start With the Pattern’s Intended Scale

    Most leathercraft PDF patterns are designed to print at 100% scale. That means the file should leave your printer without being reduced to fit within margins, enlarged to fill a page, or adjusted by a print dialog box that is trying to be helpful.

    Before printing, look for a test square, calibration box, or stated reference measurement on the pattern. It may be marked as a 1-inch square, a 2-inch line, or a metric reference. Print one page first, then measure that reference with a reliable ruler. If a 1-inch square measures 15/16 inch, the difference may seem small, but it can create noticeable problems across a long wallet panel or a multi-piece project.

    Set the print menu to “Actual Size,” “100%,” or “No Scaling.” Avoid “Fit,” “Fit to Printable Area,” and similar settings. Those options can shrink a pattern just enough to throw off stitch-hole alignment, strap lengths, or hardware placement.

    If you use a print shop, tell them clearly that the document must print at 100% with no page scaling. Bring the pattern’s test measurement with you, and check the first sheet before approving the full job. A few minutes at this stage can save a hide and several hours at the bench.

    Why Leather Pattern Sizing Is More Than Printing

    Printing accurately is the first part of sizing. The next part is understanding what the pattern dimensions are designed to accomplish.

    A pattern may include cut lines, stitch lines, fold lines, skiving areas, slots, and hardware marks. These are not interchangeable. A cut line gives you the outside shape of the leather piece. A stitch line shows where the seam is intended to sit. If you trim to a stitch line or add an unplanned seam allowance, the project can become too small, too loose, or difficult to assemble.

    This matters most where several layers meet. A card pocket that is only slightly oversized can wrinkle under a wallet edge. A gusset cut too short may pull a bag body out of shape. A snap placement moved without considering leather thickness can make a closure overly tight or unable to reach at all.

    Treat the pattern as a working set of instructions, not just an outline to cut around. Read the labels before transferring anything to leather. If a line is unclear, compare it with the other pieces and think through the order of assembly. A well-organized pattern should make that process easier, but taking a moment to orient yourself is still good shop practice.

    Match Leather Weight to the Build

    Pattern size and leather thickness work together. A design sized for 3-4 oz leather will not always behave the same way in 6-7 oz leather, even when every piece is cut perfectly.

    Thicker leather takes up more space at folds and seams. On a wallet, that extra bulk can make interior pockets tight and prevent the piece from closing neatly. On a structured case, it can change the way the gusset bends around corners. On a tray, heavier leather may produce a firmer form, but tight corners can become harder to set cleanly.

    Use the recommended leather weight when it is provided. If you want to substitute a different weight, consider the role of each piece rather than changing everything at once. A bag body may benefit from firmer leather while a gusset needs a lighter, more flexible weight. A strap may need more substance than a lining panel. The goal is not to follow a number blindly. It is to preserve the intended proportion, movement, and function of the design.

    Lining leather deserves the same attention. Adding a lining to a pattern intended for a single layer changes the thickness at every seam and fold. Sometimes the adjustment is straightforward, such as skiving edges more aggressively. Other times, a slightly wider gusset or revised closure placement may be needed. Make a small test assembly when the project includes several layers or close-fitting pockets.

    Consider Stretch Direction Before Cutting

    Leather has more give across the hide than along the backbone. For pieces that carry tension, such as straps, handles, and closure tabs, pattern orientation matters. Cutting a long strap in a stretchy direction can make it feel undersized at first and overly long after use.

    If a pattern includes grain-direction guidance, follow it. If it does not, use your judgment based on how the part will work. Parts that need stability should generally run with the least stretch. Parts that need to curve or form can often take advantage of a bit more flexibility.

    Check Fit Before Committing to Leather

    For a new project, paper is one of the best sizing tools on the bench. Print the pattern, cut out the major pieces, and tape them together where practical. You will quickly see the project’s footprint, pocket depth, strap length, and the relationship between components.

    This is especially useful when you are adapting a pattern for a specific item. If you are building a sleeve for a notebook, phone, or tool, make a cardstock mockup around the object first. Account for depth, not just height and width. A flat measurement rarely tells the whole story once seams, rounded corners, and material thickness enter the picture.

    For wearable projects, test the pattern with the real-world use case in mind. A belt length should account for the buckle, fold-over, keeper, and preferred adjustment range. A crossbody strap should be checked on your body or on the person who will use it. A handle that looks correct on paper may feel too short once a bag gains depth and hardware.

    Mockups are not wasted effort. They are a practical way to find a design that fits your bench, your materials, and the finished use of the item.

    When and How to Resize a Pattern

    Sometimes resizing is reasonable. A simple organizer, tray, or flat panel project can often be enlarged or reduced if you understand what needs to change along with it. But scaling a complete pattern up or down is not always a one-click solution.

    When a PDF is enlarged, stitch holes spread farther apart. Slots become wider. Hardware marks move outward. A 20% increase can turn a suitable snap tab into an awkwardly long one or make a zipper opening incompatible with the zipper size you planned to use. Reducing a pattern creates the opposite problem: seam allowances become narrow, corner radii tighten, and hardware may no longer fit.

    If you need a modest size adjustment, start by identifying the functional dimensions. On a notebook cover, those may be the notebook height, width, spine allowance, and pocket depth. On a pouch, they may be the interior width, gusset depth, and zipper length. Adjust the areas that control those dimensions instead of scaling every feature without review.

    Keep stitch spacing consistent whenever possible. Rather than enlarging existing holes, redraw or mark a new stitch line at the intended seam allowance, then prick or punch at your normal spacing. This takes more care, but it gives the finished project a more intentional look.

    Add Allowance Deliberately

    A pattern does not need extra material unless its instructions call for it. Many leather patterns are drawn with the cut line already established, so adding a general seam allowance can create confusion at assembly.

    Add material only for a clear reason: accommodating a thicker item, lengthening a strap, changing a fold-over closure, or allowing for a custom edge treatment. Mark the change directly on a paper copy first. Then confirm that connected pieces still agree with one another. A single altered panel often requires a related adjustment elsewhere.

    A Quick Pre-Cut Sizing Check

    Before making the first cut, pause for a short review. Confirm that the printed reference square measures correctly and that the page is at 100%. Check that you are using the correct pattern version and have identified the cut, fold, and stitch lines. Compare the recommended leather weight with what is on your bench, then think through any effect of lining, reinforcement, or hardware.

    Finally, lay out the largest pieces on the hide with stretch direction and surface character in mind. This step helps you avoid discovering too late that a long strap will fall across a soft area or that a prominent scar sits at the center of a clean front panel.

    Common Sizing Questions

    Can I print a leather pattern on letter-size paper?

    Yes, if the pattern is formatted for letter-size pages. Multi-page patterns are often designed to be tiled, with registration marks or alignment guides for taping the sheets together. Print at 100%, trim only where instructed, and align the marks before taping.

    Should I cut directly from the printed pattern?

    You can, but many makers prefer to transfer pieces to cardstock, manila folder material, or reusable template plastic. A sturdier template is easier to trace accurately and holds up well if you plan to make the project again.

    What if my hardware is a different size than the pattern calls for?

    Measure the hardware before cutting. You may be able to adjust a slot, hole, or tab, but review the surrounding construction too. A larger buckle may need a wider strap end, while a larger snap may require more clearance from an edge or fold.

    Accurate sizing is not about making every project identical. It gives you a dependable starting point, so your adjustments are thoughtful choices rather than surprises. Print carefully, test what matters, and let the pattern provide the structure while your material choices make the build your own.

  • 12 Best Leather Gifts to Make for Any Occasion

    12 Best Leather Gifts to Make for Any Occasion

    A handmade leather gift earns its place through use. The best leather gifts to make are not necessarily the largest or most elaborate projects. They are the pieces that feel good in the hand, solve a small daily problem, and show the maker paid attention to the person receiving them.

    That is good news for any leatherworker. A well-cut card holder, a sturdy valet tray, or a simple key fob can be every bit as memorable as a larger bag. The right project comes down to three things: the recipient’s routine, your current skill level, and the amount of bench time you can realistically give the build.

    What Makes a Leather Gift Worth Making?

    Leather is already a personal material. It gains character with handling, darkens with age, and records the small marks of ordinary life. A useful item made from quality leather becomes more familiar over time rather than wearing out of favor.

    For a gift, usefulness matters more than novelty. Before selecting a pattern or sketching an idea, consider what the recipient carries, sets down, or reaches for every day. A person who travels may appreciate a luggage tag or passport cover. Someone with a cluttered nightstand may get real use from a catchall tray. For a minimalist, a slim wallet may be a better choice than a large organizer with more pockets than they need.

    It also helps to choose a project with clean construction. Straight cuts, even stitching, tidy edges, and hardware that suits the design will make a modest project feel considered. A simple gift done carefully is almost always stronger than an ambitious build rushed at the end.

    Best Leather Gifts to Make by Skill Level

    Key fobs and keychains for a quick, personal build

    A leather key fob is a small project, but it gives you room to make thoughtful choices. You can select a color that fits the recipient, add a stamped initial, or use a solid brass, nickel, or black hardware finish that matches their everyday carry.

    This is an approachable first gift because it uses little leather and teaches useful fundamentals: cutting clean straps, rounding corners, punching holes, setting hardware, and finishing edges. It is also forgiving. If a first attempt does not meet your standard, you have not lost much material or time.

    For a more refined version, use a lined strap or a folded construction with a stitch line around the perimeter. Keep the design restrained. A key fob should feel secure and comfortable, not bulky in a pocket.

    Valet trays for the person who likes order

    A leather valet tray is one of the most practical gifts a maker can build. It gives keys, coins, watches, earbuds, and pocket tools a clear place to land. On a desk, dresser, or entry table, it quickly becomes part of someone’s routine.

    This is especially suitable for beginners because many tray designs begin with a single piece of leather and a few corner fasteners. The work is straightforward, but the finished result looks polished when the layout is balanced and the corners are set consistently.

    Choose firmer vegetable-tanned leather if you want a tray that holds its shape well. Softer leather can work for a relaxed look, though it may not sit as crisply at the corners. A free leather tray pattern can be a useful way to practice the process before building a gift in a special leather.

    Card holders for an everyday essential

    A card holder is a strong choice when you want to make something compact, useful, and distinctly handmade. It is also a project where pattern clarity matters. Pocket placement, stitch spacing, and allowance around card slots all affect how the finished piece feels.

    For a first card holder, avoid adding too many pockets. Two exterior slots and a center opening can carry the essentials without making the project thick or difficult to assemble. Thin, firm leather is usually the better choice for pockets, while a slightly heavier backing leather can add structure.

    Pay close attention to the edges before stitching. Once the layers are assembled, some areas are harder to refine. Sanding, beveling, and burnishing the exposed pocket edges early will save time and help the finished gift look intentional.

    Notebook covers for writers, planners, and list makers

    A notebook cover is a generous gift without requiring the complexity of a full bag. It can hold a common pocket notebook, a larger journal, or a refillable insert system. The best size depends on what the recipient actually uses, so check dimensions before cutting leather.

    This project offers room for personal details. A name, initials, a short maker’s mark, or a discreet stamped date can make the cover feel one of a kind. Keep decoration away from fold lines and areas that need to bend. Leather will forgive many things, but it will not always fold neatly through heavy tooling or thick layers.

    A notebook cover can be made with simple slip pockets, elastic, or a wrap closure. Slip pockets look clean and traditional. Elastic makes changing inserts easy. A wrap strap adds visual presence but takes more material and planning. Pick the construction that fits the recipient’s habits rather than adding features for their own sake.

    Belts for a classic, lasting gift

    A handmade belt can become a favorite piece of daily wear, but it deserves careful measurement. Unlike a wallet or tray, the fit has to be right. Do not rely on pants size alone. Measure a belt the recipient already wears from the fold at the buckle to the hole they use most often.

    Belts are a good project for makers who are comfortable cutting long, straight straps and setting hardware cleanly. The leather should be firm enough to support the buckle without stretching excessively. A properly finished belt also benefits from patient edgework along its full length.

    There is no need to overcomplicate it. A well-proportioned strap, a quality buckle, secure keeper, and evenly spaced holes are the details that matter. If you want a safer gift option when sizing is uncertain, a key fob or tray may be the better choice.

    Small pouches for tools, cords, or daily carry

    A zip pouch, snap pouch, or fold-over utility case makes a useful gift for someone who carries cables, art supplies, grooming items, or small tools. It is a flexible category because you can adjust the size and closure to suit the purpose.

    The trade-off is that pouches introduce more construction decisions. Zippers need accurate placement. Gussets require careful cutting. Snap closures need enough structure around them to avoid pulling or distortion. If you are still learning, a simple envelope-style pouch with a snap is a satisfying place to start.

    For a more experienced maker, a pouch is an opportunity to combine leathers, add a lining, or create a clean interior finish. Just keep the intended contents in mind. A pouch for cables needs less structure than one meant to protect hand tools.

    Choose Leather and Hardware With the Gift in Mind

    The material should support the project, not fight it. Vegetable-tanned leather is excellent for trays, belts, stamped details, and projects that benefit from shaped structure. Chrome-tanned leather can be a good fit for soft pouches and relaxed accessories. Many projects work well with a combination of the two, but thickness and temper need to be compatible at the seams.

    Color is equally personal. Natural, brown, and black leathers are dependable choices when you do not know someone’s style well. Rich burgundy, olive, navy, or a bright accent can make sense when you do. If the recipient wears silver jewelry or carries matte black gear, matching the hardware finish is a small detail that can make the gift feel especially considered.

    Do not overlook thread. A thread color close to the leather keeps the look quiet and classic. Contrast thread highlights the craftsmanship, but it also makes uneven spacing more visible. Choose based on your confidence and the style of the project.

    Give Yourself Enough Time for the Finish

    The final steps often separate a good leather gift from a gift that feels complete. Cut and punch with enough time left for edge finishing, conditioning, hardware checks, and a last inspection under good light. Look for rough fibers, loose thread ends, uneven burnish, and fingerprints from adhesives or finish.

    If you are making a gift for a deadline, build a smaller project than you think you need. A card holder completed with care is better than a notebook cover that still needs its edges finished on the morning of the occasion. Well-organized project patterns can help here by removing some of the guesswork from layout and assembly, leaving more time for the parts of the craft that deserve your attention.

    A handmade gift does not need to announce how many hours it took. Let the clean lines, useful design, and honest material do that work. Choose a project that fits your bench, make it with patience, and give someone a piece they will be glad to carry or use for years.

  • Leathercraft Pattern Instructions That Work

    Leathercraft Pattern Instructions That Work

    A leather pattern can look perfect on screen and still create a frustrating afternoon at the bench. The difference is usually not the idea behind the project. It is whether the leathercraft pattern instructions answer the questions that come up between printing the file and burnishing the final edge: What leather should I use? Which pieces get cut first? Where does this stitch line begin? What needs to happen before glue goes on?

    Good instructions do not remove the hands-on nature of leatherworking. They give that work a dependable order. For a beginner, that means fewer avoidable mistakes. For an experienced maker, it means less time interpreting a template and more time making thoughtful choices about leather, thread, hardware, and finish.

    What Good Leathercraft Pattern Instructions Include

    A useful pattern is more than a collection of outlines. It is a construction plan for a finished object. The pattern pieces tell you what to cut, but the instructions explain how those pieces become a tray, wallet, case, or other functional item.

    Start by looking for a clear materials section. It should identify the recommended leather weight, the amount of leather needed, thread size or stitch spacing when relevant, and the hardware required. These recommendations are not always rigid rules. A 4-5 oz leather may work well for a structured small good, while a softer temper or heavier hide may change the way folds, pockets, and edges behave. Knowing the intended material gives you a solid starting point before you decide where to personalize the build.

    Clear instructions should also identify the tools that matter for the project. You do not need an exhaustive inventory of every tool in a workshop, but you should know if a project depends on a skiving knife, a particular punch size, a strap cutter, or a press for setting hardware. This is especially helpful when choosing your next project. A well-designed pattern lets you see whether it fits your current bench before you begin.

    The most useful instructions then move in construction order. They explain which pieces need to be cut, marked, tooled, dyed, skived, or edge-finished before assembly. They show the relationship between parts rather than leaving you to discover it after adhesive has been applied.

    Read the Full Pattern Before Cutting Leather

    Many leatherworking mistakes begin with a reasonable impulse: print the pattern, choose a hide, and start cutting. Taking ten minutes to read through the whole file first can save a much larger amount of leather and time.

    Check the print settings before anything else. Pattern PDFs are commonly designed to print at actual size, not scaled to fit the page. If the file includes a one-inch test square or calibration line, measure it with a ruler. A small printing error can be enough to make layered pieces misalign, hardware sit poorly, or a stitched assembly come out tighter than intended.

    Next, study the piece labels and any fold, stitch, cut, or placement marks. A cut line and a stitch line serve different purposes. So do a crease line and a tooling boundary. If the pattern offers mirrored pieces, confirm whether you need to flip the template before tracing. This matters on projects with a visible grain side, a directional finish, or an asymmetrical layout.

    It also helps to picture the project in stages. Identify the exterior, lining, gusset, pocket, reinforcement, and closure components. If a step is unclear, pause before cutting. The best time to resolve uncertainty is while the leather is still one uncut piece of hide.

    Build a Simple Cutting Plan

    Leather is not uniform like cardstock. Grain character, scars, stretch, wrinkles, and belly softness all affect where a pattern piece belongs. A pattern may show the shape, but the maker still decides how to place it on the hide.

    Reserve the cleanest, firmest areas for prominent exterior panels and straps. Use less consistent areas for linings, hidden reinforcements, or small internal pieces when the project allows it. Pay attention to stretch direction on long straps, narrow closures, and pieces that need to hold their shape. Cutting these along a stable direction can improve the finished feel of the item.

    Before tracing, arrange every pattern piece on the leather. This dry layout helps you confirm that you have enough usable material and lets you make better decisions about grain, color variation, and natural marks. It can also reveal when a piece needs to be turned or mirrored.

    When marking the leather, use a method you can remove or conceal. A scratch awl, silver pen, or light pencil mark may work depending on the leather and the location of the line. Keep reference marks precise, especially at stitch starts, hardware locations, and alignment points. Those small marks often do more for a clean final result than a decorative detail added at the end.

    Follow the Construction Sequence, Not Just the Pictures

    Photos and diagrams are valuable, but they should support the written steps rather than replace them. The correct order of operations is what makes a project manageable.

    For example, edge finishing is often easier before two layers are glued together. Decorative stamping or carving usually belongs before assembly, while certain crease lines are cleaner after a panel is backed or folded. Stitch holes may need to be punched before a curved piece is formed, or afterward if the project depends on a precise final shape. There is no single rule for every design. The pattern instructions should tell you what the project requires and why the sequence matters.

    Use a dry fit before committing with glue. Bring the pieces together, check the orientation, and confirm that the stitch lines and edge allowances meet as expected. This is particularly worthwhile for pocket assemblies, folded corners, gussets, and snap tabs. If you find a mismatch during dry fitting, you can correct it without trying to separate cemented leather.

    When it is time to glue, work in controlled sections. Apply adhesive evenly, allow it to reach the recommended tack, and use alignment marks instead of relying on the edge alone. Leather can shift slightly as it is pressed together. A careful start makes trimming, sanding, and stitching much easier later.

    Use Instructions as a Guide, Then Make the Project Yours

    A structured pattern does not require a strictly identical result. Once you understand what each part does, you can make choices that suit your style and materials.

    You might change thread color, choose solid brass instead of antique hardware, add a maker’s mark, or select a leather with more pull-up and character. These are usually low-risk changes because they do not alter the project geometry. Changes to leather thickness, closure type, stitch spacing, or the dimensions of a pattern piece deserve more caution. They can affect fit, capacity, and construction order.

    A practical approach is to make the first version close to the recommended build, especially if the design is new to you. Make notes as you work: the leather weight you used, the thread size, any skiving adjustments, and where you would alter the design next time. That first build becomes a working sample, and your notes make future versions more intentional.

    When Instructions Feel Unclear

    Even a carefully prepared pattern can meet a maker at an unfamiliar skill level. If a term or technique stops you, avoid guessing at the point of no return. Look at the diagram, reread the surrounding steps, and compare the pattern pieces to the intended finished form.

    Break the step into a smaller question. Are you unsure which edge receives glue, whether a line is decorative or structural, or which side of the leather faces outward? Answering one of those questions at a time is more useful than trying to solve the whole project in your head.

    For newer makers, a simple project is often the best place to learn how pattern instructions work. A tray, card holder, or small case teaches cutting accuracy, edge work, folding, adhesive control, and stitching without asking you to manage a large number of parts. Old Line Crafts & Designs approaches patterns with that bench-ready clarity in mind, so makers can build skills through projects rather than through avoidable confusion.

    A Better Pattern Makes Room for Better Craft

    The goal of clear leathercraft pattern instructions is not to make every project automatic. It is to give you a reliable framework for the parts that should not be a mystery. With the layout understood and the construction sequence in hand, you can pay attention to the details that make handmade leather goods feel considered: a straight stitch line, a smooth edge, a well-set snap, and leather chosen for the way it will age. Pick a design that fits your bench, read it before you cut, and let the finished piece teach you what to build next.

  • Chrome Tan Versus Vegetable Tan for Leatherwork

    Chrome Tan Versus Vegetable Tan for Leatherwork

    A wallet that feels crisp and structured, a soft bag that drapes comfortably, and a molded belt pouch may all begin as cowhide. Yet the leather behind each project can behave very differently at the bench. Chrome tan versus vegetable tan is not simply a question of appearance. It affects how leather cuts, accepts a crease, takes tooling, finishes at the edge, and changes through years of use.

    For makers, the useful question is not which tanning method is universally better. It is which leather supports the build you have planned. Choosing that early saves material, reduces frustration, and helps a good pattern become the finished piece you pictured.

    What Tanning Changes in a Hide

    Tanning stabilizes animal hide so it will not decay. The process also determines much of the leather’s working character. Vegetable tanning uses plant-derived tannins, traditionally from tree bark and other natural materials. Chrome tanning uses chromium salts and is the most common commercial tanning method.

    Those are broad categories, not complete descriptions of every hide. Weight, temper, grain selection, oils, waxes, dyes, and surface finishes all matter too. A firm chrome-tanned leather can feel more structured than a soft vegetable-tanned leather, depending on how each was made. Still, knowing the baseline differences gives you a reliable starting point.

    Vegetable-tanned leather is often firmer, more absorbent, and more responsive to shaping and surface work. Chrome-tanned leather is commonly softer, more flexible, and more color-consistent. At the bench, those traits create different opportunities.

    Chrome Tan Versus Vegetable Tan at the Bench

    The biggest distinction is usually how each leather responds to moisture, pressure, and finish work.

    Cutting, marking, and assembly

    Chrome-tanned leather often cuts smoothly and bends easily around tight curves. This makes it a comfortable choice for projects with turned edges, gussets, linings, or a softer hand. It is widely available in finished colors, textures, and prints, so it can be especially useful when the visual character of a bag, pouch, or accessory matters as much as the construction.

    Its softness can also require a little more control. A stretchy or loose-tempered chrome tan may shift while cutting or distort when pulled during stitching. Clean pattern weights, sharp blades, and careful handling make a noticeable difference. If a pattern calls for crisp folds or a self-supporting form, check the leather’s temper before committing to a full cut.

    Vegetable-tanned leather usually gives you a firmer cutting experience. Pattern lines are easy to mark, stitch grooves hold their shape, and fold lines can be cleanly creased. This makes it a familiar choice for belts, card holders, holsters, knife sheaths, trays, cases, and other projects where structure is part of the design.

    It also rewards accurate work. Because it holds a mark, an unintended scratch, deep divider line, or uneven crease may remain visible. That is not a reason to avoid it. It is a reason to slow down, use a clean work surface, and test your process on a scrap first.

    Tooling, stamping, and molding

    Vegetable tan is the clear starting point when a project includes carving, stamping, wet molding, or hand-dyed artwork. When cased properly, its fibers open enough to accept impressions and then hold the detail as the leather dries. It can be formed around a mold, shaped into a tray, or given a defined contour that becomes part of the finished design.

    Chrome tan generally does not case and tool in the same way. It may take a light stamp or crease depending on the hide, but results can be inconsistent, especially with heavily finished leathers. Water can also darken, spot, or affect the surface of some chrome-tanned hides. If detailed tooling is central to the project, choose a tooling-grade vegetable tan rather than trying to force a soft fashion leather into that role.

    Edges and burnishing

    This is where many makers first feel the practical difference. Natural vegetable-tanned leather can often be bevelled, dampened, and burnished into a smooth, glassy edge with gum, wax, or a simple slicking process. A well-finished veg-tan edge can become one of the most satisfying details in a handmade piece.

    Chrome-tanned leather is often more fibrous at the edge and may not burnish cleanly. That does not mean it cannot look polished. Edge paint, folded construction, binding, or a carefully chosen edge coat can produce a refined result. The key is matching your finishing plan to the material. Do not select a soft chrome tan for a design built around traditional burnished edges unless you are prepared to change the edge treatment.

    Appearance, Aging, and Everyday Use

    Vegetable-tanned leather often begins pale or lightly dyed and develops a patina from light, handling, oils, and use. A natural leather wallet may deepen from tan to a warm brown over time. Marks and scuffs can become part of its story, particularly on full-grain leather with a more natural finish.

    That aging is a major reason many makers enjoy vegetable tan. It brings variation and a lived-in character that cannot be fully planned at the start. It can also be less forgiving if the customer or recipient wants a surface that stays visually uniform. Water spots, scratches, and uneven exposure to sunlight can be more noticeable.

    Chrome-tanned leather often provides a more stable, finished color from the beginning. It may be better suited to bright colors, smooth fashion finishes, pebbled grains, suede-like surfaces, and hides designed for regular flexing. Many chrome-tanned leathers resist water and staining better than unfinished vegetable tan, though the exact performance depends on the finish.

    For everyday bags, soft zip pouches, watch straps, and lined goods, chrome tan can offer comfort and color options that are difficult to duplicate with veg tan alone. For a belt, molded case, heirloom-style wallet, or hand-tooled panel, vegetable tan often gives the maker more control over form and surface detail.

    How to Choose Leather for Your Pattern

    Start with the pattern’s construction rather than the leather you happen to have on hand. Look at the parts that need to hold shape, bend, fold, or finish cleanly. A structured valet tray needs leather that can be wet formed and retain its corners. A relaxed tote needs leather that can flex naturally without fighting the seams.

    Consider the intended edge treatment next. If the pattern shows exposed, burnished edges, vegetable tan or another leather known to burnish well is the safer choice. If it uses turned edges, binding, or paint, a suitable chrome tan may work beautifully.

    Then think about the maker experience you want from the project. Beginners often find firm, medium-weight vegetable tan easier to measure, cut, and stitch because it stays put. At the same time, a soft chrome-tanned leather can make a simple pouch or lined accessory more approachable because it needs little to no dyeing, casing, or burnishing. Neither route is automatically easier. Each asks for different skills.

    When a pattern specifies leather weight and temper, treat both as meaningful. Weight tells you thickness. Temper tells you how firm or flexible the hide feels. A 4-ounce leather can be soft enough for a slouchy pouch or firm enough for a small structured case. Ask the supplier about both, and purchase a sample or small panel when the project depends on a particular finish.

    Can You Combine Chrome Tan and Vegetable Tan?

    Yes. Many well-designed leather goods use both. A vegetable-tanned exterior can provide structure and burnished edges, while a chrome-tanned lining adds color, softness, or a contrasting texture. A chrome-tanned bag body may use vegetable-tanned straps, tabs, or reinforcement pieces where strength and a crisp edge are useful.

    Mixed-material builds need a little planning. The layers may stretch differently, absorb adhesive differently, and respond differently to skiving. Test your glue, stitch length, and edge finish on offcuts before moving to the final pieces. A small sample assembly is faster than correcting a finished panel.

    A Better First Test Than Guessing

    Before cutting into a new hide, make a small test strip. Cut an edge, bevel it, burnish or paint it, crease it, fold it, and stitch through two layers. If the project involves molding or stamping, test that too. Ten minutes with a scrap tells you more than a product description ever can.

    The best leather is the one that lets your pattern do its job and makes the finished piece feel intentional in the hand. Choose the hide for the build in front of you, keep a few notes on what worked, and let every project make the next one easier to approach with confidence.

  • Beginner Leather Finishing Guide for Clean Results

    Beginner Leather Finishing Guide for Clean Results

    A project can be cut cleanly, stitched evenly, and still look unfinished if the edges are fuzzy, the surface is blotchy, or the final coat feels tacky. That is why a beginner leather finishing guide is less about collecting bottles and more about learning a dependable order of operations. A few careful finishing steps can make a simple tray, wallet, or key fob feel intentional and ready to use.

    Finishing also has a practical job. It helps protect leather from handling, light moisture, and everyday grime while giving the piece a more consistent appearance. The right approach depends on the leather, the project, and the look you want, but beginners do not need a crowded shelf of specialty products to get satisfying results.

    Start With the Leather You Chose

    Before choosing a dye, balm, or edge treatment, identify the leather in front of you. Vegetable-tanned leather is the most forgiving place to learn because it accepts dye, can be tooled or burnished, and responds well to many common finishes. It is often used for structured trays, belts, cases, and small goods.

    Chrome-tanned leather is usually softer and may already have a finished surface. It can make excellent projects, but it does not always absorb dye or burnish like veg tan. Suede, nubuck, and heavily coated leathers call for their own methods, so avoid testing a new finish on the project itself.

    Use a scrap from the same hide whenever possible. A finish can darken natural leather, deepen a dyed color, add shine, or slightly stiffen the grain. Five minutes spent testing a scrap saves a finished project from an unpleasant surprise.

    The Beginner Leather Finishing Guide: Use the Right Order

    Finishing works best when each step supports the next. If you apply a protective top coat before dyeing, for example, the dye may not penetrate. If you burnish edges after treating the entire surface, you can leave residue where you do not want it.

    For most vegetable-tanned projects, the basic sequence is simple: complete cutting, stamping, and assembly work; clean the leather; apply color if desired; treat and burnish the edges; then add a light protective finish. Let each product dry fully before moving on. Rushing is one of the most common causes of streaks, sticky surfaces, and uneven color.

    The sequence can shift slightly based on construction. Some makers dye pieces before stitching so light-colored thread stays clean. Others prefer to assemble first so the color remains consistent across the finished form. For a first project, follow the recommendation in your pattern if one is provided, then make notes about what worked at your bench.

    Prepare the Surface Before Adding Color

    A clean, even surface is the foundation of a good finish. Brush away loose fibers and shop dust. If the leather has marks from handling, lightly wipe it with a clean cloth. Use cleaners sparingly, especially on natural veg tan, because too much moisture can leave tide marks or change the surface color.

    If you are applying dye, make your final cuts and edge bevels first. Dyes can collect along rough cut lines and make them more obvious. A smooth edge and clean grain surface give color a better chance to look even.

    Apply dye in thin, controlled coats with a wool dauber, soft cloth, sponge, or airbrush, depending on the product and project size. Work from one edge to another rather than stopping in the middle of a broad panel. Light coats are easier to build than a single heavy coat, which can look muddy and may rub off later.

    Dye is optional. Natural leather develops character through use and exposure, and many makers prefer to protect it with a conditioner or finish while letting the leather age naturally. A clean natural finish is not a shortcut. It is a design choice.

    Give Edges the Attention They Deserve

    Edges are where handmade work often becomes visible at a glance. A rounded, smooth edge makes a project feel more comfortable in the hand and more durable in daily use.

    Start by trimming the edge flush if layered pieces have shifted during glue-up. Sand progressively, beginning with a grit that removes unevenness and moving to a finer grit for a smoother surface. You do not need to chase a mirror-like edge on every project. The goal is an even profile without loose fibers or obvious steps between layers.

    For vegetable-tanned leather, lightly dampen the edge with water or a burnishing agent, then rub it with a wood slicker, canvas, or another smooth burnishing tool. Friction compresses the fibers and creates a darker, more polished edge. Use modest moisture. A dripping-wet edge becomes soft and can turn fuzzy again as it dries.

    Edge paint is another option, especially for chrome-tanned leather and modern bag-style projects. It creates a coated edge rather than a burnished one. It can look excellent, but it requires patience: thin layers, full drying time, and light sanding between coats. For a first build in veg tan, burnishing is usually the simpler method to learn.

    Choose a Finish for the Job, Not the Label

    Leather finishes range from light conditioners to stronger acrylic-style top coats. Each has a trade-off. More protection may mean more shine or a slightly less natural feel. A soft, natural-looking finish may need more regular care.

    A light leather balm or conditioner is a good choice for many natural vegetable-tanned goods. It can enrich the color, add a gentle sheen, and keep the leather from feeling dry. Apply a small amount with a soft cloth, let it absorb, then buff lightly. Too much conditioner can leave a project greasy or overly dark.

    Wax-based finishes can offer a pleasing hand feel and modest water resistance. They suit items such as notebook covers, trays, and everyday small goods, though they may need occasional renewal. Acrylic resolene-style finishes provide stronger surface protection and can be useful on dyed leather that may see frequent handling. They should be applied in thin, even coats, often diluted according to the product directions, because a heavy layer can look plastic-like or crack as leather flexes.

    No finish makes leather waterproof. For most handmade projects, the reasonable goal is resistance to normal use: fingerprints, a light spill, changing weather, and the wear that comes from being carried or handled. If a project will face hard outdoor use, choose both the leather and the finish with that use in mind.

    Let Drying Time Do Its Work

    A finish that feels dry on the surface may still be curing underneath. Set pieces aside on a clean surface where air can move around them, and avoid stacking damp parts together. This is especially useful for trays, folded goods, and projects with broad panels that can pick up impressions.

    After the finish has dried, buff gently with a clean cloth if the product calls for it. Check the project under good light. Look along the edges, flex straps or folds carefully, and run a clean cloth across dyed areas to see whether excess color transfers. If it does, the leather may need more buffing, more drying time, or a compatible top coat.

    Keep a small finishing note with each new project: the leather type, dye color, edge method, finish used, number of coats, and drying time. Leather varies from hide to hide, so your own notes become more useful than a one-size-fits-all recipe. They also make it easier to repeat a result you liked.

    Common Beginner Problems and Practical Fixes

    Blotchy dye usually comes from uneven absorption, inconsistent application, or stopping and restarting on a large panel. Test first, use a light hand, and consider applying a suitable prep product only when it fits the dye system you are using. Adding more dye to a blotchy area rarely creates an even result.

    Fuzzy edges often mean the edge was not sanded enough before burnishing, or it was too wet. Let it dry, sand lightly, and burnish again with less moisture. If the leather is chrome tanned, switch expectations: edge paint or a clean, carefully sanded raw edge may be the better choice.

    A sticky finish points to heavy application, incompatible layers, or insufficient drying time. Do not keep adding product. Give it time in a dry, temperate space, then assess it on a scrap before attempting a correction on the project.

    Uneven shine is usually easier to prevent than repair. Apply finishes with consistent, overlapping passes and avoid going back over sections that have begun to set. A small test panel helps you learn how quickly a particular product dries in your workshop.

    The best finishing routine is the one you can repeat without guessing. Start with a straightforward project, a few compatible materials, and a scrap beside you for testing. As your cuts, stitches, and edges become more familiar, the final finish will stop feeling like a separate mystery and become one more satisfying part of the build.

  • Leather Pattern Cutting Checklist for Clean Builds

    Leather Pattern Cutting Checklist for Clean Builds

    A clean finished piece usually begins long before the first stitch. This leather pattern cutting checklist gives you a steady process for moving from a printed pattern to accurately cut leather, with less waste, fewer surprises, and more confidence at the bench.

    Cutting is one of those stages that can feel simple until a small error follows you through the rest of the build. A slightly shifted template, a missed fold line, or a strap cut across a weak section of hide can change how the whole project fits. Taking a few minutes to set up well protects the time you will spend tooling, stitching, burnishing, and finishing later.

    Leather Pattern Cutting Checklist Before You Start

    Begin with the pattern itself. Confirm that it printed at 100% scale and measure the included test square, if your pattern has one. “Fit to page” or automatic printer scaling can make a small project noticeably undersized, especially around card pockets, gussets, and hardware placements.

    Read the pattern notes before cutting anything. Look for the recommended leather weight, whether seam allowance is already included, the number of pieces required, and any pieces that need to be mirrored. A well-organized pattern should make these details clear, but a quick review prevents the familiar frustration of discovering a second side panel was needed after you have already moved on.

    If you plan to reuse a pattern, transfer it to a sturdier material such as cardstock, chipboard, or acrylic. Paper patterns are perfectly workable for a one-time build, but they can soften, stretch, and lose a clean edge after repeated tracing. A durable template also makes it easier to mark notches, stitch lines, and fold locations consistently.

    Before arranging pieces on the leather, gather the tools you will use: a sharp knife with a fresh blade, a straightedge, a scratch awl or silver pen suited to your leather, pattern weights, a cutting mat, and a wing divider if stitch lines need to be marked. Keep your striking tools separate from the cutting area so the bench stays clear. Good setup is not about owning every tool. It is about having the right few tools within reach and ready to use.

    Inspect the Leather Before You Lay Out the Pattern

    Leather is not uniform sheet material. The character that makes it appealing – grain variation, stretch, scars, wrinkles, and changing firmness – also affects where each pattern piece belongs.

    Lay the hide flat and inspect both sides in good light. The grain side will show scars, loose grain, insect marks, and color variation. The flesh side often reveals soft areas, thin spots, or a stretchier temper than you expected. None of these features automatically make the leather unusable. They simply need to be placed thoughtfully.

    For visible panels, such as a wallet exterior, tray base, or bag flap, reserve the cleanest and most consistent areas. Put minor marks in places where they will be hidden by a lining, folded into a seam, or used for smaller reinforcement pieces. For rustic work, a natural mark may suit the design. For a refined, polished project, it may distract from the finished result.

    Pay attention to grain direction and stretch. The belly is usually more elastic and less firm than the back or shoulder. It can work well for small tabs, lining pieces, or areas that benefit from flexibility, but it is often a poor choice for long straps, belt-like pieces, or structured exterior panels. Cut straps along the length of the hide whenever possible to reduce stretch and help them hang and wear more evenly.

    Plan the Layout Before Making a Mark

    Do not trace and cut one piece at a time unless the project is very small. Arrange every pattern piece first. This is where you can make the most of your leather and avoid discovering that a large panel will not fit after the best area has already been used for a small component.

    Place large pieces first, then medium panels, then small parts such as tabs, keepers, and pocket layers. Turn the templates where the pattern allows, but respect direction arrows, fold marks, and any grain-direction guidance. If a piece must be mirrored, set the first template down and immediately place its matching mirrored piece beside it. That visual check catches many costly mistakes.

    Leave enough space between pieces for your cutting method. A knife cut needs only a modest gap, while a rotary cutter or a rough-cut-then-trim process may require more room. Avoid nesting pieces so tightly that the knife has no clean path around the template. Saving a fraction of an inch is rarely worth a crooked edge or an accidental cut into the next part.

    This is also the right time to think about color and finish consistency. Pull-up leather, hand-dyed leather, and hides with strong natural variation can look different from one area to another. Place matching left and right components close together when a balanced appearance matters.

    Mark Clearly, but Only Where It Will Be Hidden

    Once the layout is settled, secure the templates with weights or hold them firmly without shifting. Trace with a light, accurate line. A scratch awl works well for many vegetable-tanned leathers because it leaves a fine mark that can be cut directly. On darker or chrome-tanned leather, a silver pen or removable marking pen may be easier to see.

    Mark the details that matter to construction: stitch-line references, fold lines, hardware centers, slots, notches, and alignment points. Keep these marks on the flesh side whenever possible. If a mark must go on the grain side, make it light and place it where it will be covered, creased, or removed during edge trimming.

    For symmetrical pieces, label the flesh side as you go. Simple notes such as “left exterior,” “right pocket,” or “grain side out” can save you from assembling a mirrored component backward later. This matters most on projects with angled pockets, tapered panels, or directional tooling.

    Cut in a Controlled Sequence

    Start with straight cuts and long outside edges. Use a metal straightedge where appropriate, hold it firmly, and make several light passes rather than forcing the blade through thick leather in one cut. A sharp blade should cut with control, not require excessive pressure. If you are leaning hard on the knife, replace or strop the blade before continuing.

    Curves deserve a slower approach. Rotate the leather rather than twisting your wrist, and use short, deliberate cuts. For tight inside curves, it is often better to rough cut just outside the line and trim carefully to the final line afterward. This takes a little longer, but it gives you a cleaner edge and a more accurate fit.

    As each part is cut, place it in a small stack or tray and compare it against the pattern before setting the template aside. Check that paired pieces match, tabs are facing the correct direction, and slots or notches have not been missed. It is much easier to correct a problem while the hide and template are still on the bench.

    Make a Quick Quality Check Before Construction

    Before gluing or punching, dry-stack the major components in their intended order. You are looking for clean pairings, consistent margins, and a layout that makes sense from the flesh side and grain side. If a piece looks slightly oversized, now is the time to trim it. If two parts do not align, find out whether the issue came from printing, tracing, cutting, or an overlooked pattern instruction.

    A useful final check includes four questions:

    • Are all pieces cut, including mirrored parts and reinforcements?
    • Are stretch-prone areas placed where they will not weaken the project?
    • Are fold lines, hardware marks, and stitch references still visible where needed?
    • Are your visible panels free of marks or flaws that will bother you later?

    There is no need to chase perfection on every cut. Handmade work has small variations, and leather itself has a natural voice. The goal is to make intentional choices, especially where accuracy affects fit, structure, and the finished appearance.

    A reliable leather pattern cutting checklist turns the first stage of a project into a calm, repeatable habit. Take the extra few minutes to inspect, arrange, mark, and verify. Your stitching will go more smoothly, your edges will line up with less correction, and you can spend more of your bench time enjoying the build rather than working around an early mistake.