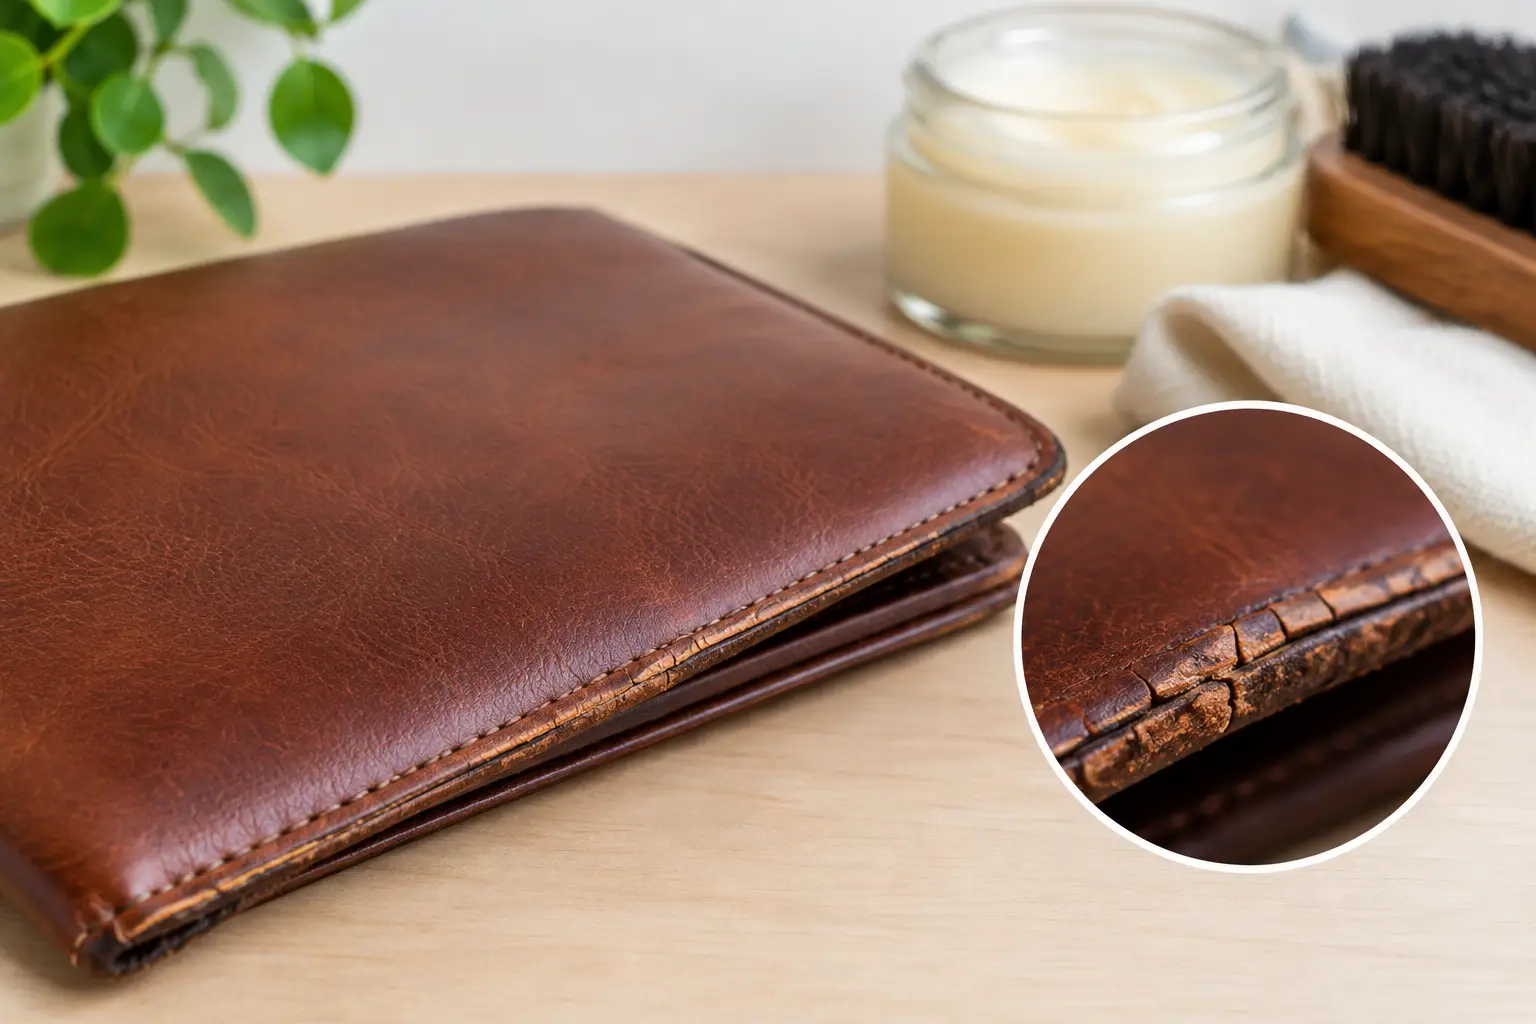
A polished edge can make a simple card holder, tray, or sheath feel finished and intentional. Leather edge cracking does the opposite: it pulls attention straight to a weak-looking line, even when the cutting and stitching are otherwise clean. The good news is that most cracked edges can be traced to a few workable causes, and preventing them usually comes down to material choice, preparation, and patience at the bench.
Why leather edges crack
An edge cracks when its fibers cannot flex together. That can happen because the leather is too dry, the edge has been compressed too aggressively, the finish is too rigid, or the layers beneath the edge are moving differently from one another.
The location of the crack offers a useful clue. Fine surface cracks that show up after applying paint, wax, or another coating often point to a finish problem. Deeper splits along a folded edge may indicate dry leather, a fold made without enough support, or a piece that is simply too heavy for the bend you are asking of it. Cracks at the end of a glued stack can suggest incomplete adhesion or uneven sanding.
Not every imperfect edge is a failure. Vegetable-tanned leather can show character, especially on a well-used item. The concern is an edge that breaks open, catches on fabric, sheds fibers, or continues to split with normal use.
Start with leather that suits the project
Good edge work begins before the first cut. Firm, clean vegetable-tanned leather is often a reliable choice for burnished edges because its fibers compact well. Softer chrome-tanned leathers can still make excellent goods, but they may need a different approach, such as edge paint, a folded construction, or a turned edge.
Dry, old, or poorly stored leather is more likely to crack during bending and finishing. Before committing to a larger project, bend a narrow offcut sharply across the grain and inspect it under good light. If the grain opens immediately or the flesh side fractures, use that hide for a less demanding application or adjust the design.
Leather weight matters, too. A thick strap folded tightly around a small radius is under more stress than a thin card-pocket edge. If your project needs a crisp fold, consider thinning the fold line, using a wider curve, or choosing a leather with enough temper for the job. A pattern is a useful starting point, but the leather on your bench should always guide the final decision.
Watch the direction of the fibers
Leather does not behave exactly the same in every direction. A long strap cut across a weaker area of the hide may stretch and flex more than expected. On small goods, this can show up as cracking near corners or around curved pocket openings. When possible, place highly stressed edges in stronger sections of the hide and test a scrap cut in the same direction as the part you plan to use.
Prepare the edge before adding finish
Trying to cover a rough edge with more finish usually creates a temporary fix. The finish may look smooth at first, but uneven fibers underneath can keep moving until a brittle surface layer breaks.
Trim stacked pieces flush after glue-up, then sand gradually. Start only as coarse as needed to level the layers, and work through finer grits until the edge is even and free of deep scratches. Sanding is not just cosmetic. It gives the fibers a consistent surface so they can be compressed and sealed evenly.
If you are gluing several layers, let the adhesive cure according to its instructions before heavy sanding or burnishing. Rushing this stage can create a clean-looking edge that later separates or cracks when the leather flexes. Pay special attention to corners, strap ends, and curved sections, where layers are easiest to sand unevenly.
A small amount of moisture can help vegetable-tanned leather burnish, but soaking the edge is rarely helpful. Leather that is too wet can swell, soften, and then shrink as it dries. Aim for lightly damp, not saturated. Let the leather return toward its natural color before judging the final edge.
Match the finish to the leather and its use
There is no single best edge finish for every build. The right choice depends on the leather, the construction, and how much the item will flex.
Burnished edges work especially well on firm vegetable-tanned leather. After sanding, a light application of water, gum tragacanth, or a suitable burnishing compound can help compact fibers. Burnish with controlled pressure using a hand tool, canvas, wood slicker, or powered burnisher. Excessive heat and pressure can darken the edge or create a hard glazed surface that later cracks, so build the shine in light passes instead of forcing it all at once.
Wax can add a pleasant final feel and a little protection, but it is best treated as a finishing layer rather than a cure for loose fibers. Apply it sparingly, then buff. A heavy wax buildup can look uneven and may collect dirt along the edge over time.
Edge paint gives a more uniform, coated appearance and can be a good fit for softer leather or layered pieces. Its trade-off is flexibility. Paint needs thin, properly dried coats and enough flex for the item’s intended use. A thick coat on a frequently bent wallet fold or strap edge is more likely to crack than several thin coats allowed to dry fully between applications.
Give finishes time to cure
Dry to the touch is not always cured. If you stack, bend, package, or use a project too soon, a finish can crease before it has developed its intended flexibility. Keep finished pieces flat or gently supported while they cure, especially in humid or very cold conditions.
Temperature also matters during application. A cold shop can make adhesives and finishes behave differently, while direct heat can dry the surface too quickly. When an edge finish starts cracking repeatedly, test it on scrap in your usual workspace before changing every part of your process.
How to repair minor edge cracking
Small surface cracks can often be improved, particularly if the underlying leather is still sound. Start by determining whether the crack is only in the finish or extends into the leather itself.
For a crack limited to a coating, gently sand or abrade the damaged area until loose material is removed and the transition is smooth. Avoid digging a deep trough into the leather. Clean away dust, then reapply a compatible finish in thin layers, allowing each layer to dry as directed. Blend the repair into the surrounding edge rather than building a raised patch over one spot.
For a burnished edge with slight fiber separation, lightly sand the area, add a modest amount of burnishing aid, and re-burnish with controlled pressure. If the edge has become very dry, a small amount of appropriate leather conditioner applied to the leather, not flooded into the edge, may help restore some flexibility. Test first, since conditioners can darken natural leather and affect later finishes.
A deep crack through the leather deserves a more honest assessment. On a non-structural edge, you may be able to trim, sand, and refinish it if doing so does not alter the shape or reveal a weak area. On a strap, handle, belt, or heavily used fold, replacement is often the better repair. A beautiful finish cannot restore lost strength to damaged fibers.
A bench routine that prevents cracked edges
Consistency is more useful than a complicated finishing routine. Before moving on from an edge, check that the leather is appropriate for the bend, glued layers are fully bonded, sanding marks are refined, and the selected finish matches the amount of flex the item will see.
For repeatable results, keep a few labeled test strips from the leathers you use most often. Try your preferred burnish or paint process on those scraps, bend them after curing, and note what holds up. This takes a little time, but it saves far more time than repairing a finished project after the fact.
When working from a project pattern, make one test component if the construction includes a tight fold, multiple laminated layers, or an unfamiliar leather weight. That small trial can tell you whether to skive a fold, alter a finishing product, or ease a corner before the full build is underway.
A strong edge is rarely the result of one magic product. It comes from choosing leather that can do the work, preparing it carefully, and giving each stage enough time. Build that rhythm into your bench process, and your finished edges will look better not only on photo day, but after the piece has been carried and used.