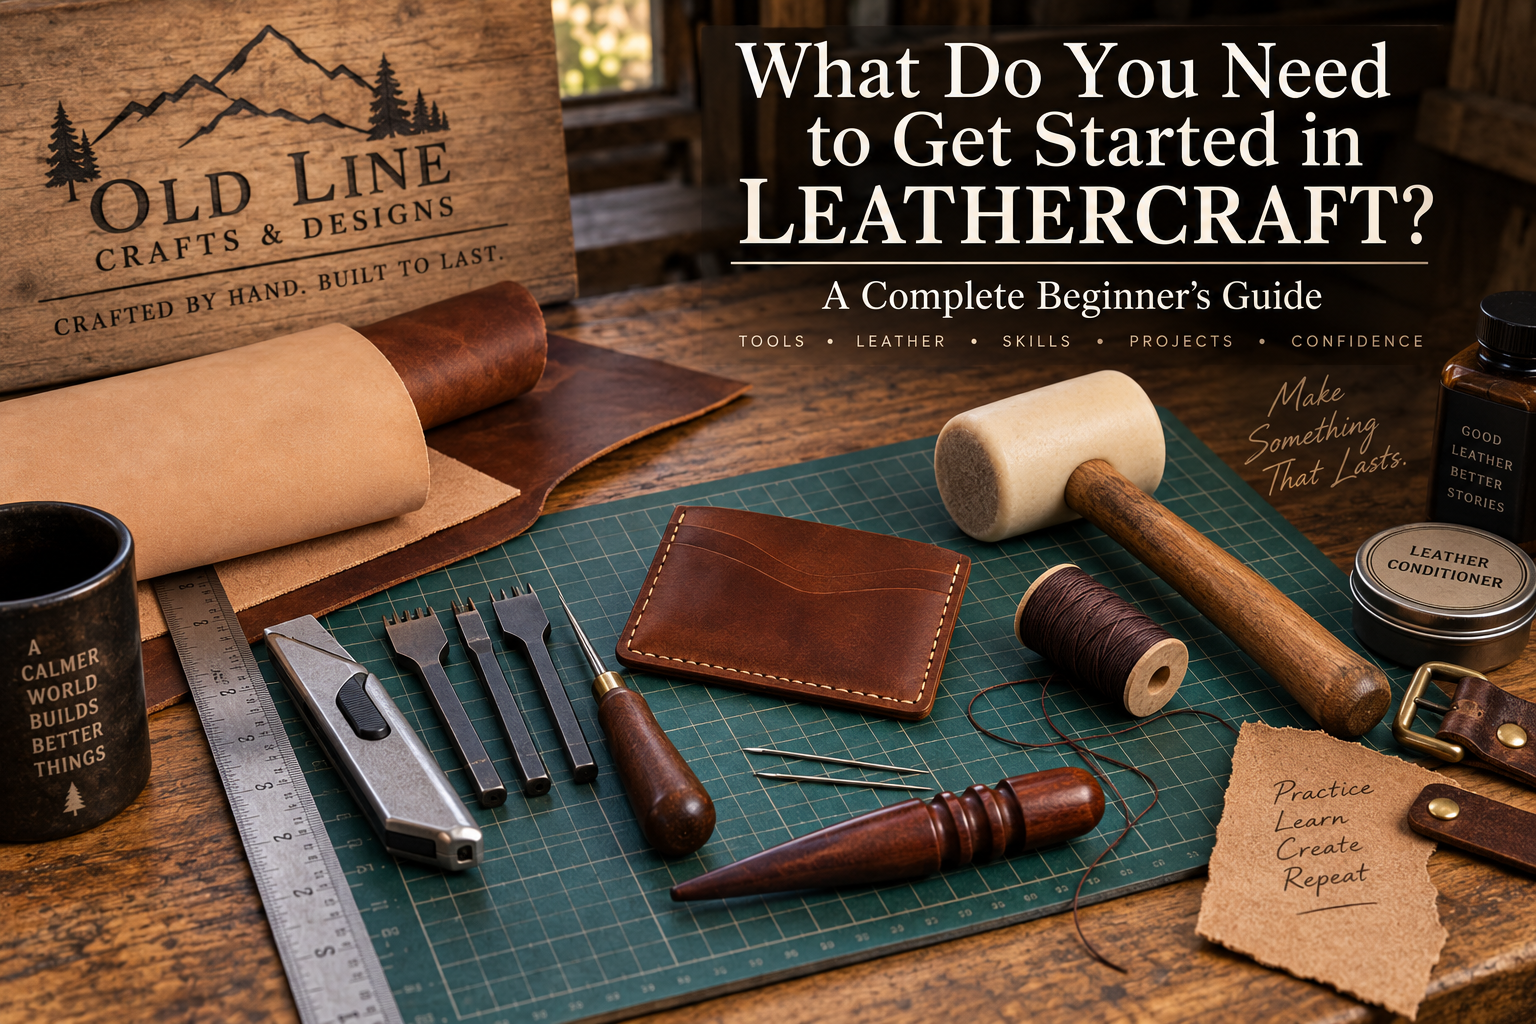
There is something different about making something from leather with your own hands.
You begin with a flat piece of material. A few cuts, holes, stitches, folds, and carefully finished edges later, you may be holding a wallet, journal cover, key holder, pouch, pair of bracers, bag, or another useful object that could last for years. This is a basic skill in leathercraft.
That transformation is a big part of what makes leathercraft so satisfying.
It can also make leatherworking look intimidating from the outside.
Search for “leatherworking tools” and you can quickly find workbenches covered with dozens—sometimes hundreds—of specialized tools. There are knives, groovers, punches, bevelers, skiving tools, stitching irons, edge creasers, mauls, burnishers, stamps, presses, dyes, finishes, and tools whose purpose may not be obvious to someone who has never worked with leather before.
Here is the good news:
You do not need most of them to begin.
In fact, one of the easiest ways to make leathercraft unnecessarily expensive is to try to build a complete workshop before completing your first project.
A much better approach is to choose a manageable project, acquire the few tools needed to complete it properly, and allow your workshop to grow along with your skills.
This guide for leathercraft beginners will walk you through what a beginner actually needs. Additionally, it covers what can wait, how to choose your first leather, and essential skills. Finally, it explains common beginner mistakes to avoid.
Start With a Project, Not a Shopping Cart
One of the most useful pieces of advice for someone new to leathercraft is also one of the simplest:
Decide what you want to make before deciding what you need to buy.
Leathercraft is an enormous category.
Someone making a hand-stitched card holder needs a different collection of tools than someone carving Sheridan floral designs, making leather armor, constructing handbags, or producing heavy belts.
Buying tools before choosing a project often results in spending money on things you do not actually need.
Instead, pick a first project with a clear purpose.
A card holder might teach accurate cutting, stitching, edge finishing, and pocket alignment.
A leather key fob might teach cutting, punching, edge finishing, folding, and hardware installation.
A journal cover can introduce larger pattern pieces, pockets, stitching, snaps, and fitting.
A pair of simple leather bracers can introduce heavier leather, straps, rivets, fitting, and light wet forming.
Each project creates its own short tool list.
That is a much more affordable—and far less overwhelming—way to build a workshop.
Understanding Leather Before You Buy It
Your tools matter, but the leather itself will have an even greater effect on how your first project behaves.
Not all leather is the same.
A piece of soft upholstery leather and a piece of firm vegetable-tanned tooling leather may both be genuine leather, but trying to use them interchangeably can make a project extremely frustrating.
Before ordering your first piece, understand three basic characteristics: tanning method, thickness, and temper.
Vegetable-Tanned Leather
Vegetable-tanned leather—often shortened to veg tan—is one of the most useful materials for learning traditional leatherworking skills.
It is generally firmer than many chrome-tanned leathers and works especially well for projects where you want defined edges, clean cuts, stamping, carving, dyeing, wet forming, or burnishing.
Veg tan is commonly used for items such as wallets, belts, sheaths, notebook covers, bracers, straps, pouches, and costume leather armor.
If you have seen someone carve a decorative pattern into leather and then bevel, shade, dye, or antique the design, there is a good chance they were working with vegetable-tanned leather.
For many beginner projects, it is an excellent starting material.
Chrome-Tanned Leather
Chrome-tanned leather is frequently softer and more flexible.
It is widely used for bags, upholstery, garments, soft pouches, footwear, and other projects where flexibility and drape are useful.
Chrome-tanned leather certainly belongs in leathercraft, but it behaves differently from vegetable-tanned leather.
Its edges usually do not burnish the same way, and very soft leather can actually be more difficult for a beginner to cut accurately because it wants to stretch or move under the knife.
Neither tanning method is inherently better.
The question is whether the leather suits the project.
Leather Thickness: What Do the Ounces Mean?
Leather is commonly sold by weight in ounces, but in leatherworking an ounce describes thickness rather than the total weight of the piece.
As a practical rule, one ounce of leather thickness is approximately 1/64 inch, or about 0.4 millimeter.
Here is a useful starting reference:
| Leather Weight | Approx. Thickness | Common Uses |
|---|---|---|
| 2–3 oz | 0.8–1.2 mm | Wallet pockets, liners, small accessories |
| 3–4 oz | 1.2–1.6 mm | Card holders, wallets, watch straps |
| 4–5 oz | 1.6–2.0 mm | Small cases, journal covers, pouches |
| 5–6 oz | 2.0–2.4 mm | Key fobs, heavier accessories, light straps |
| 6–8 oz | 2.4–3.2 mm | Bracers, structured pieces, heavier straps |
| 8–10 oz | 3.2–4.0 mm | Belts and some heavy structural projects |
These are starting points, not rigid rules.
Construction matters.
A wallet made from four overlapping layers of 5-ounce leather can become surprisingly bulky. On the other hand, a project that needs to hold a three-dimensional shape may feel weak if made from leather that is too thin.
Before buying leather, read the project’s material recommendations.
For a deeper explanation, see our Leather Thickness Guide.
Do Not Overlook Leather Temper
Temper describes how soft or firm leather feels.
A soft-tempered leather bends and drapes easily.
A firm-tempered leather holds its shape more strongly.
This matters because two pieces of leather of exactly the same thickness can behave very differently.
Imagine making a structured tool pouch from extremely soft leather. The thickness might technically be correct, but the pouch may collapse instead of holding the intended shape.
Likewise, making a soft drawstring pouch from rigid leather could turn a simple project into a battle.
When shopping, do not look at thickness alone.
Ask yourself:
Does this project need to bend, drape, fold, or hold its shape?
That question will often tell you as much as the ounce measurement.
You Do Not Need to Buy an Entire Hide
Another common beginner assumption is that getting into leathercraft means buying an entire side of leather.
Usually, it does not.
For smaller projects, leather panels, remnants, shoulders, or project-sized pieces may be more economical.
Buying for a specific project also lets you experiment with different leather weights and types without accumulating hundreds of dollars of material.
And always buy or save a little scrap.
Scrap leather is one of the most valuable supplies in your workshop.
Before trying something new on your project, test it on scrap first.
Test your stitch spacing.
Test your hole punch.
Test a rivet.
Test your dye.
Test your edge finish.
Test your stamp.
Test your burnishing method.
A small scrap can save a much larger piece of expensive leather.
The Beginner Leathercraft Tool Kit
You could spend thousands of dollars outfitting a leather workshop.
You do not need to.
A surprisingly small collection of tools can complete a large number of projects.
| Tool | Why You Need It | Buy Now or Later? |
|---|---|---|
| Cutting mat | Protects your table and knife edge | Essential |
| Metal ruler | Guides straight cuts safely and accurately | Essential |
| Sharp utility or craft knife | Cuts leather and patterns | Essential |
| Scratch awl | Transfers marks and hole locations | Very useful |
| Poly/rawhide mallet or maul | Drives punches and stitching chisels | Essential for punched work |
| Stitching chisels | Creates evenly spaced stitching holes | Essential for hand stitching |
| Harness needles | Used for saddle stitching | Essential for hand stitching |
| Waxed thread | Forms your leather seams | Essential for hand stitching |
| Hole punches | Creates hardware, lace, and strap holes | Project dependent |
| Edge beveler | Removes sharp corners from exposed edges | Highly recommended |
| Sandpaper | Trues and smooths edges | Essential and inexpensive |
| Edge burnisher | Polishes suitable leather edges | Recommended |
| Leather adhesive | Holds pieces during assembly | Project dependent |
| Wing divider | Marks consistent stitch or border lines | Useful upgrade |
| Stitching pony | Holds work while saddle stitching | Optional at first |
| Skiving knife | Reduces leather thickness in selected areas | Learn later |
| Tooling stamps | Decorative carving and stamping | Only if your project needs them |
Notice what is missing.
You do not need an industrial sewing machine.
You do not need a clicker press.
You do not need fifty stamping tools.
You do not need an electric edge burnisher.
You do not need an expensive French skiving knife before you know whether you enjoy skiving.
Start with tools that solve problems you actually have.
The Most Important Tool May Be Your Knife
Accurate leatherwork begins with accurate cutting.
You do not need an expensive custom leather knife to begin. A quality utility knife or craft knife with a fresh blade can produce excellent results.
The important word is fresh.
Leather quickly reveals a dull blade.
Instead of slicing cleanly, a dull knife may drag, wander, compress the edge, or require excessive force.
Trying to save a worn blade can easily cost more in damaged leather than replacing the blade would have cost.
For long straight cuts, use a metal ruler.
For curves, work slowly and make multiple controlled passes rather than trying to force the knife through the full thickness at once.
And whenever possible, move the leather rather than twisting your wrist into an awkward cutting position.
A clean cut makes nearly every later step easier.
Learn to Mark Before You Cut
Professional-looking leatherwork begins before the knife touches the leather.
Take time to transfer the pattern accurately.
Hold or secure the pattern so that it cannot shift. Mark important corners, stitch lines, hole centers, fold lines, and hardware locations.
If your pattern includes a calibration square, verify it before tracing anything.
A PDF pattern that prints several percent too small may still look correct while producing strap widths, stitching holes, overlaps, or hardware locations that no longer match.
If you are working from downloadable patterns, our guide on How to Print PDF Leather Patterns at the Correct Scale explains this process in detail.
A few minutes checking paper can prevent an expensive mistake in leather.
Hand Stitching: You Do Not Need a Sewing Machine
One of the things that surprises many newcomers is that beautifully stitched leather goods can be made entirely by hand.
Traditional leather hand stitching commonly uses a technique called saddle stitching.
Instead of sewing with one needle, you use one length of thread with a needle on each end. Both needles pass through every stitching hole.
The result is a strong, attractive seam and an especially useful skill for hobby leatherworkers because it requires very little equipment.
A practical beginner setup is a set of stitching chisels, two harness needles, waxed polyester thread, and eventually a stitching pony if you find yourself doing a lot of sewing.
For many everyday projects, chisels somewhere around the 3.5–4 mm spacing range provide a useful general-purpose starting point. Thread around 0.6 mm produces a relatively clean appearance, while thicker thread creates a more rugged visual style.
Do not become overly concerned with finding the “perfect” combination immediately.
Consistency matters more.
Make straight holes.
Use the same needle sequence every time.
Pull each stitch with similar tension.
Your tenth stitching line will almost certainly look better than your first.
For a complete walk-through, read How to Saddle Stitch Leather by Hand.
Edge Finishing Is What Makes a Beginner Project Look Finished
A beginner can cut and stitch a technically functional leather item fairly quickly.
The difference between something that looks like a first experiment and something that looks intentionally handmade is often found in the edges.
Freshly cut vegetable-tanned leather can look rough and fibrous.
A basic edge-finishing process usually involves trimming or aligning the layers, sanding the edge smooth, lightly beveling the sharp corners, applying an appropriate burnishing agent or small amount of moisture, and rubbing the edge with a burnisher until the fibers compact.
It is repetitive.
It also makes an enormous visual difference.
Do not rush this stage because the project seems “finished” once the stitching is complete.
Leathercraft rewards patience in the final ten percent.
What About Glue?
Leather adhesive is often misunderstood by beginners.
In many stitched projects, glue does not replace the stitching.
Instead, it keeps the layers from moving while you trim the edges and punch the stitching holes.
That makes your final alignment considerably more accurate.
Apply adhesive sparingly and according to the manufacturer’s directions.
More glue is not better.
You want the layers secured, not saturated.
And keep adhesive away from any exposed surface where it may interfere with dye, finishing, or appearance.
Punching Holes Without Ruining Your Tools
If you will be using stitching chisels, rivet punches, oblong punches, or drive punches, do not strike them directly onto your nice cutting mat or a hard tabletop.
Use a suitable punching surface beneath the leather.
Dense punch boards are inexpensive compared with replacing damaged tools.
Your striking tool matters too.
Avoid using an ordinary steel claw hammer directly on leather punches and stitching chisels. A poly, rawhide, or other suitable leatherworking mallet protects the tool better and is generally more pleasant to use.
Leatherworking tools are meant to cut leather—not your workbench.
Hardware: Rivets, Snaps, Buckles, and Chicago Screws
Hardware gives leathercraft an entirely different vocabulary.
Sooner or later you may use double-cap rivets, snaps, buckles, D-rings, swivel hooks, Chicago screws, eyelets, or other fasteners.
Do not buy a giant assortment simply because it looks useful.
Buy the hardware your chosen project requires.
Then buy a few extras.
Why extras?
Because setting hardware is a skill.
A rivet can bend.
A snap can be installed backward.
A post can be too long.
A setter can slip.
Practice the exact hardware on scrap before installing it in the finished project.
That five-minute habit can save hours of work.
What Should Your First Leathercraft Project Be?
Your first project should be interesting enough that you want to finish it, but simple enough that you can concentrate on technique.
The ideal first project has relatively few pieces, clear construction, modest material requirements, and a finished purpose you understand.
Good beginner projects include card holders, key fobs, valet trays, simple journal covers, coasters, small pouches, and straightforward wearable pieces such as bracers.
The goal is not to prove how complicated a project you can survive.
The goal is to finish something.
Finishing teaches you far more than starting.
When you complete a small project, you see the entire leatherworking sequence:
pattern → leather selection → tracing → cutting → preparation → assembly → stitching or hardware → edge finishing → final result
That complete cycle is where confidence begins.
Old Line Crafts & Designs has a growing collection of original leathercraft patterns ranging from practical everyday projects to larger medieval and armor-inspired builds. Some are intentionally designed as approachable projects for newer makers, while others give you somewhere to go as your skills develop.
That progression matters.
Your first project does not need to be your dream project.
It simply needs to teach you enough to make the next project possible.
Why Using a Pattern Is Particularly Helpful When You Are Learning
There is sometimes an idea that “real” leatherworkers should design everything from scratch.
Eventually, designing your own pieces can be one of the most rewarding parts of the craft.
But learning leatherworking and learning product design simultaneously can create unnecessary frustration.
Imagine trying to diagnose a wallet that will not close properly.
Did you cut inaccurately?
Is the leather too thick?
Is the pocket geometry wrong?
Is the stitch allowance incorrect?
Were the pieces assembled in the wrong order?
Is the design itself flawed?
When you begin with a well-planned pattern, many of those variables have already been resolved.
That means you can concentrate on learning the craft itself.
You learn how to guide a knife.
How much pressure a punch requires.
How leather responds to water.
How tightly to pull a saddle stitch.
How much sanding produces a clean edge.
How a correctly set rivet feels.
Over time, those skills give you the experience to modify patterns—and eventually design your own.
A pattern is not a substitute for craftsmanship.
It gives craftsmanship a reliable place to begin.
That is the philosophy behind the patterns we develop at Old Line Crafts & Designs: give the maker clear geometry and a logical construction path, while leaving the actual craftsmanship in the maker’s hands.
A Pattern Cannot Replace a Paper Mockup
Even when working with a proven pattern, paper remains one of the cheapest tools in your workshop.
Before cutting good leather—especially for wearable, fitted, folded, or multi-piece projects—make a paper or cardstock version.
Does it fit?
Do the pieces overlap where expected?
Is the closure in the correct place?
Can you reach the hardware?
Does the wallet fold?
Does the strap fit the buckle?
Does the wearable piece allow movement?
Cardstock costs very little.
Good leather does not.
This is especially important when body size, hardware dimensions, or personal preference can affect the final fit.
The Beginner Tool Trap: Cheap Kits Versus Good Individual Tools
Starter kits can be useful.
They can also be misleading.
A large tool count printed on the box does not necessarily mean you are receiving more useful equipment.
Sometimes a 40-, 50-, or 60-piece kit contains many specialized tools you will not use while compromising on the quality of the few tools you use constantly.
A better beginner purchasing strategy is to prioritize the tools that touch nearly every project:
a reliable knife, a sturdy metal ruler, a proper cutting and punching surface, decent stitching chisels if you plan to sew, suitable needles and thread, and a useful edge beveler.
You can upgrade almost anything later.
But a tool that cuts poorly or produces inconsistent holes can make learning unnecessarily difficult.
Buy fewer tools.
Learn them well.
Then let your projects tell you what the next purchase should be.
How Much Does It Cost to Start Leathercraft?
There is no single correct answer because you may already own several useful items.
If you already have a utility knife, metal ruler, work surface, sandpaper, and basic measuring tools, your initial investment may be surprisingly modest.
A simple hand-stitching setup adds stitching chisels, needles, thread, a mallet, and a suitable punching surface.
A project using rivets may require only a punch and setter beyond the basic cutting tools.
Rather than setting a goal of owning a “complete leatherworking kit,” set a simpler goal:
Own everything required to finish Project #1.
Then Project #2 can justify the next tool.
After several projects, you will notice that your workshop has grown naturally around the kind of leatherworking you actually enjoy.
That is far better than discovering a year later that half of an expensive starter kit has never left the box.
Create a Small, Comfortable Workspace
You do not need a dedicated workshop.
Many leatherworkers begin on a kitchen table, folding workbench, basement desk, or corner of a garage.
You do need a stable work surface and good lighting.
Leathercraft involves sharp tools, small alignment marks, narrow edges, and detailed stitching. Being able to clearly see your work makes a measurable difference.
Keep the area around your cutting path clear.
Store knives safely when not in use.
Cut away from your hands and body.
Use a non-slip ruler arrangement where possible.
Keep fingers out of the path of punches and blades.
And if you use adhesives, dyes, finishes, or other chemical products, follow the manufacturer’s ventilation, handling, and disposal instructions.
Craftsmanship is never improved by rushing.
Your First Month in Leathercraft
If you want to turn leathercraft into a lasting hobby rather than a weekend experiment, resist the urge to learn everything at once.
A simple progression works well:
- Week One — Learn to cut. Practice straight cuts, gentle curves, and accurate pattern tracing on inexpensive leather or scrap. Learn how a sharp blade feels and how little force a good cut actually requires.
- Week Two — Learn holes and stitching. Practice punching straight stitching lines on scrap and saddle stitch them repeatedly. Focus on consistency rather than speed.
- Week Three — Learn edges and hardware. Sand, bevel, and burnish several scraps. Practice setting the exact rivets, snaps, or hardware you expect to use.
- Week Four — Complete a real project. Use a clear pattern and combine the skills you have practiced. Take your time and finish every step rather than abandoning the project when something is slightly imperfect.
At the end of that month, keep your first completed project.
Do not hide it because a stitch wandered or an edge is not perfect.
Put it somewhere you will see it.
Six months later, compare it with what you are making then.
That comparison is one of the most satisfying parts of learning a craft.
Common Beginner Leathercraft Mistakes
Nearly everyone makes the same handful of mistakes while learning.
The first is buying too much equipment too soon.
The second is using the wrong leather for the project.
The third is working with a dull knife because the blade “still cuts.”
The fourth is skipping practice on scrap.
The fifth is rushing edge finishing.
The sixth is cutting leather before verifying the pattern and dimensions.
The seventh is expecting the first project to look like something made by a craftsperson with ten years of experience.
That last mistake matters.
Leathercraft is a physical skill.
Your hands learn pressure, angle, rhythm, and feel through repetition.
You can read about saddle stitching for hours, but twenty minutes stitching scrap will teach you something a paragraph cannot.
Read.
Watch.
Learn.
Then put leather on the bench.
Do You Need Leather Tooling Stamps to Begin?
No.
Leather tooling is a wonderful branch of the craft, but it is not required to make high-quality leather goods.
A simple project with accurate cuts, clean stitching, smooth edges, and well-set hardware can be beautiful without a single decorative stamp.
If tooling interests you, add it after you are comfortable with basic construction.
Starting with a small number of versatile stamps is often better than purchasing an enormous assortment.
Tooling is another area where scrap leather becomes invaluable.
Practice impressions before committing them to your project.
Every piece of leather absorbs moisture and accepts a stamp a little differently.
Should You Dye Your First Project?
You can, but you do not have to.
Natural vegetable-tanned leather has its own appeal and will change in appearance as it ages and develops a patina.
Pre-dyed leather can simplify your first build by removing an entire finishing variable.
If you want to learn dyeing, test the complete finishing process on scrap from the same leather before touching your project.
Do not merely test the dye.
Test the dye and whatever conditioner, antique, resist, oil, or topcoat you expect to use afterward.
The final color may look different from the initial dye application.
Leather has a habit of reminding us that testing is cheaper than guessing.
How Do You Know When You Are Ready for a Bigger Project?
Probably sooner than you think.
You do not need perfect stitching before attempting something larger.
You need a basic understanding of the techniques the project requires.
If you can trace accurately, cut reasonably cleanly, punch holes consistently, understand basic stitching or hardware installation, and follow an assembly sequence, you already have the foundation for a surprising range of leather projects.
The next project should stretch one or two skills—not ten.
If you have built a card holder, try a journal cover.
If you have made a key fob, try a pouch.
If you have made simple bracers, perhaps move into a more structured wearable piece.
If you have completed a flat project, try something that forms into three dimensions.
Leatherworking becomes much easier when you build ability in layers.
A Few Beginner Rules Worth Keeping
If you remember nothing else from this guide, remember these ideas:
Choose the project before the tools.
Buy leather for the project, not for an imaginary future workshop.
A sharp knife is safer and more accurate than a dull one.
Practice unfamiliar operations on scrap.
Check the pattern before cutting leather.
Take finishing as seriously as construction.
Your first project is allowed to look like your first project.
And perhaps the most important:
Finish things.
A completed imperfect project will teach you more than six perfect projects you only planned.
Where to Go From Here
If leathercraft has been something you have been thinking about trying, you do not need to wait until you own every tool or understand every technique.
Choose one useful project.
Buy the correct leather.
Gather the handful of tools it requires.
Practice on scrap.
Then start cutting.
When you run into a skill you have not learned yet, learn that skill because your project now gives it context.
That is how a collection of unfamiliar tools begins to make sense.
It is also how leathercraft stops feeling like something other people know how to do and starts becoming something you do.
Old Line Crafts & Designs was created around that same idea.
Our Leathercraft Patterns are designed to give makers a clear starting point, and our growing Leathercraft Education Library is here to help explain the skills behind the projects.
You do not need to become an expert before making something worthwhile.
You become better by making.
So pick a project.
Put a piece of leather on the bench.
And make the first cut.
Crafted by hand. Built to last.
Old Line Crafts & Designs — Original Leathercraft Patterns. Made for Makers.
