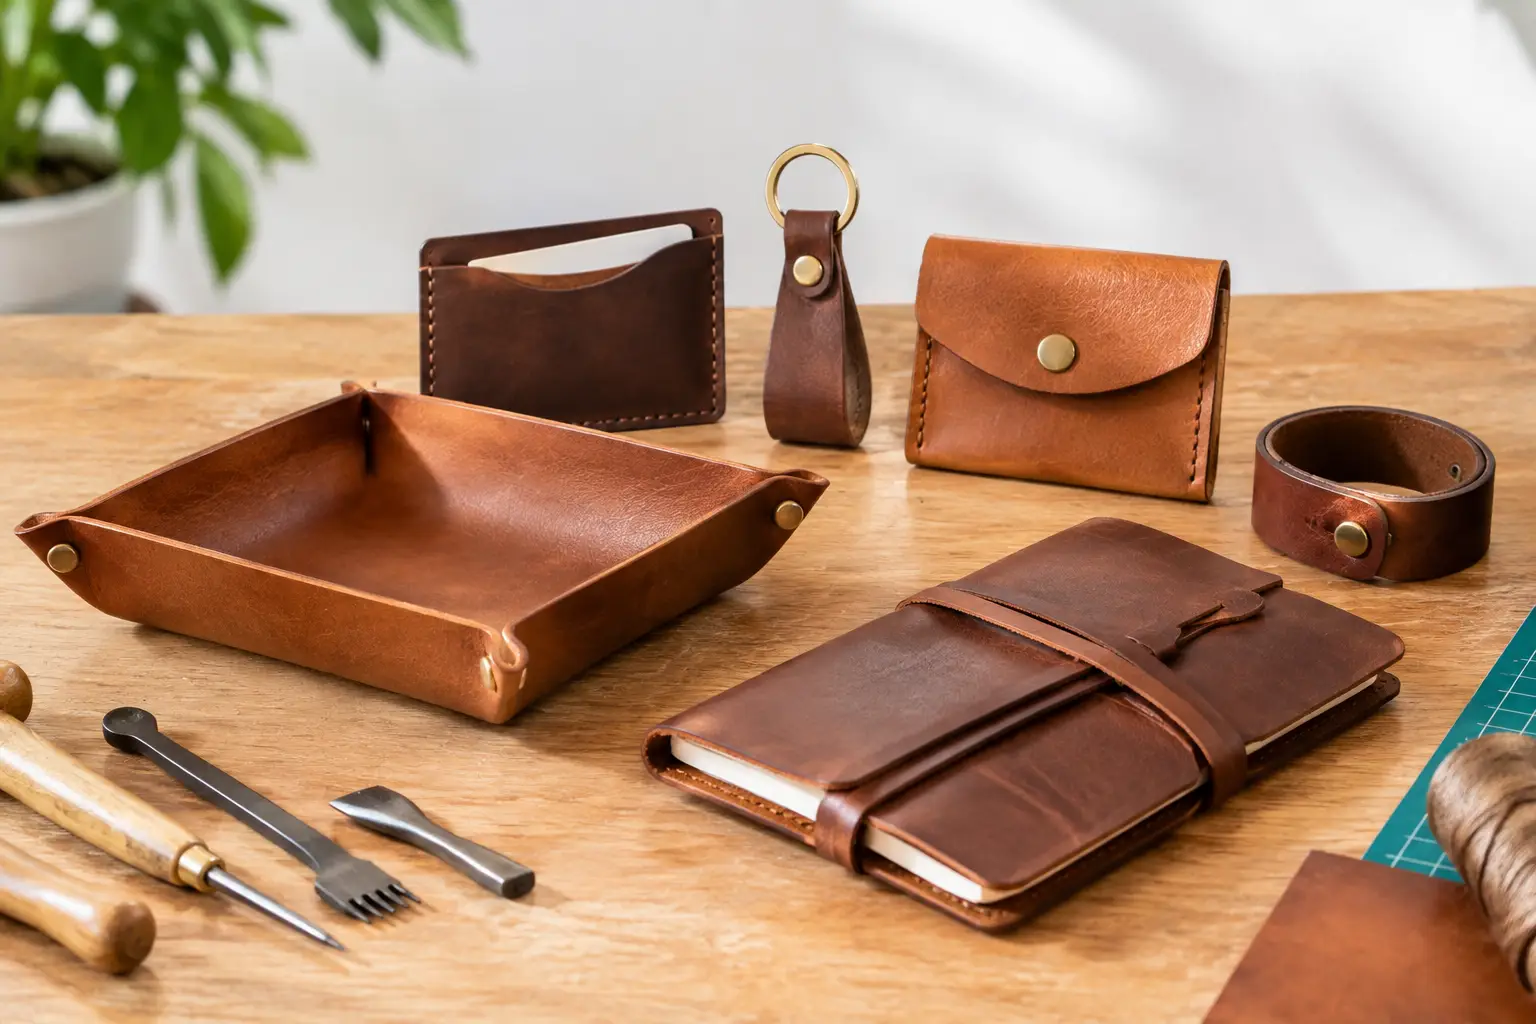
A first leather project should give you more than a finished object. It should teach you how leather behaves under a blade, how a stitch line comes together, and what a clean edge feels like in your hand. Start too large or too complicated, and those lessons get buried under avoidable frustration.
The best leather projects for beginners are small, useful, and forgiving. They use straightforward construction, ask for a manageable amount of leather, and leave room to practice the foundational work that carries into every future build: accurate cutting, clean hole placement, saddle stitching, edge finishing, and hardware setting.
What Makes a Leather Project Beginner-Friendly?
Beginner-friendly does not mean disposable or overly simple. A good first project can still look refined and earn a place in your everyday routine. The difference is that its construction gives you a fair chance to succeed on the first attempt.
Look for patterns with few pieces, mostly straight or gentle curves, and minimal layers at the seams. A project that uses one type of stitch, one weight of leather, and one or two hardware components is easier to diagnose if something goes wrong. Clear pattern layouts matter, too. When cut lines, stitch marks, and fold locations are easy to read, you can spend less time guessing and more time building.
Leather choice affects the experience as much as the pattern. Vegetable-tanned leather is especially helpful for early projects because it cuts cleanly, accepts burnished edges, and develops character with use. Chrome-tanned leather can be excellent for soft goods, but its stretch and softer edges may add challenges before you have established your basics.
8 Best Leather Projects for Beginners
1. Catchall tray
A simple valet or catchall tray is one of the strongest places to start. Most versions are cut from a single piece of leather and shaped with snaps, rivets, or stitched corners. You practice accurate cutting, corner rounding, edge work, and hardware setting without committing to a large build.
It is also forgiving. If your burnishing is not yet perfectly even, the tray remains useful and attractive on a desk, nightstand, or entry table. A tray pattern is particularly useful for learning how leather changes when it is folded and formed.
2. Key fob or keychain
A key fob teaches precision on a small scale. You will cut a narrow strap, finish its edges, fold it around a key ring, and secure it with a rivet or stitch line. The project uses very little material, so it is a sensible place to test a new dye, finish, or hardware color.
The trade-off is scale. Small work exposes uneven cuts quickly, so take your time with the strap edges and use a straightedge. If you want a faster first finish, choose a wider fob rather than a slim, detailed design.
3. Simple card holder
A card holder is the first small project that can feel like a serious piece of leatherwork. It introduces layering, glue control, stitching close to an edge, and careful trimming after assembly. Finished well, it becomes an everyday item or a thoughtful handmade gift.
Choose a design with two or three pockets rather than several angled compartments. More pockets can look impressive, but they create thicker seam stacks and demand greater accuracy. A straightforward card holder lets you focus on clean alignment and consistent saddle stitches.
4. Coaster set
Coasters are practical practice pieces that do not feel like practice pieces. A set lets you repeat the same process several times, which is exactly how skills become reliable. You can test edge beveling, burnishing, stamping, dye application, and protective finishes across multiple pieces.
Use the first coaster to establish your process, then improve the next three. This repetition makes the project valuable even if one piece is not quite right. Square coasters with softened corners are easier to cut than detailed shapes and still look considered.
5. Bookmark
A leather bookmark is a clean introduction to decorative work. It can be as simple as a finished strip of leather or include a stamped border, a small stitched detail, or a tassel. Because it stays flat, you can concentrate on surface treatment and edge quality.
This is a good project for trying tooling or letter stamps for the first time. Keep decoration restrained. One centered initial, a border line, or a small maker’s mark usually looks more polished than filling every open area.
6. Minimalist notebook cover
A notebook cover teaches measuring, folding, and fitting a real object. The best beginner versions use a simple wrap design with interior flaps that hold a standard notebook in place. You can make one with limited stitching, or choose a stitched perimeter if you want more needle time.
Fit is the part that requires care. Measure the notebook you plan to use, including its thickness, before cutting leather. A cover that is slightly generous is easier to live with than one that pulls tightly at the spine.
7. Cord wrap or cable organizer
A cord wrap is quick to build and genuinely useful, especially if you carry charging cables or earbuds. It usually requires a small strip or tab of leather plus a snap, making it a low-risk way to practice hardware placement.
Use scrap leather for a test piece before setting the snap on the final cut. This small extra step teaches an important workshop habit: test the tool, hardware, and leather thickness together before committing to the finished work.
8. Simple belt or wrist strap
A belt or wrist strap is a good next step once you are comfortable cutting straight lines and setting hardware. You will work with a longer piece of leather, finish more edge length, and learn how buckle placement affects fit. The result is durable, visible, and satisfying to wear.
This project has less room for careless measurement than a tray or key fob. For a belt, measure an existing belt that fits well from the buckle fold to the hole most often used. For a wrist strap, make a paper mockup first. A few minutes of fitting can save a quality strap from becoming scrap.
Choose the Right First Build for Your Bench
The best project depends on what you want to learn. If you are mostly curious about cutting and finishing, start with a tray, coaster, or bookmark. If hand stitching is what brought you to leathercraft, a card holder offers more focused practice. If you want to learn snaps or rivets, choose a key fob or cord wrap.
Also consider the tools already on your bench. A project should not require a major tool purchase just to get started. A sharp utility knife or round knife, cutting surface, metal ruler, edge beveler, burnishing tool, adhesive, stitching tools, thread, and a mallet will cover many early builds. The exact setup varies by project, but sharp, dependable basics are more useful than a crowded tool drawer.
Patterns can reduce uncertainty here. A well-organized pattern gives you piece dimensions, stitch locations, assembly order, and a clear sense of what the finished project should look like. That structure is especially valuable while you are learning to distinguish a construction problem from a material or tool problem.
Build Skills in a Useful Order
There is no rule saying you must complete projects in a fixed sequence, but a gradual progression makes the craft more enjoyable. Start with a flat or lightly formed item. Move next to a piece with hardware. Then take on a project with layered pockets and hand stitching. By the time you begin a notebook cover or belt, the basic motions will feel more familiar.
Do not rush to make every edge perfect on your first project. Aim instead for deliberate work: cut on the line, mark before punching, glue sparingly, and check alignment before stitching. Small pauses prevent most of the mistakes that make a project feel discouraging.
Keep your first builds. A tray with uneven burnishing or a card holder with slightly wandering stitches is evidence of real progress, not a failed attempt. Choose a project that fits your available time, prepare the materials before you begin, and let the next clean cut teach you what the last one could not.