Blog

  • Leather Journal Cover Template PDF That Fits

    Leather Journal Cover Template PDF That Fits

    A journal cover can look simple on the finished side of the bench: a clean wrap, a few straight stitch lines, and a notebook tucked neatly inside. The fit is where the real work lives. A well-made leather journal cover template PDF gives you a dependable starting point for that fit, so you can spend less time correcting paper measurements and more time building a cover you will want to carry.

    For hobby makers, a journal cover is also a useful project because it asks for several foundational skills without becoming overwhelming. You will cut long, visible edges, form pockets or flaps, mark consistent stitch lines, and make choices about leather weight and closure style. The right template keeps those decisions organized while leaving room for your own material and finishing preferences.

    What a Leather Journal Cover Template PDF Should Include

    A journal cover pattern is more than an outside rectangle. It needs to account for the notebook itself, the leather thickness, the way the cover bends at the spine, and the amount of material required for interior pockets or sleeves. If one of those measurements is missing, the project can look correct on the cutting mat and still feel too tight once assembled.

    Start by checking whether the pattern names the notebook size it is designed to fit. Common formats such as pocket, A6, A5, B5, and standard composition notebooks are not interchangeable. Even notebooks with the same labeled size can vary in thickness, corner shape, and spine construction. A template should tell you the intended insert dimensions and, ideally, the maximum thickness it can accommodate.

    Clear cut lines matter just as much. Look for a full-size print layout, a scale check or test square, and labels that distinguish the exterior panel from interior pieces. A pattern that leaves you guessing about which edge folds inward can create an expensive mistake before you ever thread a needle.

    Construction guidance should also match the project. You do not need a lengthy manual for every cover, but helpful notes should explain assembly order, pocket placement, stitch-hole spacing when applicable, and where to burnish or finish edges before final stitching. Those details reduce the awkward moments that happen when a part is technically cut correctly but impossible to finish cleanly after it is sewn in place.

    Full-size templates versus measurement plans

    A full-size template prints at actual dimensions and is cut out or traced directly onto leather. It is often the most comfortable choice for a newer maker because the layout is already resolved. Print at 100% or “actual size,” then measure the test square before tracing anything.

    A measurement plan provides dimensions and lets you draw the pattern yourself. This can be a good fit for an experienced maker who wants to adjust the design or work around a particular notebook. It also takes more care. A small drafting error at the spine or pocket can change how the finished cover closes.

    Neither format is automatically better. Full-size patterns save setup time, while measurement-based plans can make customization easier. What matters is that the PDF states its format clearly and gives you enough information to verify the scale.

    Choose the Right Journal Before You Cut Leather

    The easiest way to get a satisfying result is to begin with the exact notebook you plan to use. Set it on the bench, measure its height, width, and thickness, and note whether it has rounded corners, a hard cover, spiral binding, or an elastic closure. These features affect what kind of leather cover will work best.

    A slim stitched notebook usually fits comfortably inside a cover with simple slip pockets. A thicker hardcover journal may need deeper pockets, a roomier spine allowance, or a wrap style that does not rely on tight sleeves. Spiral-bound notebooks need special consideration because the coil can prevent the cover from lying flat and may rub against the leather over time.

    If a template is made for replaceable inserts, do not assume it will fit a permanently bound journal. Replaceable-cover designs often use flexible flaps, elastic cords, or a notebook sleeve system. They are practical for daily use, but their measurements are built around a particular type of insert.

    Before cutting leather, make a paper mockup. Cardstock, poster board, or even a cereal box works well for this step. Tape the pieces together, insert the journal, and open and close it several times. You are checking for a cover that holds the notebook securely without forcing it to bow or making the front flap spring open.

    Match Leather Weight to the Construction

    Leather selection has a direct effect on fit. A pattern designed around lightweight to medium-weight leather may become stiff and bulky when cut from heavy veg-tan. In particular, interior pockets can stack up quickly at the fold and create a thick ridge along the spine.

    For a flexible everyday cover, many makers prefer leather that bends easily and does not fight the journal. Chrome-tanned leather, oil-tanned leather, and lighter veg-tan can all work, depending on the look and finishing process you want. A firmer veg-tan cover gives you a crisp, structured result and provides a good surface for tooling or stamping, but it may need more break-in time.

    Think about the project as a whole rather than choosing leather by appearance alone. A soft pull-up exterior paired with thick, stiff interior pockets can make assembly harder than necessary. A lighter lining leather or a pocketless design may be the better choice when you want a slim cover.

    If the PDF includes a recommended leather weight, treat it as useful guidance rather than a restriction. You can substitute materials, but adjust your expectations. Heavier leather may require a wider spine allowance, thinner pocket leather, or a simpler construction.

    Build With a Clean Order of Operations

    Journal covers reward preparation. Long edge work is easier before assembly, and pockets are much easier to finish before they are attached to the exterior. Read the entire pattern once, then lay out your leather pieces in their finished orientation before making any holes.

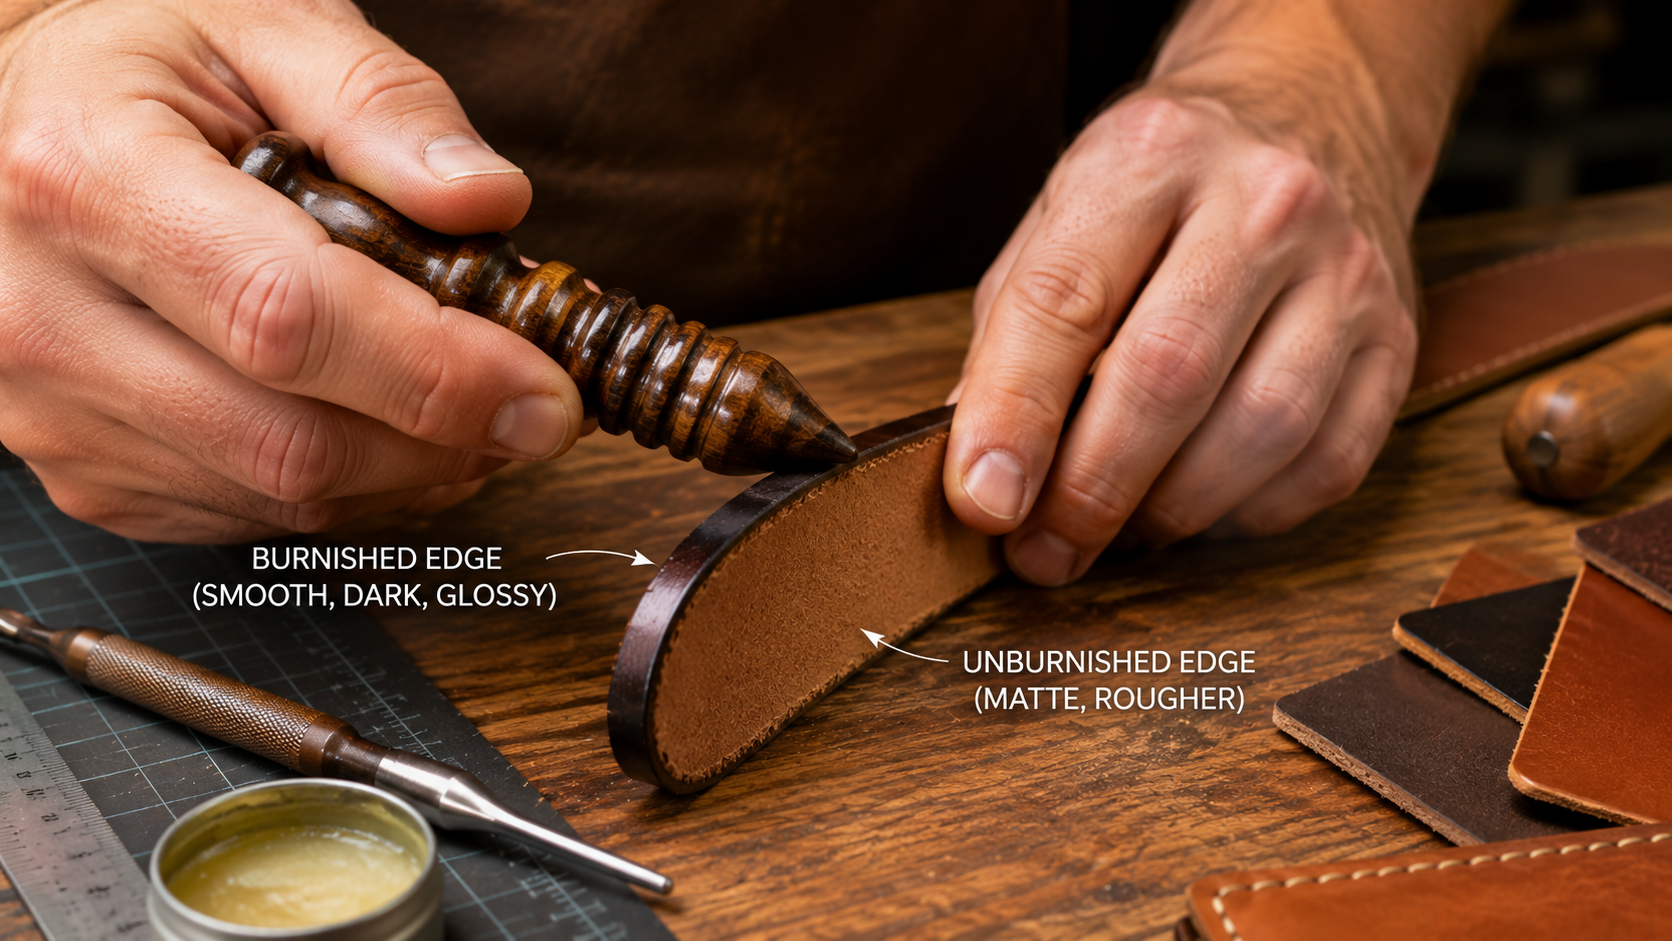
    A dependable order usually looks like this: cut and inspect the pieces, bevel and burnish the accessible edges, mark fold lines, position pockets or closures, then punch and stitch. The exact sequence depends on the design, but the principle stays the same. Complete the work you cannot reach later before you commit the layers together.

    Take extra care when marking stitch lines near the journal spine. A stitch line placed too close to a fold can restrict movement and make the cover feel rigid. One placed too far away can leave a loose, untidy pocket. A thoughtfully drafted leather journal cover template PDF should establish that relationship for you, but it is still worth checking with your paper mockup and the actual leather thickness.

    For hand stitching, keep your spacing consistent and your tension firm but controlled. Pulling too hard can pucker softer leather or distort a long edge. If you use a pricking iron or stitching chisel, practice on a scrap from the same leather first. The leather’s firmness changes how cleanly holes open and how the finished stitch line sits.

    Make the Design Your Own Without Changing the Fit

    Once the base pattern is working, small choices can make the cover feel personal. A pen loop, a snap tab, a wrap strap, a card slot, or a stamped initial can add function without requiring a complete redesign. Add these features thoughtfully, especially if the cover is meant to stay slim.

    A closure is a good example of a trade-off. An elastic band is simple, forgiving, and practical for notebooks that expand over time. A snap tab creates a more tailored look but needs accurate placement and can add bulk at the edge. A long wrap strap suits a rustic or field-notes style build, though it uses more leather and changes the cutting layout.

    Decorative work deserves the same planning as construction. Tooling, carving, dyeing, and stamping are usually best completed on the exterior panel before the cover is assembled. Test dye color and finish on a scrap first. Leather can darken, absorb unevenly, or show more contrast than expected once a finish is applied.

    A Pattern Should Leave Room for Good Craft

    A reliable template does not remove the maker from the project. It handles the repeatable geometry – panel sizes, pocket depths, stitch placement, and construction order – so you can focus on clean cuts, thoughtful material choices, and the small details that make the cover yours.

    If you are building your first cover, choose a design with a straightforward notebook fit and minimal hardware. If you already have a few projects behind you, look for a pattern that gives you a fresh construction detail without asking you to draft every piece from scratch. Old Line Crafts & Designs creates patterns with that bench-ready balance in mind: enough structure to build with confidence, and enough creative space to make a finished piece you will be proud to use.

    Print the template, check the scale, mock up the fit, and let the leather tell you what it needs. A journal cover is made to gather marks, notes, and miles over time. Starting with a clear pattern gives it the considered beginning it deserves.

  • Leather Tool Roll Pattern PDF for a Better Build

    Leather Tool Roll Pattern PDF for a Better Build

    A good leather tool roll earns its place quickly. It keeps your most-used tools together, protects edges from knocking into one another, and makes it easier to move from the bench to a class, market setup, or weekend project. The right leather tool roll pattern PDF gives you more than a cutting outline. It gives you a clear plan for building something you will reach for often.

    Tool rolls look simple at first glance, but the details decide whether they feel useful or frustrating. Pocket spacing, leather weight, closure placement, and the order of assembly all affect the finished roll. Starting with a thoughtfully organized pattern means less time guessing and more time building.

    What a leather tool roll pattern PDF should show

    A workshop-ready pattern begins with accurate full-size pieces or clearly marked dimensions. You should be able to print the pages, confirm the scale using a test square, and understand how the pieces join before cutting into good leather. If a pattern requires tiling across multiple pages, page alignment marks make that process far easier.

    Look for a layout that identifies each component: the main body, pocket panel, flap if included, straps, and any reinforcement pieces. Clear labels prevent a surprisingly common mistake: cutting a small strap or pocket from the wrong leather before you have considered stretch, thickness, or grain direction.

    Construction notes matter just as much as the template. A useful pattern explains where to glue, when to mark or punch stitch holes, and when to install hardware. It does not need to teach every basic leatherworking skill from the ground up, but it should make the project sequence easy to follow for a maker with basic cutting, stitching, and finishing experience.

    Start with the tools you actually use

    Before choosing a design, set out the tools you want the roll to carry. Not the full collection in your drawer. Choose the tools you regularly bring to the bench: perhaps a skiving knife, edge beveler, scratch awl, stitching chisels, wing dividers, a small ruler, and a few hand tools.

    Measure their width and length, then consider the handle shapes. A row of equal narrow pockets may suit edge tools and slim awls, but it will not comfortably hold a round maul handle or a thicker knife. A roll with varied pocket widths is often more practical than one with many identical slots.

    Also consider height. Tool pockets should expose enough handle to grab easily while covering sharp points and working edges. If the pockets are too shallow, tools can shift or fall out when the roll is carried vertically. If they are too tall, you may have to tug at every tool to remove it. There is no single perfect measurement because tool sets vary, but a pattern should give you a sensible starting proportion.

    A good test is to place paper strips over your tools before cutting leather. Fold and tape the strips into approximate pocket shapes, then roll them around the tools. This small bench test can reveal whether a pocket needs more width, a flap needs more length, or a closure needs to sit farther from the edge.

    Choose leather that supports the design

    Most leather tool rolls benefit from vegetable-tanned leather because it cuts cleanly, takes a burnished edge well, and gives the project a structured feel. For a lighter everyday roll, medium-weight leather can keep bulk under control. For a larger roll carrying heavy hand tools, a firmer main body and reinforced strap area may be the better choice.

    Thickness is a trade-off. Heavy leather offers protection and presence, but several folded pocket layers can become difficult to stitch and stiff to roll. Lighter leather creates a more flexible result, though it may need support at stress points. The pattern’s recommended leather weight is useful guidance, especially if it accounts for how many layers meet at the pocket base and closure.

    Soft chrome-tanned leather can work well as a lining or for a relaxed tool wrap, but it behaves differently from veg tan. It may stretch more, burnish less predictably, and require more care when marking and gluing. If you are building your first tool roll, following the leather type and weight suggested by the pattern usually produces the most predictable result.

    Pay attention to pocket construction

    The pocket panel is the working center of the project. In many designs, it is stitched along vertical lines to create individual slots, then attached at the bottom to the main body. The order matters. Stitching pocket divisions after the panel is fully attached can leave you fighting excess material under the presser foot or stitching pony.

    Mark stitch lines carefully and check the spacing a second time before punching. Small variations become obvious across a row of pockets. If you are hand stitching, use a stitching chisel size that fits the scale of the project. Very large spacing can look coarse on narrow tool pockets, while extremely fine spacing may add unnecessary work and crowd the leather.

    Pocket depth should also allow for the curve created when the roll closes. Tools and leather take up more room in a rolled position than they do laid flat. A pattern designed around this reality will leave enough clearance so the pocket panel does not pull, wrinkle, or force the closure out of alignment.

    Closures and carry styles change the experience

    A simple leather tie is quiet, repairable, and fitting for a traditional shop roll. It also allows some flexibility if the roll carries a different number of tools from one day to the next. A buckle strap gives a more structured look and can feel secure, but it adds hardware work and requires accurate placement. Snaps are quick to use, although they are less forgiving if the packed roll becomes much thicker or thinner than planned.

    Some makers prefer a flap that folds over the tool handles before the roll closes. This helps keep tools contained and adds protection, particularly if the roll will travel in a bag. Others prefer an open-top design for faster access at the bench. Neither is automatically better. Choose based on whether the roll is primarily for storage, transport, or daily use beside your work.

    Print, check, and prepare before you cut

    Print the pattern at 100 percent scale, not “fit to page.” Then measure the included reference square with a ruler. This takes less than a minute and can save an entire project from being slightly undersized. If your printer changes scale, check its settings and print again before proceeding.

    Cut out the paper pieces and arrange them on your leather with grain direction in mind. Long straps should generally run along the stronger direction of the hide, and visible pieces deserve a clean area with character that suits the project. Natural marks can add personality, but avoid weak spots, deep scars, or loose grain where the strap bends and pulls.

    Mark only what you need. Cut lines, fold lines, stitch lines, and hardware centers are useful. Too many marks can clutter the grain side and create opportunities for error. A disciplined pattern helps here by separating cutting information from construction information rather than placing every instruction on one crowded page.

    Build confidence through the small steps

    A tool roll is an approachable project, but it rewards patience. Square cuts, even pocket divisions, clean edges, and a closure that lands in the right place create the polished result people notice. Take time to dry-fit the pieces before glue-up, especially around the pocket panel and straps.

    Old Line Crafts & Designs approaches project patterns with that bench reality in mind: clear structure should support your decisions without taking the satisfaction out of making. You can still choose the leather, edge treatment, thread color, and hardware that make the project your own.

    If you want a more personal fit, adjust with care. Widening one pocket may require shifting every pocket line that follows. Adding a flap changes the amount of leather needed and may affect strap length. Make changes on paper first, then test them with your own tools before committing to the hide.

    A well-made tool roll does not need to hold everything you own. It only needs to hold the tools that help you sit down, get to work, and enjoy the next project with a clearer bench.

  • Choose a Printable Leather Card Holder Template

    Choose a Printable Leather Card Holder Template

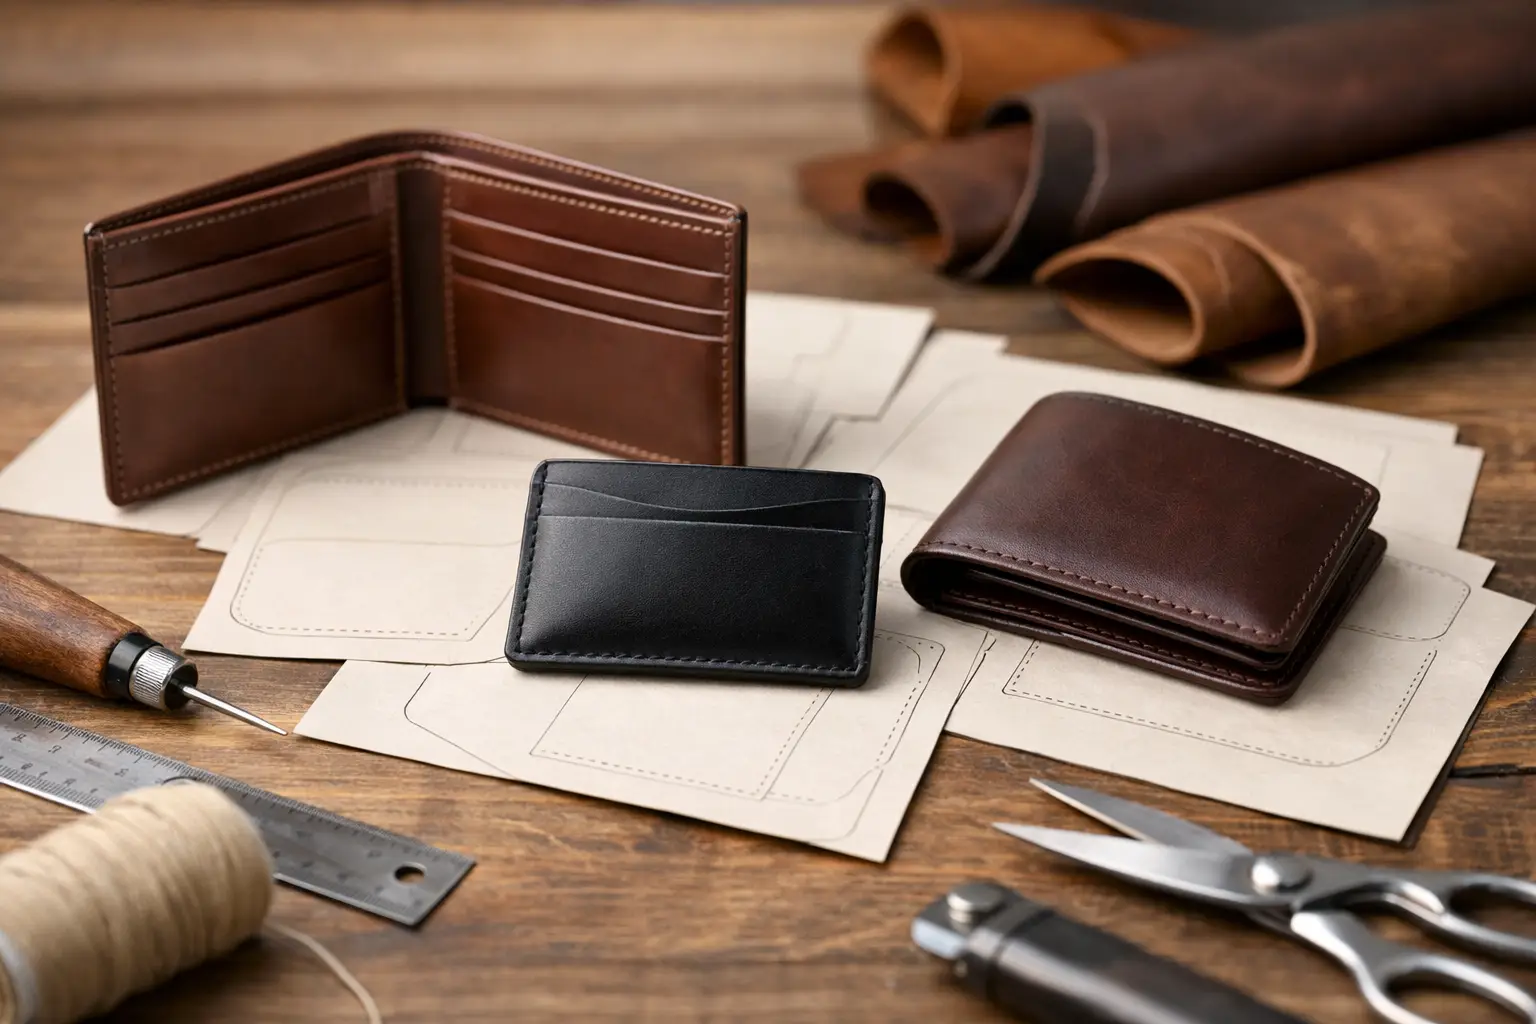
    A card holder is a small project, but it leaves very little room for uncertainty. A pocket set that is a fraction too tight, a fold line that lands in the wrong place, or a template printed off-scale can turn good leather into a frustrating build. The right printable leather card holder template gives you a dependable starting point, so you can spend less time guessing and more time building a piece you will want to carry.

    For a first wallet project, a card holder is also one of the best ways to practice the details that make leatherwork feel refined: accurate cutting, clean edge preparation, even stitch spacing, and thoughtful finishing. For an experienced maker, it is a quick, useful build that can become a reliable gift, market item, or personal everyday carry.

    What a Good Printable Leather Card Holder Template Should Do

    A printable template should do more than provide an outline. It should help you understand how the finished piece comes together before you make the first cut. At minimum, the layout needs clear cut lines, stitch locations or a stitching guide, fold references where needed, and dimensions that remain accurate when printed.

    Scale is the first detail to check. A pattern designed for US Letter paper should include a one-inch test square or another clear scale reference. Print the page at 100 percent or Actual Size, then measure that reference before transferring anything to leather. Avoid settings such as Fit to Page, Shrink Oversized Pages, or automatic scaling. They are convenient for documents, but they can change a close-fitting card pocket enough to affect the finished result.

    The design itself should also account for real cards, not just flat measurements on paper. Standard payment cards are roughly 3.37 by 2.13 inches, yet a holder needs room for leather thickness, stitched seams, and cards sliding in and out without a fight. Pocket allowances are one of the places where a well-considered pattern saves time. You can certainly draft your own, but it often takes a few test versions to get that fit right.

    Clear construction order matters just as much. A simple card holder may have only a few pieces, but the order of operations still affects the outcome. Pocket tops are easier to burnish before assembly. Decorative tooling, stamping, or maker marks usually belong on the panels before stitching. Glue-up, punching, stitching, and final edge work each have their place. A pattern with practical guidance helps keep those steps from becoming an afterthought.

    Choose a Card Holder Design That Fits Your Bench

    Not every card holder template suits every maker or use case. Before choosing a design, think about what the holder needs to carry and how you want to build it.

    A slim front-pocket card holder is often the most approachable option. It may use a back panel and two or three layered pockets, creating a compact piece for a few cards and folded bills. This format is a good choice when you want to practice aligned layers and perimeter stitching without adding complex folds.

    A folded card wallet adds capacity and offers a more traditional profile. It can include interior slots, a center pocket, or room for cash, but it also introduces a crease or fold that needs to be planned around leather temper and thickness. If you use firm vegetable-tanned leather, skiving the fold area or choosing a thinner weight can make a noticeable difference.

    Minimal one-piece or two-piece designs are fast and satisfying, especially for gifts or batch work. Their simplicity is part of the appeal, though it means every visible detail carries more weight. Cut edges, stitch lines, and corner shaping need to be especially clean because there is nowhere for rough work to hide.

    For a first build, choose a template with a construction method that matches the tools already on your bench. If you hand stitch with pricking irons, a pattern that provides stitch marks or spacing guidance will be useful. If you prefer a sewing machine, make sure the design leaves a practical seam allowance and does not depend on hand-punched holes. The best project is not necessarily the most detailed one. It is the one you can complete with confidence using the materials and tools you have.

    Leather Weight Changes the Pattern Fit

    A printable leather card holder template is a plan, not a rule that ignores material. Leather thickness has a direct effect on pocket capacity, edge bulk, and how neatly the holder closes or lies flat.

    For many card holders, leather in the 2 to 3 ounce range works well for pockets, while a slightly firmer 3 to 4 ounce leather can suit a back panel. That is a starting point rather than a fixed formula. A soft chrome-tanned leather may need reinforcement or a more structured lining. A dense, firm vegetable-tanned leather can create beautiful edges and crisp shape, but it may become bulky quickly when several layers meet.

    If you want to use heavier leather than the pattern suggests, consider skiving pocket edges, fold areas, and stacked seam allowances. Skiving reduces bulk where it matters most while preserving the strength of the main panel. It is worth practicing on a scrap from the same hide first. A few controlled passes are easier to manage than trying to remove too much leather at once.

    Leather temper also affects the experience of using the holder. Firmer leather holds a sharp silhouette and can develop character with use. Softer leather feels broken-in sooner and may accept cards more easily, but it can stretch over time. Neither choice is wrong. Match the material to the look, feel, and durability you want from the finished piece.

    Make a Test Piece When Fit Matters

    A paper mockup is one of the simplest ways to prevent an avoidable mistake. Print the pattern, cut it out, and tape the pieces into their approximate finished form. Slide in the cards you expect the holder to carry. This reveals whether the format feels too tall, too wide, or too shallow before leather enters the equation.

    For an unfamiliar template or a thicker hide, make a quick prototype from inexpensive leather, craft foam, or heavy cardstock. You do not need to fully finish it. The purpose is to check pocket depth, stitch placement, and the way the layers stack. This short test is especially helpful if you plan to modify the pattern with additional pockets, a thumb notch, or a different corner shape.

    Print, Transfer, and Cut With Care

    Once the pattern has printed at the correct scale, keep the paper template accurate. Cut directly on the template lines with scissors or a utility knife, then place it on the leather in a way that respects the grain and any visible character marks. For a polished exterior panel, avoid placing a deep scar or loose grain in the most visible area unless that natural feature is part of the look you want.

    Some makers trace around templates with a scratch awl or silver pen; others use pattern weights and cut around the paper. Both approaches can work well. The important part is consistency. Mark stitch lines, pocket tops, and alignment references lightly enough that they will not show after assembly.

    Take extra care when cutting matching pocket pieces. Stack-cutting can save time, but only if your knife stays vertical and the leather does not shift. For a first attempt, cutting each piece separately may be slower but easier to control. A clean cut edge makes every later step, from gluing to burnishing, more predictable.

    Before glue-up, dry fit the full layout. Check that pocket openings sit level, side edges align, and any decorative elements face the intended direction. Then prepare the edges that will be inaccessible after stitching. This is often the difference between a card holder that feels thoughtfully finished and one that feels rushed.

    Small Details Create a Finished Look

    A card holder earns its character through details. Rounded corners can feel classic and forgiving in a pocket. Sharper corners create a more architectural look but demand precise trimming. A contrast thread highlights the stitch line, while tonal thread lets the leather take center stage. Burnished natural edges suit vegetable-tanned leather, while painted edges can create a clean, modern finish on certain leathers.

    Keep the project focused. One well-placed stamp, a simple maker mark, or a carefully chosen thread color usually does more than several competing details. If you are making the holder as a gift, initials can be meaningful, but place them where they will not interfere with pocket flex or stitching.

    Old Line Crafts & Designs patterns are built for makers who want a clear path from printed page to finished project. Whether you choose a simple card sleeve or a layered wallet, the goal remains the same: a design that fits your bench and leaves room for your own material choices and finish work.

    Print at the right scale, check the fit before cutting, and let the quality of your preparation carry through the final stitch. A well-made card holder may be small, but every time it is used, the care you put into it will be easy to see.

  • How to Choose a Leather Wallet Pattern That Fits

    How to Choose a Leather Wallet Pattern That Fits

    A wallet can look like a small project right up until you begin cutting. Then the questions arrive: Will the pockets hold cards without stretching out? Is there enough room for stitching? Which layers should be skived, and which should stay firm? A well-designed leather wallet pattern answers those questions before your leather reaches the cutting mat.

    For hobby makers, that structure matters. You still get the satisfaction of choosing the leather, thread, edge treatment, and final character of the piece. But you spend less time correcting avoidable fit problems and more time building a wallet you will actually want to carry.

    What a Good Leather Wallet Pattern Should Solve

    A wallet pattern is more than an outline to trace. It is a construction plan for a compact item where every fraction of an inch affects the finished result. Pocket placement, fold allowance, stitch-line spacing, leather thickness, and assembly order all work together.

    The strongest patterns make those decisions visible. They show each piece clearly, identify what gets cut from leather, and account for the overlap needed to secure a card pocket or create a clean fold. They also give you a workable sequence, so you are not trying to stitch a section that should have been finished earlier.

    This is especially useful with wallets because the project has little room for error. A slightly narrow pocket can make cards difficult to remove. A stack of thick leather at the center fold can keep the wallet from closing comfortably. Stitching too close to an edge can weaken a high-use area. The pattern does not replace good bench habits, but it gives those habits a sound starting point.

    Choose a Leather Wallet Pattern for Your Carry

    Before selecting a design, think about the wallet you want to use, not just the wallet you want to make. A clean card holder is satisfying to build, but it may not serve someone who carries several cards, folded bills, receipts, or an ID every day.

    Start with the wallet style

    A card holder is often a good first wallet project. It uses fewer pieces, has fewer layers, and lets you focus on accurate cutting, gluing, stitching, and edge finishing. It is a practical choice if you want to build confidence with small leather goods.

    A bifold gives you more storage and a classic everyday format. It also introduces more planning. You may need multiple interior pockets, a long fold, and careful control of leather thickness near the spine. The finished piece can be rewarding, but it asks more from your material selection and assembly process.

    Minimalist bifolds, vertical wallets, and money clips sit somewhere in between. Their layouts are often simpler than a traditional bifold, yet they still teach useful lessons about pocket geometry and carrying comfort. Choose the format that fits the intended use first. A wallet that looks refined but does not suit the owner’s daily carry will spend more time in a drawer than a pocket.

    Match the pattern to your current skills

    A beginner does not need to avoid wallets, but it helps to choose a project with a manageable number of pieces and straightforward stitch runs. Look for clear markings, practical instructions, and a construction order that does not assume you already know how to solve every detail.

    More experienced makers may prefer a design with layered interiors, turned edges, or opportunities for customization. Even then, a thoughtfully organized pattern saves time. Drafting from scratch has its place, but using a ready-to-build design can let you focus on leather selection, refinement, and your own finishing choices.

    Check your tools before you begin

    Most wallet patterns can be built with a modest set of hand tools, but the details matter. Confirm whether the project calls for a punch size you own, a specific stitch spacing, skiving, rivets, snaps, or hardware. If a pattern includes a fold line, make sure you have a method for creasing or lightly grooving it without damaging the grain.

    Do not treat a tool list as a challenge to buy everything at once. Often, a simpler pattern is the better choice if it allows you to build well with the tools already on your bench. Clean cuts, consistent glue placement, and careful stitching will do more for the finished wallet than an elaborate tool collection.

    Read the Pattern Before Cutting Leather

    Printing and cutting immediately is tempting, especially when a new project is waiting. Take a few minutes to review the entire pattern first. That short pause can save a good hide from a frustrating mistake.

    Confirm the print scale according to the pattern instructions. Many printable patterns include a reference square or measurement line for this reason. If that reference is off, every pocket and panel will be off with it.

    Next, identify each pattern piece and note whether it needs to be cut once, twice, or mirrored. This is a common point of confusion with interior pockets and side panels. If you are using leather with a pronounced grain, pull-up effect, or color variation, plan the orientation of each piece before tracing. A pocket cut in the opposite direction may still function, but it can change the visual balance of the wallet.

    Finally, walk through the assembly order in your head. Notice which edges need to be beveled and burnished before they are covered by another layer. Mark stitch lines and crease lines where needed. A good build feels calmer when these small decisions happen early.

    Use a Test Fit for Pockets and Folds

    Paper templates are useful, but a quick test fit with scrap leather or heavy cardstock can reveal what a flat pattern cannot. Place actual cards in the pocket layout and check the reveal at the top. You want enough card exposed to remove it easily, without leaving so much exposed that it feels insecure.

    Remember that leather thickness changes the final dimensions. A pattern designed for thinner interior leather may feel tight if every layer is cut from firm, heavy vegetable-tanned leather. For many wallets, a firmer outer shell paired with thinner pocket leather creates a more comfortable result. The right combination depends on the pattern, the wallet style, and the look you want.

    Test the fold, too. On a bifold, the center area needs enough room for the layers to bend naturally. If the fold feels bulky during a dry fit, it will not improve after stitching. Skiving or thinning selected areas can help, but it is better to make that decision before glue and thread make the assembly permanent.

    Build in an Order That Keeps Edges Clean

    Wallet construction rewards patience because some of the best-looking details become inaccessible later. Interior pocket edges are the clearest example. Once a pocket is glued beneath another panel, you may no longer be able to bevel, burnish, or apply edge paint neatly.

    Start by cutting accurately and labeling pieces lightly on the flesh side. Then complete any required skiving, crease work, or interior edge finishing before glue-up. Dry fit the layers once more, especially if you have adjusted leather weight or made a small personalization change.

    When it is time to assemble, use light, controlled glue coverage. Excess adhesive near pocket openings can create a messy edge or interfere with burnishing. Let glued sections set as directed by your adhesive, then stitch with a consistent rhythm. On compact projects, uneven stitch spacing stands out quickly, so take the time to keep your awl or irons aligned.

    After stitching, trim and refine the outer edge only if the pattern and construction method allow it. Then bevel, sand, burnish, or paint according to the finish you prefer. There is no single correct edge treatment. A burnished veg-tan edge has a different character from a painted chrome-tan edge, and both can look excellent when they suit the leather and the build.

    Signs a Wallet Pattern Is Ready for Your Bench

    Before committing to a design, look for practical signals that it has been organized with the maker in mind:

    • Clearly labeled pattern pieces with usable cut lines and measurements
    • A defined assembly order, including notes for folds, pockets, or hardware
    • Material guidance that helps you choose workable leather weights
    • Stitching and edge-finishing details that account for the finished construction

    Clarity does not mean every creative decision is made for you. The best patterns leave room for your own leather, thread color, stamp work, lining choice, and finish. They simply remove the uncertainty that does not add anything useful to the project.

    At Old Line Crafts & Designs, that is the purpose behind a workshop-ready pattern: give makers a clean layout and practical guidance, while leaving the craft itself in their hands.

    Make the Pattern Your Own, One Change at a Time

    Once you understand the construction, customization becomes more enjoyable and less risky. You might change thread color, add a maker’s mark, choose a contrasting pocket leather, or alter the edge finish. These are small choices, but they can give a familiar design a distinct personality.

    Be cautious with dimensional changes. Widening a pocket, shortening a panel, or substituting thicker leather can affect several connected pieces. If you want to modify the layout, make a paper mockup first and test it with real cards and bills. That simple step protects your leather and helps you learn why the original dimensions were chosen.

    A good wallet project should leave you with more than a finished accessory. It should teach you something useful for the next build: how leather weight affects a fold, how much pocket reveal feels right, or how a better assembly sequence makes the whole process easier. Choose a design that fits your bench now, build it with care, and let the next one carry a little more of your own experience.

  • Leather thickness examples calipers and a leather belt on a workbench

    Leather Thickness Guide: How to Choose the Right Leather for Your Project

    One of the first questions new leatherworkers encounter is also one of the most important:

    What thickness of leather should I use?

    Buy leather that is too thin and a project that should be firm may feel floppy and weak. Buy leather that is too heavy and a wallet can become bulky, a strap may resist folding, and a detailed project can become unnecessarily difficult to assemble.

    The challenge is that leather is commonly sold by weight in ounces, even though what most beginners really want to know is how thick it is.

    This guide explains leather weights in straightforward terms and gives practical starting points for everything from card holders and straps to leather bracers and cosplay armor.

    Understanding Leather Weight

    In leathercraft, an ounce is a measurement of thickness, not the weight of the entire hide.

    As a practical approximation:

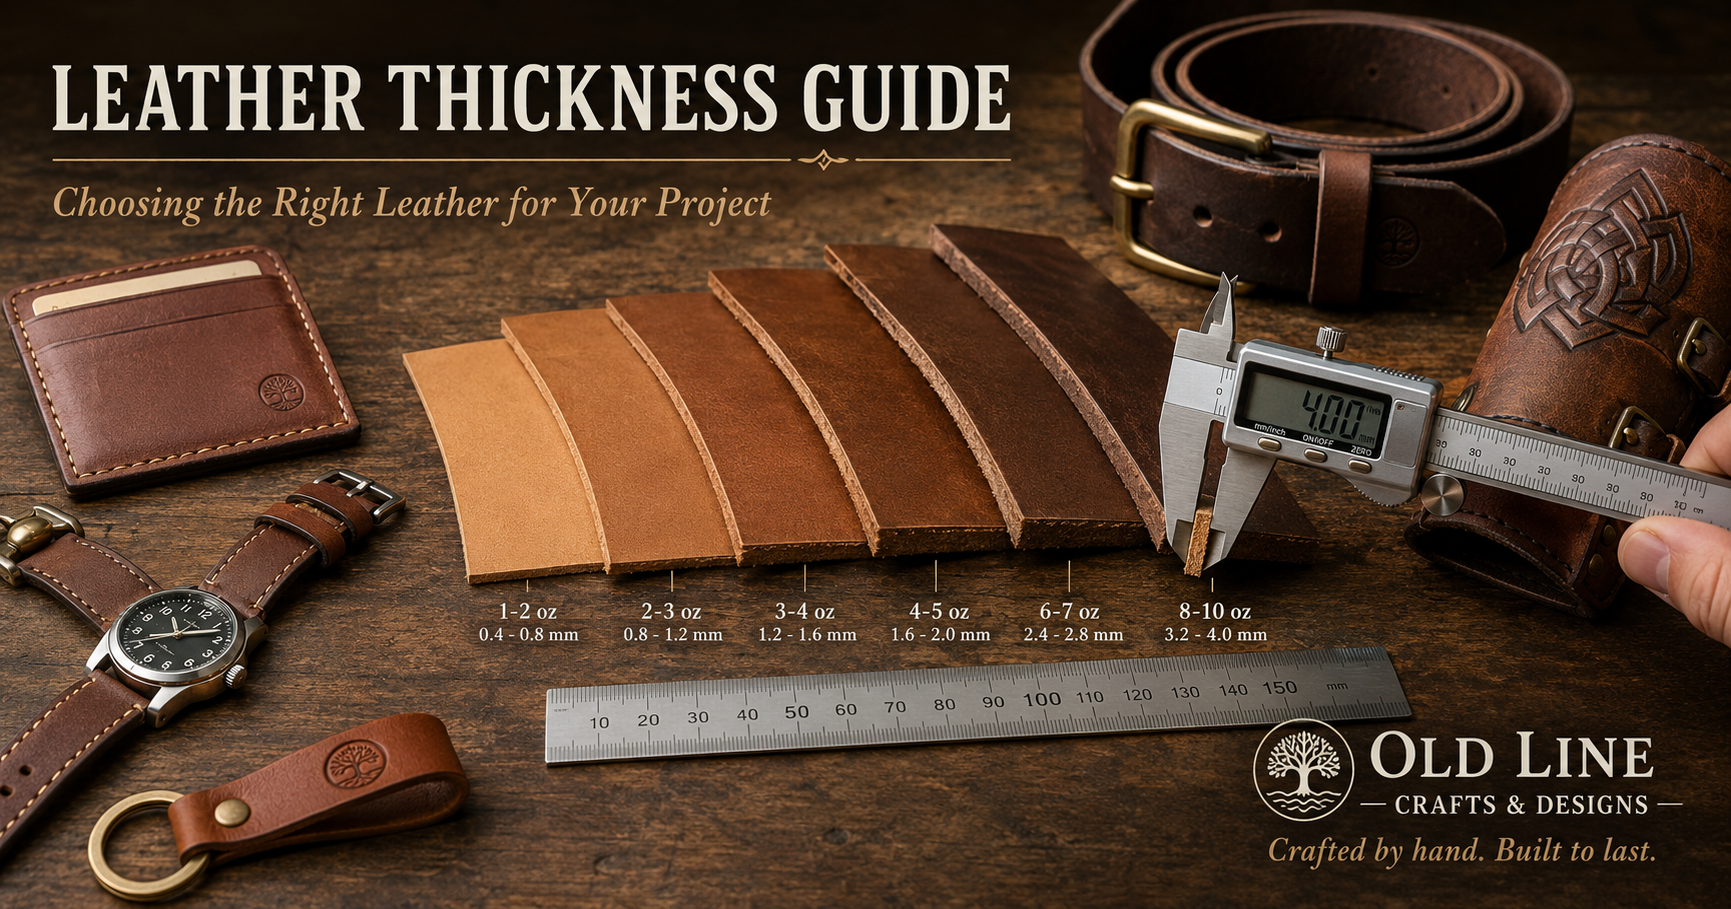
    1 oz leather ≈ 1/64 inch ≈ 0.4 mm thick

    Because leather is a natural material, thickness varies across a hide. That is why suppliers frequently list a range such as 4–5 oz rather than one exact measurement.

    Here is a useful workbench reference:

    Leather WeightApprox. ThicknessTypical Uses
    2–3 oz0.8–1.2 mmWallet pockets, linings, lightweight details
    3–4 oz1.2–1.6 mmCard holders, wallet components, small accessories
    4–5 oz1.6–2.0 mmWallet exteriors, pouches, light straps, general projects
    5–6 oz2.0–2.4 mmHeavier accessories, bracers, structured projects
    6–7 oz2.4–2.8 mmBelts, straps, heavier bracers, armor components
    7–8 oz2.8–3.2 mmBelts, sheaths, structured armor
    8–9 oz3.2–3.6 mmHeavy belts, sheaths, substantial armor pieces
    9–10 oz3.6–4.0 mmHeavy-duty and rigid leather projects

    These are starting points rather than absolute rules. A design, construction method, desired flexibility, and number of leather layers can all change the ideal choice.

    What Type of Leather Should a Beginner Buy?

    For many traditional leathercraft projects, vegetable-tanned leather, commonly called veg-tan, is an excellent material to learn with.

    It can be cut, punched, stamped, carved, dyed, burnished, wet-formed, and finished in many different ways. Current beginner guidance likewise commonly recommends vegetable-tanned leather because of its firmness, ability to accept tooling and finishing, and suitability for developing core leatherworking skills.

    That versatility is particularly useful when you are learning because one piece of leather can teach you several techniques.

    Chrome-tanned leather is also useful, but it tends to be softer and is often better suited to projects where flexibility is desirable, such as soft bags, garments, linings, and certain accessories.

    Neither tanning method is universally “better.” The correct choice depends on what you are making.

    Best Leather Thickness for Card Holders

    A card holder needs enough structure to retain cards without becoming unnecessarily bulky.

    For many designs, 3–4 oz vegetable-tanned leather is a useful starting point. Current leather selection references similarly place three-slot card holders around this range.

    Remember that multiple layers add up quickly.

    Three layers of 4 oz leather stacked together create a much thicker edge than a single 4 oz piece.

    For a layered card holder, you might therefore combine:

    • 3–4 oz exterior leather
    • 2–3 oz pocket leather

    This is one reason experienced leatherworkers often use different weights within the same project.

    Best Leather Thickness for Wallets

    Wallets present the same problem on a larger scale.

    A beautiful piece of 8 oz leather may be excellent for a belt, but several layers of it would create an extremely bulky wallet.

    A practical combination might use:

    Exterior: approximately 3–5 oz
    Interior pockets: approximately 2–3 oz

    The exact combination depends on the design.

    When evaluating a wallet pattern, think about the finished stack, not just the thickness of each individual piece.

    Best Leather for Keychains and Small Accessories

    Keychains can tolerate somewhat heavier leather because they normally contain fewer stacked layers.

    Approximately 4–6 oz works well for many designs, although folded keychains may benefit from lighter leather depending on how many layers overlap.

    This is an excellent place to use scraps left from larger projects.

    Best Leather for Watch Straps

    Watch straps need an interesting combination of strength, comfort, and flexibility.

    A strap that is too thin can feel insubstantial. One that is too thick may not bend comfortably around the wrist or fit correctly through the buckle and hardware.

    Approximately 3–4 oz leather can provide a useful starting point, although lined straps may use thinner individual layers. Leather-selection references likewise commonly place watch straps around this range.

    Always consider the dimensions of your buckle and watch adapters before selecting leather.

    Best Leather Thickness for Belts and Heavy Straps

    Belts require substantially more structure than wallets.

    Approximately 7–9 oz is a common range for a single-layer leather belt, although the desired style and construction can change that considerably.

    Heavy straps used on bags, armor, and equipment may fall into a similar range.

    If two pieces will be laminated together, lighter leather can be used to achieve the desired finished thickness.

    What Leather Should You Use for Leather Armor?

    Armor introduces another variable: structure.

    A costume bracer does not need the same flexibility as a wallet pocket. A breastplate needs even more structure.

    Vegetable-tanned leather is particularly useful because moisture allows it to be shaped and molded. Once dry, appropriately selected veg-tan can retain considerably more form than soft garment leather.

    For many cosplay and LARP projects, useful starting ranges are:

    Bracers and vambraces: 5–8 oz
    Shoulder armor: 6–9 oz
    Tassets and leg armor: 6–9 oz
    Chest armor: roughly 7–10 oz depending on construction
    Armor straps: approximately 5–8 oz

    These should not be treated as safety specifications. They are construction guidance for costume, cosplay, Renaissance Faire, and appropriate LARP projects—not certified protective equipment.

    Commercial leather-armor patterns likewise vary considerably by design. For example, Tandy Leather recommends 4–5 oz firm-tempered leather for one chest-armor pattern, illustrating why the pattern’s construction matters as much as a generic weight rule.

    A Beginner-Friendly Armor Starting Point: Bracers

    If you want to learn leather armor construction, you do not need to start with a full cuirass.

    Bracers are an excellent first armor project because they require relatively little leather while teaching techniques that transfer directly to larger builds:

    • Pattern tracing
    • Accurate cutting
    • Hole punching
    • Edge finishing
    • Rivet setting
    • Strap installation
    • Optional stitching
    • Wet forming
    • Fitting

    Old Line Crafts & Designs’ Wayfarer Bracers were designed around exactly this progression. The pattern recommends 5–8 oz vegetable-tanned leather for the main bracer and overlays, with optional lighter leather or suede for details.

    This is also a natural entry point into the Armor for the Commoner collection.

    What Leather Should You Use for Spartan-Style Armor?

    A Spartan-inspired helmet, pauldrons, greaves, and other structured pieces generally need more body than small everyday-carry goods.

    For these projects, vegetable-tanned leather provides another advantage: it can accept tooling, decorative borders, dye, antiquing, and molded shaping.

    That allows one basic pattern to produce very different finished appearances.

    A maker might choose:

    Natural veg-tan + antique finish for an aged historical-fantasy appearance.

    Dark brown dye + brass hardware for a rugged campaign-worn look.

    Black dye + contrasting edges for a darker fantasy interpretation.

    The pattern should always take priority over a generic leather-weight chart because its geometry and assembly method were designed around a particular material range.

    Why Leather Thickness Changes Your Hardware Choice

    Leather thickness also affects your hardware.

    A rivet post needs enough length to pass through every leather layer while leaving enough material to set correctly.

    The same principle applies to:

    • Chicago screws
    • Snaps
    • Buckles
    • Rivets
    • Sam Browne studs

    This becomes especially important with armor because an assembly may contain a base layer, decorative overlay, strap, and hardware at the same connection point.

    Do not choose hardware before calculating the total assembled thickness.

    Thickness Also Changes Your Stitching

    Leather thickness affects hand stitching too.

    As projects become heavier, you may choose different:

    • Thread diameters
    • Needle sizes
    • Stitch spacing
    • Edge offsets
    • Hole sizes

    A delicate card holder and a heavy leather armor component should not necessarily use identical stitching.

    If you are new to hand sewing leather, read our How to Saddle Stitch Leather by Hand: A Complete Beginner’s Guide before beginning a stitched project.

    Don’t Forget the Paper Mockup

    This is particularly important for wearable leather projects.

    Before cutting expensive leather, print the pattern at the specified scale and make a paper or cardstock mockup.

    Check:

    • Overall dimensions
    • Wrist or arm circumference
    • Strap positions
    • Buckle locations
    • Range of movement
    • Overlap
    • Symmetry

    Paper costs pennies.

    Good leather does not.

    For downloadable patterns, also verify the pattern’s calibration square before assembling the pages.

    Buy for the Project, Not for Your Future Workshop

    Beginners sometimes think they need an entire side of leather before they can begin.

    You usually don’t.

    For a first card holder, bracer, keychain, or small accessory, a correctly sized panel or shoulder can be a much more practical purchase.

    Choose the project first.

    Read its materials list.

    Determine the leather weight.

    Then buy enough material to complete the project plus some extra for testing.

    That extra material is valuable.

    Use it to test:

    • Dye
    • Stitch spacing
    • Rivets
    • Snaps
    • Edge burnishing
    • Tooling
    • Wet forming

    Never make the first strike of a new stamp—or the first application of an unfamiliar dye—on your finished project.

    Keep a Leather Scrap Library

    One of the easiest ways to become better at choosing leather is to keep labeled scraps.

    Write the weight on the flesh side:

    3 oz
    5 oz
    7 oz
    9 oz

    Over time, you will stop thinking only in numbers.

    You’ll be able to pick up a piece of leather and immediately understand how it will behave.

    That experience is far more useful than memorizing a chart.

    Quick Leather Selection Cheat Sheet

    If you’re standing at the workbench wondering where to begin, use this as a starting point:

    Wallet pockets: 2–3 oz
    Card holders: 3–4 oz
    Wallet exteriors: 3–5 oz
    Watch straps: 3–4 oz
    Keychains: 4–6 oz
    General beginner projects: 4–6 oz
    Bracers: 5–8 oz
    Belts: 7–9 oz
    Structured costume armor: approximately 6–10 oz depending on design

    Then check the pattern instructions before purchasing your leather.

    The Right Leather Makes the Project Easier

    Leathercraft becomes much easier when the material is working with the design rather than against it.

    The correct leather doesn’t guarantee a perfect project. You still need accurate cutting, good hole placement, consistent stitching or hardware installation, and careful finishing.

    But choosing the appropriate leather gives all those skills a better foundation.

    If you’re just beginning, start small.

    Make a card holder.

    Build a keychain.

    Try a pair of bracers.

    Learn how different leather weights cut, punch, stitch, burnish, and form.

    Then move on to the larger project you’ve been thinking about.

    At Old Line Crafts & Designs, our downloadable leathercraft patterns are designed to help makers turn those developing skills into finished projects—from practical everyday leather goods to wearable fantasy and medieval-inspired armor.

    Start with the right leather. Follow the pattern. Build something of your own.

  • 8 Beginner Leatherworking Projects Worth Building

    8 Beginner Leatherworking Projects Worth Building

    A first leather project should give you more than a place to practice stitches. It should leave you with something you will actually use, while teaching one or two new skills without turning your bench into a troubleshooting exercise. The best beginner leatherworking projects are modest in size, clear in construction, and forgiving enough that a slightly uneven cut or stitch does not ruin the finished piece.

    Choose projects with straight or gently curved lines, few layers, and a purpose you understand. A useful tray, card holder, or key fob gives every step a reason: cut accurately because the edges will show, stitch consistently because the seam holds the piece together, and finish carefully because your hands will touch it every day.

    What Makes a Good First Leather Project?

    For a new maker, project fit matters more than project size. A small item can still be frustrating if it requires tight interior turns, complex gussets, or several pieces that must align perfectly. On the other hand, a larger project with simple geometry can be a calm, satisfying build.

    Look for a pattern that clearly shows the cut pieces, hardware placement, stitch lines, and assembly order. That structure lets you spend less time guessing and more time building. A well-organized pattern is especially helpful when you are still learning how leather behaves after cutting, folding, gluing, and burnishing.

    Vegetable-tanned leather is often a practical choice for early projects because it cuts cleanly, accepts edge finishing well, and lets you see your tool work. Chrome-tanned leather can be softer and more forgiving for some items, but its edges may not burnish in the same way. Neither choice is universally better. Match the leather to the project and the finish you want.

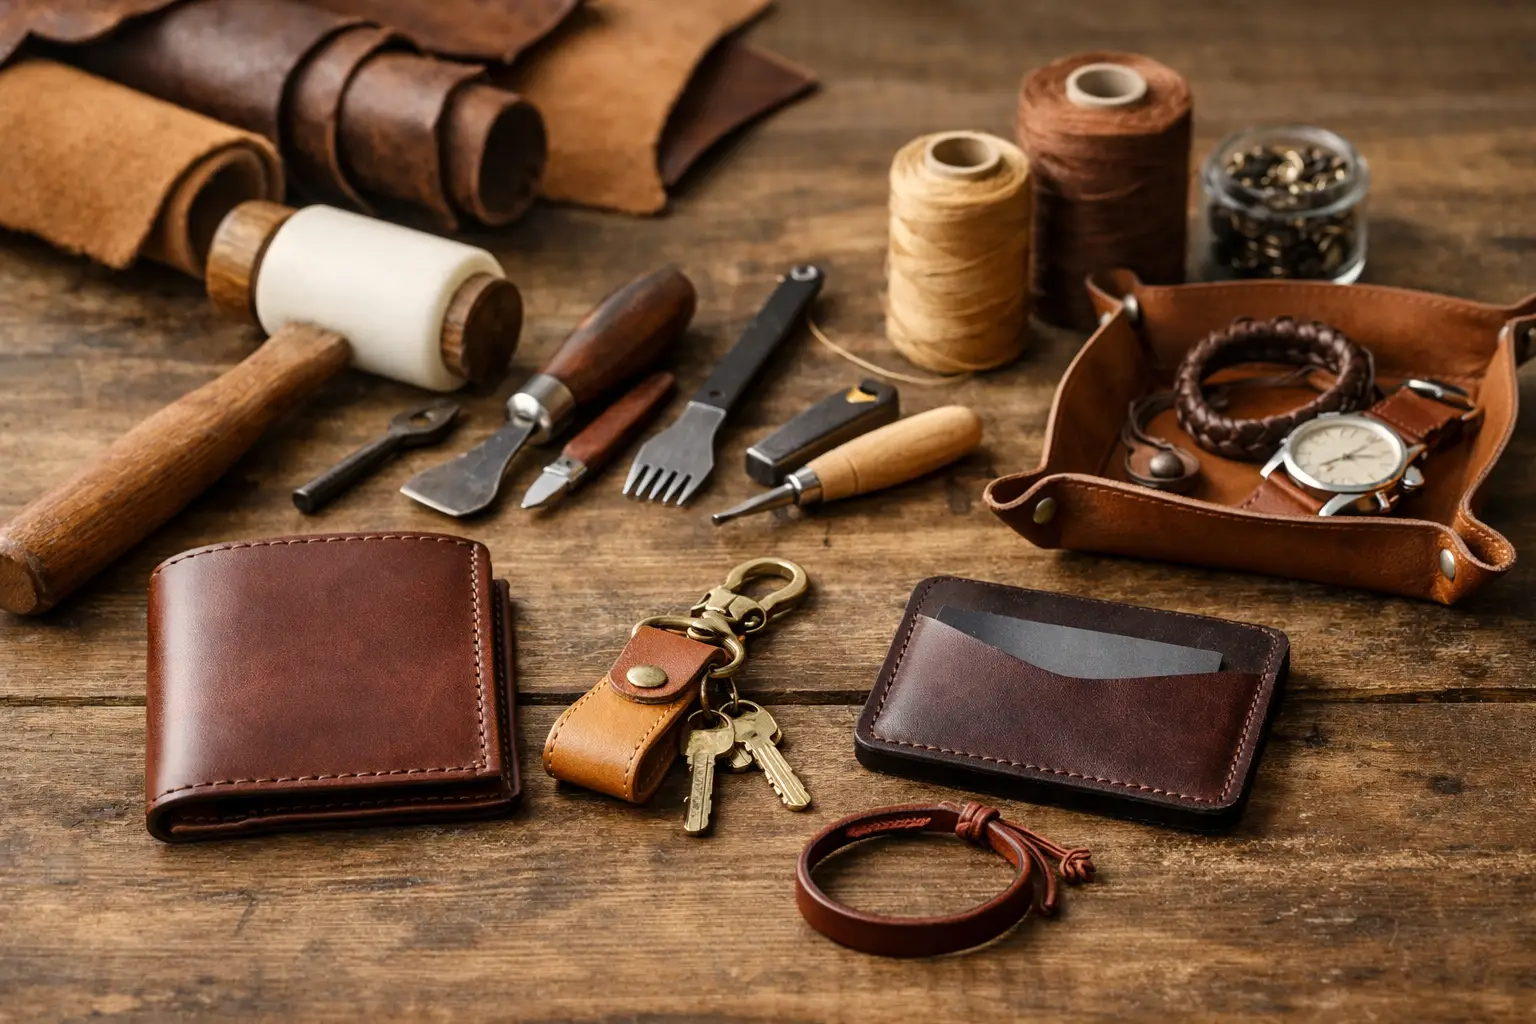
    You also do not need a fully equipped workshop to begin. A sharp knife, cutting surface, ruler, scratch awl, edge beveler, stitching chisels or pricking irons, needles, thread, adhesive, and a mallet cover a great deal of ground. Add tools as your projects show you where they will save time or improve your results.

    8 Beginner Leatherworking Projects to Build Skills

    1. Catchall tray

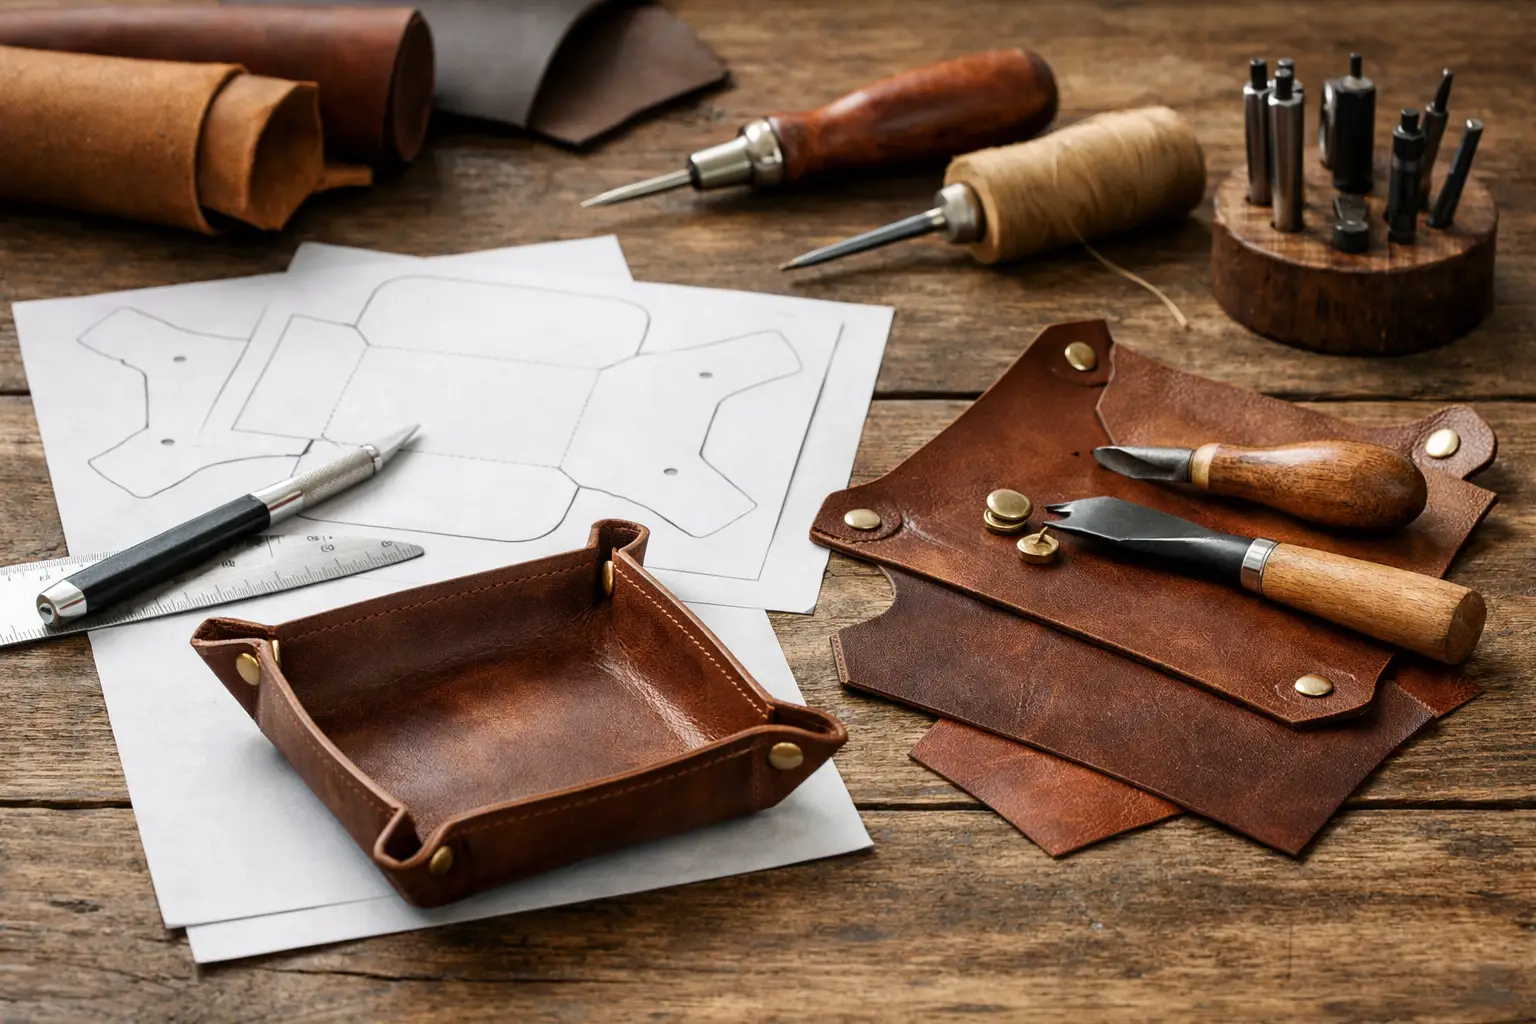
    A leather catchall tray is one of the most useful first builds because it teaches accurate cutting, corner hardware or folded construction, and edge cleanup without requiring a long seam. It is also a project where a good result is visible quickly.

    Use it for keys, watches, pocket contents, or small shop hardware. If you are using snaps, take time to mark and test the placement on scrap first. A tray that sits flat with clean corners feels surprisingly polished, even when it is your first attempt.

    2. Key fob or wristlet

    A key fob is a short project, but it asks for care in the places that matter: straight cuts, centered hardware, neat edges, and a tidy fold. It is an excellent way to practice setting a rivet, snap, or Chicago screw before relying on that hardware in a larger build.

    Make two or three from the same basic layout. Repetition is useful here. By the third one, you will notice how much cleaner your measuring, cutting, and burnishing have become.

    3. Simple card holder

    A card holder introduces layered construction and stitching in a manageable form. Most versions use a back panel and one or two pockets, giving you enough assembly practice without the complexity of a full wallet.

    The key trade-off is thickness. Heavy leather can create a substantial, durable holder, but it may become bulky at the pocket seams. A lighter weight leather usually makes assembly easier and produces a slimmer carry. Skive only if you are ready to practice it; a thoughtfully chosen leather weight can keep the project simple.

    4. Coaster set

    Coasters are often overlooked, but they are excellent practice pieces. They let you focus on consistent cutting, corner treatment, stamping, dyeing, or edge finishing without worrying about assembly. A set also encourages repeatable work, which is where basic techniques start to feel natural.

    Try a simple shape first, such as a square with rounded corners or a circle. Once you can produce four matching pieces, experiment with a maker’s mark, a border line, or a different edge finish. Keep the design restrained so the craftsmanship remains the focus.

    5. Notebook cover

    A notebook cover is a satisfying step up from flat goods. It can involve a fold, interior pockets, or a pen loop, but the basic construction remains easy to understand. Because it wraps around a common notebook size, it has a clear function and makes a thoughtful handmade gift.

    Before cutting leather, measure the actual notebook you plan to use. Covers based on standard dimensions can still fit differently depending on the binding and page count. A paper mockup takes only a few minutes and can prevent an avoidable fit problem.

    6. Luggage tag

    A leather luggage tag combines straightforward cutting with a small amount of hardware and personalization. It is an approachable place to try letter stamps, a decorative border, or a contrasting thread color.

    Keep the strap construction simple at first. A sturdy strap with a secure buckle or snap is more useful than an elaborate design with too many potential failure points. If the tag will travel often, choose hardware that is strong enough for regular pulling and movement.

    7. Sunglasses sleeve

    A soft or lightly structured sunglasses sleeve teaches you to plan for the thickness of the object inside. It is usually a simple folded shape with one stitched side seam, but the dimensions need enough ease for the glasses to slide in comfortably.

    Make a paper version around the glasses before committing to leather. If you are hand stitching, use this project to practice keeping a long seam even from beginning to end. A clean saddle stitch and well-finished opening can make a basic sleeve feel refined.

    8. Minimal belt pouch

    A small belt pouch is a good next project once you are comfortable cutting, gluing, and stitching. It introduces a functional attachment point and may include a flap, snap, or loop, yet it remains far less demanding than a large bag.

    Keep the first version focused on one job: carrying a pocketknife, small notebook, multitool, or similar item. Avoid adding compartments until the basic form fits well. Function should lead the design, especially while you are learning how leather thickness changes folds and seams.

    Build in the Right Order

    Many early frustrations come from working out of sequence rather than from a lack of skill. Do your decorative stamping, dyeing, or marking before assembly when the leather is flat and supported. Cut carefully, then bevel and burnish edges that will become difficult to reach later. Dry-fit components before glue touches the leather.

    When stitching, use a light mark or guide line and keep your chisels perpendicular to the work. A single crooked hole is rarely disastrous, but a row that slowly drifts will be noticeable. Slow down at the start of every seam, then establish a steady rhythm. Consistency matters more than speed.

    Let adhesive do its job before punching stitch holes through layered pieces. If the parts shift while you punch, even a good pattern becomes harder to assemble cleanly. A few minutes of patient setup can save you from trying to correct a misaligned seam later.

    Use Mistakes as Bench Notes

    Your first projects do not need to be perfect to be successful. A darkened edge, a slightly proud stitch, or a corner that could be cleaner is useful information for the next build. Keep the piece, use it, and notice what changes after a week or a month of handling.

    It helps to write down the leather weight, thread size, stitch spacing, finish, and hardware you used. These small bench notes become more valuable as you make variations of the same project. They also make it easier to understand whether a result came from technique, material choice, or the pattern itself.

    If a project feels too difficult halfway through, simplify rather than abandon it. Leave off the decorative detail, choose a basic edge finish, or make a second version with fewer features. Completing a clean, functional item builds more confidence than forcing a complicated design past its natural stopping point.

    Choosing Your Next Project Pattern

    Once you have completed a few small goods, choose your next build based on the skill you want to strengthen. Pick a tray or coaster set for edges and finishing, a card holder for layered stitching, or a pouch for shaping and fit. This approach keeps your progress intentional without making the craft feel like a course you have to rush through.

    Old Line Crafts & Designs patterns are built around that kind of clear bench experience: organized pieces, practical construction, and projects that give makers a finished result worth carrying or using. Whether you work from a simple paper template or a more detailed pattern, clarity at the start makes room for better craftsmanship at the finish.

    Set out one project, cut a piece of scrap for testing, and give yourself permission to work slowly. The leather will teach you something every time you put it on the bench.

  • Free Leather Tray Pattern PDF for Your First Build

    Free Leather Tray Pattern PDF for Your First Build

    A handful of loose change, keys, a watch, and a pocketknife can make a workbench or nightstand feel cluttered fast. A small leather valet tray gives those everyday items a proper place, and it is one of the most rewarding projects a maker can complete in an afternoon. With a free leather tray pattern PDF, you can spend less time figuring out proportions and more time cutting, shaping, and finishing a useful piece of leatherwork.

    This is a simple project, but it is not a throwaway one. A well-made tray teaches the same habits that carry into wallets, cases, and bags: accurate cutting, clean edge work, intentional hardware placement, and thoughtful finishing. Better still, the finished tray gets used every day.

    What a Free Leather Tray Pattern PDF Should Do

    A tray pattern should remove uncertainty without taking the craft out of your hands. It needs to show a clear cut line, the location of corner hardware or stitching, and the finished shape of the tray. If the layout feels vague before you cut leather, the project will feel vague at the bench too.

    For a first build, look for a pattern designed around a single piece of leather. This construction keeps the project approachable while still allowing room for good decisions. You will choose leather weight, hardware finish, edge treatment, and whether the tray will live by the front door, on a desk, or beside the bed.

    Old Line Crafts & Designs approaches entry-level patterns with that balance in mind: enough structure to build with confidence, with enough flexibility to make the project feel like your own. A free pattern is also a useful way to see how a well-organized template fits your working style before choosing a more involved project.

    Print the Pattern Before You Cut

    PDF patterns only work when they print at the intended scale. Open the file and select 100% or “actual size” in the print settings. Do not use “fit to page,” as even a small reduction can shift corner holes and change the finished tray dimensions.

    If the pattern includes a test square, measure it with a ruler after printing. The square should match its stated size exactly. This small check takes less than a minute and prevents a frustrating discovery after leather has already been cut.

    Once the scale is confirmed, cut out the paper template carefully. Some makers prefer to glue the printout to poster board or thin chipboard, especially if they plan to make more than one tray. A firmer template is easier to trace accurately and stands up better to repeated use.

    Choose Leather That Matches the Job

    Leather selection changes both the look and the behavior of a valet tray. For most single-layer trays, vegetable-tanned leather in the 4 to 6 ounce range is a practical starting point. It has enough body to hold the tray shape, yet it can still be folded at the corners without excessive bulk.

    A lighter leather can work for a softer, more relaxed tray, particularly if you are using it for jewelry or a few small desk items. The trade-off is that it may not keep its shape as firmly. Heavier leather gives a substantial feel and a crisp profile, but it can make snapped corners harder to close and may require more deliberate forming.

    Chrome-tanned leather is another option when you want a softer hand or a more casual look. It is often easier to fold, though edge finishing may be less clean than with vegetable-tanned leather. If this is your first tray, vegetable-tanned leather usually offers the clearest path to a polished result because it cuts, burnishes, stamps, and finishes predictably.

    The cleanest side of the leather generally becomes the interior of the tray, where it will be most visible. Before tracing, inspect both sides for marks, wrinkles, loose grain, or uneven color. Place the pattern so those natural characteristics either become part of the design or stay outside the cut line.

    Tools You Will Actually Use

    A tray project does not require a crowded tool rack. A sharp utility knife or round knife, a cutting mat, a metal ruler, and a scratch awl will handle the layout and cutting. Add a hole punch sized for your chosen snaps, plus a snap-setting tool and a firm surface for setting hardware.

    For finishing, use sandpaper or an edge beveler if you have one, along with a burnishing agent or a simple damp cloth for vegetable-tanned leather. A clean rag helps apply conditioner or finish. If you want to add a maker’s mark, stamp it while the leather is flat, before the corners are assembled.

    Do not force a project to match the tools you happen to own. If you do not have snap setters, you can adapt a tray pattern into a stitched-corner version, provided you mark and punch the stitch holes consistently. Snaps are quicker and make the tray easy to flatten for travel or storage. Stitching offers a more traditional appearance and can be a good practice exercise, but it adds time and requires more precision.

    Build the Tray in a Calm Sequence

    Start by tracing the pattern with a scratch awl or fine pen. Keep the template flat and hold it firmly as you trace so the lines do not shift. Cut just outside the line if you prefer to refine the edge afterward, or cut directly on the line if your knife control is already reliable. Several light passes are safer and more accurate than trying to cut through thick leather in one stroke.

    Before installing hardware, soften the corners slightly if you are working with firm vegetable-tanned leather. A light mist of water on the flesh side can make folding easier, but avoid soaking the piece. Let the leather absorb the moisture briefly, then fold each corner along the intended line to check the shape.

    Punch the snap holes after checking the folds. This order matters because a hole that looks properly placed on a flat pattern can sit differently once the leather bends. Test the corner overlap, confirm that the snaps align, and only then set the hardware. When you set snaps, support the cap on a firm, smooth surface and use controlled strikes. Too much force can flatten or damage the hardware; too little can leave a loose connection.

    Finish Edges While the Tray Is Flat

    Edge work is easier before the corners are fastened. First, inspect the cut edge and trim any small fibers or uneven areas. Sand lightly, working through finer grits as needed. If you have an edge beveler, a small bevel on the grain side and flesh side can make a simple tray look noticeably more refined.

    For vegetable-tanned leather, dampen the edge lightly and burnish it with a wood slicker, canvas, or cloth. Use steady friction rather than pressure alone. The goal is a smooth, compact edge, not a dark, overheated one. Apply your preferred edge treatment only after the shape is clean.

    A light coat of leather balm or finish can protect the surface and bring out the color, especially on natural vegetable-tanned leather. Test any product on an offcut first. Some conditioners darken leather more than expected, which may be welcome on a rich brown tray but less desirable on a pale natural one.

    Make a Simple Pattern Feel Personal

    The tray shape may be straightforward, but the details can make it distinctly yours. Solid brass snaps feel warm and traditional. Nickel hardware creates a cleaner, more modern contrast. Antique finishes work well with distressed leather, while black hardware can give a dark, understated build a purposeful look.

    A stamped initial, a short set of coordinates, or a small maker’s mark can add character without crowding the design. Keep decoration away from fold lines and snap locations. Those areas take the most stress, and clean construction should remain the focus.

    Color is another worthwhile choice. Natural leather will develop its own patina through use. A hand-applied dye can produce a deeper, more controlled look, but it asks for careful preparation and even application. If you are still learning dye work, a tray is an excellent place to practice, though starting with pre-dyed leather removes one variable from the project.

    Common Problems and Easy Corrections

    The most common issue is a tray that rocks on the table or has uneven corners. This usually comes from inconsistent cutting or hardware holes that were punched without checking the folded alignment. If the tray has not been assembled yet, compare opposite sides with a ruler and make small corrections before setting the snaps.

    Ragged edges usually point to a dull blade or hurried cutting. Replace the blade sooner than you think you need to. Leather rewards sharp tools, and a clean cut saves considerable time in sanding and finishing.

    If a snap will not close easily, check whether the leather is too thick at the overlap. Skiving the underside of one corner can reduce bulk, but make this adjustment gradually. Removing too much leather weakens the area around the hardware. When using heavier stock, choosing a snap with a suitable post length is often the better solution.

    A first tray does not need to be flawless to be useful. It needs clean fundamentals, a shape that sits well, and details you enjoy seeing in daily use. Print the pattern, make a careful first version, and pay attention to the moments that slow you down. Those small observations are how a simple bench project becomes the foundation for the next one.

  • Leatherworker hand saddle stitching vegetable tanned leather with two needles and waxed thread

    How to Saddle Stitch Leather by Hand: Complete Beginner’s Guide

    A clean line of hand stitching can completely change the appearance of a leather project.

    Even a simple card holder, strap, sheath, pouch, or wallet can look dramatically more refined when the stitching is straight, evenly tensioned, and consistent from beginning to end.

    One of the most important hand-stitching techniques in traditional leathercraft is the saddle stitch.

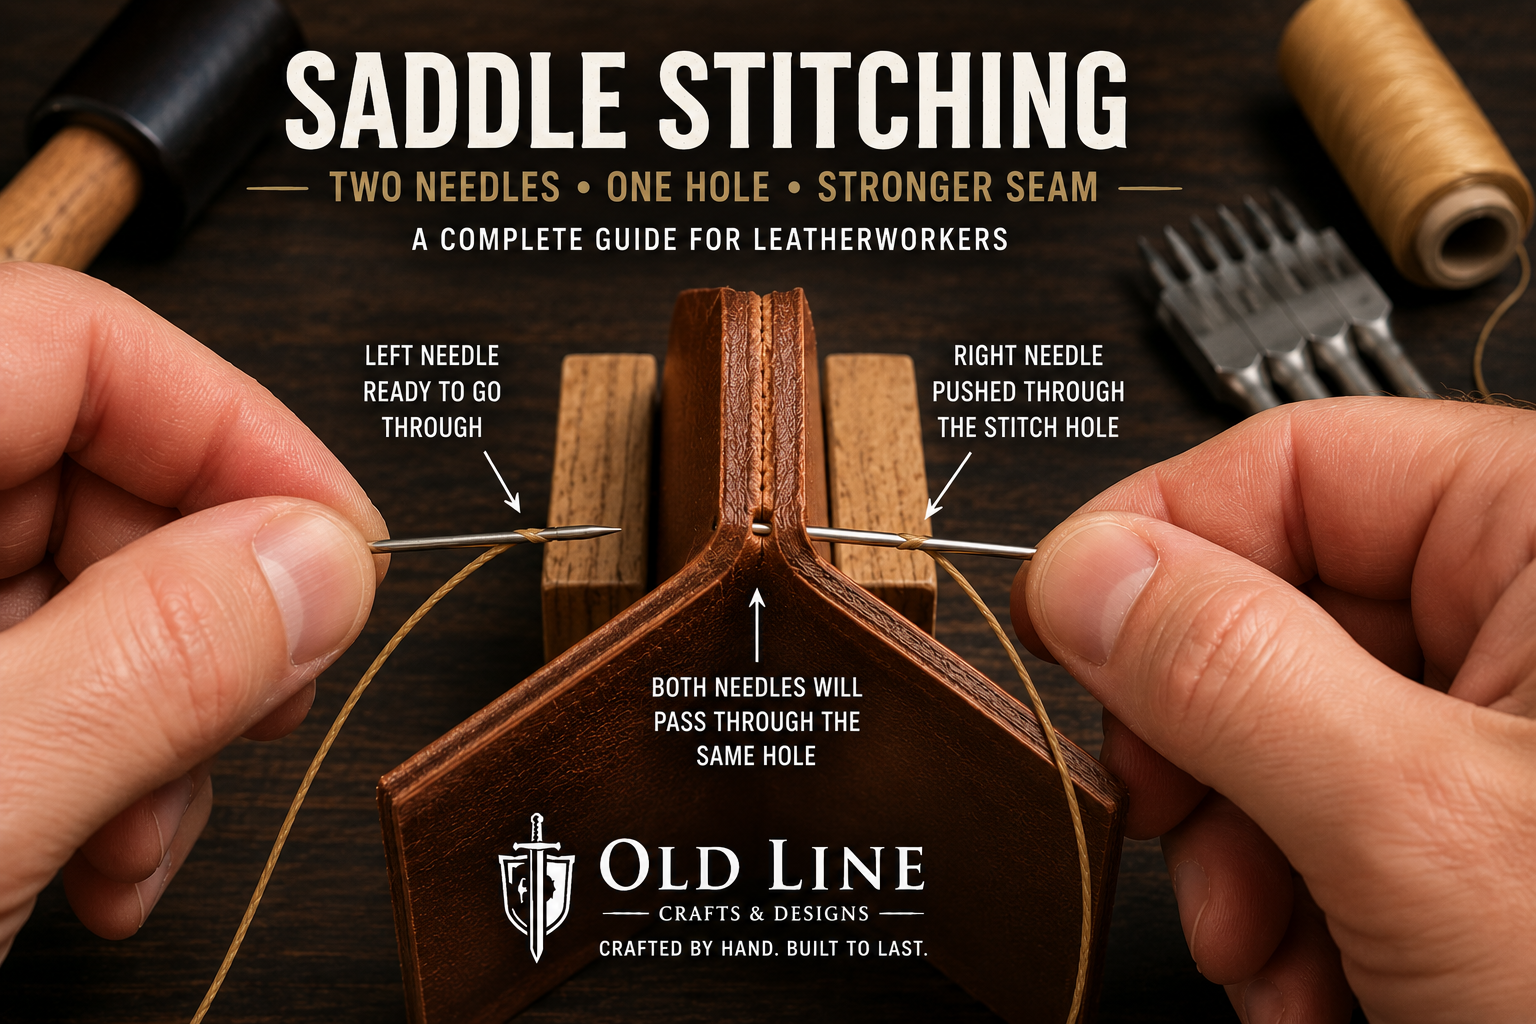
    Unlike ordinary sewing, saddle stitching uses one length of thread with a needle on each end. Both needles pass through every stitching hole, creating a strong, attractive seam that is particularly well suited to leather.

    It is also a skill that can be learned without a sewing machine.

    In this guide, we will cover what saddle stitching is, why leatherworkers use it, the tools and materials you need, how to prepare your leather, how to saddle stitch step by step, how to finish the seam, and how to avoid common beginner mistakes.


    What Is Saddle Stitching?

    Saddle stitching is a traditional method of hand sewing leather using:

    • One continuous length of thread
    • Two blunt leatherworking needles
    • Pre-punched stitching holes

    A needle is attached to each end of the thread.

    During stitching, both needles pass through each hole from opposite sides of the leather.

    This creates a strong interlocking seam.

    The technique was historically associated with saddlery and harness making, but today it is widely used for:

    • Wallets
    • Card holders
    • Belts
    • Watch straps
    • Bags
    • Sheaths
    • Keychains
    • Pouches
    • Leather armor
    • Cases
    • Everyday-carry accessories
    • Decorative leather goods

    Saddle stitching is valued both for its strength and for the distinctive angled stitch pattern it can create when done consistently.


    Why Use a Saddle Stitch?

    There are several reasons leatherworkers continue to use saddle stitching even when sewing machines are available.

    Strength

    A sewing machine normally creates a lockstitch, which uses two separate threads.

    Saddle stitching uses one continuous thread that passes through every hole from both sides.

    If one stitch becomes damaged, the seam generally does not immediately unravel in the same manner as some machine-sewn seams can.

    That makes saddle stitching particularly useful for items that receive regular use.

    Appearance

    A well-executed saddle stitch produces a clean, consistent line of stitching.

    When properly spaced and tensioned, the stitches can develop the characteristic angled appearance seen on many high-quality handmade leather goods.

    Control

    Hand stitching allows the leatherworker to control every individual stitch.

    You can adjust:

    • Tension
    • Stitch angle
    • Thread placement
    • Corners
    • Curves
    • Difficult-to-reach areas

    This is especially helpful on small or unusually shaped leather projects.

    No Sewing Machine Required

    You can create extremely strong leather seams with relatively simple tools.

    For a beginner, that makes saddle stitching one of the most useful leatherworking skills to learn.


    Saddle Stitch vs. Machine Stitching

    Both methods have advantages.

    Machine sewing is significantly faster and makes sense when producing large quantities of leather goods.

    Saddle stitching is much slower, but it gives the maker more control and creates the traditional appearance associated with handmade leathercraft.

    Neither technique is automatically better for every project.

    For small-batch handmade work, however, saddle stitching offers a combination of strength, appearance, and craftsmanship that is difficult to duplicate.


    Tools Needed for Saddle Stitching

    You do not need a large collection of specialized equipment.

    A basic saddle-stitching setup includes the following.

    Two Harness Needles

    Saddle stitching requires two needles.

    Leatherworking harness needles typically have relatively blunt tips because the stitching holes are created before sewing.

    The needle should be large enough for your thread to pass through comfortably without being excessively large for the stitching hole.


    Leatherworking Thread

    Common choices include:

    • Waxed polyester
    • Waxed nylon
    • Linen thread

    Waxed thread is particularly convenient for beginners because the wax helps control the thread, reduces fraying, and makes it easier to pull through the leather.

    Thread thickness should complement the size of the project and stitching holes.

    Fine leather goods generally look better with finer thread.

    Heavy straps, armor, sheaths, and rugged projects can accommodate heavier thread.


    Stitching Chisels, Pricking Irons, or Punches

    Unlike fabric sewing, you normally do not force the needle through solid leather.

    The stitching holes are created first.

    Common tools include:

    Stitching Chisels

    Stitching chisels can punch completely through the leather and are very convenient for beginners.

    Pricking Irons

    Traditional pricking irons generally mark or partially penetrate the leather, with an awl then used to complete the hole.

    Many modern leatherworkers also use irons capable of punching completely through thinner leather.

    Diamond Chisels

    Diamond-shaped stitching chisels are common because they create angled holes that naturally help develop the traditional saddle-stitch appearance.


    Stitching Groover or Wing Divider

    A stitching line helps keep the holes consistently positioned from the edge.

    A wing divider is an excellent tool for marking that line.

    A stitching groover can also create a recessed channel in which the thread sits.

    Both approaches can work.

    The important thing is maintaining a consistent distance from the edge.


    Scratch Awl

    A scratch awl can be useful for:

    • Marking stitch locations
    • Opening holes slightly
    • Guiding alignment
    • Transferring marks

    For traditional saddle stitching with pricking irons, a stitching awl may also be used to open each hole as you sew.


    Stitching Pony or Stitching Clamp

    A stitching pony holds the leather vertically while leaving both hands free.

    This is extremely useful because saddle stitching works best when you can control one needle with each hand.

    A stitching pony is not absolutely required, but it makes the process significantly easier.


    Scissors or Thread Snips

    Use sharp scissors or thread snips for cutting thread cleanly.


    Lighter for Synthetic Thread

    When using synthetic polyester or nylon thread, the ends can often be carefully melted after stitching to help secure them.

    Use caution around leather.

    The goal is to melt the thread end—not scorch your project.

    Natural linen thread should not be finished this way.


    How Far From the Edge Should Stitching Be?

    There is no single universal measurement.

    The correct distance depends on:

    • Leather thickness
    • Thread size
    • Project style
    • Strength requirements
    • Stitch spacing

    For many small leather goods, the stitching line is commonly placed somewhere around 1/8 to 3/16 inch from the edge.

    Heavy projects may use a larger offset.

    Whatever measurement you choose, consistency is more important than the exact number.

    A wandering stitch line is immediately noticeable.


    Choosing Stitch Spacing

    Stitch spacing is often described as:

    • Millimeters between teeth
    • Stitches per inch, or SPI

    Smaller spacing creates more stitches and generally produces a finer appearance.

    Larger spacing creates a more rugged look.

    A general starting point might be:

    Fine leather goods

    Approximately 3.0–3.38 mm

    Useful for refined wallets, card holders, and small accessories.

    General leathercraft

    Approximately 3.5–4.0 mm

    A versatile range for many beginner projects.

    Heavy or rugged projects

    Approximately 4.0–5.0 mm or larger

    Useful for heavier straps, bags, sheaths, and some armor applications.

    These are guidelines, not rules.

    The thread thickness should visually complement the spacing.


    How Much Thread Do You Need?

    A useful beginner rule is to start with approximately:

    4 times the length of the seam

    For example, if your seam is 12 inches long:

    12 × 4 = approximately 48 inches of thread

    Thicker leather, larger stitch spacing, complicated corners, and heavy thread may require more.

    It is usually better to have a little extra thread than to run short several stitches before the end.


    Preparing Leather for Saddle Stitching

    Good stitching begins before the needles come out.

    Step 1: Glue the Leather Layers

    If two or more leather pieces will be stitched together, adhesive can help prevent them from shifting.

    Apply an appropriate leather adhesive and allow it to set according to the manufacturer’s directions.

    Do not rely on stitching alone to align badly positioned layers.


    Step 2: Trim and Align the Edges

    Once the pieces are joined, inspect the edges.

    If necessary:

    • Trim uneven areas
    • Sand the edges
    • Make sure the layers align

    This is easier to correct before stitching.


    Step 3: Mark the Stitching Line

    Use a wing divider, stitching groover, or another suitable guide.

    Run it consistently along the edge.

    This creates the line where the stitching holes will be placed.


    Step 4: Punch the Stitching Holes

    Position your stitching chisel on the marked line.

    Keep the tool vertical.

    Strike it with an appropriate mallet on a suitable punching surface.

    For long stitching runs, place one or two teeth of the chisel into previously punched holes before creating the next set.

    This helps maintain consistent spacing.


    Be Careful Around Corners

    Corners are where stitching layouts often become uneven.

    Before punching everything, look ahead.

    You may need to adjust the final few holes slightly so the corner remains visually balanced.

    Do not blindly punch until you reach the edge.

    Good leatherwork often involves planning the hole layout before committing to it.


    Threading Two Needles

    Saddle stitching requires a needle on both ends of the same thread.

    Cut the required length.

    Thread one needle onto each end.

    Many leatherworkers lock the thread onto the needle.

    One common method is:

    1. Pass the thread through the needle eye.
    2. Pierce the thread with the needle a short distance from the end.
    3. Pull the pierced portion toward the eye.
    4. Slide it over the needle.
    5. Pull the thread tight.

    This creates a simple lock that helps prevent the needle from falling off while stitching.

    Repeat on the opposite end.


    How to Saddle Stitch Leather Step by Step

    Now you are ready to sew.

    For this example, assume the leather is held vertically in a stitching pony.


    Step 1: Start at the First Hole

    Pass one needle completely through the first hole.

    Pull the thread until the length is approximately equal on both sides.

    You should now have:

    • One needle on the left
    • One needle on the right
    • Equal thread on both sides

    Step 2: Pass the First Needle Through the Next Hole

    Take the needle from one side and pass it through the next hole.

    Pull most of the thread through, but do not fully tighten yet.


    Step 3: Pass the Second Needle Through the Same Hole

    Take the opposite needle and pass it through the same hole from the opposite direction.

    Be careful.

    You do not want the second needle to pierce through the thread that is already inside the hole.

    Pull it through carefully.


    Step 4: Set the Stitch

    Once both needles have passed through the hole, pull the thread outward from both sides.

    Use consistent tension.

    You want the stitch snug against the leather, but you do not need to pull as hard as possible.

    Excessive tension can:

    • Distort the leather
    • Enlarge the holes
    • Create inconsistent stitches
    • Cause thin leather to buckle

    Consistency is the goal.


    Step 5: Repeat the Same Motion

    Move to the next hole.

    Repeat the exact same sequence:

    First needle through → Second needle through → Pull evenly

    Consistency matters.

    If you alternate which needle goes first or change how the thread sits inside the hole, the angle of your stitches may change.

    A good saddle stitch comes from repeating the same motion every time.


    Maintaining the Traditional Stitch Angle

    One reason saddle stitching looks attractive is the slight diagonal angle of the stitches.

    That appearance comes from several factors:

    • Angle of the stitching holes
    • Direction the needles enter
    • Position of the thread inside the hole
    • Stitch tension

    Choose a consistent sequence and use it for every stitch.

    Experienced leatherworkers often develop a rhythm.

    Eventually the sequence becomes almost automatic.


    Avoid Piercing Your Thread

    One of the most common saddle-stitching mistakes happens when the second needle passes through a hole and pierces the thread already inside.

    You may suddenly find that the thread will not move freely.

    If that happens, do not force it.

    Back the needle out and pass it through again beside the thread.

    You can also gently pull the first thread toward one side of the hole to make room for the second needle.


    How to Finish a Saddle Stitch

    You generally do not tie a bulky knot at the end.

    Instead, saddle stitching is commonly secured with backstitches.

    Step 1: Reach the Final Hole

    Complete the normal stitch.

    Step 2: Stitch Backward

    Instead of continuing forward, return through the previous stitching holes.

    Two or three backstitches are common for many projects.

    This locks the thread into the existing seam.

    Step 3: Trim the Thread

    After completing the backstitches, trim both thread ends close to the leather.

    If using synthetic thread, carefully melt the tips.

    Press the softened ends down gently if necessary.

    Do not hold the flame directly against the leather.


    Should Saddle Stitches Be Hammered?

    Many leatherworkers lightly hammer their completed stitching.

    A smooth-faced leatherworking hammer can help:

    • Set the stitches into the leather
    • Flatten raised thread slightly
    • Close stitching holes
    • Create a more uniform appearance

    Use controlled pressure.

    The goal is to set the stitching, not crush or mark the leather.


    Stitching Before or After Edge Burnishing?

    The answer depends on the project.

    If an edge will become difficult to access after stitching, some edge preparation may be completed beforehand.

    For layered projects, however, final sanding and edge finishing are often performed after the layers have been glued and stitched together.

    A common sequence is:

    Glue → Trim → Mark stitch line → Punch → Stitch → Sand edges → Bevel → Burnish

    The exact order can change depending on the design.


    Stitching Around Curves

    Curves require additional planning.

    When punching stitching holes around a curve:

    • Use shorter irons when necessary
    • Rotate gradually
    • Avoid forcing a long chisel around a tight radius
    • Keep the distance from the edge consistent

    Two-tooth stitching chisels can be particularly useful around tight curves.


    Saddle Stitching Thick Leather

    Heavy leather requires more attention.

    You may need:

    • Larger stitching holes
    • Heavier thread
    • Larger needles
    • Greater edge distance
    • A strong stitching pony
    • An awl to help open the holes

    Never force a needle aggressively through an undersized hole.

    If the hole is too tight, address the hole rather than risking a broken needle or injured hand.


    Choosing Thread Color

    Thread color changes the personality of a leather project.

    Matching Thread

    Creates a subtle, refined appearance.

    Example:

    Brown thread on brown leather.

    Contrasting Thread

    Makes the stitching part of the design.

    Examples:

    Cream thread on dark brown leather
    Tan thread on black leather
    White thread on chestnut leather

    Contrasting stitching highlights every stitch—which also means mistakes become more visible.

    If you are just beginning, matching or moderately contrasting thread can be more forgiving.


    Thread Thickness and Project Style

    Thread should complement the leather and stitch spacing.

    Heavy thread with very small stitch spacing can look crowded.

    Fine thread with extremely large spacing may look too delicate.

    The relationship between:

    Leather thickness + hole spacing + thread diameter

    is more important than any single measurement.

    Experiment on scraps.


    Common Saddle Stitching Mistakes

    Uneven Stitch Tension

    If some stitches are pulled tightly and others loosely, the seam will look inconsistent.

    Try to use the same amount of tension each time.

    Changing Stitch Direction

    Changing which needle goes first can alter the appearance of the stitch.

    Develop a repeatable sequence.

    Punching Crooked Holes

    If the stitching chisel is tilted, holes may emerge in different positions on the back.

    Keep the tool vertical.

    Stitching Too Close to the Edge

    Stitching too close to the edge can weaken the seam or cause the leather to tear.

    Piercing the Thread

    Be aware of the first thread when the second needle enters the hole.

    Pulling Too Hard

    Saddle stitching requires firm, consistent tension—not maximum strength.

    Running Out of Thread

    Measure generously.

    Extra thread costs far less than restarting an entire seam.

    Ignoring the Back Side

    Beginners often concentrate exclusively on the front.

    Inspect both sides.

    Good saddle stitching should look intentional from either direction.


    How to Practice Saddle Stitching

    You do not need to begin with a wallet.

    Cut two strips of scrap vegetable-tanned leather.

    Glue them together.

    Draw a straight stitch line.

    Punch approximately 15–20 holes.

    Then practice.

    Concentrate on:

    1. Keeping the same needle sequence
    2. Maintaining even tension
    3. Avoiding pierced thread
    4. Developing a consistent rhythm
    5. Making both sides look clean

    Once you can stitch a straight line consistently, practice:

    • Corners
    • Curves
    • Longer seams
    • Thicker leather
    • Different stitch spacing

    Scrap leather is cheaper than practicing on a finished project.


    How Long Does Saddle Stitching Take?

    Saddle stitching is slower than machine sewing.

    That is part of the process.

    Speed develops naturally with experience.

    Do not sacrifice stitch quality because you are trying to sew faster.

    A leatherworker who creates a consistent seam slowly will usually produce a better result than someone who rushes.

    Accuracy first.

    Speed later.


    Is Saddle Stitching Good for Beginners?

    Absolutely.

    In fact, saddle stitching is one of the first traditional skills a new leatherworker should learn.

    It teaches several useful habits:

    • Accurate marking
    • Consistent punching
    • Thread control
    • Stitch tension
    • Patience
    • Attention to detail

    Once you understand the basic movement, the technique becomes surprisingly straightforward.


    Saddle Stitching Leather Armor

    Not every leather armor design requires stitching.

    Many pieces use:

    • Rivets
    • Chicago screws
    • Straps
    • Buckles
    • Snaps

    But saddle stitching can be useful for decorative seams, reinforcement, straps, trim, and certain armor components.

    For a rugged armor project, you might choose:

    • Heavier thread
    • Wider stitch spacing
    • Strong contrasting stitching

    This creates a different visual character than the finer stitching used on a wallet or card holder.

    Internal link suggestion: Link “leather armor” to the Spartan Warrior Armor Pattern Bundle.

    Internal link suggestion: Link “armor components” to your Spartan Warrior Armor Series collection page.


    Saddle Stitching Small Leather Goods

    Saddle stitching is particularly well suited to small leather goods.

    Wallets, card holders, keychains, watch straps, and everyday-carry accessories allow the stitching itself to become part of the design.

    These projects are also excellent for developing your skills because the stitching runs are shorter and easier to control.

    Internal link suggestion: Link “card holders” and “everyday-carry accessories” to relevant Old Line Crafts & Designs products or collections.


    A Simple Saddle Stitch Checklist

    Before stitching:

    ✓ Leather pieces aligned
    ✓ Layers securely glued
    ✓ Edges trimmed
    ✓ Stitching line marked
    ✓ Holes evenly punched
    ✓ Thread length checked
    ✓ Two needles attached
    ✓ Leather securely clamped

    While stitching:

    ✓ Same needle first every time
    ✓ Avoid piercing the thread
    ✓ Maintain even tension
    ✓ Check front and back
    ✓ Keep a consistent rhythm

    When finishing:

    ✓ Backstitch 2–3 holes
    ✓ Trim thread ends
    ✓ Carefully melt synthetic thread if appropriate
    ✓ Lightly set stitches with a smooth hammer
    ✓ Complete final edge finishing


    The Difference Is Consistency

    Saddle stitching is not difficult because it contains dozens of complicated steps.

    It is challenging because the same simple steps need to be repeated consistently.

    Straight holes.

    Even spacing.

    Same needle sequence.

    Same tension.

    Again.

    Again.

    Again.

    That repetition is what creates the clean line of stitching that makes handmade leatherwork distinctive.

    Your first stitching line may not be perfect.

    Your tenth will probably look considerably better.

    Keep your early projects.

    A few months later, compare them with your newer work.

    The improvement may surprise you.


    Learn the Skill, Then Build Something

    Leatherworking skills become useful when you apply them to actual projects.

    Once you can cut accurately, punch consistent holes, saddle stitch, set hardware, and finish your edges, you have the foundation needed to build a wide range of leather goods.

    At Old Line Crafts & Designs, our downloadable leathercraft patterns are designed to help makers turn those skills into finished projects.

    Start with scrap leather.

    Learn the motion.

    Develop consistency.

    Then make something you can be proud to say you stitched by hand.

    Explore downloadable leathercraft patterns, project guides, and leatherworking resources at Old Line Crafts & Designs.

    Crafted by hand. Built to last.
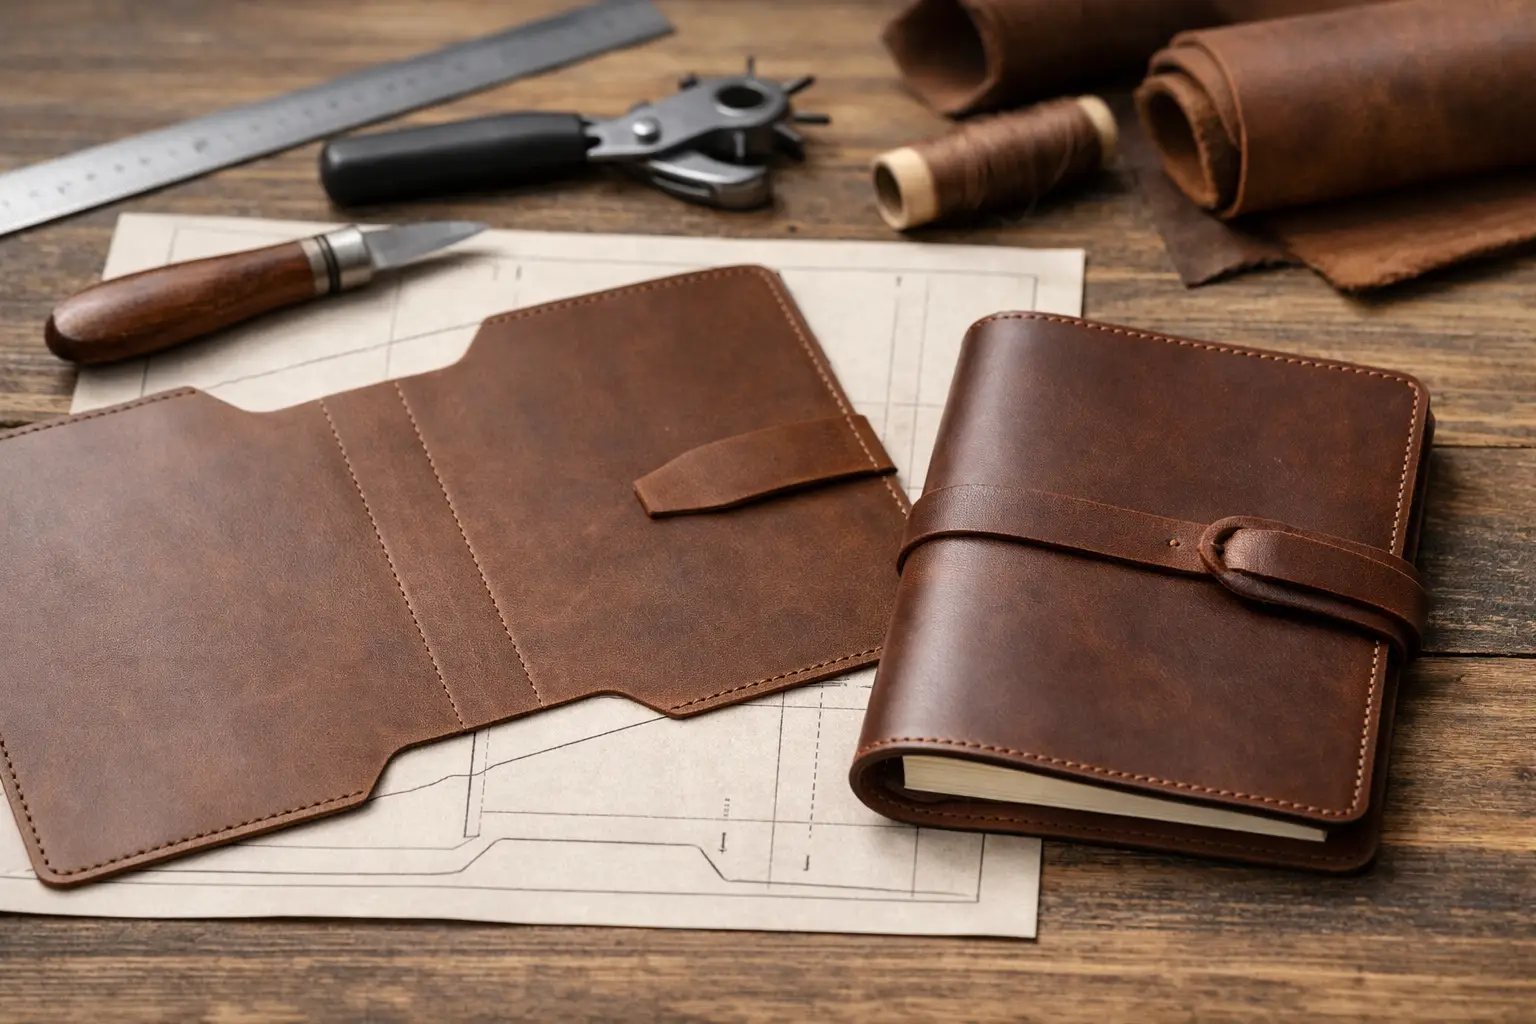
  • Edge Burnishing Leather at workbench

    Edge Burnishing in Leathercraft: What It Is, Why It Matters, and How to Do It

    One of the easiest ways to tell the difference between a leather project that looks unfinished and one that looks professionally made is to look at the edges.

    Freshly cut leather often has a rough, fibrous edge. Even if the rest of the project is carefully cut, stitched, dyed, and assembled, an unfinished edge can make the entire piece look incomplete.

    That is where edge burnishing comes in.

    Burnishing is the process of smoothing, compacting, and polishing the exposed edge of leather until it becomes firm, rounded, and often slightly glossy.

    It is one of the most useful finishing skills a beginning leatherworker can learn.

    At Old Line Crafts & Designs, edge finishing is an important part of creating leather projects that look intentional and finished. This guide explains what burnishing is, why it is done, what you need, and how to burnish leather edges step by step.

    What Is Leather Edge Burnishing?

    When leather is cut, the exposed edge contains loose fibers.

    If you run your finger along a freshly cut piece of vegetable-tanned leather, the edge may feel rough or fuzzy.

    Burnishing uses a combination of:

    • Moisture or burnishing compound
    • Pressure
    • Friction
    • Repeated rubbing

    to compress those fibers together.

    As the fibers compact, the edge becomes smoother and more polished.

    A properly burnished leather edge often becomes slightly darker than the surrounding leather and develops a smooth, almost sealed appearance.

    Why Do Leatherworkers Burnish Edges?

    Burnishing is not purely decorative.

    It provides several benefits.

    It Makes the Project Look Finished

    A clean, polished edge creates a noticeable visual difference.

    Compare a rough cut edge with a properly beveled and burnished edge and the burnished piece will usually look much more refined.

    That can be particularly important on:

    • Wallets
    • Card holders
    • Belts
    • Straps
    • Keychains
    • Sheaths
    • Bags
    • Leather armor
    • Watchbands
    • Everyday-carry accessories

    It Makes the Edge Feel Better

    Leather products are frequently handled.

    A smooth edge feels more comfortable against your hands, wrist, clothing, or skin than a rough fibrous edge.

    This is particularly important for straps, belts, watchbands, and other items that receive frequent contact.

    It Helps Control Loose Fibers

    Burnishing compacts the exposed leather fibers rather than leaving them loose.

    That gives the edge a cleaner appearance and reduces fuzziness.

    It Adds a Professional Detail

    Customers may not know the term “burnishing,” but they often notice the difference.

    Small finishing details such as clean stitching, polished edges, consistent hardware placement, and smooth curves contribute heavily to the perceived quality of a handmade leather product.

    What Types of Leather Can Be Burnished?

    Traditional edge burnishing works particularly well with vegetable-tanned leather.

    Vegetable-tanned leather contains fibers that respond very well to moisture, pressure, and friction.

    Other types of leather may not burnish as easily.

    Chrome-tanned leather, very soft leather, and some heavily finished leathers often require different edge-finishing techniques such as edge paint.

    If you are unsure, test the process on a scrap from the same piece of leather.

    What Tools Do You Need to Burnish Leather?

    You do not need expensive equipment.

    A basic edge-burnishing setup can be very simple.

    Edge Beveler

    An edge beveler removes the sharp corner from the top and bottom edges of the leather.

    This helps create the rounded profile commonly associated with a finished leather edge.

    Sandpaper

    Sandpaper helps level and smooth the edge before burnishing.

    Useful grits may include approximately:

    • 220 grit for correcting uneven edges
    • 400 grit for smoothing
    • 600 grit or higher for finer finishing

    You do not necessarily need every grit. The goal is to gradually make the edge smoother.

    Wooden Burnisher

    A wooden burnisher, sometimes called a wood slicker, is one of the traditional tools used for edge finishing.

    Many have several grooves designed for different leather thicknesses.

    The leather edge rides inside the groove while the tool is rubbed rapidly back and forth.

    Canvas or Denim

    A piece of canvas or denim can also be used to burnish leather.

    The texture generates friction while helping polish the surface.

    It is inexpensive and remarkably effective.

    Burnishing Compound

    There are several options.

    Common choices include:

    • Water
    • Gum tragacanth
    • Tokonole
    • Beeswax
    • Saddle soap
    • Specialized edge compounds

    Different leatherworkers develop their own preferred process.

    If you are just beginning, you do not need to purchase every compound available.

    Start simple and experiment on scraps.

    How to Burnish a Leather Edge

    A good burnished edge starts before you ever pick up the burnisher.

    The quality of the cut and preparation will affect the final result.

    Step 1: Make a Clean Cut

    Start with a sharp knife.

    The cleaner and straighter the initial cut, the easier the edge will be to finish.

    A rough or uneven cut requires more sanding later.

    If two or more layers of leather have been glued together, make sure the layers are aligned as closely as possible before edge finishing begins.

    Step 2: Level the Edge

    If the edge is uneven, sand it until the layers form one consistent surface.

    For a glued multi-layer project, this step is especially important.

    Sand along the edge rather than aggressively across it.

    Your goal is to remove high spots and create a continuous line.

    Step 3: Bevel the Corners

    Run an appropriately sized edge beveler along the top and bottom corners.

    This removes the sharp 90-degree edges.

    After both sides are beveled, the edge begins developing a rounded profile.

    Do not remove too much material.

    Several controlled passes are better than forcing the beveler through the leather.

    Step 4: Sand Again

    Lightly sand the beveled edge.

    This blends the bevel into the center of the leather edge.

    As you progress through finer sandpaper, the surface should begin to feel increasingly smooth.

    Run your finger over the edge.

    If you can still feel major bumps or ridges, continue preparing it before applying burnishing compound.

    Step 5: Apply a Small Amount of Moisture or Compound

    Apply your chosen burnishing solution sparingly.

    The edge should be damp—not soaked.

    Too much water or compound can make the leather overly soft or messy.

    If you are using water, apply just enough to darken the edge slightly.

    If using gum tragacanth, Tokonole, or another compound, follow the manufacturer’s recommendations and use a thin layer.

    Step 6: Burnish the Edge

    Place the leather edge into an appropriately sized groove on your wooden burnisher.

    Rub the tool quickly back and forth along the edge.

    You are creating friction.

    As you work, you should begin to see and feel the fibers compress.

    The edge will gradually become:

    • Smoother
    • Darker
    • Firmer
    • More polished

    Do not apply excessive force.

    Speed and consistent friction are more important than trying to crush the leather.

    Step 7: Inspect the Edge

    Stop periodically and run a finger over the surface.

    If the edge still feels rough, determine whether it needs:

    • More burnishing
    • Additional compound
    • More sanding
    • Additional beveling

    Do not assume every problem can be solved by simply rubbing harder.

    A poor burnish often comes from insufficient preparation rather than insufficient friction.

    Step 8: Repeat if Necessary

    High-quality edges are often created through several cycles.

    For example:

    Sand → Apply compound → Burnish → Inspect → Lightly sand → Burnish again

    Each pass can improve the surface.

    Patience matters more than speed.

    Step 9: Finish With Wax

    Some leatherworkers apply a small amount of beeswax or another suitable wax after the primary burnishing process.

    The edge can then be polished again using canvas, denim, or a burnisher.

    This can add additional smoothness and a subtle sheen.

    What Should a Finished Burnished Edge Look Like?

    There is no requirement that every burnished edge look like polished glass.

    The appropriate finish depends on the project.

    For many everyday leather goods, a good edge should be:

    • Even
    • Smooth to the touch
    • Free of loose fibers
    • Consistently rounded
    • Slightly darker than the leather
    • Cleanly integrated with the rest of the project

    A rugged leather armor project may use a different level of polish than a dress belt or refined wallet.

    The edge finish should match the character of the item.

    Common Edge Burnishing Mistakes

    Trying to Burnish Before Sanding

    Burnishing cannot hide a badly uneven edge.

    Prepare the surface first.

    Using Too Much Water

    The goal is to dampen the fibers, not saturate the leather.

    Pressing Too Hard

    More pressure does not automatically create a better edge.

    Excessive force can distort thinner leather.

    Using a Groove That Is Too Small

    The leather should fit comfortably into the burnisher groove.

    If the groove is too narrow, it can damage or deform the edge.

    Expecting One Pass to Be Enough

    Edge finishing is a process.

    Several light passes usually produce better results than one aggressive attempt.

    Forgetting Difficult-to-Reach Edges

    Think about your assembly order.

    Some edges become difficult or impossible to burnish after stitching, riveting, folding, or attaching another component.

    Whenever practical, finish those edges before final assembly.

    Burnishing Before or After Dyeing?

    The sequence varies depending on the project and finishing products.

    Many leatherworkers perform most of the sanding and edge preparation first, then apply dye and continue the final burnishing process afterward.

    The important thing is consistency.

    If you are trying a new dye, edge compound, or finish, test your entire process on scrap leather before using it on the project.

    That one habit can prevent many finishing problems.

    Practice Edge Burnishing on Scraps

    Edge burnishing is an ideal skill to practice because you do not need to risk a finished project.

    Take several strips of scrap vegetable-tanned leather.

    Try different combinations:

    • Water and wood
    • Water and canvas
    • Gum tragacanth
    • Tokonole
    • Beeswax
    • Different sandpaper grits

    Then compare the results.

    You will quickly begin to understand how your particular leather responds.

    Edge Burnishing and Leather Armor

    Although polished edges are often associated with wallets, belts, and small leather goods, edge preparation is also useful when building leather armor.

    Helmet panels, shoulder armor, cuirass components, straps, and exposed decorative sections can all benefit from properly finished edges.

    For a rugged Spartan-inspired build, you may not want every edge polished to a mirror-like shine.

    But removing loose fibers, smoothing the surface, and creating a consistent edge can still improve the finished appearance significantly.

    A Small Step That Makes a Big Difference

    Leatherworking often comes down to small details.

    A clean cut.

    A straight stitch.

    A properly set rivet.

    A carefully rounded corner.

    A smooth edge.

    None of those details alone makes a project.

    Together, they make the project look intentional.

    If you are new to leathercraft, do not be discouraged if your first burnished edge is not perfect.

    Cut some scrap leather.

    Sand it.

    Bevel it.

    Apply a little moisture.

    Start rubbing.

    Then compare your first attempt with your fifth.

    You will probably see the improvement immediately.

    Keep Building Your Leatherworking Skills

    At Old Line Crafts & Designs, our downloadable leathercraft patterns are designed to give makers a starting point for learning new skills while creating projects they can actually use, display, or wear.

    As you work through larger projects, techniques such as cutting, edge beveling, burnishing, riveting, wet forming, stitching, and finishing become increasingly familiar.

    Take your time.

    Practice on scrap.

    And remember that some of the smallest finishing steps can make the biggest difference in the final piece.

    Explore downloadable leathercraft patterns and the Spartan Warrior Armor Series at Old Line Crafts & Designs.

    Crafted by hand. Built to last.
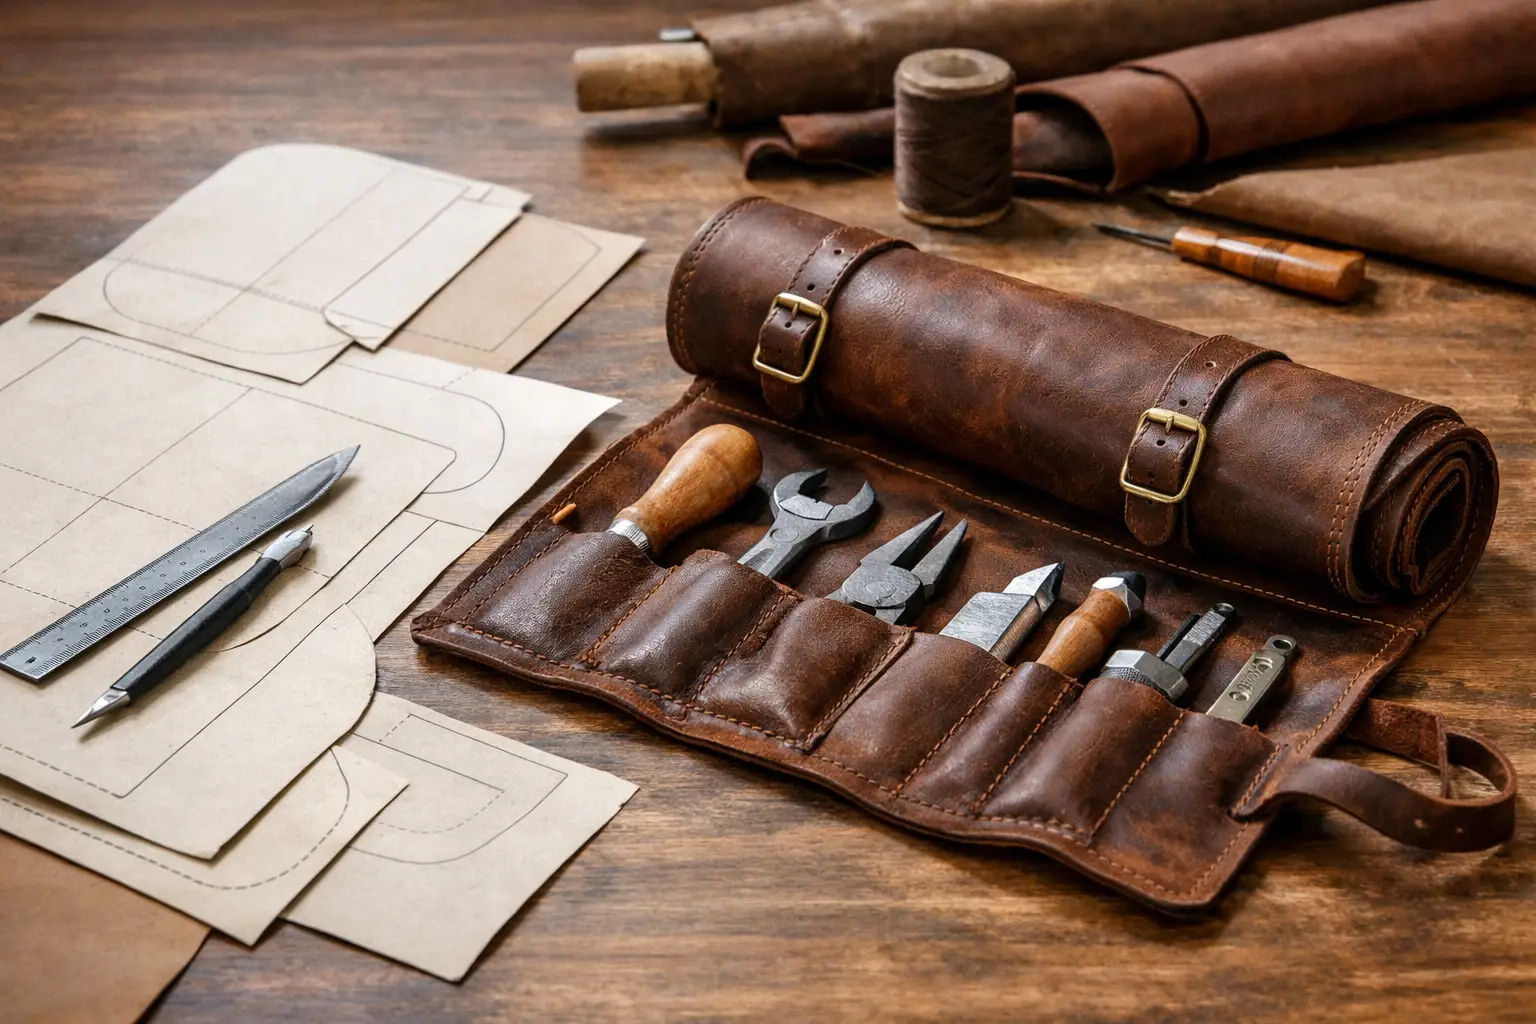
  • How to Print PDF Leather Patterns at the Correct Scale

    Downloading a leathercraft pattern gives you the ability to start a new project almost immediately. But there is one important step between downloading your pattern and cutting your leather:

    You need to make sure the pattern prints at exactly the correct size.

    A leather pattern printed only a few percent too large or too small can create problems later. Stitching holes may not align. Rivet locations can move. Straps may become too wide for their hardware. Multiple armor panels may no longer fit together correctly.

    For a small leather project, the difference may be annoying.

    For a multi-piece project such as a leather helmet, cuirass, or set of pauldrons, it can mean wasting a significant amount of leather.

    This guide explains how to print downloadable PDF leathercraft patterns accurately before you make your first cut.

    Why Printing Scale Matters in Leathercraft

    A properly designed PDF leather pattern contains precise dimensions.

    When the pattern calls for a piece that is 8 inches long, the printed template needs to be 8 inches long.

    Unfortunately, printers and PDF applications sometimes attempt to be helpful by automatically resizing documents to fit within a printer’s margins.

    Settings such as:

    Fit
    Fit to Page
    Shrink Oversized Pages
    Scale to Fit

    can alter the dimensions of your pattern.

    A pattern printed at 96% instead of 100% may still look perfectly normal on the page.

    The problem becomes apparent only after you begin assembling the project.

    That is why checking the scale should become part of your normal leathercraft workflow.

    Step 1: Download the PDF Pattern

    Download your leathercraft pattern and save the original PDF to your computer.

    Keeping an original copy gives you a clean master that you can print again if a template becomes damaged while cutting, tracing, or assembling your project.

    If the pattern includes instructions as well as templates, review the instructions before printing.

    Look specifically for information about:

    • Required paper size
    • Printing scale
    • Calibration squares
    • Page orientation
    • Overlapping or tiled pattern pieces
    • Special assembly instructions

    For patterns designed for US Letter paper, make sure your printer is loaded with 8.5 × 11-inch paper.

    Step 2: Open the PDF in a PDF Reader

    For the most predictable results, open the downloaded file in a dedicated PDF reader rather than printing directly from a web-browser preview.

    Before printing the entire pattern, locate the page containing the calibration square or another known measurement.

    This is the page you should print first.

    Step 3: Select 100% or Actual Size

    Open the Print dialog.

    Look for the section controlling page sizing or scaling.

    The exact wording varies depending on the software and printer, but you generally want:

    Actual Size

    or

    Custom Scale: 100%

    Avoid options that automatically resize the document.

    In particular, watch for:

    • Fit
    • Fit to printable area
    • Shrink
    • Scale to fit
    • Reduce oversized pages

    The goal is simple:

    One inch in the PDF needs to become one inch on the printed page.

    Step 4: Print the Calibration Page First

    Do not print a 15-page pattern package immediately.

    Print only the page containing the calibration square.

    This saves paper and ink if something is wrong with your printer settings.

    After printing, find the calibration reference.

    Many leathercraft patterns use a 1-inch square specifically for this purpose.

    Step 5: Measure the Calibration Square

    Use an accurate ruler to measure the printed calibration square.

    Measure from the actual edges of the square rather than the surrounding page.

    If the pattern specifies a 1-inch calibration square, it should measure:

    1.000 inch × 1.000 inch

    If it does, your printer is producing the pattern at the intended scale.

    You can proceed with the remaining pages.

    If it does not, do not cut leather yet.

    Return to your print settings and determine why the page is being resized.

    What If My Calibration Square Is the Wrong Size?

    Suppose your 1-inch calibration square measures approximately 15/16 inch.

    Your printer or software is reducing the document.

    That difference might appear insignificant.

    But consider a 12-inch armor component printed at the same incorrect scale.

    The dimensional error becomes much more noticeable.

    When multiple components depend on matching hole locations and overlapping geometry, those small errors accumulate.

    Correct the printer settings and print the calibration page again.

    Continue adjusting until the reference measurement is correct.

    Step 6: Print the Complete Pattern

    Once the calibration measurement is correct, print the remaining pattern pages using exactly the same settings.

    Do not switch printers or change scaling options midway through the job.

    After printing, keep the pages in numerical order.

    For a larger project, this simple habit makes assembly much easier.

    Step 7: Check Large or Tiled Pattern Pieces

    Some leathercraft components are larger than a single sheet of US Letter paper.

    These pieces may be divided across multiple pages.

    If your pattern uses tiled pages, look for:

    • Alignment marks
    • Registration marks
    • Matching edges
    • Page numbers
    • Overlap areas

    Trim and join the pages according to the instructions.

    Before transferring the assembled template to leather, measure one or two known dimensions again.

    This gives you a second opportunity to catch an error before cutting material.

    Step 8: Consider Making a Cardstock Master

    Standard printer paper works well for many projects, but frequently used patterns can benefit from being transferred to cardstock.

    A cardstock template is:

    • Easier to trace
    • More resistant to tearing
    • Less likely to move while marking leather
    • Easier to store for future projects

    Another option is to glue or temporarily mount the printed pattern to heavier paper before cutting out the template.

    If you plan to make the same leather item multiple times, creating a durable master template can save considerable time.

    Step 9: Make a Paper Mockup for Complex Projects

    For larger three-dimensional leathercraft projects, consider assembling a paper or cardstock prototype before cutting leather.

    This is particularly useful when building:

    • Leather helmets
    • Shoulder armor
    • Cuirasses
    • Masks
    • Bags
    • Cases
    • Other multi-panel projects

    A paper mockup helps you understand how flat pattern pieces become a three-dimensional object.

    It also gives you an opportunity to identify obvious fitting or orientation issues without sacrificing expensive leather.

    Step 10: Transfer the Pattern to Leather

    Once you have confirmed that the pattern is correctly scaled, place the template on your leather.

    Before tracing, think about how the pieces are arranged.

    Large leathercraft projects can contain many oddly shaped components, and efficient placement can reduce waste.

    Start with the largest pieces.

    Then use the remaining spaces for:

    • Straps
    • Tabs
    • Reinforcement pieces
    • Small panels
    • Keepers
    • Decorative components

    Carefully mark all important pattern information.

    That may include:

    • Cutting lines
    • Stitching holes
    • Rivet holes
    • Snap locations
    • Slots
    • Fold lines
    • Alignment marks
    • Component numbers

    Do not rely on remembering these locations after removing the paper template.

    A Simple Rule That Can Save Expensive Leather

    Before cutting any downloadable leathercraft pattern, remember this sequence:

    Download → Print calibration page → Measure → Verify → Print pattern → Cut template → Transfer to leather → Cut leather

    The most important step is Measure → Verify.

    It takes less than a minute.

    That minute can prevent an incorrectly scaled pattern from being transferred to an entire hide.

    Printing Leather Armor Patterns Is Especially Important

    Accurate printing becomes even more important when making leather armor.

    A wallet may contain only a few pattern pieces.

    A Spartan-inspired helmet, set of pauldrons, or cuirass can contain numerous components whose geometry depends on neighboring pieces.

    Hole locations need to correspond.

    Overlapping panels need to overlap by the intended amount.

    Curved components need to form the intended shape.

    That is why correctly scaled templates are particularly important for cosplay and LARP leather armor projects.

    If you’re considering one of these projects, verifying your printed pattern should always be your first construction step.

    Building Your First Leathercraft Project From a PDF Pattern

    If you’re new to leatherworking, downloadable patterns are a useful way to develop your skills. A great starter project for beginners is the Wayfarer Bracers Pattern.

    Instead of simultaneously trying to design a product and learn how to construct it, you can concentrate on the fundamental techniques:

    • Cutting accurately
    • Punching clean holes
    • Setting hardware
    • Stitching
    • Edge finishing
    • Dyeing
    • Wet forming
    • Following an assembly sequence

    As your skills improve, you can begin modifying patterns or eventually designing projects of your own.

    Choosing Your Next Leathercraft Project

    When selecting a downloadable leather pattern, choose a project appropriate for your current skills while giving yourself something new to learn.

    A smaller project is often a good place to develop cutting, stitching, and edge-finishing skills.

    When you’re ready for a larger challenge, multi-piece projects such as leather armor introduce three-dimensional construction, shaping, hardware installation, and more complex assembly.

    If your goal is to build a complete matching Spartan-inspired armor set, the Spartan Warrior Armor Pattern Bundle provides a coordinated way to tackle the project component by component.

    One Final Check Before You Cut

    Leather rewards patience.

    Taking an extra minute to check a measurement, sharpen a blade, verify a hole location, or test a finish on scrap leather usually takes far less time than correcting a mistake afterward.

    The same principle applies to downloadable patterns.

    Before the first cut:

    Check the scale.

    Then check it once more.

    Your leather—and your finished project—will thank you.

    Find Your Next Project at Old Line Crafts & Designs

    At Old Line Crafts & Designs, our downloadable leathercraft patterns are designed to help makers turn flat pieces of leather into projects they can be proud to say they built themselves.

    Whether you’re developing your leatherworking skills or preparing to take on a larger cosplay or LARP armor build, start with a properly printed pattern and take the project one piece at a time.

    Explore our downloadable leathercraft patterns and Spartan Warrior Armor Series at Old Line Crafts & Designs.

    Crafted by hand. Built to last.
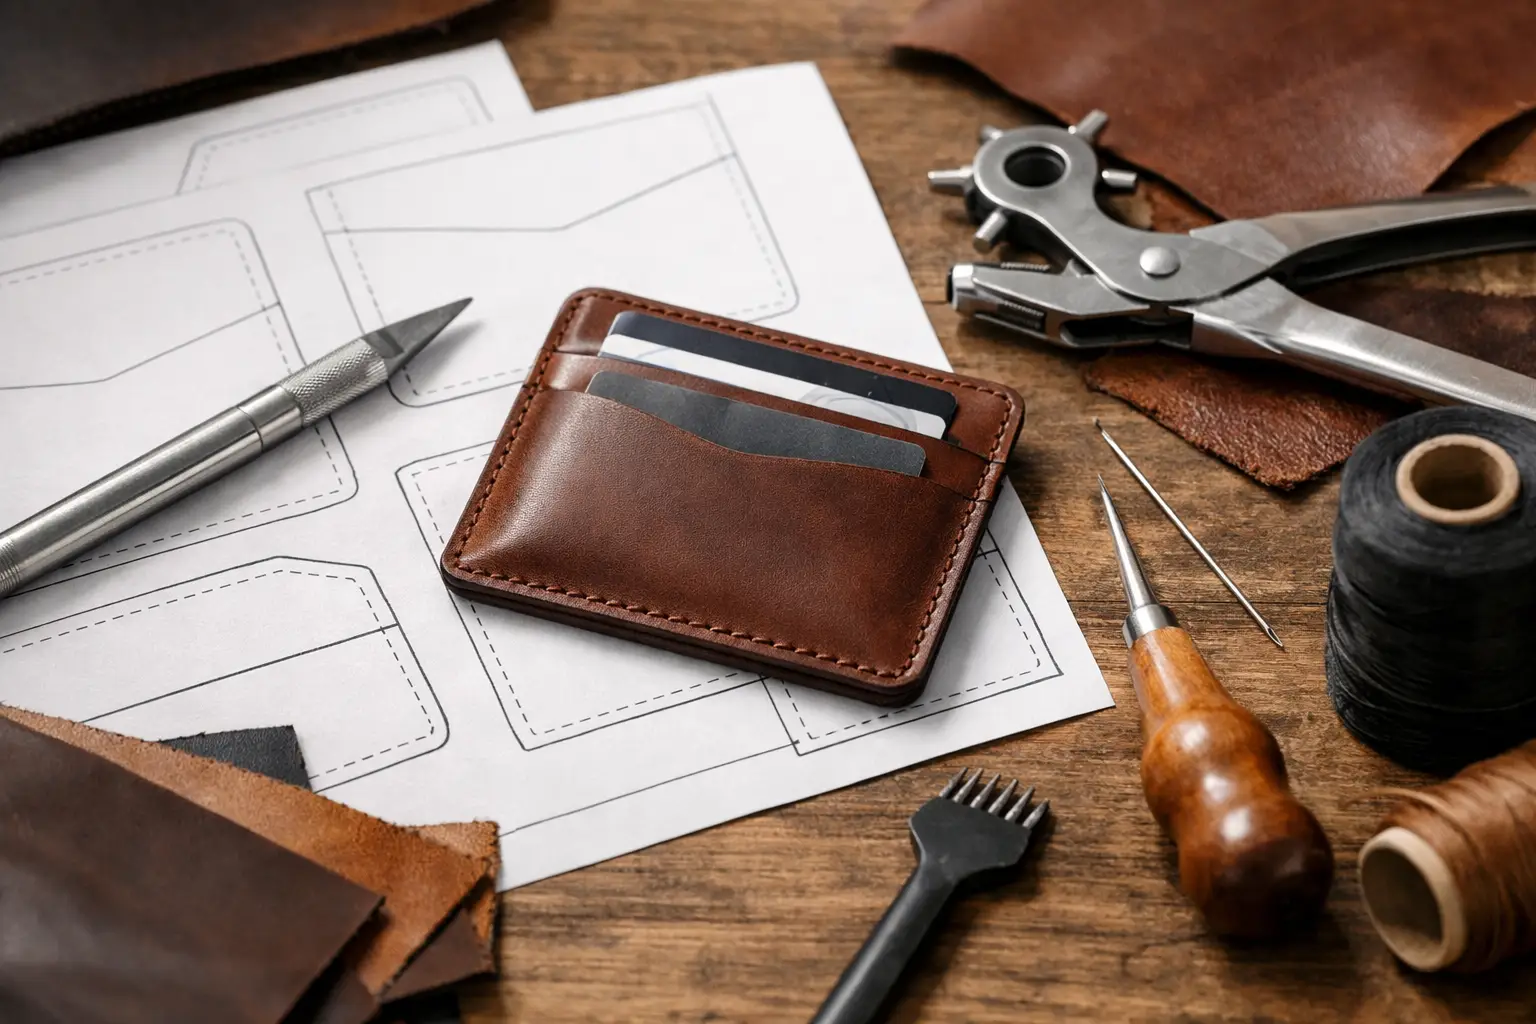
Sign up to receive the
Old Line Workbench
Weekly Newsletter

We don’t spam! Read our privacy policy for more info.